Start from the load case, not the tote style
For coffee roasters, the bag should be engineered around what it will carry, how often it will be used, and how it will be packed. A tote that holds two retail pouches has a different failure profile from a gift bag carrying a mug, brewer, and coffee beans. If the RFQ does not define the load, each supplier fills in the blanks with a different assumption, and comparison pricing becomes meaningless.
Write the carry scenario in concrete terms. Define the actual contents, the expected weight, and the type of handling the bag will see in the warehouse, the store, or at an event. That lets you set a working load and a separate test load instead of relying on vague claims like durable or premium.
- Name the contents by item and weight, not by adjectives.
- Separate the normal carry load from the sample test load.
- Treat mugs, tins, and glass as special cases because corner pressure matters.
- Keep the load case in the RFQ, sample approval sheet, PO, and QC form.
- State whether the tote is for retail resale, a giveaway, or a gift bundle because the construction target changes.
Lock the cloth spec: GSM, weave, and surface behavior
Jute and burlap are often used interchangeably in sales copy, but procurement needs a harder spec. Ask for the actual body fabric weight and make the supplier say whether the number is before or after lamination. For many retail tote programs, 280-320 GSM is a practical starting point for lighter loads, while heavier gift programs often need a denser cloth and stronger handle build.
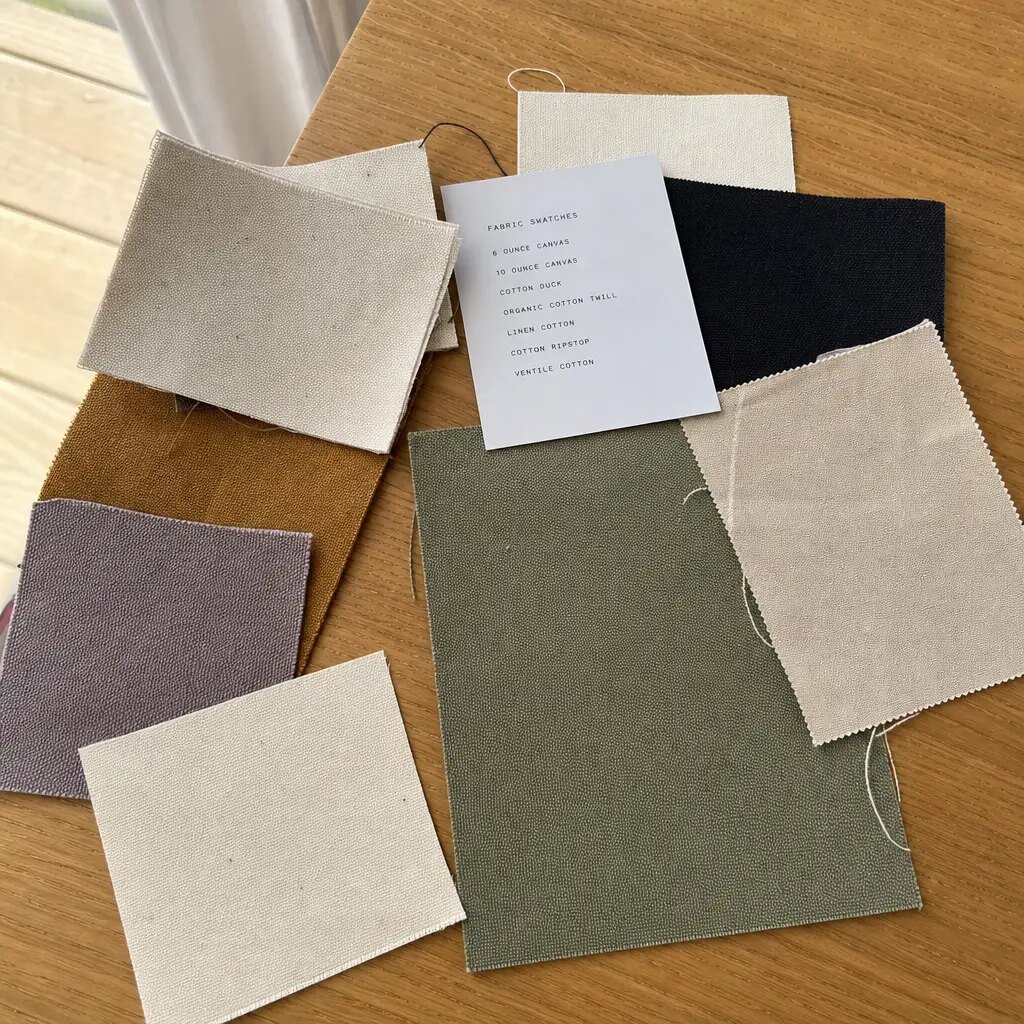
GSM does not tell the whole story. Two fabrics can share the same number and still perform differently if one weave is open and stretchy while the other is tighter and more stable. Approve a physical swatch for shade, weave density, and hand feel, then require the bulk run to match that reference instead of a generic style description.
- Ask for the quoted GSM and the measurement method.
- Confirm whether lamination is included in that number.
- Approve a physical swatch for weave, shade, and hand feel.
- Write rejectable defects separately from normal natural variation.
- Reject heavy stains, mildew, large holes, and weak yarn lanes even when the fabric is within nominal GSM.
Use lamination only when it solves a real problem
Inner PP lamination helps when the tote needs structure, less fiber shedding, or a cleaner interior face for retail presentation. It also helps the bag stand upright after packing, which matters for shelf display and gift sets. If the roaster is selling a more polished merch piece, lamination can be the difference between a bag that looks finished and one that looks flimsy.
The tradeoff is real. Poor lamination can smell, crack at fold lines, or delaminate after compression in cartons. That is why lamination should be a spec decision, not a default upgrade. Ask how the sample was folded, packed, and compressed before approval, and check odor after the bag has sat sealed long enough for any glue or film smell to show up.
- Choose lamination when structure and inner cleanliness matter more than a purely natural hand feel.
- Check odor after the sample has been sealed in poly or carton, not only when it is fresh out of the box.
- Run a fold and compression check before approving carton packing.
- State whether the exterior print depends on the lamination layer for stability.
- For unlaminated bags, tighten the acceptance rules on shedding and inner cleanliness.
Treat the handle as the main durability decision
Most tote failures start at the handle, not the body fabric. A strong-looking jute panel can still fail if the handle is only captured by the top hem or if the anchor is too short. Coffee roaster totes are especially exposed because buyers often load dense contents such as bean bags, ceramic cups, brew tools, jars, or books. A bag that survives a giveaway can still fail in retail use.
Cotton webbing or jute-cotton webbing is usually a better carry surface than a narrow rope handle, especially once the load starts climbing. Width matters because it spreads pressure across the hand and the seam. Attachment matters just as much: box-cross stitching and a reinforcement patch usually spread force better than simple straight stitching, and a longer handle route into the seam gives the anchor more resistance to pull-out.
- Specify handle material, width, drop, color, and attachment method.
- For medium and heavier loads, ask for box-cross stitching and reinforcement at the anchor.
- Request close-up photos of the handle from both the outside and inside of the bag.
- Check stitch density and backstitch security at each anchor point.
- After load testing, inspect for torn yarns, stretched stitch holes, and top hem puckering.
Size the body, gusset, and top finish around the products
A useful coffee tote has to fit the actual pack format, not just meet a nominal width and height. The gusset controls whether a bag stands upright, whether a gift set sits flat, and whether the front panel bows once it is loaded. A shallow gusset can save material but make the bag look strained. An oversized gusset can waste cloth, increase carton volume, and make the bag awkward for narrow products.
The top finish matters as much as the body. A folded hem or clean bound edge gives the opening more strength and helps reduce fray. Buyers should specify hem depth because it affects both the appearance and the handle support. Use a base board only when the presentation benefit justifies the added cost, shipping cube, and moisture risk.
- Specify finished width, height, gusset, handle drop, and hem depth in centimeters.
- Test the tote with the real pack format, such as a flat pouch, box, mug, or gift bundle.
- Confirm the opening is wide enough for packing staff to load quickly.
- Use a base board only when the retail presentation benefit is worth the extra cost and carton volume.
- Review empty, half-full, and fully loaded samples because each state shows a different structural risk.
Keep branding simple enough for coarse jute
Jute gives coffee branding a natural look, but it is not a smooth print substrate. The yarns are coarse, the panel is uneven, and the color can vary from bag to bag. Screen print works best for bold logos, simple illustrations, and one or two colors with enough line weight. It is less reliable for tiny text, thin serif type, QR codes, or large dense ink fields.
A real approval needs a strike-off on the actual fabric and construction, not a digital proof alone. If the brand needs finer detail, compare screen print with a sewn patch, woven label, or printed panel. Print durability also needs a fold and rub check because the ink can scuff or crack where the bag creases in packing and use.
- Use screen print for simple artwork with moderate line weight.
- Ask the supplier for a minimum line width and minimum text size before artwork is finalized.
- Compare print, patch, woven label, and transfer options when the artwork is detailed.
- Keep artwork away from seams and high-crease zones.
- Check the print after rubbing, folding, carton compression, and reopening.
Build the quote sheet so every supplier prices the same bag
Unit price is not useful if each supplier is quoting a different construction. One factory may assume 280 GSM unlaminated jute with basic handles, while another quotes a denser laminated build with webbing handles and reinforcement patches. The bags can look similar in a thumbnail, but the cost and performance are not comparable. The cleanest way to compare quotes is to lock the specification sheet before asking for pricing.
A usable quote sheet should cover dimensions, GSM, lamination, handle construction, print method, packing, sample route, and target load. Ask for price breaks at the same spec and the same order volume so you can see what really drives cost. This also keeps the bulk order from drifting away from the approved sample after negotiation starts.
- Keep dimensions, material, lamination, handle, print, and packing constant when comparing suppliers.
- Ask for itemized notes on the main cost drivers, not just a final unit price.
- Request price breaks at matching volumes, such as 1,000, 3,000, and 5,000 pieces if those are your likely order bands.
- Confirm what triggers a new MOQ: size change, handle change, print color count, label, or packing method.
- Make sample and bulk assumptions explicit so the approved construction is the quoted construction.
Approve samples in stages, not from mockups
A jute tote sample should prove the construction, not only the look. Early samples are often made with whatever material the sample room has on hand, which is useful for shape review but not enough for bulk sign-off. Before production, the buyer needs a pre-production sample made from the intended bulk materials and sewn with the planned handle and seam method.
Use a staged approval path. First confirm size, shape, gusset, and visual direction. Then approve the fabric swatch and print strike-off. Finally approve a pre-production sample packed the way the bulk order will ship. If the tote is meant to carry a defined coffee bundle, load it with the real contents or an equivalent weight and repeat the lift test before approval.
- Keep one sealed approved sample as the production reference.
- Require the pre-production sample to use intended bulk fabric, handle tape, thread, print, and packing method.
- Review odor after closed packing because smells are often more obvious in sealed cartons.
- Test the sample loaded, not only flat on the table.
- Photograph the approved handle stitching, print placement, hem finish, and carton fold direction.
Run a repeatable durability test before bulk release
A durability test does not need to be complicated, but it does need to be repeatable. Start with the same load case used in the RFQ, then test at 125-150 percent of the declared working load if the construction can reasonably support it. Hold the load for a fixed time, lift and lower the bag repeatedly, then inspect the handle anchors, seam lines, top hem, and gusset corners for movement or damage.
A practical protocol is simple: test five samples, hold each loaded bag for 10 minutes, then run 20 lift cycles with the same fill weight. Pass criteria should be explicit. No handle pull-out, no open seam, no broken stitch line, no major distortion that prevents the bag from standing or closing properly, and no significant print transfer, scuffing, or odor after airing. If one of the five fails, stop and review the build; if two fail, the construction is not ready for bulk.
- Confirm sample count and test load before approval so results are not anecdotal.
- Use 5 samples, a 10-minute static hold, and 20 lift cycles as a practical starting protocol.
- Inspect the bag after each phase for stitch creep, yarn tearing, and top hem distortion.
- Define failure before testing: open seam, handle slippage, broken stitch line, or loss of function.
- Record load, duration, cycle count, sample condition, and pass or fail result in the quality file.
Close QC with packing rules that reduce claims
Final inspection should separate normal jute variation from true defects. Natural fiber goods will not look as uniform as synthetic bags, so the standard has to be practical. Small slubs, shade variation, and minor texture differences are usually acceptable if they match the approved sample. Broken stitching, handle pull-out risk, mildew odor, open seams, large holes, and unreadable print are not.
Write dimensional tolerances into the PO so the supplier knows what will be checked on arrival. Many buyers use centimeter-level tolerances for finished width, height, gusset, and handle drop, then a tighter band for print placement. Inspection should also include cartons from different parts of the run, not only the easiest cartons at the front. Open top, middle, and lower cartons where possible, then check fold direction, carton counts, shipping marks, odor, and print scuffing.
- Set finished-size tolerances for width, height, gusset, handle drop, and print placement before production.
- Classify defects as critical, major, or minor so natural variation is not confused with functional failure.
- Include loaded handle checks on random samples when the tote carries coffee bundles or drinkware.
- Inspect inner cleanliness for dust, loose fibers, thread ends, and debris.
- Open cartons after packed compression to catch fold cracks, print scuffing, and shape distortion.
- Use the sealed approved sample as the reference for fabric, sewing, handle position, print, and overall finish.
Specification comparison for buyers
| Spec decision | Recommended option | When it fits | Buyer risk to check |
|---|---|---|---|
| Body fabric weight | Use a verified body fabric spec around 280-320 GSM for light retail totes, and 320-360 GSM when the bag must carry mugs, 1 kg coffee packs, or repeat-use retail load. Confirm whether the GSM is measured before or after lamination. | Retail gift bags, sampler bundles, and coffee shop merch that needs a sturdier hand feel. | A similar-looking cloth may be looser or lighter than the sample, which affects print quality, stretch, and seam stability. |
| Weave density | Approve an actual swatch and require the bulk cloth to match it closely in openness, shade, and hand feel. | Programs where shelf appearance and repeat handling matter. | GSM alone does not show how much the panel will distort under load or how much fiber shedding to expect. |
| Lamination | Use inner PP lamination only when the bag needs shape retention, a cleaner interior, or less fiber shed. Keep the lamination decision explicit in the spec. | Gift bags, display bags, and orders that must stand upright after packing. | Lamination can add odor, crack on fold lines, or delaminate if the bag is compressed in cartons. |
| Handle width | Use 25 mm as a lower starting point for lighter retail carry and 30-35 mm for 3-7 kg use cases. | Reusable coffee totes and premium merch with denser contents. | Narrow handles dig into the hand and concentrate stress at the anchor point. |
| Handle attachment | Specify box-cross stitching with reinforcement patch, or a long handle route into the seam. Reject top-hem-only tacking for heavier loads. | Orders that may carry bean bags, mugs, or gift sets. | A bag can look fine in photos and still pull out at the handle under real use. |
| Top and edge finish | Use a folded hem or bound edge with a defined finished depth; keep raw edges out of the opening zone. | Retail bags that are opened and closed often. | Raw edges fray, shed, and weaken the top line over time. |
| Print method | Use screen print for bold logos and simple art. Use sewn patch or woven label for small text or finer marks. | Roaster logos, origin graphics, and simple retail branding. | Thin lines, tiny text, and dense ink areas can fill in or crack on coarse jute. |
| Sample route | Require a strike-off plus a pre-production sample made from intended bulk materials and sewn with the planned handle and seam method. | Any order where reorder consistency matters. | Sample-room substitution is common unless the buyer locks the same materials for bulk approval. |
Buyer checklist before sampling
- Write the finished width, height, gusset, handle drop, handle width, hem depth, and print position in centimeters before you ask for pricing. Add tolerances to each critical dimension so the supplier is not guessing.
- Define the real load case in plain terms, such as two 500 g coffee bags, a 1 kg coffee bag with a mug, or a sampler kit with accessories. Avoid words like heavy duty unless you also define the weight.
- Separate the working load from the test load. If the bag will normally carry 3 kg, ask the factory to prove the build above that level on the sample you approve.
- State the jute body GSM, and say whether the number includes lamination. Ask for a matching physical swatch, not just a specification sheet.
- Decide up front whether the tote is unlaminated, inner laminated, or reinforced. Put the reason in the spec so the supplier does not choose the cheapest interpretation.
- Choose handle material, width, color, drop, thread type, and reinforcement method before artwork approval.
- Set logo limits for print size, line thickness, text size, ink color, and any areas that must stay clear of seams or folds.
- Require a strike-off on the actual substrate, not a digital mockup, before you approve production.
- Add odor requirements for jute, ink, glue, lamination, and packing materials because coffee brands are sensitive to smell transfer.
- Ask for one appearance sample, one loaded functional sample, and one pre-production sample when the order size or reorder risk justifies it.
Factory quote questions to send
- What exact GSM are you quoting, and is that measured before or after lamination?
- Can you send a bulk-intended fabric swatch or a clear photo of the intended weave density?
- What finished size tolerance do you normally hold for width, height, gusset, handle drop, and print position?
- What safe working load do you recommend for this construction, and what test load can you demonstrate on a sample?
- Is the handle cotton webbing, jute webbing, a blend, rope, or another material, and what is the width?
- How is the handle attached: top-hem insertion, box-cross stitch, reinforcement patch, side-seam integration, or a combination?
- What thread type, stitch density, and backstitch pattern do you use on the handle anchors and side seams?
- Will the logo be screen printed directly on raw jute, printed on laminated jute, heat transferred, or sewn as a patch or label?
- What minimum line width and minimum text size do you recommend for your jute surface?
- Can you provide a strike-off, a pre-production sample, carton packing details, and packed carton dimensions before final bulk approval?
Quality-control points to confirm
- Measure finished width, height, gusset, handle drop, handle width, hem depth, and print placement against the approved tolerance sheet.
- Check fabric GSM by the agreed method and compare weave appearance, hand feel, shade, and shedding to the approved swatch.
- Inspect for stains, mildew marks, oil spots, large holes, weak yarn lanes, and excessive loose fiber shedding.
- Verify handle material, width, insertion depth, reinforcement patch size, stitch pattern, stitch density, and thread security.
- Run lift, hold, and repeated handling checks using the intended load plus the agreed margin on random samples.
- Inspect handle anchors after testing for seam creep, yarn tearing, top hem distortion, broken thread, or patch separation.
- Check side seams, bottom gusset, corners, and top hem for skipped stitches, open seam ends, fraying, and weak edge finish.
- Review print for position, shade, registration, edge clarity, missing ink, smearing, cracking, rub-off, and fold damage.
- Smell-test loose and packed bags for excessive fiber odor, damp smell, mildew, ink, glue, or lamination odor before carton sealing.
- For first production runs, inspect 32 pieces total per style from at least three carton positions, or one full carton if that gives broader coverage, then apply your own AQL or acceptance rule.