Start With the Date Your Team Actually Needs the Pouches
When buying wholesale cotton drawstring pouches for craft fairs, the deadline that matters is not simply the factory completion date. It is the day the pouches are usable by the team that fills, allocates, prices, or ships the finished goods. For many buyers, pouches are an upstream packaging component. Jewelry, soaps, candles, stationery, textiles, ornaments, accessories, and gift kits may sit ready while the packing team waits for the correct pouch to arrive. A one-week delay can mean overtime packing, courier upgrades, split shipments, or a last-minute switch to unbranded packaging.
Build the timeline from the required in-hand date at the warehouse, co-packer, distributor, event-kit assembler, or fair location. Then work backward through domestic delivery, import clearance if applicable, international freight, export packing, final inspection, mass production, material booking, sample approval, artwork approval, and purchase order confirmation. This is where many schedules fail: the supplier’s production lead time usually starts only after all production inputs are approved, not when the first email is sent.
Ask a sharper question than, "What is your lead time?" Ask whether the supplier can meet a named ship-out date for the exact order structure. A repeat order in natural cotton with one size, one cord, and one-color screen print is a different job from a first order with custom dyed cotton, three sizes, five artworks, woven labels, barcode labels, and individual packing. Factory capacity matters, but buyer approval speed often matters just as much.
- Set three RFQ dates: required in-hand date, latest supplier ship-out date, and date pouches are needed for packing finished goods.
- Break the schedule into quote alignment, sampling, production, inspection, export packing, freight, receiving, and internal allocation.
- For first orders tied to fixed craft fair dates, aim to approve the pre-production sample 6-8 weeks before the required supplier ship-out date.
- Ask the supplier to define the lead-time trigger in writing, because some count from deposit while others count from approved sample or material arrival.
- Freeze artwork, carton marks, and packing data early; late buyer approvals are one of the easiest schedule risks to prevent.
Use a Reverse Timeline Instead of a Rough Estimate
A reverse timeline turns an event deadline into a procurement control tool. Start with the date cartons must be ready for use, then subtract freight time, customs or domestic receiving time, inspection time, packing time, sewing time, printing time, material preparation, and sample approval. This avoids a common buying mistake: accepting a 20-working-day production estimate while ignoring the extra calendar days needed for sample comments, payment release, carton label approval, freight booking, and internal receiving.
Separate working days from calendar days. Factories often quote production in working days, excluding weekends and local holidays. Craft fair teams plan in calendar days. A quoted 20 working days can become roughly four calendar weeks before inspection and freight. If the order crosses a holiday period, a local shutdown, or a seasonal peak, ask whether fabric booking, printing capacity, and sewing capacity are already reserved for your order.
The reverse timeline should also identify priority SKUs. If one size, fabric color, or artwork is needed for an early fair, the supplier may be able to cut, print, pack, or ship that SKU first. Without allocation instructions, the factory may pack in the order that is easiest for production, not the order that protects the buyer’s event calendar. This becomes critical if the fallback is a split shipment by courier or air freight.
- Plan with calendar days internally and working days for factory production, then reconcile both before issuing the purchase order.
- Add at least one sample-revision window for first orders, especially when fit, print placement, or cord function is untested.
- Schedule inspection before freight pickup and before cartons are fully sealed, so corrective action is still possible.
- Confirm whether pouches must arrive before finished goods are packed, not merely before the fair opens.
- Keep a decision log for artwork version, fabric approval, cord approval, sample approval, packing approval, and carton marks.
Choose Fabric by Function, Not by Description
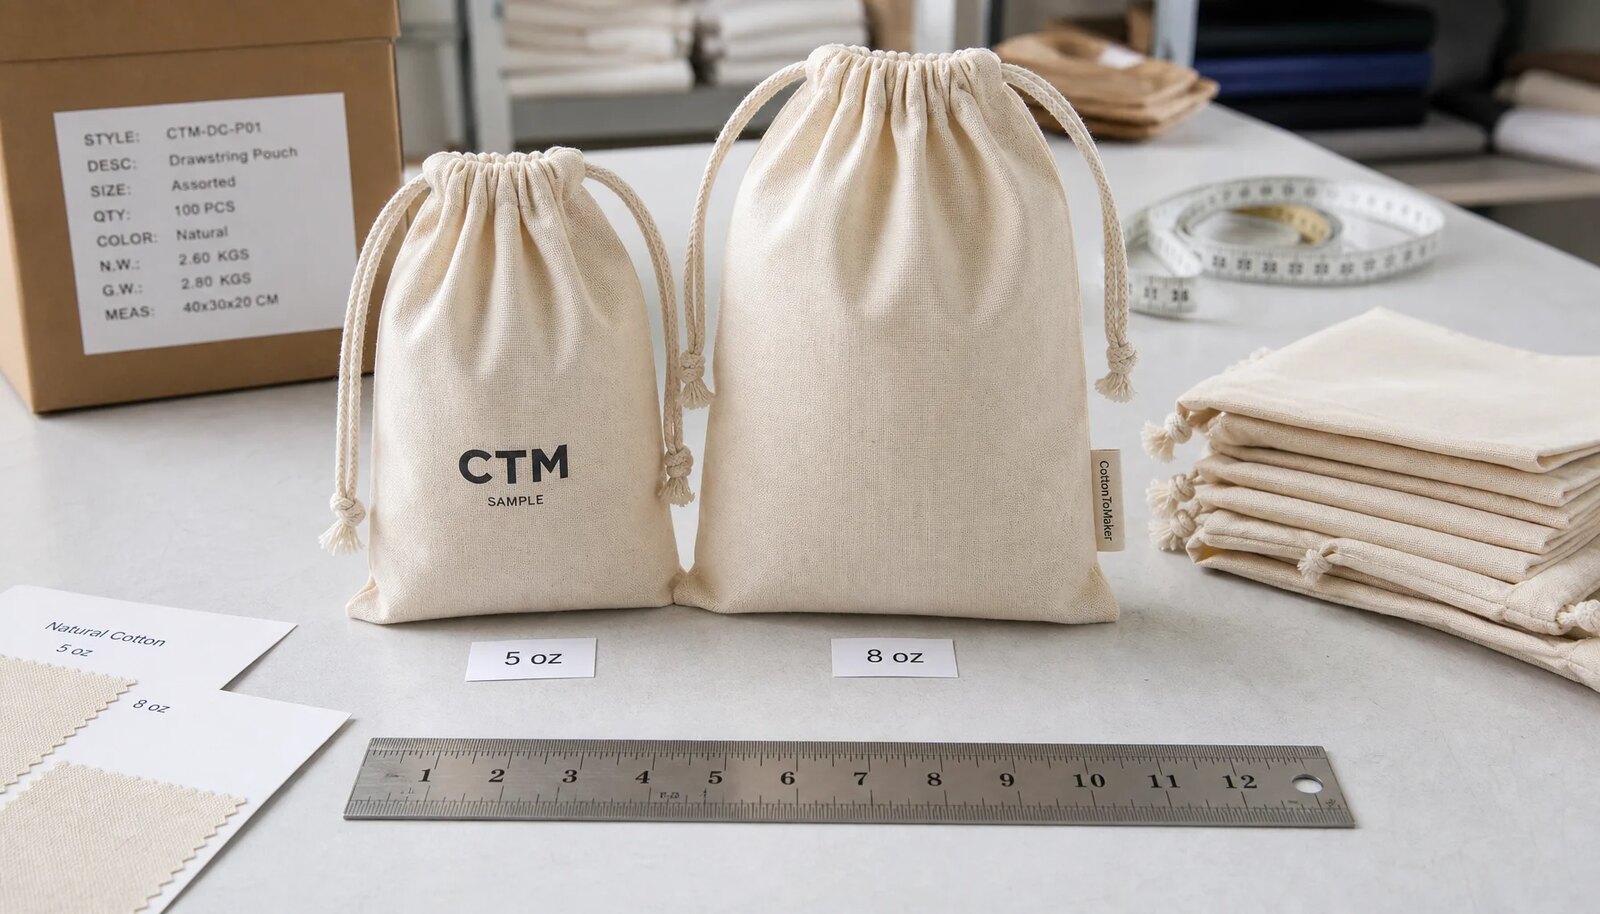
Fabric weight affects price, hand feel, opacity, print result, seam strength, closure performance, carton weight, and perceived retail value. For many craft fair programs, 5 oz to 6 oz cotton, approximately 150-180 GSM, is the practical middle ground. It usually looks presentable for retail packaging, folds efficiently, and works well for lightweight products such as jewelry, handmade soap, small candles, greeting cards, accessories, ornaments, and light gift sets.
Heavier 8 oz cotton canvas, often around 240-280 GSM depending on mill and weave, is better when the pouch should feel reusable or hold heavier products. It can suit ceramics, glass jars, small tools, maker kits, and premium gift bundles. The tradeoff is straightforward: higher material cost, heavier cartons, more bulk at the drawstring channel, and sometimes slower cutting and sewing. On very small pouches, heavy canvas may also close poorly, so test it with the actual product inside.
Lightweight 3 oz to 4 oz cotton, roughly 90-130 GSM, can work for dust covers, light inserts, sample packs, or low-cost event giveaways. It is usually not the right choice when the pouch is part of the product’s retail value. Avoid vague descriptions such as natural cotton bag, eco pouch, or premium cotton unless the supplier also confirms weight, weave, color, and certification requirements. Natural cotton, bleached cotton, dyed cotton, organic cotton, and recycled cotton blend are different sourcing tasks with different lead-time and QC implications.
- Request fabric weight in both ounces and GSM so suppliers using different measurement conventions can be compared accurately.
- Specify the fabric type where relevant, such as plain cotton, cotton muslin, cotton twill, or cotton canvas.
- Use natural or bleached cotton for faster standard programs unless custom color is essential to the brand plan.
- For dyed fabric, allow time for lab dip approval, bulk shade approval, colorfastness checks, and possible dye-lot MOQ.
- Do not change GSM after sample approval without resampling, because fit, closure, print appearance, and freight estimates can all change.
Specify Size, Fit, and Drawstring Construction
Size planning causes more delays than many buyers expect. Product dimensions are useful, but they are not the same as a production specification. A pouch needs room for insertion, fabric thickness, seam allowance, drawstring channel, bottom shape, and display presentation. A tight pouch may look neat in a photo but slow down warehouse packing or booth preparation. A loose pouch may be faster to fill, yet look less premium on a craft fair table.
List finished pouch dimensions as width x height and state clearly whether height includes the drawstring channel. If the pouch has a gusset, boxed bottom, rounded bottom, folded bottom, lining, or special seam construction, name it and sample it. A flat cotton drawstring pouch is usually the fastest and most economical structure. A gusseted or boxed-bottom pouch can be better for jars and bulky products, but it adds sewing operations, measurement points, and inspection risk.
Do not leave the drawstring details open. Single drawstring pouches pull from one side and can be economical. Double drawstring pouches pull from both sides and often close more evenly, but use more cord and labor. Cord diameter should match the pouch size and product weight; small pouches may use thinner cord, while medium or heavier pouches often need a sturdier 3-5 mm cord. The channel must stay wide enough for smooth pulling after sewing, pressing, and printing.
- Provide finished pouch width and height, product dimensions, product weight, and a product photo or sample for fit review.
- State whether the pouch is flat, gusseted, boxed-bottom, single drawstring, double drawstring, lined, or unlined.
- Define cord material, diameter, color, knot style, and whether plastic or metal tips are permitted or excluded.
- Keep first orders to two or three core sizes when possible to simplify MOQ, cutting, print setup, carton labels, and inspection.
- Create SKU codes that identify size, fabric color, cord color, artwork, label type, and packing method.
Set Decoration Rules Before Artwork Approval
Decoration method affects cost, schedule, and QC risk. Screen printing is common for wholesale cotton drawstring pouches because it is efficient for volume orders and reliable for bold artwork with one to three solid spot colors. It works best when the logo is vector-based, Pantone references are clear, and the design stays away from seams, gussets, bottom folds, and the drawstring channel. Provide AI, EPS, PDF, or SVG files before asking for a firm production quote.
Transfer printing, digital transfer, and similar methods can be useful for detailed artwork, gradients, full-color seasonal graphics, or many low-volume SKUs. These methods may reduce screen setup complexity, but they add other checks: transfer edge feel, adhesion, cracking, rubbing resistance, moisture sensitivity if relevant, and performance on textured cotton. If customers will handle the pouch repeatedly at craft fairs, test the printed area after opening and closing the sample several times.
Embroidery, woven labels, printed labels, and hangtags can improve presentation, but each one has a production consequence. Embroidery can pucker lightweight cotton or become too dense for a small pouch front. A woven side label introduces label MOQ and placement checks. A hangtag adds stringing, label verification, and packing labor. Choose decoration based on artwork complexity, order volume, handling expectations, and approval time, not simply because a method sounds premium.
- Use screen print for solid logos, repeat programs, and higher quantities where setup cost is spread across enough units.
- Use transfer print for gradients, fine detail, full-color seasonal graphics, or many small artwork variations.
- Define print size and placement with measurements, such as centered front print with the artwork top 3 cm below the drawstring channel.
- Require a safe print area for each pouch size, especially when the same artwork is scaled across multiple sizes.
- Separate screen charges, transfer setup, embroidery digitizing, label cost, and repeat-order cost from the unit price.
Treat MOQ as a Production Map
MOQ is not only a number to negotiate. It reflects how the supplier buys fabric, books dyeing, cuts panels, prepares cords, sets screens, organizes sewing, packs cartons, and controls waste. A quote for 5,000 natural cotton pouches in one size with one logo is not the same as 5,000 pieces split across five sizes, three colors, and ten artworks. The total quantity may be identical, but the setup work is not.
Ask for MOQ by the factors that create real production work: finished size, fabric color, cord color, artwork, print method, label type, hangtag, and packing method. Natural cotton often has better availability than custom dyed fabric. One shared cord color is easier than several cord colors. Bulk packing is simpler than individual barcode packing. If a supplier offers a low total MOQ, check whether setup charges or unit prices change once each SKU is listed.
Craft fair programs often need variety. Different makers, regions, seasons, or product categories may need different presentation. Manage that variety deliberately. Grouping SKUs by shared fabric, shared cord, shared print process, and shared packing style helps protect cost and schedule. If volume is low across many designs, a plain pouch with a locally applied hangtag, sticker, or insert card may be more flexible than printing many small pouch designs.
- Request MOQ per size, artwork, fabric color, cord color, label type, and packing method instead of relying on total order MOQ.
- Ask whether mixed sizes can share one fabric purchase MOQ while still being cut, printed, packed, and inspected separately.
- Group products into shared pouch sizes rather than creating a custom size for every craft item.
- Compare the landed cost of SKU complexity, including setup charges, inspection time, carton volume, and freight.
- Confirm repeat-order MOQ and setup charges if the same craft fair program may reorder during the season.
Make the RFQ Comparable and Audit-Ready
A strong RFQ prevents weak quotes. If one supplier assumes 5 oz natural cotton, bulk packing, and one-color screen print while another assumes 8 oz canvas, individual barcode bags, and transfer print, the lower unit price does not mean much. Every supplier should quote against the same technical basis, and every assumption should be visible. This is especially important when the order supports a fixed event season and there is not enough time to restart sourcing after a sample failure.
Include finished size, quantity by SKU, fabric weight, fabric color, cord material, cord diameter, cord color, print method, artwork file, Pantone references, print size, print placement, packing method, carton mark requirements, inspection requirements, delivery term, destination, and required ship-out date. If the supplier should recommend a size, provide product dimensions, weight, and photos so the recommendation can be reviewed objectively.
Ask for a cost breakdown. Unit price can hide screen charges, transfer setup, embroidery digitizing, sample fees, label costs, hangtag costs, barcode handling, individual packing materials, export carton charges, domestic trucking, document fees, or bank charges. A clear quote format helps procurement compare suppliers, negotiate repeat orders, and avoid disputes over whether a label, carton mark, or packing method was included.
- List quantities by SKU, not only total quantity, so MOQ, price breaks, packing, and inspection scope are clear.
- Require quote validity, payment terms, trade terms, production lead time, sample lead time, carton data, and freight handoff point.
- Ask for fabric weight, cord diameter, print method, and packing method to be repeated in the quote, not only discussed by email.
- Request estimated carton dimensions and gross weight before choosing courier, air, sea, or domestic freight.
- Ask the supplier to identify buyer approvals that could put the required ship-out date at risk.
Use Sampling to Lock the Standard
Sampling should prove the real bulk-production risks. A photo sample can help early discussion, but it is not enough for an event-tied purchase. The buyer needs to evaluate fabric hand feel, opacity, finished dimensions, product fit, closure function, cord quality, print placement, print color, seam strength, odor, and packing presentation. If the pouch holds a specific product, insert it, remove it, and reinsert it several times. Packing speed matters when hundreds or thousands of pieces must be prepared before a fair.
The best approval sample is a pre-production sample made with bulk or bulk-equivalent fabric, final cord, final stitch method, final artwork, actual print process, and final construction. A substitute-fabric sample may be acceptable for early size testing, but it should not become the mass-production standard unless the buyer accepts that risk in writing. Once the pre-production sample is approved, freeze the specification and document the acceptable tolerances.
Make sample comments measurable. Instead of saying the pouch feels small, record the measured width and height, the product insertion issue, and the revised target size. Instead of saying the logo is too high, state the required distance from the drawstring channel. Clear comments reduce revision cycles because the supplier can correct the sample without guessing what the buyer means.
- Measure sample width and height flat, then record target measurements, actual measurements, and approved tolerance.
- Test the actual product inside the pouch for fit, closure, protection, table presentation, and packing speed.
- Pull the cord repeatedly to check channel clearance, fabric bunching, knot security, and cord slippage.
- Rub the print with a dry white cloth and, where relevant, a slightly damp cloth to check ink transfer or weak adhesion.
- Photograph the approved sample from the front, back, inside seam, drawstring channel, print close-up, and packed condition.
Write QC Standards Before Cutting Starts
Cotton drawstring pouches look simple, but bulk defects can create expensive event problems. Common issues include uneven size, twisted cords, blocked drawstring channels, skipped stitches, loose threads, open seams, fabric stains, shade variation, print misalignment, ink smears, mixed sizes, wrong artwork, short shipment, and incorrect carton labels. For craft fair programs, packing errors can be as damaging as product defects because event teams may not have time to sort cartons before setup.
The purchase order should define measurable acceptance criteria. Finished dimensions need a tolerance. Print placement needs an allowed variation. Fabric color needs an approved sample or shade standard. Cord material, diameter, and color should match the approved sample. Wrong size, wrong artwork, missing cord, open seam, blocked channel, severe stain, and incorrect carton quantity should be treated as major defects unless the buyer defines another rule in writing.
For larger orders, buyers may use an agreed inspection level and AQL plan, or a buyer-specific internal inspection rule. Inspection should cover appearance, function, measurements, fabric, print quality, packing, carton count, SKU segregation, and carton marks. Inspection after freight pickup is no longer a control point. At that stage it is mainly a complaint record, and the buyer may have very little time to recover before the event.
- Classify wrong artwork, wrong size, missing cord, open seam, blocked channel, severe stain, and incorrect carton quantity as major defects.
- Measure samples from multiple cartons and production bundles instead of checking only the top pieces from one carton.
- Test cord pull function on sampled pieces to catch blocked channels, weak knots, cord slippage, and uneven closure.
- Inspect print placement, registration, color, adhesion, cracking, pinholes, bleeding, smearing, and distortion against the approved sample.
- Verify carton labels, SKU segregation, inner bundles, carton count, and destination markings as part of QC.
Plan Packing, Freight, and Event Allocation Together
Packing choices affect unit cost, freight, labor, inspection, and the buyer’s ability to distribute pouches quickly. Bulk packing is usually most efficient when pouches will be filled or allocated by the brand, importer, distributor, or event-kit team. Inner bundles of 50 or 100 pieces make counting easier while avoiding the cost and waste of individual packaging. For many craft fair programs, bulk packing by SKU with clear carton marks is the best balance of speed and control.
Individual polybags, paper sleeves, barcode labels, hangtags, and retail-ready packing may be necessary when the pouch itself is sold as merchandise, shipped directly to stores, or included in finished retail kits. These choices add packing material, labor, carton volume, barcode verification, and more inspection points. A pouch with a low unit price can become expensive if every piece must be folded, bagged, labeled, scanned, and packed by destination.
Carton specifications should match the distribution environment. A carton optimized for sea freight may be too heavy for small event teams. A courier-friendly carton may increase total volume. Confirm pieces per carton, carton dimensions, gross weight, net weight, inner bundle quantity, carton strength, and carton markings before the PO is finalized. If cartons ship to multiple craft fair locations, send the allocation plan before packing begins.
- Use bulk packing by SKU when pouches will be filled or allocated locally; use individual packing only when retail handling requires it.
- Confirm inner bundle quantity, pieces per carton, carton dimensions, gross weight, and net weight before booking freight.
- Keep carton gross weight practical for manual handling by warehouses, courier drivers, and fairground teams.
- Mark cartons with PO number, SKU, size, fabric color, artwork, quantity, carton number, and destination or event allocation code.
- Send multi-location allocation instructions before cartons are sealed to avoid local resorting, relabeling, or split-shipment confusion.
Specification comparison for buyers
| Spec decision | Recommended option | When it fits | Buyer risk to check |
|---|---|---|---|
| Baseline fabric | 5 oz to 6 oz cotton, approximately 150-180 GSM, plain weave or light canvas | Jewelry, soap bars, candles in small tins, cards, ornaments, accessories, lightweight gift kits, and general craft fair packaging | Below-spec fabric can look semi-transparent, wrinkle hard, or feel like giveaway packaging; verify GSM, opacity, and approved hand feel against the production sample |
| Premium fabric upgrade | 8 oz cotton canvas, approximately 240-280 GSM, with stronger body and higher perceived reuse value | Ceramic pieces, glass jars, small tools, maker kits, premium gift bundles, and products where the pouch is part of the retail presentation | Higher GSM can increase unit cost, carton weight, closure bulk, cutting time, and freight volume; test drawstring closure with the actual product inside |
| Low-cost fabric option | 3 oz to 4 oz cotton, approximately 90-130 GSM, only for very light contents or dust-cover use | Very light inserts, low-cost event giveaways, sample packs, or internal protection where retail hand feel is not critical | May show product outlines, tear more easily at seams, and reduce perceived product value; confirm whether the buyer accepts transparency and lighter handle |
| Fabric color | Natural or bleached cotton for fastest standard programs; dyed cotton only when brand color control is essential | Natural fits handmade, organic, and craft positioning; bleached fits cleaner artwork contrast; dyed fits strict brand palettes or seasonal collections | Custom dyeing adds lab dip approval, dye-lot MOQ, shade variation risk, colorfastness checks, and extra calendar time before cutting |
| Drawstring specification | Single or double cotton cord, typically 3-5 mm diameter depending on pouch size; polyester cord when color matching or higher abrasion resistance is required | Cotton cord suits natural branding and soft handling; polyester cord suits frequent opening, color cords, and heavier handling | Cord diameter, cord shrinkage, knot security, and channel clearance must be approved; thin cord can look underspecified and slip through weak knots |
| Print method | Screen print for 1-3 solid spot colors; transfer print for fine detail, gradients, or many small artwork variations | Screen print fits bulk craft fair programs and repeat logos; transfer fits seasonal graphics, multi-color artwork, and mixed low-volume SKUs | Artwork near seams, bottom folds, gussets, or drawstring channels can distort; require a safe print area and placement tolerance |
| Finished-size tolerance | Commonly ±0.5 cm for small pouches and ±1.0 cm for medium or larger pouches, unless fit-critical products require tighter control | Most flat cotton drawstring pouches used for craft fair packaging, kitting, and distribution | Do not assume tolerance from a drawing; write target dimensions, measurement method, and tolerance into the PO and inspection checklist |
| MOQ structure | Quote MOQ by size, fabric color, artwork, cord color, label type, and packing method, not only by total order quantity | Importers, distributors, and brand teams consolidating craft fair packaging under one seasonal or house-brand program | Low total MOQ can hide minimums for fabric rolls, dye lots, screens, cutting setup, labels, hangtags, or individual packing labor |
| Packing method | Bulk pack by SKU with inner bundles of 50 or 100 pieces unless retail-ready presentation is required | Distributors, event-kit teams, fair operators, and brands that fill or allocate pouches after import | Individual packing improves presentation but adds labor, carton volume, barcode checks, plastic or paper material cost, and more QC points |
Buyer checklist before sampling
- Set the required in-hand date, latest supplier ship-out date, and the date pouches must be ready for packing finished craft products before requesting unit prices.
- Define the pouch role as protective packaging, branded gift packaging, resale merchandise, event-kit packaging, or reusable value-add; the role changes fabric weight, decoration, and QC priorities.
- Provide finished pouch dimensions as width x height and state whether height includes the drawstring channel; include gusset depth or boxed-bottom dimensions if applicable.
- Send product dimensions, product weight, and a product photo or physical sample so the supplier can check fit, closure, fabric strength, and packing speed before sampling.
- Choose fabric by function: 3-4 oz for light dust-cover use, 5-6 oz for standard craft fair packaging, and 8 oz canvas when durability or reusable feel justifies the higher cost.
- State fabric color and preparation clearly: natural, bleached, dyed, pre-shrunk, organic cotton, recycled cotton blend, or other certified material requirement; avoid vague terms such as eco cotton.
- Confirm drawstring construction, including single or double cord, cotton or polyester material, diameter in millimeters, cord color, knot style, and whether metal or plastic tips are excluded.
- Provide artwork as vector files such as AI, EPS, PDF, or SVG with Pantone references, print dimensions, placement measurements, and minimum clearance from seams, gussets, bottom fold, and drawstring channel.
- Separate MOQ and price by size, fabric color, artwork, print method, label type, cord color, and packing method so competing supplier quotations can be compared fairly.
- Ask for setup charges, screen charges, sample charges, label charges, hangtag charges, individual packing costs, carton costs, repeat-order pricing, and quote validity instead of reviewing unit price alone.
Factory quote questions to send
- What exact fabric are you quoting, including cotton type, ounce weight, GSM, weave, color, shrinkage treatment, and whether it is greige, natural, bleached, dyed, pre-shrunk, organic, or recycled blend?
- What is the MOQ per finished size, fabric color, artwork, cord color, label type, print method, and packing method, and which of those MOQs are flexible for repeat orders?
- Is your quoted lead time counted from deposit receipt, purchase order confirmation, artwork approval, material arrival, or signed pre-production sample approval?
- Can the pre-production sample be made with bulk or bulk-equivalent fabric, final cord, final stitch method, final artwork, and the same print process planned for mass production?
- What finished-size tolerance do you apply after cutting, sewing, pressing, and packing, and will you write that tolerance into the proforma invoice or purchase order confirmation?
- What print method are you quoting, and what are the setup charges, screen charges, transfer mold charges, color-change charges, repeat-order charges, and minimum artwork quantities?
- What is the maximum printable area for each pouch size, and how far must artwork stay from side seams, bottom seam, gusset if any, and drawstring channel?
- Can you run a print adhesion or rubbing check on the actual cotton fabric, especially for dark ink, heavy ink coverage, transfer graphics, or artwork that will be handled repeatedly?
- What stitch density, seam type, seam allowance, and back-tack points will be used, and how do you check open seams, skipped stitches, fraying, and drawstring channel blockage?
- What cord diameter, cord material, cord color, and knot method are included in the quote, and what substitutions require buyer approval before production?
Quality-control points to confirm
- Finished pouch dimensions should be measured flat before packing using the agreed method, with tolerance written into the purchase order; common working tolerances are ±0.5 cm for small pouches and ±1.0 cm for larger pouches unless product fit requires tighter control.
- Fabric weight should be verified against the approved sample and quoted GSM, because natural cotton, muslin, twill, and canvas can look similar in photos but differ in opacity, handle, shrinkage, and seam strength.
- Fabric shade should be checked against the approved sample or shade standard under consistent light, with special attention to natural cotton lot variation, bleached whiteness, and dyed fabric batch differences.
- Seams should be straight, back-tacked at stress points, and free from skipped stitches, loose threads, puckering, needle holes, fabric fraying, and open seams.
- Drawstring channels should remain clear after sewing and printing, with no trapped cord, twisted cord, blocked channel, broken tips, loose knots, or slippage when the cord is pulled repeatedly.
- Cord material, color, diameter, and construction should match the approved sample; substitution from cotton to polyester cord, or from thicker to thinner cord, should require written buyer approval.
- Print placement should stay within the approved tolerance and safe print area, with no obvious smearing, cracking, pinholes, ghosting, bleeding, misregistration, scorching, or distortion near seams.
- Print adhesion and rubbing resistance should be checked on actual cotton fabric, especially for dark ink on natural cotton, heavy ink coverage, transfer prints, and pouches likely to be handled repeatedly.
- The inside of the pouch should be checked for thread waste, fabric dust, stains, odor, needle fragments, or printing contamination that could transfer to craft products.
- SKU segregation should be verified by size, fabric color, artwork, cord color, label type, and packing method so event teams do not receive mixed cartons that require manual sorting.