Treat packing as part of the pouch specification
Corporate gifting orders usually run on fixed dates: conferences, employee onboarding, client appreciation, holiday programs, distributor launches, and gift-with-purchase campaigns. In these projects, the pouch is not only a soft bag with a logo. It is a component that must fit the gift, arrive countable, pass inspection, and move through warehouse or event handling without extra sorting.
That is why a carton packing plan belongs in the RFQ, not at the end of production. If one supplier quotes 500 pieces per carton and another quotes 1,000 pieces per carton, the unit price alone does not show the real landed cost. Carton count, gross weight, freight cube, labeling, and receiving labor can change the total program cost and the risk of late delivery.
A stronger buying specification defines the pouch and the export packing together: finished size, GSM, fabric finish, drawcord, logo method, inner bundle count, pieces per master carton, carton dimensions, net weight, gross weight, carton marks, and destination split. This makes supplier quotes easier to compare and gives your inspection team measurable checkpoints.
- Add inner bundle and master carton requirements to the first RFQ.
- Ask for carton L x W x H, gross weight, and pieces per carton with the quote.
- Require first-carton photos before the factory seals the full batch.
- Treat wrong carton quantity, wrong labels, or mixed SKUs as commercial defects.
Start with the insert and fulfillment route
The correct pouch size starts with the item going inside. Measure the actual product, box, bottle, candle, card set, charger, notebook, sample kit, or jewelry case. Record width, height, depth, weight, and rigid corners. Then test how much allowance is needed for the item to slide in quickly and for the drawstring to close above it without hiding the logo.
A pouch can technically fit but still fail in a kitting line. A narrow opening slows packers. A tight top channel may not close cleanly over a rigid box. Too much extra fabric can look messy inside a premium gift box. A sharp product corner may stress a low-GSM bottom seam. These issues are easier to correct at sample stage than during event fulfillment.
The route also matters. A brand warehouse may accept simple master cartons. A 3PL may require barcode labels and fixed carton weights. Regional office deliveries may need destination-specific carton numbering. Event venue deliveries may need readable carton marks and easy handling by non-warehouse staff. The pouch packing plan should follow the actual distribution path.
- Measure the insert before choosing a catalog pouch size.
- Test the pouch with the real item, not only a dummy insert.
- Add opening allowance for fast hand packing.
- Confirm maximum carton weight for manual handling.
- Separate requirements for warehouse, 3PL, venue, and multi-destination shipments.
Set finished size, tolerance, and usable capacity
Cotton drawstring pouches should be specified as finished width x finished height, measured flat after sewing. Confirm this because some suppliers quote cut size or approximate catalog size. Finished size controls fit, logo position, usable capacity, carton packing, and inspection acceptance.
Commercial tolerances should be practical. For small pouches, ±0.5 cm is often used when the supplier confirms it is achievable. Larger pouches may need ±1.0 cm. If the insert fit is tight, do not rely on general tolerance language. Approve a filled pre-production sample and state the critical dimensions that must be controlled.
Usable capacity is smaller than flat dimensions suggest. Seam allowance, fabric thickness, and the drawcord channel reduce space. A 12 x 17 cm pouch will not comfortably hold a 12 x 17 cm rigid box. Thick inserts need width allowance and top closure allowance. If the logo must remain visible after closure, check the filled sample in the final presentation position.
- State size as finished width x finished height after sewing.
- Define the measurement method: flat, empty, after pressing, or normal packed condition.
- Use a filled sample to approve size and logo visibility.
- Add top allowance for drawstring closure.
- Record tolerance by SKU if sizes vary.
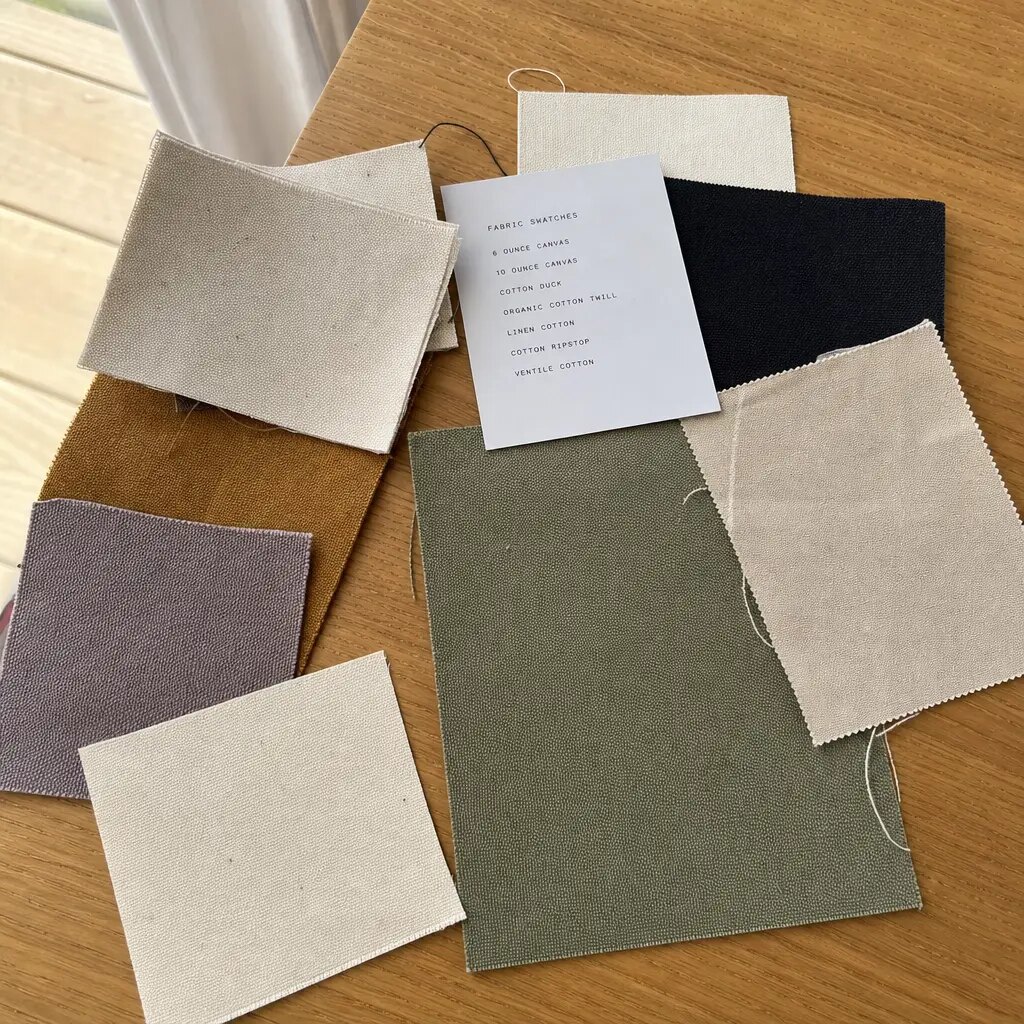
Choose GSM and fabric finish with acceptance standards
Fabric GSM affects hand feel, opacity, seam strength, print result, carton weight, and cost. For many corporate gifting programs, 120-140 GSM cotton is a balanced starting point. It is usually more substantial than very light promotional cloth while still packing efficiently. For heavier or premium inserts, 180 GSM is worth quoting as an upgrade.
The finish must be named clearly. Natural unbleached cotton has a warmer tone and may show seed specks, slubs, and small weaving irregularities. That can suit eco-positioned packaging, but only if the buyer accepts the natural variation. Bleached cotton gives a cleaner base for many logos. Dyed cotton supports brand color programs but requires shade approval and lot control.
If your marketing mentions reuse or washability, ask for evidence instead of assuming performance. Many drawstring pouches are made for packaging, not repeated laundering. Shrinkage, print cracking, and dye fastness should be tested under the conditions you intend to claim.
- Use 120-140 GSM as a standard quote base for general gifting.
- Quote 180 GSM for heavier inserts, better opacity, or a more premium feel.
- Define acceptable natural cotton specks and slubs before bulk cutting.
- Approve dyed fabric by swatch or lab dip, not by screen image.
- Do not make washability claims unless shrinkage and print durability are tested.
Specify drawcords, seams, and closure performance
Drawcord performance strongly affects perceived quality. A rough cord, short tail, loose knot, or tight channel can make a pouch feel cheap even when the fabric is acceptable. A single drawcord may work for cost-sensitive programs, while a double drawcord usually opens and closes more smoothly and presents better for customer-facing gifts.
Cord material should not be left as “standard.” Cotton cord supports a natural look but can vary in lint and twist. Polyester cord can be cleaner and more color-stable depending on style. Diameter matters: too thick can jam in the channel, while too thin can feel weak and cut into the fabric under tension.
Seams should match the insert weight. Light gifts may only need standard lockstitch construction. Bottles, candles, chargers, small tools, or rigid boxes may require better seam allowance, stronger stitch density, or reinforcement at stress points. During QC, inspectors should check the top channel, bottom seam, back-tacks, cord ends, and actual open-close function.
- Specify single or double drawcord in the PO.
- Confirm cord material, diameter, color, tail length, and end finish.
- Check cord movement with the insert inside the pouch.
- Classify open seams, skipped stitches, broken threads, and cord pull-through as major defects.
- Review the top channel and bottom seam, not only the front logo.
Control artwork, print method, and logo placement
Most corporate pouch logos look simple on a screen but behave differently on cotton. Screen printing is usually the practical choice for one-color and two-color logos at volume. The key limits are small text, fine lines, registration, and ink behavior on textured fabric. Ask the printer for minimum line thickness and text height based on the actual cotton GSM.
Heat transfer can handle full-color artwork, gradients, and complex marks, but it must be tested on the real fabric. Check hand feel, gloss, edge lifting, cracking, tackiness, and stacking transfer. Woven labels can create a premium look, but they add sewing placement tolerance and another inspection point.
Logo placement should be written as a production instruction. Include artwork version, logo width and height, color reference, position from top or bottom edge, centered or offset alignment, and tolerance. Also confirm whether printing happens before or after sewing. Pre-sewing printing may shift slightly during stitching; post-sewing printing may be limited by seams, channel bulk, and platen access.
- Approve one final artwork file for each logo version.
- State logo size, color reference, placement, and tolerance.
- Ask whether printing is before or after sewing.
- Test fine text and thin lines at actual print size.
- Check printed samples for rubbing, ink bleed, cracking, gloss, and stacking transfer.
Use an RFQ format that prevents hidden assumptions
A useful RFQ makes suppliers quote the same product and packing basis. If one supplier uses 100 GSM cotton and another uses 140 GSM, the lower price is not a true comparison. If one supplier quotes dense master cartons and another quotes bulky cartons, freight and receiving costs will differ.
Your RFQ should include finished pouch size, tolerance, fabric GSM, finish, color, drawcord style, seam requirements, logo method, artwork count, quantity by SKU, sample requirement, inner bundle count, master carton quantity, carton dimensions, weights, labels, inspection requirement, destination split, and shipment terms. If packing density is uncertain, request two options: dense export pack and presentation-protective pack.
Ask suppliers to separate setup and special handling costs. Screen charges, heat-transfer setup, label tooling, sampling, barcode labels, carton marks, destination sorting, and special packing labor should be visible. This helps when the marketing team adds a second logo or the warehouse changes label requirements.
- Use the same spec sheet for every supplier.
- Ask for price by SKU and artwork version.
- Require carton dimensions and gross weight in the quote.
- Separate product cost, sample cost, setup cost, and packing cost.
- Reject quotes that only state “standard export packing” without carton data.
Sample carton packing plan for quote comparison
The packing plan below is an example format, not a universal standard. Actual quantities depend on pouch size, GSM, cord bulk, fold method, carton strength, and carrier limits. Use the format to force suppliers to provide comparable carton data before production starts.
Example item: 15 x 20 cm finished natural cotton drawstring pouch, 140 GSM, one-color screen print, double cotton drawcord, flat packed. Proposed packing: 50 pieces per paper-banded inner bundle, 10 bundles per master carton, 500 pieces per carton. Sample carton dimensions: 50 x 40 x 35 cm. Net weight: 7.5 kg per carton. Gross weight: 8.5 kg per carton. Carton volume: 0.070 CBM. Packing density: about 7,143 pieces per CBM.
If another supplier quotes 400 pieces in a 50 x 40 x 40 cm carton, carton volume is 0.080 CBM and density is 5,000 pieces per CBM. Even if the unit price is similar, the second option uses more freight cube per 1,000 pieces. Compare total CBM for the full order: 10,000 pieces at 500 pieces per 0.070 CBM carton equals 20 cartons and 1.40 CBM. At 400 pieces per 0.080 CBM carton, it equals 25 cartons and 2.00 CBM. That difference can affect air freight, courier dimensional weight, warehouse storage, and event handling.
A carton mark for the example could read: PO CTM-2026-041 / SKU DP-1520-NAT / Natural Cotton Drawstring Pouch 15 x 20 cm / Logo A / Qty 500 PCS / Carton 01 of 20 / N.W. 7.5 KG / G.W. 8.5 KG / Size 50 x 40 x 35 CM / Destination: Chicago Event Warehouse / Made in [Country]. Confirm country-of-origin wording with your compliance team and supplier.
- Ask suppliers to provide pieces/carton, carton dimensions, N.W., G.W., and total CBM.
- Compare pieces per CBM, not only unit price.
- Check that carton weight is practical for manual receiving.
- Approve first-carton photos: open carton, closed carton, label, scale weight, and bundle layout.
- Make the packing list match carton marks exactly.
Plan inner bundles, master cartons, and labels
Flat packing is usually the safest and most countable format for cotton pouches. Pouches should be aligned consistently, with cords tucked inside or laid in the same direction. Random loose stuffing creates cord tangling, uneven cartons, recounting, and visible creasing.
Inner bundles should use round counts such as 25, 50, or 100 pieces. The best choice depends on the kitting process. A fulfillment line may prefer 50-piece bundles that match work batches. A distributor may prefer 100-piece bundles to reduce handling. The bundle method should be named: paper band, tied bundle, inner polybag, or another agreed method.
Carton labels should support receiving without opening every box. Include PO number, SKU, size, fabric color, logo version, quantity, carton number, total carton count, net weight, gross weight, destination, and origin if required. For split shipments, use destination-specific carton numbering, such as A1-A20 for one destination and B1-B15 for another.
- Use fixed inner bundle counts instead of loose random packing.
- Keep different sizes, colors, and logo versions in separate cartons unless mixed packing is approved.
- Confirm label content and placement before packing starts.
- Use destination-specific carton numbering for split deliveries.
- Request label photos before shipment release.
Manage MOQ, lead time, inspection, and approval gates
MOQ can be driven by fabric lot size, dyeing minimums, cutting efficiency, print setup, artwork versions, sewing line changes, and destination sorting. Ask what drives the MOQ instead of treating it as one fixed number. A natural cotton pouch with one logo has a different MOQ structure from a program with four sizes, dyed fabric, and three destination label sets.
Lead time should be broken into gates: artwork confirmation, sample making, courier time, sample approval, fabric booking, cutting, printing, curing or transfer setting, sewing, trimming, inspection, inner packing, carton packing, final packing list, and shipment handover. Event-linked programs should work backward from the in-hands date and reserve time for inspection or repacking corrections.
Inspection should cover both product and packing. Product checks include finished size, GSM, shade, natural fabric marks, logo quality, seam security, stitch density, cord length, cord ends, and drawstring function. Packing checks include inner bundle count, pieces per carton, carton dimensions, carton weight, labels, carton sequence, and whether SKUs or destinations are mixed without approval.
- Ask MOQ by fabric color, size, logo version, and packing requirement.
- Group SKUs by shared fabric and print setup when negotiating.
- Freeze artwork and carton labels before production packing.
- Inspect first packed cartons before the full batch is sealed.
- Keep a signed approved sample and packing plan for repeat orders.
Specification comparison for buyers
| Packing decision | Recommended option | When it fits | Buyer risk to check |
|---|---|---|---|
| Inner bundle count | Fixed bundles of 25, 50, or 100 pieces with cords aligned or tucked | 3PL receiving, event kitting, regional office allocation, and repeat reorder control | Loose packing causes recounting, cord tangling, inconsistent carton weights, and slower kitting |
| Bundle protection | Paper band or tied bundle for low-plastic programs; inner polybag only when dust or moisture protection is required | Brand sustainability rules, warehouse handling, humid routes, or long storage periods | No inner protection can lead to dirty fabric; excessive plastic may conflict with buyer packaging policy |
| Pieces per carton | Set a fixed carton quantity after sample packing, then use it on the PO and packing list | Freight quoting, inventory control, customs documents, and receiving checks | Changing carton quantities after production creates carton-count mismatches and shortage claims |
| Carton density | Dense flat pack without bulging, fabric distortion, crushed cords, or over-compression | Export shipments where freight cube matters but presentation still needs to be acceptable | Over-packed cartons deform pouches; under-packed cartons waste freight volume and may collapse |
| Carton size | Use supplier-confirmed L x W x H from first packed carton, not an estimated catalog carton | Air, sea, courier, and truck freight comparisons | Freight quotes based on estimated cartons can change after final packing |
| Carton weight | Keep gross weight within manual handling and carrier limits; request net and gross weight per carton | Warehouse receiving, venue delivery, courier shipment, and split destinations | Heavy cartons may be refused, surcharged, or difficult for event staff to move |
| Carton marks | Print or label PO, SKU, size, color, logo version, quantity, carton number, destination, N.W., G.W., and COO if required | Multi-SKU gifting programs, distributor shipments, and event delivery | Weak marks create sorting errors; carton labels that do not match the packing list delay receiving |
| Destination sorting | Pack by SKU and destination unless mixed cartons are explicitly approved | Regional office drops, department kits, retailer routing, or event venues | Mixed cartons require reopening, sorting, relabeling, and recounting at destination |
| First-carton approval | Require photos of open carton, closed carton, label, scale weight, and bundle layout before full sealing | Custom pouch orders with logo, special packing, or strict delivery dates | If the first carton is wrong, the whole batch may need repacking after inspection |
Buyer checklist before sampling
- Measure the actual insert width, height, depth, weight, and rigid corners before selecting pouch size.
- Confirm whether the quoted dimensions are cut size or finished size after sewing.
- Set finished-size tolerance in writing, such as ±0.5 cm for small pouches or ±1.0 cm for larger pouches when acceptable.
- Choose cotton GSM based on insert weight, opacity, hand feel, seam strength, logo method, and carton weight.
- Define fabric finish as natural, bleached, dyed, washed, or custom color, including acceptable natural cotton marks or shade tolerance.
- Approve artwork file, print method, print size, print color reference, placement distance, and placement tolerance.
- Confirm whether printing is done before or after sewing because this affects logo placement near seams and drawcord channels.
- Specify cord material, cord diameter, cord color, single or double drawcord, tail length, and knot or tip finishing.
- Lock inner bundle quantity, master carton quantity, carton dimensions, net weight, gross weight, carton mark format, and sealing method before bulk packing.
- Ask for a pre-production sample that shows fabric, seams, cord action, logo quality, folding method, inner bundle, and carton label.
Factory quote questions to send
- What exact finished pouch size are you quoting, and is tolerance measured after sewing and packing?
- What cotton GSM is included, what production tolerance applies, and how will GSM be checked?
- Is the fabric natural, bleached, dyed, washed, or custom colored, and will bulk fabric come from one lot?
- For natural cotton, which seed specks, slubs, weaving marks, or shade variations are acceptable?
- What seam type, stitch density, seam allowance, and top-channel construction are included?
- Which drawcord material, diameter, color, tail length, and end finishing are included?
- Which print method is quoted, what setup fee applies by color or artwork version, and what curing or drying time is required?
- What minimum line thickness and minimum text height do you recommend for screen printing on this cotton GSM?
- What logo placement tolerance can you hold from the top edge, side edge, and pouch centerline?
- How many pieces are packed per inner bundle, per inner bag or band, and per master carton?
Quality-control points to confirm
- Finished size should be measured flat after sewing using the agreed method, with tolerance recorded by size and SKU.
- Fabric GSM should match the written specification within the agreed production tolerance, checked by cutter sample or lab method when required.
- Fabric shade should be compared with the approved sample under consistent lighting, especially for dyed or bleached cotton.
- Natural cotton seed specks, slubs, and weaving irregularities should be classified as acceptable or rejectable before bulk cutting.
- Top hem and cord channel must be straight, secure, and wide enough for the specified cord to move without snagging.
- Side seams and bottom seams must have no open seams, skipped stitches, broken threads, loose back-tacks, large needle holes, or exposed raw edges beyond the approved finish.
- Stitch density and seam allowance should suit the insert weight, with reinforced areas checked when pouches carry heavier items.
- Cord length, cord diameter, cord color, and cord tail length should be consistent across inspection samples.
- Cord ends must be knotted, tipped, stitched, or otherwise secured so they do not fray or pull back into the channel.
- Drawstring function should be tested by opening and closing samples from each inspection lot, not only by visual check.