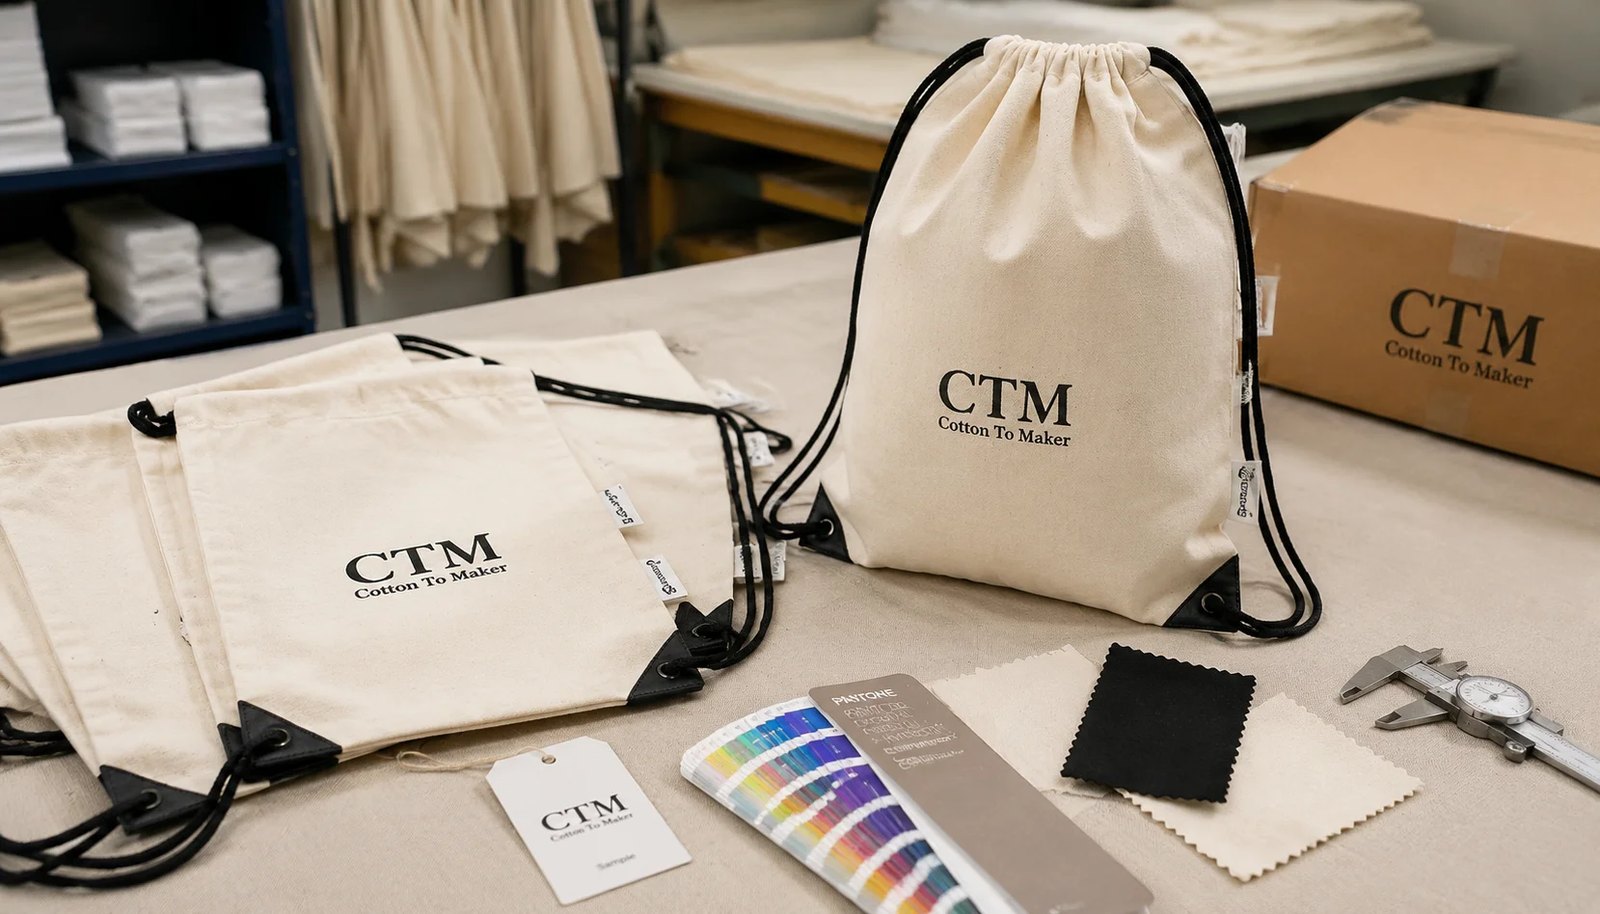
Why print proofing becomes the critical control point on liquor retail bag orders
When buyers source wholesale cotton drawstring backpacks for liquor retailers, sewing is only part of the risk. The more expensive mistakes usually start in proofing. A bag can be the right size, the right fabric weight, and still miss the mark because the logo sits too close to the channel, the disclaimer becomes unreadable, or one regional version is packed into the wrong cartons.
Liquor retail programs often involve several decision makers at once. A store chain may review logo hierarchy. A spirits brand may focus on Pantone direction. A distributor may care most about version coding and delivery splits. Procurement has to turn all of that into one usable manufacturing instruction. If those details stay scattered across email threads, trouble tends to appear late, when changing anything is slower and more costly.
The safest way to manage the order is to separate three approvals. First, approve the product specification: fabric, size, drawcord, seams, reinforcement, and packing format. Second, approve the artwork proof: revision number, print size, placement, color direction, and any protected text or legal copy. Third, approve the inspection standard: what will be measured, where it will be measured from, and what variation is still acceptable.
That structure sounds basic, but it prevents common disputes. A digital mockup may look fine while still being too weak for production. For B2B buyers, the rule is simple: the print proof should function as a factory instruction, not just a design preview. If it does not define scale, seam-based placement, version code, and revision control, it is not ready for bulk.
- Treat the print proof as a manufacturing record, not a marketing visual.
- Keep product specification, artwork approval, and QC criteria as separate sign-off documents.
- Assign one internal final approver before sampling begins.
- Link proof revision numbers to the PO or internal project code.
- Require version control whenever more than one retailer, region, or partner logo is involved.
Start with the real use case before asking for unit price
Many sourcing problems begin with an incomplete RFQ. The buyer asks for a price on a cotton drawstring backpack, and the supplier naturally quotes the simplest workable option. That can mean lighter fabric, basic seams, and a generic print assumption. The quote may look competitive, but it may not match the actual campaign at all.
Use case changes the right specification. A tasting-event giveaway may only need to hold tasting notes, a flyer, a corkscrew, or another lightweight branded accessory. A gift-with-purchase program usually needs a better hand feel because the bag contributes to perceived value. A chain-wide retail rollout may care less about premium feel and more about version control, clean carton marking, and easy distribution through stores or regional warehouses. A limited resale item needs tighter presentation because the customer will examine it more closely.
It also helps to think in terms of load profile, not just weight. Soft inserts behave differently from rigid items. Even if the bag is never meant to carry a bottle, hard-edged promotional items can stress the lower corners. That is where reinforcement, seam allowance, and cord quality stop being minor details.
A short internal brief makes quotes easier to compare. Include intended contents, handling level, whether the item is free or sold, how many logo versions are planned, and the minimum presentation standard. Suppliers can then quote a product that fits the job instead of defaulting to the cheapest promotional bag format.
- Event giveaway: prioritize readable print, quick approvals, and efficient bulk packing.
- Gift-with-purchase: improve hand feel and visual presentation without overspecifying the bag.
- Distributor rollout: focus on carton labels, version splits, and warehouse practicality.
- Retail resale: expect tighter standards for fabric body, print quality, and finishing.
- List the likely contents so the factory can judge corner stress and size correctly.
Choose fabric weight, cotton base, and construction with realistic expectations
Cotton bag specifications are often discussed in ounces per square yard, while many buying teams also work in GSM. As a practical reference, 6 oz cotton is roughly around 200 GSM, 8 oz around 270 GSM, and 10 oz around 340 GSM. Those are useful guides, not exact rules. Weave, yarn, and finishing can shift the final result, so the supplier should confirm the actual quoted construction.
For many liquor retail promotions, 6 oz cotton is workable when the bag is a simple giveaway and the contents are light. It folds compactly and usually carries a lower cost. The tradeoff is that it wrinkles more easily, may show the outline of contents, and can feel less substantial in a premium setting. An 8 oz bag is often the practical middle ground because it gives better body and opacity without the extra bulk and freight weight of 10 oz. Heavier options should be chosen only when the program genuinely needs that denser retail feel.
Fabric color matters almost as much as weight. Natural unbleached cotton is popular and widely available, but buyers should expect some variation. Shade can shift slightly from lot to lot, and seed specks may be visible depending on the fabric grade. That character may be acceptable, even desirable, for a natural look, but it should never come as a surprise after approval. White or bleached cotton usually gives stronger contrast for dark prints and clearer small copy, though it also shows dirt more readily in production and transit. Dyed cotton can align well with brand identity, but it adds shade approval and may push MOQ higher.
Construction details deserve equally clear language. If the bag is flat, say flat. If the lower corners need support, specify whether that means a patch, bartack, extra layer, or corner tab. If the drawcord affects customer experience, define its material and approximate diameter. If post-wash shrinkage could matter for resale or reuse, ask the supplier how the chosen cotton typically behaves instead of assuming all cotton performs the same way.
- Use 6 oz for cost-sensitive promotional use and simple graphics.
- Use 8 oz when better hand feel and reduced show-through matter.
- Choose 10 oz only when the heavier feel clearly supports the retail objective.
- Approve natural cotton with realistic expectations on shade variation and visible seed-speck character.
- Specify the reinforcement method instead of writing reinforced corners only.
Match the print method to readability, repeatability, and order complexity
Screen printing is usually the default for wholesale cotton drawstring backpacks, and for good reason. It is cost-effective on simple logos, familiar to most factories, and usually the easiest method to compare across quotations. For one-color and two-color retail or supplier branding, it often gives the clearest commercial path. Still, buyers should confirm what the quote actually includes: number of colors, print area, setup charges, and whether each logo version needs a separate screen set.
Cotton is textured and absorbent, which means artwork that looks crisp on screen may soften in real production. Fine lines can spread. Reverse details can close up. Small copy may become marginal, especially on natural cotton. This is where a strong print proofing checklist matters. If a QR-style code, campaign disclaimer, or retailer-required line must remain legible, note the minimum protected text size and test it physically on the actual fabric.
Transfers and digital processes have their place, but they are not automatic upgrades. Heat transfer can help with gradients or image-style artwork, though it changes hand feel and can create a patch-like edge effect that some retail teams dislike. Digital methods may help when there are many artwork variants, but buyers should ask practical questions about durability, color density, and unit economics. The right method is the one the factory can repeat consistently on the chosen cotton, not the one that looks nicest in a PDF preview.
A dependable print process is measurable. The supplier should be able to recommend minimum printable detail, explain likely limitations on the chosen fabric, and provide a realistic sample route. If the answer is vague, the quote is probably still too generic.
- Screen print is usually the best fit for 1-3 color liquor retail branding.
- Protect fine text by defining minimum text height and line thickness early.
- Use transfer only when the artwork requires it and hand-feel tradeoffs are accepted.
- Evaluate digital printing by durability, consistency, and cost, not novelty.
- Ask the factory to state minimum positive and reverse detail on the actual cotton base.
Build a proof file that can run production without guesswork
A weak proof says approved and shows a logo somewhere on a bag outline. A production-ready proof does much more. It should show finished bag dimensions, print width and height, placement measured from fixed seams, artwork revision number, date, color references, orientation, and notes covering any mandatory readable elements. That is the file that keeps a bulk order stable when several teams are involved.
Placement needs special attention on drawstring backpacks because the top channel reduces the usable front panel. A logo that appears centered in artwork software may end up looking high once the channel is sewn and the cords are inserted. The cleaner instruction is to define placement from the top seam and one side seam, or to create a print zone below the channel and center the artwork within that zone. Phrases like centered nicely or visually balanced do not belong in a production proof because they cannot be inspected consistently.
If the bag carries legal copy, age-gated promotional text, or co-branded marks, spell out the hierarchy. State minimum width, any clear-space rule that matters, and whether one brand mark may scale smaller than the other. These details become especially important on multi-party liquor campaigns, where regional teams may send their own localized versions with slightly different priorities.
Version control should carry through the whole process. Each artwork version should have a unique code used on the proof, sample tag, inspection report, and carton label. That discipline helps prevent a common but costly outcome: bags made correctly, then packed to the wrong destination because the version references were not aligned.
- Use AI, EPS, or press-ready PDF for final logo files.
- Show print dimensions in mm or cm, not visual scale alone.
- Measure placement from seams or a defined print zone, not by eye.
- Add revision number, approval date, and approver name to every proof.
- Assign each logo version a code that follows the order through sampling, QC, and packing.
Use staged sample approvals instead of one rushed sign-off
Sampling works best in layers. For first-time orders or changed specifications, begin with a blank sample if size, fabric, or construction is new. That lets the buyer confirm the bag body before paying for repeated print corrections on a shape that may not even be final. Once the structure is accepted, move to a printed strike-off or pre-production sample on the actual production fabric.
This sequence matters because different problems appear at different stages. A blank sample can reveal that the bag feels too light, the cords feel thin, or the top channel leaves less printable space than expected. A printed sample can reveal something else entirely: ink spread, softness of edges, reduced brightness on cotton, or disclaimer text that looks acceptable on screen but weak in hand. Those are not theoretical risks. They are normal production realities that need to be seen early.
Not every repeat order needs the full route. If the same factory is using the same fabric, same size, same construction, same print method, and the same artwork scale, a digital proof update may be enough. But once key variables change, the risk rises quickly. New fabric color, finer text, different print location, or more artwork versions all justify stronger sampling controls.
A useful internal policy is to define sample requirements by order type before the campaign starts. That keeps the process disciplined. It also helps procurement explain why some projects can move fast and others need more checkpoints.
- Blank sample: confirm size, fabric, cord, and sewing details first.
- Printed strike-off: confirm readability and color behavior on the real cotton base.
- Pre-production sample: best when both construction and print are new.
- Top-of-production sample: useful when timing is tight but a physical checkpoint is still needed.
- Use repeat-order shortcuts only when the critical variables truly remain unchanged.
Control MOQ, version count, and quote structure before the PO is released
MOQ on cotton drawstring backpacks is not just a sewing issue. Fabric planning, dye lots, print setup, version separation, and packing complexity all influence the practical minimum. A factory may be able to sew a few hundred pieces, but if the order is split into multiple store or distributor logos, each version may trigger separate screens, separate proofs, and separate carton coding.
That is common on liquor retail programs. One chain may want a house logo. Another may need a co-branded version with a spirits supplier. A distributor may ask for regional variants. Buyers should ask the supplier to separate shared costs from variable costs where possible. The blank sewn bag cost can often be shown separately from screen charges, per-color print cost, sample charges, and version-handling costs. That makes the quotation more useful because procurement can see exactly which complexity is driving price.
Quantity breaks should be requested at real decision points, not random numbers. For many buyers, 500, 1000, 3000, 5000, and 10000 pieces show the price curve clearly enough to support planning. On basic one-color work, the largest unit-cost drop may happen once setup charges are spread across a larger run. On dyed cotton, MOQ pressure may come from fabric commitment rather than from sewing capacity.
The cheapest quote is not always the best quote. If the supplier cannot explain how versions will be controlled, how cartons will be labeled, or how mixed artwork will be separated at inspection, price alone says very little. Correct allocation matters as much as total delivered quantity.
- Ask for blank bag cost and print cost to be separated where possible.
- Request quantity breaks that match real budget or rollout decisions.
- Keep the same size and construction across logo versions to simplify sourcing.
- Expect dyed cotton to increase MOQ because of shade planning and fabric commitment.
- Confirm whether mixed-version cartons are allowed or prohibited before production starts.
Set measurable QC standards for print, sewing, fabric, and function
Quality control only works when the order defines what good means in measurable terms. Words like high quality or strong stitching sound reassuring, but they do not help much at inspection. Cotton bags are soft goods, so some variation is normal. The goal is not zero variation. The goal is to control the variation that affects use, presentation, and distribution accuracy.
For fabric, confirm the agreed weight and the expected visual character of the chosen base. Natural unbleached cotton should be judged against the approved physical reference, not against a perfectly uniform mockup. For size, state how width and height are measured on a laid-flat bag and what tolerance applies. In many simple cotton bag programs, a commercial tolerance around ±0.5 cm to ±1.0 cm may be workable depending on construction, but that still needs to be written down.
Print inspection should cover more than color. Measure placement from seams, not by eye. Check print size where brand hierarchy matters. Review fine text after curing and folding, because some details deteriorate in appearance once the bag is handled normally. If more than one color is printed, ask the factory what registration tolerance will be used. Also define what counts as rejectable print defects, such as obvious smudging, severe off-register appearance, major pinholes, or inconsistent strike-through compared with the approved sample.
Sewing and function checks are just as important. Inspect side seams, bottom seam, reinforcement consistency, skipped stitches, raw-edge exposure beyond the agreed construction, and severe puckering. Test the drawcord for smooth movement and secure end finishing. Finally, verify carton labels and destination splits before shipment release. A well-made bag can still fail operationally if the version breakdown is wrong.
- Verify fabric weight and compare fabric appearance to the approved sample.
- Measure bag size and print placement using stated tools and reference points.
- Check fine text after curing and normal folding, not only fresh off press.
- Inspect seam security, reinforcement consistency, and cord function.
- Audit carton labels, version codes, and shipment splits before release.
Treat packing and carton marking as operational controls, not afterthoughts
Packing affects cost, cleanliness, handling speed, and error rates at destination. For most liquor retail giveaway programs, bulk packing is the practical default. It reduces material use, lowers carton volume, and makes it easier for store teams or event staff to access the bags quickly. But bulk packing still needs rules: define the fold method, pieces per carton, and version separation clearly if multiple artworks are involved.
Individual polybags can make sense when the cotton drawstring backpacks are sold as merchandise, included in a polished gift set, or need cleaner consumer-facing presentation. In that case, the added labor and material should appear clearly on the quotation. Buyers should also consider whether that extra packaging creates more work at store level if staff need to unpack large volumes under time pressure.
Cotton is prone to visible dirt pickup and compression creasing. White and bleached fabrics show this most clearly, though natural cotton can also look poor if packed too early or handled in damp conditions. Bags should be dry and prints fully cured before packing. Cartons should be properly sealed and strong enough for stacking and transit. If the artwork versions are split by destination, the outer marks must be accurate enough that warehouse staff do not need to open cartons to identify contents.
On regional liquor programs, carton marking is part of quality control, not just logistics paperwork. Each carton should show item code, artwork version, quantity, PO reference, destination, and carton number. When those basics are missing, even a technically correct production run can create expensive downstream confusion.
- Use bulk packing for most store distribution and event programs.
- Use individual polybag only when resale or presentation clearly justifies it.
- Specify pieces per carton and fold method when kit assembly or shelf prep depends on consistency.
- Require version code and destination mark on every master carton.
- Do not pack bags before prints are fully cured and the product is dry.
Map lead time by stage and use a procurement-ready print proofing checklist
Lead time should be viewed as a sequence of controlled steps, not one broad number from the factory. For printed cotton drawstring backpacks, the order may move through artwork review, proof revision, blank sample, printed sample, approval, fabric preparation, screen making, cutting, printing, sewing, trimming, packing, inspection, and export handover. Buyers often find out too late that the quoted factory lead time started only after approvals were complete.
Liquor retail campaigns usually work backward from a fixed launch, event, or in-store activation date. The safest method is reverse scheduling from the latest acceptable warehouse arrival. Then build in internal deadlines for artwork freeze, sample sign-off, PO release, and any distributor routing instructions. If time becomes tight, simplify variables rather than hoping complexity will somehow move faster. Standard natural cotton is usually easier than dyed fabric. One print position is easier than two. Fewer logo versions reduce both proofing and packing risk.
A practical print proofing checklist for this category should confirm the final art revision number, Pantone direction, print dimensions, placement from seams, minimum readable text, version coding, approved sample type, approved fabric base, packing split by version, and inspection tolerances. Circulating that checklist before approval helps stakeholders focus on what production needs, not only what the artwork looks like.
It also helps to ask direct questions before release. Which approval starts production time? What cannot be changed after screen making? How will version coding appear on cartons? If the launch date is fixed, identify what can safely be simplified and what cannot. Skipping a critical proofing or version-control step may save days early and cost far more later.
- Confirm whether production lead time starts after art approval or after all approvals and deposit.
- Add sample transit, final inspection, and finished-goods transit to the total schedule.
- Reduce artwork and packing complexity when the launch date cannot move.
- Freeze artwork before screen making and bulk fabric commitment.
- Use a written print proofing checklist as part of final PO approval.
Specification comparison for buyers
| Spec decision | Recommended option | When it fits | Buyer risk to check |
|---|---|---|---|
| Fabric weight | 6 oz cotton for basic giveaway use; 8 oz cotton for stronger hand feel and better opacity; 10 oz only when a heavier retail feel is required | Tasting events, liquor store promotions, supplier co-branding, loyalty gifts, and limited resale programs | 6 oz can wrinkle more and show contents through the panel; 10 oz raises fabric cost, carton weight, and may be unnecessary for light-use promotions |
| Finished size | Around 38 x 42 cm for standard flat style; increase only after testing the actual insert set or accessory packout | Gift-with-purchase bags, tasting note sets, corkscrew kits, caps, flyers, and lightweight branded accessories | Oversized bags waste fabric and freight cube; undersized bags cause seam stress and poor presentation once filled |
| Construction style | Flat bag for most promotions; add reinforced lower corners or corner tabs when harder or heavier contents are likely | General giveaway programs, warehouse distribution, and repeated customer reuse | If reinforcement is not specified, point-load stress can cause corner seam opening during use |
| Print method | Screen print for most logos and 1-3 color branding; transfer only for gradients or photo-style art; digital only after checking durability and cost | Retail chain logos, supplier marks, seasonal campaign art, and event branding | Small copy, thin lines, and low-contrast artwork may not reproduce cleanly on absorbent cotton without test prints |
| Print tolerance basis | Approve placement from top seam and side seam, not visual centering alone | Any order with retailer brand guidelines, co-branding hierarchy, or legal copy | A print can look centered in artwork software but sit too high once the drawcord channel is sewn |
| Drawcord specification | Cotton or polyester cord with stated diameter, secure knots or heat-cut ends, and even channel sewing | Frequent open-close use, store handling, and customer carry-out | Thin low-grade cord can fray, cut into the channel, or pull unevenly if diameter and quality are not agreed |
| MOQ structure | Keep same fabric, size, and construction across versions, then separate logo setup logic | Regional chains, banner variants, store-specific logos, and distributor-supported campaigns | Multiple logo versions increase screen setup, proof control, and packing error risk even if sewing MOQ is low |
| Proof route | Digital proof plus printed strike-off or pre-production sample on actual fabric for first runs | New artwork, new cotton shade, fine text, color-sensitive logos, or multi-party approvals | Screen-only approval can hide ink absorption, registration shift, and text fill-in on the real substrate |
| Packing method | Bulk packed by version for store distribution; individual polybag only if consumer-facing cleanliness or resale requires it | Store replenishment, event kits, rep packs, and retail merchandise | Overpacking adds cost and carton volume; weak packing can cause dirt marks, compression wrinkles, or mixed-version cartons |
Buyer checklist before sampling
- Define the end use in one line: tasting giveaway, loyalty gift, gift-with-purchase, retail resale, distributor event kit, or sales rep support item.
- State cotton fabric weight in oz and ask the supplier to confirm approximate GSM and fabric weight tolerance for bulk production.
- Specify finished bag dimensions in cm, measurement points, and acceptable tolerance, for example ±0.5 cm or ±1.0 cm depending on construction.
- Confirm whether the bag is flat or gusseted, and whether reinforced lower corners, corner tabs, bartacks, or wider seam allowance are required.
- Specify drawcord material, color, approximate diameter, top channel style, and whether cord ends should be knotted, taped, or heat sealed.
- Send vector artwork with Pantone references, print width and height, exact placement from seams, and the minimum line thickness and text size to protect.
- Mark any alcohol campaign disclaimer, QR code, age-gated promotional text, or retailer-required copy that must remain readable after printing and folding.
- Choose the approval path before PO release: digital proof, blank sample, print strike-off, pre-production sample, and if needed top-of-production sample.
- Set measurable acceptance criteria for fabric weight, size tolerance, print placement tolerance, color direction, registration, seam quality, cord function, cleanliness, and carton labeling.
- Confirm quote line items separately where possible: blank bag cost, screen/setup cost, per-color print cost, sample cost, special packing cost, carton specification, and lead time by stage.
Factory quote questions to send
- What exact fabric weight is quoted in oz and approximate GSM, and what bulk tolerance should we expect for that fabric?
- What fabric type is included: natural unbleached, bleached white, or dyed cotton, and what normal lot-to-lot shade variation is considered commercially acceptable?
- What finished size is quoted, how is it measured, and what tolerance will the factory apply at inspection?
- What seam allowance, stitch type, and stitch density are used on side seams and bottom seam for this construction?
- If reinforced corners are quoted, what reinforcement method is included: folded corner patch, bartack, extra layer, or web tab?
- What drawcord material and approximate diameter are included in the price, and how are the cord ends finished?
- Which print method is quoted, how many colors are included, and are setup charges applied per color, per design, or per logo version?
- What is the factory's recommended minimum positive line thickness, minimum reverse line thickness, and minimum readable text height on the quoted cotton fabric?
- Can the factory provide a printed strike-off or pre-production sample on the actual production fabric, and what is the sample lead time and sample charge?
- What print placement tolerance and registration tolerance will be used for inspection on this order?
Quality-control points to confirm
- Verify fabric weight against the agreed standard by cut-and-weigh method or mill documentation, with tolerance agreed before production.
- Measure finished width and height on laid-flat bags using the same measurement points stated in the PO and sample approval record.
- Check print placement from fixed seam references; a common commercial tolerance is within ±0.5 cm to ±1.0 cm depending on bag size and artwork scale.
- Check print size against approved dimensions, especially where co-branding hierarchy or readable copy depends on minimum width.
- Review color under consistent lighting against the approved sample or Pantone direction, recognizing that cotton absorption can reduce brightness versus coated references.
- Inspect fine text, disclaimer copy, and QR-style artwork for fill-in, broken lines, or unreadable detail after curing and normal folding.
- Check for print defects such as major pinholes, ghosting, smudging, excessive off-register appearance, or visible strike-through inconsistent with the approved sample.
- Confirm side seams, bottom seam, and corner reinforcement are secure, with no skipped stitches, seam grin, severe puckering, or raw-edge exposure beyond the agreed construction.
- Test drawcord function for smooth movement through the channel, secure end finishing, and no obvious cord fraying or channel blockage.
- Check cleanliness on both body and cords: no heavy oil marks, mildew odor, wet packing, excessive dust transfer, or objectionable contamination.