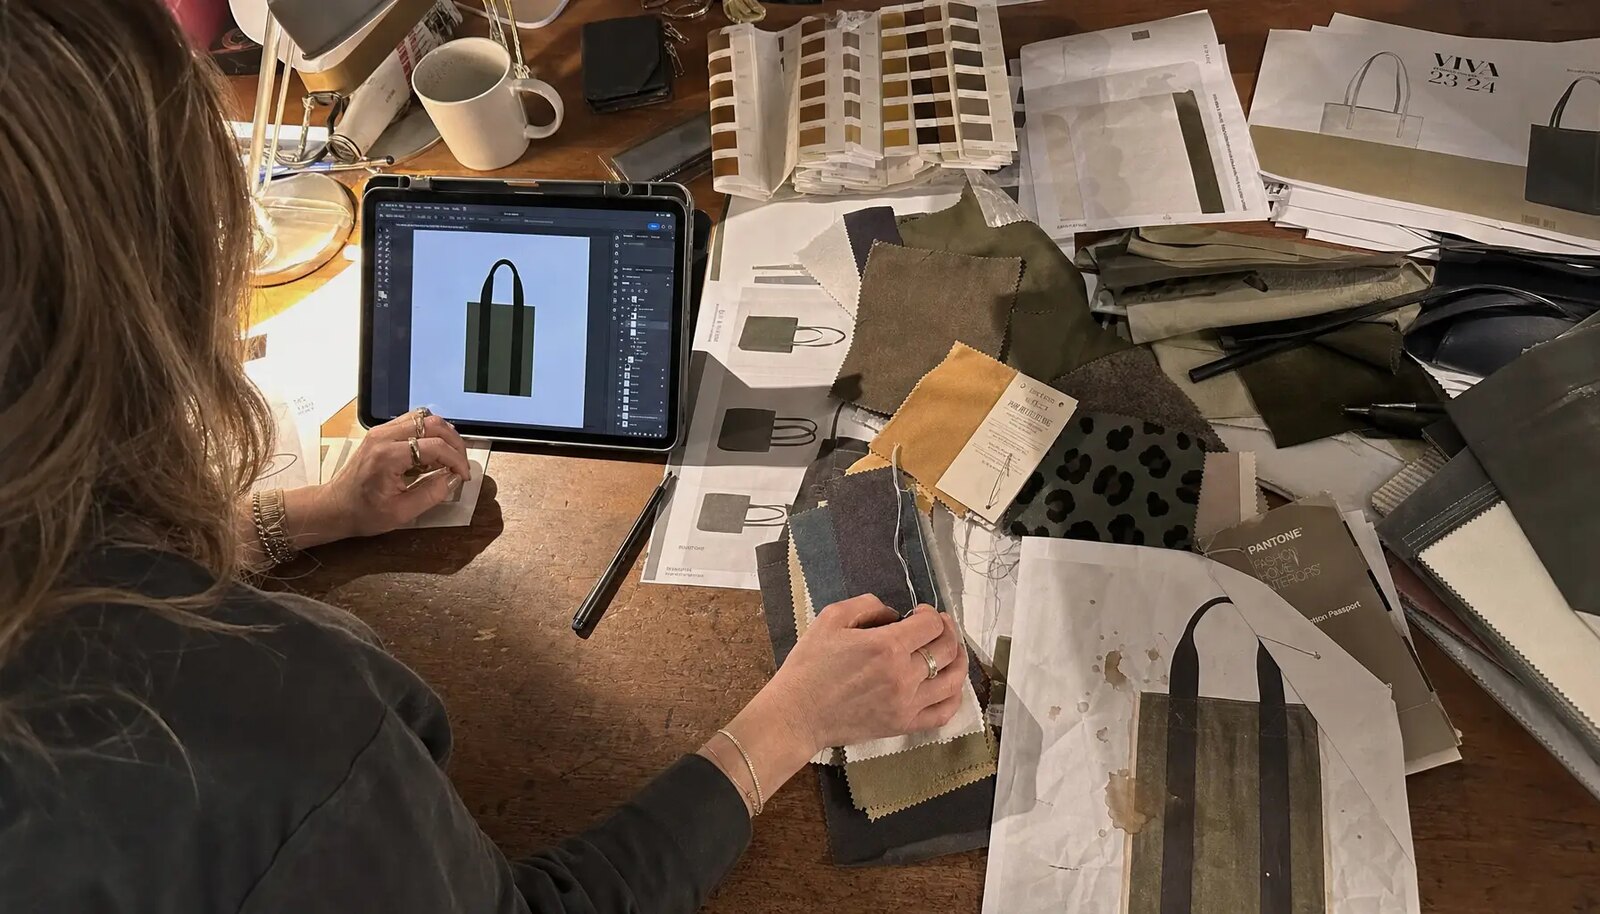
Start with the proof because craft fair buyers inspect at close range
Cotton drawstring backpacks look simple, but a retail-ready result depends on several linked decisions: fabric weight, artwork scale, print method, cord construction, and packing pressure. For wholesale cotton drawstring backpacks for craft fairs, print proofing is the control point that turns those decisions into measurable production instructions.
The common failure is not a completely unusable shipment. It is a shipment that is technically deliverable but commercially weak: ink looks dull on natural cotton, the logo sits too high and disappears into the gathered top, a transfer edge is visible, or cartons are packed so tightly that fold lines cross the design. Craft fair customers handle products in person, so small presentation issues become obvious.
A production proof should connect the artwork file, finished backpack dimensions, printable area, fabric color, ink or transfer method, placement measurements, and inspection tolerance. Marketing may approve the look, sourcing may approve price, and QC may inspect goods weeks later. A dated proof and retained physical sample keep those teams aligned.
- Use the proof as a production approval sheet, not only a visual mockup.
- Approve artwork against finished bag size and safe printable area.
- Keep key branding below the cord channel and away from seams and reinforcement.
- Record artwork version, date, print method, color references, and approval name.
- Share the same approved proof with factory, buyer, and inspector.
Lock the backpack specification before scaling artwork
Artwork cannot be proofed accurately until the bag body is defined. If an RFQ includes only a logo, quantity, and delivery date, each supplier may quote a different stock size, fabric weight, cord, and reinforcement. The unit prices will not be comparable.
Use finished dimensions, measured flat after sewing. Adult drawstring backpacks often sit near 33 x 43 cm or 35 x 45 cm, but the right size depends on the load: workshop supplies, brochures, lightweight apparel, or retail merchandise. Larger bags should be paired with stronger bottom attachment because users are more likely to fill them.
The top channel is not a reliable branding zone because it gathers when the drawstring closes. Side seams, bottom patches, grommets, and thick reinforcement areas also create no-print zones. Ask the supplier to mark the printable area before artwork is scaled.
- Specify finished width x height, for example 35 x 45 cm, with +/-1 cm tolerance.
- Confirm two-panel construction, gusset, boxed bottom, or flat bottom.
- Define cord material, color, diameter, length range, and cord-end finish.
- Choose bottom reinforcement: bartack, patch, eyelet, loop, or approved equivalent.
- Require the supplier to identify no-print zones before proof approval.
Choose cotton weight by use case, print behavior, and freight impact
Fabric GSM drives cost, hand-feel, print behavior, and carton weight. A 6 oz cotton bag can work for budget giveaways or short workshop programs, but it may wrinkle during printing and feel more promotional. If the bag is sold at a craft fair table, the lighter hand may reduce perceived value.
An 8 oz cotton canvas, roughly 260-280 GSM, is often the safest starting point for retail-facing programs. It has enough body for cleaner printing, better customer perception, and practical flat packing without the freight burden of heavier canvas.
A 10 oz canvas suits premium merchandise or gift bundles, but heavier is not automatically better. It can increase sewing difficulty, stiffen the opening, raise carton weight, and require stronger cord and reinforcement. The sample should confirm that the final cord, channel, and print still function well.
Color matters as much as weight. Natural unbleached cotton supports a handmade look but brings shade variation and flecks. Bleached cotton improves contrast for bright artwork. Dyed cotton looks polished but needs dye-lot and colorfastness control, especially for dark shades that may require underbase printing.
- 6 oz: budget events, simple one-color marks, low load expectations.
- 8 oz: paid merchandise, maker kits, reusable bags, distributor inventory.
- 10 oz: premium batches where higher landed cost is acceptable.
- Natural cotton: define acceptable flecks and shade range before production.
- Dyed cotton: check dye lot, rubbing risk, and print opacity on the final color.
Match print method to design count and artwork complexity
Screen printing remains the practical standard for bold one-to-three-color logos, event names, sponsor marks, and repeat orders. It can be durable and cost-effective at volume, but each color and design may require setup. Always approve a strike-off because ink gain, opacity, and color shift on cotton are not visible in a PDF.
DTF and heat transfer are useful for gradients, detailed illustration, many city versions, seasonal designs, or limited-edition artwork. They reduce some setup complexity but introduce other risks: edge halo, plastic hand-feel, pressure marks, cracking, and blocking if packed too soon or too tightly.
Embroidery, woven patches, and side labels can elevate a retail product, but they need the right scale. Large filled embroidery can distort lighter cotton, while a small embroidered logo or woven label may work well on 8 oz or heavier canvas.
- Screen print for simple spot colors and stronger quantities per design.
- DTF or heat transfer for detailed art, many versions, and short batches.
- Confirm underbase requirements for dark fabric before comparing prices.
- Test transfer folding, rubbing, edge lift, and hand-feel on actual fabric.
- Use embroidery or patches as accents, not default replacements for large print art.
Build a measurable proof, not a decorative mockup
A production proof should show the finished backpack outline, cord channel, seams, reinforcement zones, printable area, artwork size, artwork position, print colors, print side, and artwork version. This is especially important when craft fair designs differ only by city, date, sponsor, or artist name.
Placement should be measured from fixed sewn references. For example: print centered left to right, top of artwork 90 mm below top edge, print size 220 x 180 mm, placement tolerance +/-5 mm. These numbers give the factory a setup target and give the inspector a fair acceptance rule.
Review small text at actual size. Cotton texture can make fine lines fill in or break, especially on natural canvas. If a sponsor logo, QR code, or safety statement must be readable, test it in the strike-off before bulk production.
- Include finished size, printable area, print side, file name, version date, and approval status.
- Define print size and placement in millimeters, not by visual estimate.
- Keep important graphics away from channel gathering, seams, bottom corners, and fold lines.
- Use vector artwork with fonts outlined and low-resolution images removed.
- Add tolerances for placement, scale, color, and visible defects.
Use samples and strike-offs where digital approval cannot protect you
A digital proof can approve layout, but it cannot approve cotton shade, ink absorption, transfer hand-feel, sewing quality, cord movement, or packing marks. For a new supplier, new fabric, dark color, retail order, or brand-critical logo, a physical approval step is worth the time.
A strike-off should be made on the actual cotton fabric whenever possible. Pantone colors can look warmer, duller, or less opaque on natural cotton than on coated paper. For dark fabric, the strike-off should show whether underbase or transfer construction is included.
The pre-production sample should use final fabric GSM, cord, sewing, label, print method, and packing. If any substitute is used to save time, write down exactly what remains unapproved so the substitute does not become the bulk standard by accident.
- Approve fabric swatch before print color approval when shade matters.
- Request strike-off for new artwork, new print method, dark fabric, or strict brand colors.
- Handle the sample: open/close, pull cords, rub print, fold print, and check presentation.
- Approve final label, hangtag, barcode, polybag, or bulk pack if used.
- Retain signed samples at buyer, factory, and inspection points.
Clarify MOQ, design splits, and repeat-order assumptions
MOQ can apply to more than the total order. It may apply by fabric color, print design, label, cord color, packaging version, or carton assortment. A supplier may accept 1,000 pieces with one print, but ten artwork versions of 100 pieces each can change setup cost and production handling.
List quantities by design in the RFQ. For example: 2,000 total pieces, same 8 oz natural cotton body and black cord, four print versions at 500 pieces each, bulk packed by design. This gives the factory enough information to quote setup, sorting, labels, and carton marks correctly.
For recurring craft fair programs, ask how repeat orders will be controlled. Cotton shade and dye lots can vary. The factory should retain the approved swatch, proof, and strike-off, but repeat orders may still require reconfirmation before bulk production.
- Ask whether MOQ is per order, per color, per design, per label, or per packing version.
- Request price breaks for one design versus several design splits.
- Confirm whether blank bags can be sewn together and printed separately.
- Define carton sorting by design before production begins.
- Avoid over-ordering dated event artwork unless excess stock has a planned use.
Compare quotes by cost drivers, carton data, and responsibility
Two backpack quotes can look similar while describing different products. One may include 8 oz canvas, reinforced corners, one-color screen print, woven label, and export cartons. Another may use 6 oz cotton, thinner cord, no reinforcement, and basic packing. Procurement should compare specifications before comparing unit price.
Separate the bag body from print, setup, labels, packaging, and logistics. Bag cost is affected by GSM, size, cord, reinforcement, and sewing complexity. Print cost is affected by artwork size, colors, underbase, setup, and strike-off. Packing cost changes with polybags, barcodes, hangtags, inner cartons, sorting, and carton labels.
Carton data matters before final approval. Heavier fabric and individual packing increase gross weight and CBM. If the deadline is fixed, the team should know whether air freight is possible and what it would roughly involve in cube and weight terms. A low unit price can become expensive if long lead time forces emergency shipping.
- Compare identical GSM, size, cord, reinforcement, print area, and packing assumptions.
- Separate bag, print, setup, sample, label, barcode, packing, carton, and freight costs.
- Ask for pieces per carton, carton dimensions, gross weight, net weight, and CBM.
- Confirm Incoterm and whether export documents, inland trucking, and inspection support are included.
- Document responsibility for wrong artwork, unapproved production, rework, and buyer artwork changes.
Inspect for presentation, function, and packing accuracy
Craft fair merchandise is viewed up close, so QC should focus on visible presentation and basic use. AQL sampling may be used for larger orders, but the checklist must define defects against the approved proof and sample. A 3 mm print shift may be acceptable; a 15 mm shift usually is not.
Print inspection should cover placement, color, opacity, adhesion, registration, smudging, and stains. Measure from the same sewn references used in the proof. Judge color against the approved strike-off or signed sample under consistent lighting, not against a phone photo.
Sewing inspection should focus on stress points: cord channel, side seams, bottom reinforcement, and cord attachment. The cord should run smoothly, ends should be clean, and reinforcement should not tear under reasonable manual pull. Packing inspection should confirm counts, SKU labels, carton marks, and design separation.
- Major defects: wrong artwork, wrong version, open seam, broken cord, severe color mismatch, mildew odor, heavy stain, or major off-center print.
- Minor defects: small loose thread, slight removable wrinkle, or accepted natural cotton fleck away from the logo.
- Print checks: placement, scale, opacity, adhesion, registration, smudge, and color reference.
- Sewing checks: channel security, stitch density, reinforcement, cord length, and trimmed threads.
- Packing checks: correct count, correct SKU, no unintended mixed designs, and cartons not over-compressed.
Plan packing, carton labels, and deadline risk before goods are finished
Packing affects landed cost, warehouse receiving, and retail readiness. Bulk packing in stacks of 25 or 50 pieces works for distributors, event teams, and warehouse inventory. Individual polybags, barcode stickers, hangtags, or inner cartons should be used only when the sales channel or kit assembly process requires them.
Decide whether the printed front may be folded. Properly cured screen prints often handle flat packing well, but some transfers can show pressure marks, blocking, edge impressions, or cracking if folded too soon or compressed too tightly. The approved sample should be packed in the final style and checked after resting.
Carton labels are critical when multiple designs are involved. Each carton should show PO number, SKU, design code, quantity, carton number, gross weight, and destination if required. If mixed cartons are allowed, the exact mix should be documented. If they are not allowed, cartons should be sorted and labeled by design before sealing.
Build the production calendar backward from the craft fair date. Include artwork approval, sampling, material purchase, printing, curing, sewing or finishing sequence, inspection, rework buffer, export packing, and freight cutoff. A late backpack shipment can lose value even when quality is acceptable.
- Use bulk packing by 25 or 50 pieces when individual retail handling is not required.
- Use polybag, barcode, hangtag, or insert only when needed by channel or kit process.
- Confirm folding method and compression limits for large prints or transfer prints.
- Label cartons by PO, SKU, design, quantity, carton number, gross weight, and destination.
- Set latest approval and inspection dates before releasing bulk production.
Specification comparison for buyers
| Decision area | Recommended specification | Best fit | Procurement risk to verify |
|---|---|---|---|
| Fabric for budget programs | 6 oz cotton, about 180-210 GSM, natural or dyed, simple two-panel construction | Free giveaways, low-cost workshop bags, sponsor packs, short-duration event use | May wrinkle in printing, feel promotional, show weaker opacity, and carry less weight at bottom cord points |
| Fabric for retail-facing craft fairs | 8 oz cotton canvas, about 260-280 GSM, controlled shade and smooth-enough print face | Paid merchandise, maker kits, reusable customer bags, booth staff packs, distributor programs | If GSM drifts low, perceived value drops; if fabric is too rough, fine print and small text lose sharpness |
| Fabric for premium merchandise | 10 oz canvas, about 320-350 GSM, heavier cord and reinforced stress points | Small-batch artist merchandise, premium gift bundles, higher-price craft fair products | Higher carton weight and freight; stiffer closure; print pressure, curing, and folding marks must be checked |
| Natural vs bleached cotton | Natural cotton for handmade look; bleached cotton for cleaner artwork background | Natural for artisan positioning; bleached when bright colors or high contrast matter | Natural flecks and shade variation must be accepted in writing; bleached fabric may look less eco-style |
| Screen print | 1-3 spot colors, Pantone references, approved strike-off, underbase if needed | Bold logos, event names, sponsor marks, repeat orders, larger quantities per design | Fine lines can fill in; ink can look dull on unbleached cotton; each color/design may add setup cost |
| DTF or heat transfer | Transfer tested for adhesion, edge lift, hand-feel, folding, and rub resistance | Detailed art, gradients, many design versions, limited editions, city/date variations | Plastic hand-feel, edge halo, cracking, pressure marks, and blocking if packed too tightly |
| Embroidery or patch | Small logo embroidery, woven patch, or sewn label on 8 oz+ cotton | Premium accent branding, retail merchandise, understated maker brands | Large embroidery can distort fabric; backing, stitch count, placement, and inside finish need approval |
| Artwork placement | Centered front print below cord channel, measured from sewn edges; typical placement tolerance +/-5 mm | Standard front branding where logo must remain visible when opened or closed | Too high disappears in gathered top; too low conflicts with reinforcement, folds, or carton compression |
| Construction | 6-8 mm cotton or braided cord, secure channel ends, reinforced bottom corners by bartack, patch, eyelet, or loop | Reusable bags expected to hold brochures, small purchases, class materials, light apparel | Cord fraying, uneven lengths, weak bottom attachment, skipped stitches, and open seams at stress points |
Buyer checklist before sampling
- Define finished backpack width x height, measured flat after sewing, with tolerance such as +/-1 cm; do not rely on cut-panel dimensions.
- State fabric composition, weight in oz and GSM, color standard, shade tolerance, finish, and whether cotton is natural, bleached, dyed, recycled, organic, or blended.
- Confirm construction: cord material and diameter, channel width, side seam type, bottom reinforcement, stitch density at stress points, cord-end finish, and loose-thread trimming standard.
- Send vector artwork with fonts outlined, Pantone or brand references, print size in millimeters, print side, exact placement from top/side references, and no-print zones near seams and cord channels.
- Select print method by artwork and quantity: screen print for spot colors, DTF/heat transfer for detailed or many-version art, embroidery or patch only where fabric and budget support it.
- Require a dated proof showing finished bag outline, printable area, print scale, placement measurements, colors, print method, artwork version, and approval status.
- Approve the actual fabric swatch, print strike-off, or pre-production sample when fabric color, brand color, transfer hand-feel, or retail presentation matters.
- Set inspection criteria for size, GSM, shade, print placement, color, opacity, adhesion, seam strength, cord pull, stains, odor, carton count, and SKU labeling.
- Clarify whether MOQ applies by total order, fabric color, print design, label, packaging version, or carton assortment before approving multiple craft fair designs.
- Ask quotes to separate bag body, printing, screen/setup, sample, label, hangtag/barcode, packing labor, inner packing, export carton, and freight basis.
Factory quote questions to send
- What exact cotton weight will be used in oz and GSM, and is that weight measured before or after dyeing, washing, calendaring, or finishing?
- What are the finished dimensions, channel width, cord diameter, cord material, reinforcement method, stitch density, and measurement tolerances?
- Is MOQ based on total order, fabric color, print design, label, packaging version, or carton assortment, and how does pricing change for design splits?
- Which print method do you recommend for our artwork and fabric color, and what is the maximum safe printable area on this backpack size?
- Can you provide a strike-off on the actual fabric before bulk production, and will it show final ink opacity, transfer edge, curing, and color?
- How do you judge Pantone or brand color on natural, bleached, and dyed cotton, and under what lighting should buyer approval be made?
- How will bulk print placement be controlled, and what tolerance do you recommend from top edge, side seams, and center line?
- What checks will you perform for adhesion, dry rub, wet rub if required, folding, seam strength, cord pull, colorfastness, stains, odor, and carton count?
- What is the lead time for proofing, material purchase, dyeing if any, sampling, sample shipping, bulk production, inspection, packing, and export handoff?
- What are the carton dimensions, pieces per carton, gross weight, net weight, estimated CBM, and carton stacking or compression limits?
Quality-control points to confirm
- Finished size should normally stay within +/-1 cm unless retail packaging, kit boxes, or shelf display dimensions require tighter control.
- Fabric GSM should match the approved swatch or sample; deviations affect hand-feel, strength, print absorption, opacity, carton weight, and perceived value.
- Fabric appearance should match the approved standard for shade, flecks, slubs, dye consistency, lint, stains, and odor; natural variation must be defined before production.
- Print placement should be measured from sewn references, with a practical tolerance such as +/-5 mm for standard screen printing unless artwork requires tighter control.
- Logo color should be compared under consistent lighting against the approved strike-off or signed sample, not only against a monitor rendering.
- Print opacity must be checked on the actual cotton color, especially natural, dark, or textured fabric where ink can look uneven or dull.
- Print adhesion should pass an agreed tape pull, dry rub, fold, or scratch check; transfer prints should also be checked for edge lift and cracking.
- Bottom cord attachment should match the approved construction and should not tear or loosen under reasonable manual pull.
- Cord length should be even left to right, move smoothly through the channel, have clean ends, and be free from fraying that affects retail presentation.
- Seams should show consistent stitch density, no skipped stitches, no open seams, no needle cuts, secure channel ends, and trimmed loose threads.