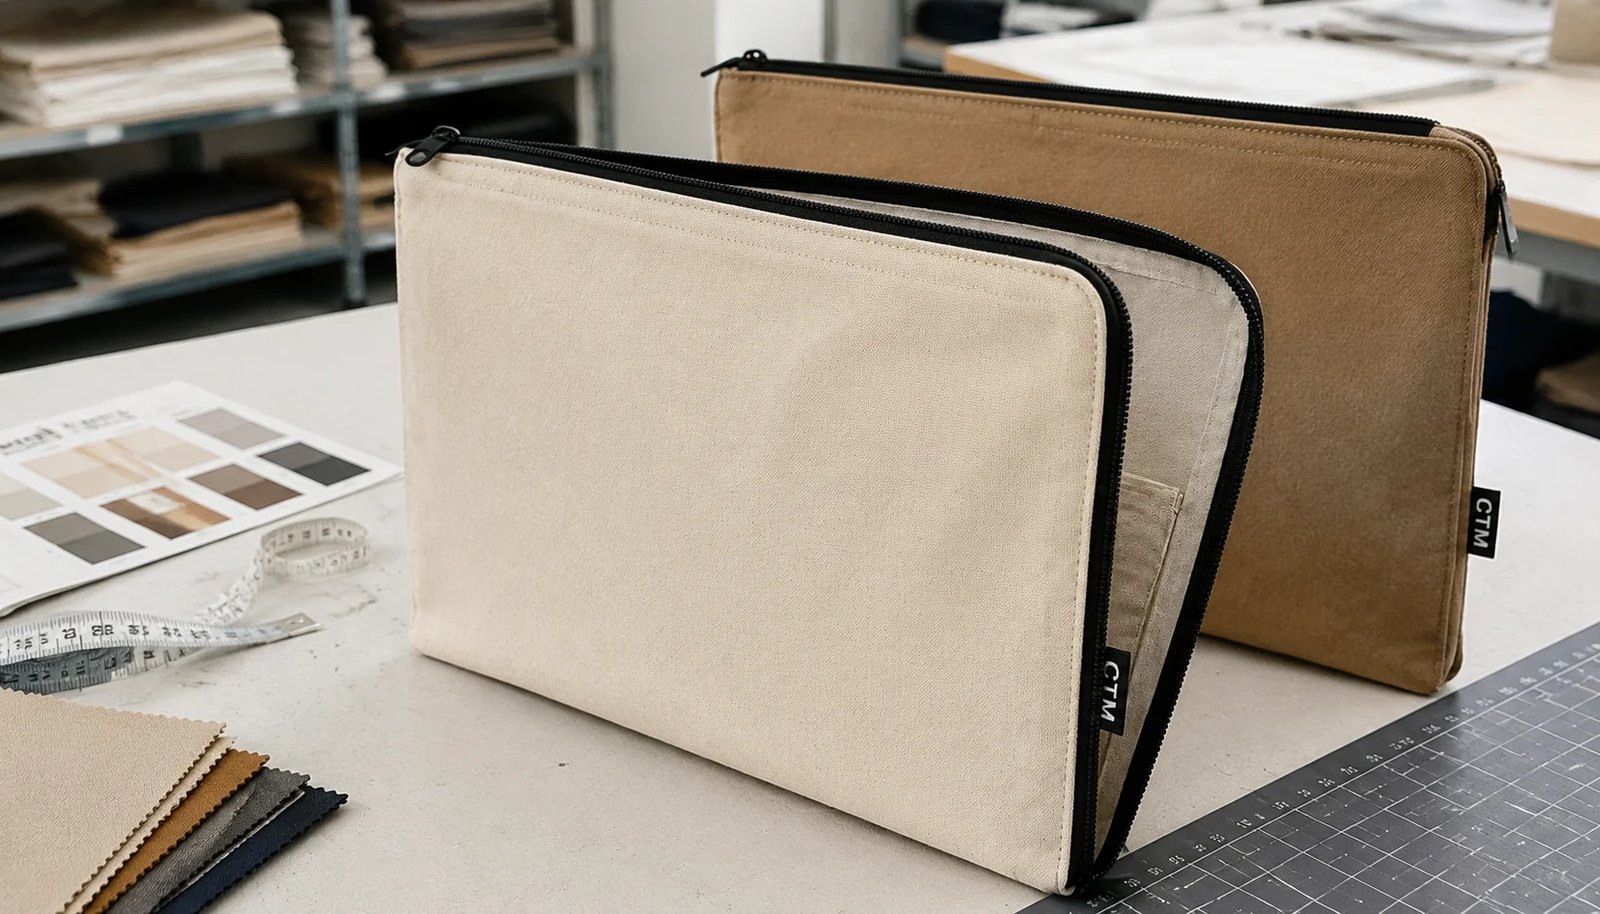
Why simple-looking portfolio orders still miss bakery launch dates
At first glance, a canvas zipper portfolio seems straightforward. It is not a molded hard case, not a heavily engineered backpack, and not a multi-material gift set. That simplicity is exactly why buyers underestimate it. In B2B sourcing, small textile items often run into delays because teams assume the factory can fill in the blanks. Once the order reaches sampling, those blanks turn into different assumptions about fabric weight, usable fit, zipper grade, printing, and packing.
For artisan bakeries, the timing problem is even sharper. These portfolios are often tied to menu launches, wholesale account meetings, trade fairs, staff training, seasonal promotions, or franchise onboarding. In other words, they are not just storage items. They support a business moment. If the goods arrive after that moment, the commercial value drops fast even when the physical quality is acceptable.
Most overruns begin long before bulk sewing. Sales may ask for an elegant A4 document holder. Marketing wants a centered logo and a natural cotton look. Operations wants low MOQ and flat packing. Training may quietly expect recipe cards, brochures, and a tablet to fit inside. None of those requests are unreasonable, but they need to be translated into a buildable specification. If they are not, the supplier quotes a version of the product, not necessarily the one the buyer needs.
That is why a wholesale canvas zipper portfolios for artisan bakeries lead time planning guide has to start with scope discipline. The key question is not only, 'How fast can this be made?' It is, 'What exactly is being approved, by whom, and in what order?' Once that is clear, lead time becomes easier to plan and easier to defend internally.
- Treat the product as a branded business tool, not just a basic sewn pouch.
- Assumption gaps at RFQ stage usually create more delay than sewing itself.
- Bakery programs often work to launch dates, event dates, or training dates with little room for rework.
- Cross-functional requests should be merged into one written specification before final quoting.
- A short item can still need disciplined sourcing if the deadline is commercially fixed.
Start with end use, insert list, and usable internal fit
The most practical RFQs begin with use case, not aesthetics. Buyers should spell out whether the portfolio is meant for sales presentations, menu sheets, distributor paperwork, pastry class materials, onboarding packs, POS support documents, or mixed collateral. That sounds basic, but it changes the construction. A sleeve for loose paper can stay slim. A portfolio that must hold laminated menus or a tablet needs more allowance, better zipper travel, and sometimes more structure.
Dimensions should be written in millimeters and split into two parts: outer finished size and usable internal fit. This distinction matters. A portfolio can measure correctly on the outside yet still feel too tight inside once seam allowance, zipper tape, fabric turn-in, and pocket build are taken into account. Saying 'must fit A4' is not detailed enough. A4 paper is 210 x 297 mm, but easy insertion requires additional practical clearance.
It also helps to list each insert separately, especially if the pack contains more than one format. For example, a bakery may include an A4 menu sheet, a folded brochure, a recipe handout, and a small note card. Those pieces stack differently than a single sheet. If one insert has lamination or heavier card stock, mention that too. Minor thickness can affect how smooth the zipper feels when the portfolio is loaded.
A good RFQ does not stop at dimensions. It also ranks requirements. If reliable A4 fit and clean branding matter more than extra pockets, say so. If a tablet fit is only a possible future use, keep it out of the mandatory spec. This helps factories quote a realistic base version and optional alternates instead of overbuilding the first sample.
- Define the field use in plain business language.
- List all inserts with dimensions and thickness where relevant.
- Ask for usable internal fit confirmation, not only outer size confirmation.
- Avoid adding compartments that do not have a real loading purpose.
- Separate must-have requirements from optional upgrades before asking for final pricing.
Material planning: canvas weight, handfeel, and fabric route
For most document-style portfolios, 12 oz to 14 oz cotton canvas, roughly 340-400 GSM finished weight, is a solid starting range. It usually provides enough body for a presentable handfeel without becoming awkward to sew around zipper corners. Fabrics below roughly 300 GSM often feel too soft and may ripple near the zipper line. Materials above roughly 450 GSM can add stiffness, but they also add seam bulk, raise handling difficulty, and increase freight weight.
Procurement should check whether the quoted fabric weight refers to a finished condition or only a nominal greige basis. The distinction matters because finishing can change both feel and behavior. If the supplier washes, calenders, or presses the fabric, the final item may sit differently than a raw-weight assumption suggests. Asking this early improves quote accuracy and reduces sample surprises.
Handfeel deserves its own line in the spec. Two canvases with similar GSM can still look and behave differently due to weave density, yarn character, and finishing. Buyers often use words like soft, structured, or firm, but those should be tied to a retained sample or a plain-language target. Without that, one factory may choose a looser natural canvas while another chooses a compact, cleaner-faced version at similar weight.
Fabric route also drives lead time. Stock natural canvas or dyed-stock fabric is usually the fastest and easiest option for lower-MOQ bakery programs. Custom-dyed body fabric adds another process stream and often means lab dip review before the factory can confirm production booking. That does not make custom color a bad choice. It simply means the extra time belongs in the calendar from day one.
Natural slub and slight shade movement are common on cotton canvas, especially in ecru or natural tones. For bakery branding, that can suit the visual language well. The important step is to define what level of textile character is acceptable and what crosses into inconsistency. Buyers should not ask for zero variation if they are choosing a natural-look material, but they should still set visual boundaries.
- Use finished GSM or oz ranges rather than broad terms like heavy canvas.
- Confirm whether weight is quoted before or after finishing.
- Describe target handfeel, not only target fabric weight.
- Use stock fabric where speed and MOQ control matter most.
- Discuss acceptable slub and shade variation before approving bulk production.
Construction details that shape function: zipper, seams, and pockets
In this category, the zipper is not a trim afterthought. It is part of the product's usability. For A4 and similar formats, #5 nylon coil is usually the safest practical default. It tends to run more smoothly around corners than many rigid alternatives and is widely available across standard colors. That said, buyers should still ask for full zipper details: size, coil type, tape material, slider style, and puller material.
Zipper tape quality matters more than many first-time buyers expect. If decoration or final pressing introduces heat, lower-grade tape can ripple, shrink, or react differently from the body fabric. The result is a portfolio that looks slightly twisted or feels rough in use. This issue rarely appears in a digital mockup, which is why production-representative samples matter so much.
Seam allowance also deserves attention because it affects internal capacity. Procurement teams often focus on outer dimensions and forget that turning and topstitching consume usable space. When the insert fit is close, ask the supplier what seam allowance they are building to and how much tolerance they expect to hold in bulk. For sewn textile goods, an outer finished-size tolerance of around +/-5 mm to +/-7 mm is often reasonable, but the real question is whether the internal opening still works in practice.
Interior construction should stay purposeful. One full-size sleeve plus one smaller card or note pocket is enough for many bakery sales or training kits. Additional dividers can look premium on a line drawing, yet they reduce usable space and create more chances for misalignment. If extra sections are necessary, ask the factory to show the effective loading width of each pocket, not just the cut pattern.
Reinforcement is another line item that can quietly vary by supplier. Zipper ends, corner turns, and pocket stress points should be secured with back-tacks or equivalent reinforcement if they are part of the expected standard. If the buyer does not ask, some suppliers will include it and some will not, which makes quote comparison unreliable.
- Specify the full zipper build, not only zipper color or nominal size.
- Test zipper travel repeatedly on the sample, including corners and end-stop areas.
- Remember that seam allowance reduces usable internal fit.
- Keep interior pockets tied to actual business use.
- Confirm reinforcement details in the quote before comparing prices.
Decoration choices that affect price, speed, and packing risk
For many artisan bakery programs, branding is simple in concept but important in presentation. A logo may be modest in size, yet it still needs to look clean on textured canvas and remain stable through packing and handling. Screen printing is often the most commercial choice when artwork uses one or two solid colors. It is usually easier to standardize, easier to cost, and better suited to canvas texture than more delicate-looking options.
Heat transfer can be useful when artwork includes finer detail or multiple color effects that would be inefficient to screen print. Still, the buyer should not move to transfer automatically just because the design file is complex. Canvas texture changes how transfers sit on the surface. Edge crispness, adhesion, and dry rub behavior should all be reviewed on an actual sample. If the applied area feels plasticky or lifts at the edge, the buyer should challenge the method before approving bulk.
Embroidery may appear premium, but it can distort medium-weight canvas, especially near seams or zipper paths. Dense stitching can also slow production and create puckering. For flat portfolios, embroidery works best only when the brand standard truly requires it and the mark stays relatively small. In many B2B bakery applications, printed branding gives a cleaner and more repeatable result.
Decoration planning should also account for trim lead time. A woven side label, custom zipper pull, or Pantone-specific tape color may seem minor compared with the body fabric, but those elements can still add approval steps and booking time. They belong on the same lead time map as the main fabric and the sample schedule.
Packing risk should not be ignored. Large dark print areas can block, offset, or mark if the goods are packed too soon or stacked face-to-face without suitable interleaving. A decoration method is only efficient if it remains stable through shipment.
- Match branding method to artwork complexity and field use.
- Request the quoted print size, number of colors, and placement assumption.
- Review transfer adhesion and rub behavior on production-like canvas.
- Treat custom labels and pulls as true preproduction tasks.
- Ask how printed panels will be packed to reduce blocking and set-off.
How to compare supplier quotes without being misled by low first prices
Price comparison breaks down when suppliers are costing different assumptions. One quote may include 14 oz finished canvas, one pocket, and reinforced zipper ends. Another may assume lighter fabric, no reinforcement, and simpler packing. The lower number is not necessarily better value. It may simply describe a cheaper build.
That is why buyers should normalize the RFQ and the quote sheet. Ask every factory to price the same fabric range, the same zipper specification, the same branding method, the same interior layout, and the same packing logic. If alternates are needed, label them clearly as alternates. This makes commercial review much cleaner and reduces internal debate over why quotations vary.
MOQ should be broken down carefully. Procurement should ask whether MOQ applies per total order, per size, per body color, per artwork, or per packaging version. A bakery group may think it is ordering one style in one quantity, but the factory may see multiple production splits because logos, labels, or packing marks differ. The same issue appears when one launch order serves different regions or franchise groups.
It helps to ask for both technical MOQ and economic MOQ. Technical MOQ is the smallest quantity the factory can physically produce. Economic MOQ is the quantity where setup costs, trim losses, and handling inefficiency stop inflating the unit price sharply. For buyers managing trial runs or phased launches, that distinction is useful.
Price breaks should reflect realistic buying behavior. If the likely first order is 300 pieces and the probable repeat is 800 or 1,000, request those exact levels. This may show that standardizing one zipper color or consolidating artwork variants produces more value than pushing for a lower opening MOQ.
Trade term alignment is the final check. A low EXW quote can look attractive next to an FOB quote until freight handling, local charges, or supplier support requirements are considered. Buyers should compare like with like.
- Normalize specs before ranking supplier prices.
- Treat missing construction details as quote gaps, not savings.
- Clarify MOQ by artwork, color, size, and pack variation.
- Ask for technical MOQ and economic MOQ separately.
- Align trade terms before drawing cost conclusions.
Sampling that actually reduces risk, not just confirms appearance
A sample round should answer real production questions. For this product, that means verifying fit, zipper performance, logo balance, and construction practicality. A digital proof can confirm content and approximate placement, but it cannot tell the buyer whether laminated inserts catch at the opening or whether the zipper feels rough when the portfolio is loaded.
A sensible sequence is usually: artwork layout confirmation first, then a pre-production sample in actual or production-representative materials, then one consolidated round of comments if adjustments are needed. This sequence is fast enough for most B2B programs and still catches the issues that matter.
When the sample arrives, review it as a working item. Load the exact documents. Insert them quickly, not carefully. Open and close the zipper multiple times. Check whether the corners run smoothly. Look at the body shape when full. A logo that looked centered on an empty panel may sit differently once the item is loaded and slightly tensioned.
Comment quality matters. Vague feedback such as 'make pocket better' or 'logo feels high' tends to generate avoidable second rounds. Clear instructions work better: move front print 5 mm lower from the zipper-edge reference; widen usable sleeve opening by 8 mm; change puller finish from matte black to nickel; add reinforcement at pocket opening. Measurable comments shorten the path to approval.
Once approved, the sample should become the sealed production reference. Keep photos, measurements, comment history, and packing notes with it. For repeat orders, that file often matters more than the original concept sketch because it captures the version the supplier actually agreed to build.
- Use sampling to validate function, not only aesthetics.
- Load the sample with real inserts under real use conditions.
- Write measurable comments rather than general impressions.
- Approve one sealed reference sample for production and inspection.
- Do not move to bulk on digital proof alone.
Lead time map from RFQ to shipment: where time is really spent
Lead time planning works best when broken into visible stages. For a relatively straightforward order using stock canvas, standard zipper colors, and simple print, a practical benchmark might be 3-5 days for RFQ clarification and quote alignment, 5-10 days for pre-production sample making, 2-4 days for buyer review and consolidated comments, 20-30 days for bulk production after final approval, and a few additional days for packing, inspection release, and shipment coordination. These are planning references, not guarantees, but they help teams work from something more useful than a single requested delivery date.
The calendar stretches when the specification adds preproduction tasks. Custom-dyed fabric can require lab dip approval. A custom woven label or branded puller may need separate development and booking. Pantone-specific trim matching can introduce another approval gate. None of these steps are unusual. Problems arise only when they are discovered late and treated as surprises.
Buyer-side delay is often the hidden driver. Sample comments may sit with marketing, or operations may wait to confirm final insert sizes. Carton marks and barcode rules are sometimes approved only after goods are already in production. Factories then appear slow even though the schedule was actually held up by missing decisions. Procurement should assign owners and due dates to internal approvals just as strictly as to supplier milestones.
For bakery launch programs, it is wise to add buffer. A one-week cushion is often the bare minimum when the order supports a hard event date or a coordinated rollout. The goal is not to make the timeline look longer than necessary. It is to separate true manufacturing time from preventable coordination loss.
Below is a simple planning view buyers can adapt during sourcing.
bullets_placeholder
- Use dated milestones instead of one broad delivery target.
- Make custom trim and custom color tasks visible from the start.
- Track buyer approval time as part of total lead time.
- Build at least a modest buffer for event-linked bakery programs.
- Update the schedule whenever specification changes are approved.
Packing, labeling, and logistics details that protect landed quality
Bulk quality is judged at receipt, not only at the factory. A canvas portfolio can be sewn correctly and still arrive looking poor if packing is too tight, decoration has not fully stabilized, or cartons are overloaded. Zipper lines can distort under compression, dark prints can set off, and heavier canvas can retain pressure marks during transit.
The first packing decision is whether each unit really needs an individual polybag. In some importer-to-warehouse flows, flat packed units with clean carton packing are enough. In other cases, especially when the portfolios will move through several handling stages before use, unit bagging offers better protection. The right answer depends on the downstream handling path, not default habit.
Interleaving may be useful if printed faces touch each other in the carton. It is a small detail, but it can prevent blocking or scuffing on dark or heavily printed panels. The same logic applies to facing direction inside the carton. These are simple controls when planned early and annoying delays when added after production.
Carton planning should be agreed before bulk starts. Buyers should confirm carton quantity, export carton dimensions, gross weight limits, and whether mixed-SKU cartons are acceptable. If barcodes, region labels, or carton sequence marks are required, those instructions should be approved in time for the packing team to follow one standard flow.
Overcompression is a common false economy. Squeezing more units into each carton may reduce carton count, but it can bend the zipper path or create visible panel pressure. For a presentation item used in front of bakery clients or distributors, landed appearance matters almost as much as manufacturing accuracy.
- Choose unit bagging based on real distribution conditions.
- Use interleaving when print coverage or rubbing risk justifies it.
- Lock carton counts and weight limits before final packing starts.
- Approve barcode and carton mark rules early.
- Avoid compression that compromises zipper shape or panel appearance.
QC checkpoints and the reorder file that saves time next season
Quality control for this product should be practical. The main questions are clear: does it fit the intended inserts, does the zipper operate smoothly, does the branding present cleanly, and is the construction consistent with the approved sample? A portfolio is a simple item, but that is not a reason to inspect casually.
Start with material confirmation. Bulk fabric should match the approved sample closely in weight, shade family, and handfeel. If natural canvas is used, define what degree of slub or shade movement is acceptable before production, not after goods arrive. This avoids arguments over inherent textile character versus true inconsistency.
Dimensional checks should include outer finished size and usable internal fit. The latter is the more important field metric. A portfolio may technically pass its external measurement and still fail in use because the opening is too tight once the insert is loaded. Quality teams should test with actual documents or equivalent dummies, not rely on visual judgment alone.
Decoration checks should be measured from agreed reference points such as seam edge, zipper edge, or bottom seam. A typical tolerance might be around +/-5 mm, but the standard should match the logo size and visual sensitivity. Print quality should also be screened for pinholes, smudging, ghosting, and set-off risk where relevant.
Zipper and stress-point checks should include repeated operation through the full travel path, especially at corners and end stops. Reinforcement at zipper ends, corners, and pocket openings should be present if specified. Final inspection should also cover packing execution, barcode accuracy, carton marking, and visible compression effects.
The final sourcing asset is the reorder file. Save the approved quote assumptions, spec sheet, sample photos, measurements, QC tolerances, trim references, and packing instructions in one place. That record makes repeat buying faster and reduces the risk of silent changes between seasons or between production runs.
- Inspect against function first: fit, zipper run, branding, and build quality.
- Use actual inserts to verify usable internal fit.
- Measure print placement from fixed reference points.
- Include packing and labeling checks in final inspection.
- Build a reorder file so future procurement starts from approved facts, not memory.
Specification comparison for buyers
| Spec decision | Recommended option | Typical B2B use fit | Buyer risk to check |
|---|---|---|---|
| Canvas weight | 12 oz to 14 oz cotton canvas, about 340-400 GSM finished weight | A4 or A5 document portfolios, menu kits, training handout holders, sales presentation sleeves | Below about 300 GSM often feels too soft and may ripple near the zipper; above about 450 GSM can increase seam bulk, corner difficulty, and freight weight |
| Fabric route | Stock natural or dyed-stock canvas where possible | Best for lower MOQ, faster material booking, and cleaner quote comparison across suppliers | Custom-dyed body fabric usually adds lab dip approval, may require higher MOQ, and can extend preproduction by 5-10+ days depending on mill route |
| Zipper specification | #5 nylon coil zipper with polyester tape and metal puller | Suitable for repeated opening on document-size portfolios and generally easier on curved corners than many low-cost alternatives | Unspecified zipper grade can lead to rough slider action, tape shrinkage after pressing, or inconsistent color between lots |
| Interior construction | One full-size document sleeve plus one card or note pocket | Fits most artisan bakery sales kits without overcomplicating production | Extra dividers reduce usable space, add stitch operations, and raise risk of skewed pockets or seam mismatch |
| Branding method | Screen print for 1-2 solid colors; heat transfer only when artwork detail requires it | Commercially efficient for bakery logos, event branding, and franchise kits | Large dark ink areas can block in packing if curing is weak; transfers need adhesion testing on actual canvas texture |
| Tolerance planning | Finished size tolerance of about +/-5 mm to +/-7 mm on outer dimensions, tighter only if justified; print placement tolerance about +/-5 mm | Reasonable for sewn textile portfolios while still protecting insert fit and logo appearance | No written tolerance standard leads to disputes on fit, centering, and cosmetic acceptance |
| Packing method | Flat packed, 20-40 pcs per export carton depending on size and stiffness; polybag only if handling conditions justify it | Good for importer warehousing, field distribution, and launch kits | Overcompression can warp zipper line and crease print; underspecified carton marks can delay receiving |
| Sampling route | Artwork layout approval, then pre-production sample in actual canvas, actual zipper, and actual print method | Fastest practical route to catch fit, bulk, and trim issues before mass production | Approving only a mockup or stock sample leaves unresolved risk on usable internal size, zipper run, and logo balance |
Buyer checklist before sampling
- Define the exact end use: sales portfolio, menu folder, distributor document sleeve, pastry class kit, onboarding pack, or event collateral holder.
- State finished outer size in millimeters and list every insert size that must fit, including paper orientation, laminated cards, brochures, recipe sheets, or tablets.
- Specify the required usable internal fit size, not only the external portfolio dimensions.
- Set canvas specification by finished weight range in GSM or oz, desired handfeel, and whether natural slub is acceptable.
- Specify zipper size, zipper material, tape color, puller finish, and whether standard stock colors are acceptable.
- State whether the item is unlined, self-fabric lined, or uses any interfacing or reinforcement.
- Choose branding method based on artwork complexity and use condition; define print size, colors, and print position reference points.
- Clarify MOQ by SKU, by colorway, by artwork, and by packing variant before comparing supplier offers.
- Request a pre-production sample in production-representative materials and test it with actual inserts.
- Define measurable acceptance criteria for size tolerance, print placement tolerance, zipper operation, stitching quality, fabric shading, and cleanliness.
Factory quote questions to send
- What is the quoted finished fabric weight in GSM or oz, and is that before or after any washing, calendaring, or pressing?
- Is the quoted canvas from stock greige, dyed-stock, or a custom mill lot, and what is the likely raw material booking time for each route?
- What are the exact zipper specs: # size, coil material, tape material, slider type, puller material, and standard available colors?
- What seam construction are you using around the perimeter, and what seam allowance is typical on this item?
- Does the quoted price include reinforcement at zipper ends, back-tacks at stress points, and top-edge stabilization on inside pockets?
- Which print method is included, how many print colors, what print size, and what placement reference is assumed in the costing?
- What are the MOQ and price break rules per size, per body color, per artwork, and per packaging variation?
- How many calendar days are needed separately for artwork check, strike-off if needed, pre-production sample, material booking, bulk sewing, and final packing?
- What dimensional and print tolerances do you normally control to on this item, and which visible canvas characteristics are considered inherent rather than defective?
- What export carton size, carton quantity, net weight, and gross weight are assumed in your quote?
Quality-control points to confirm
- Fabric weight and handfeel consistent with approved sample; if measured by laboratory test, confirm agreed tolerance with supplier before production.
- Outer finished dimensions checked after sewing and pressing, with usable internal fit verified using actual target inserts.
- Print placement measured from agreed reference points such as left seam, bottom seam, or zipper edge; typical tolerance often set around +/-5 mm unless artwork or size requires another standard.
- Print surface free from obvious pinholes, smudging, ghosting, or offset marks; adhesion and dry rub performance checked according to agreed method.
- Zipper opens and closes smoothly through full travel, including corner transition zones, with no tooth skipping, tape twisting, or slider detachment.
- Zipper end stops, corner turns, and stress points secured with clean back-tack or equivalent reinforcement.
- Inside pocket alignment even, pocket opening usable, and stitching not closing the intended insertion space.
- No major panel-to-panel shade difference beyond approved allowance; mixed-lot appearance controlled on natural canvas.
- Stitch density reasonably consistent, no broken stitches, no open seams, and no raw edge exposure where the construction spec does not allow it.
- Loose threads, needle damage, oil marks, pressure creases, and contamination screened before final packing.