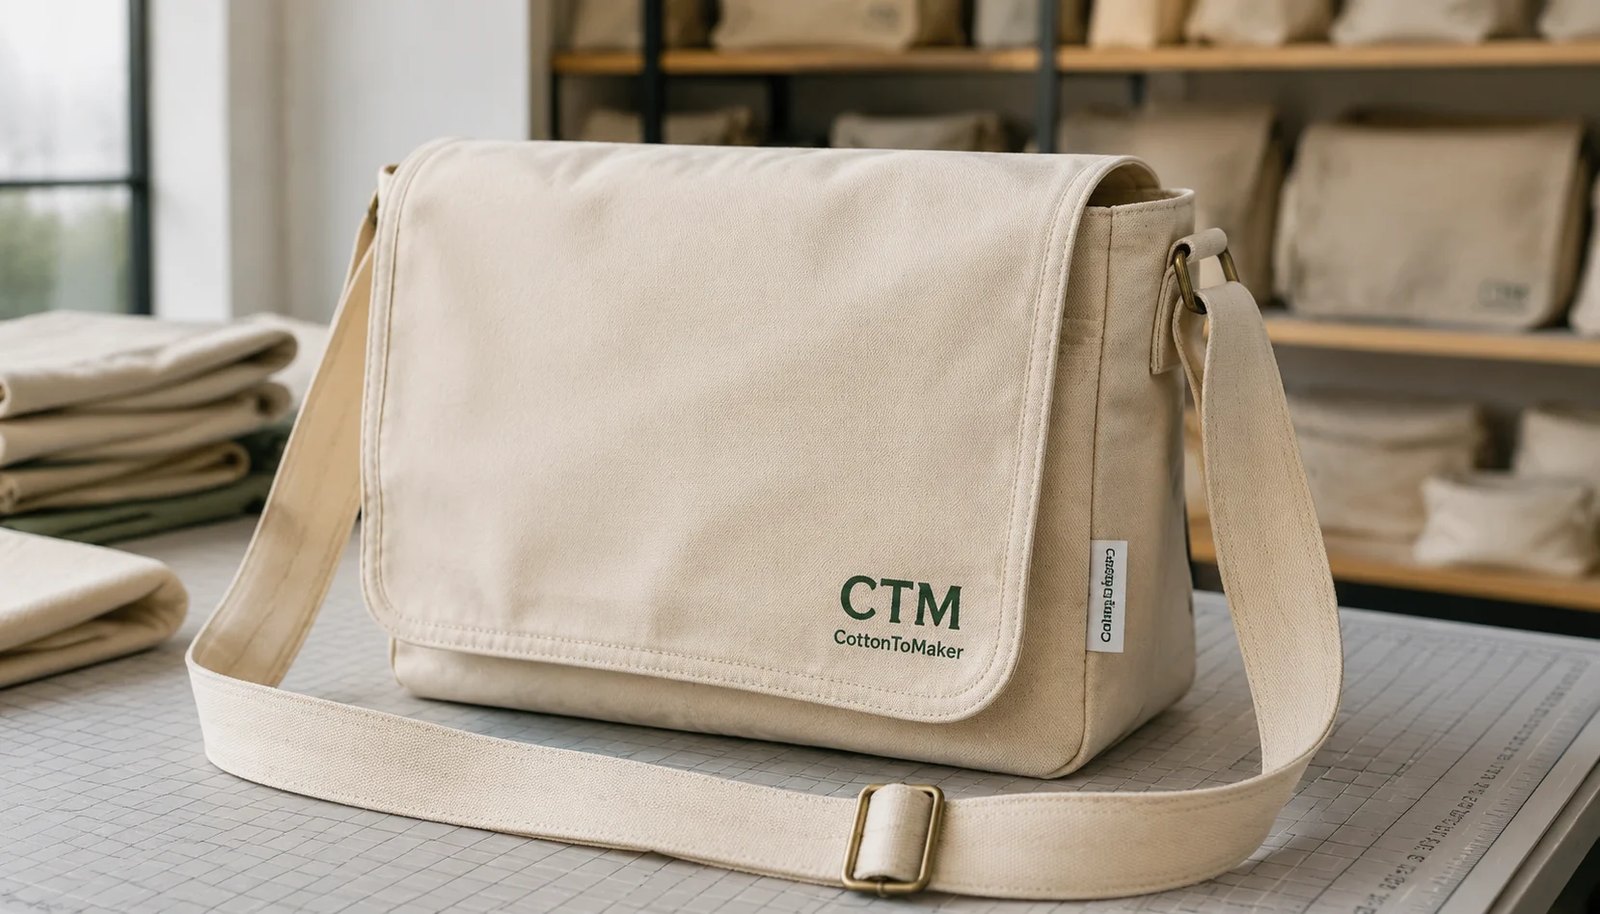
Start with the retail job, not the artwork file
For wholesale canvas messenger bags for natural grocers, logo placement should be decided after the buyer knows how the bag will be sold, displayed, packed, and used. A bag for paid resale needs a more merchandise-like look than a free event giveaway. A staff bag may need larger walking visibility. A loyalty reward may need restrained branding because the customer is expected to use it repeatedly outside the store.
This decision affects more than the printed area. It changes the flap shape, closure choice, pocket placement, strap attachment, label plan, hangtag position, and carton packing. A logo that looks balanced on a flat template can sit too close to the lower edge once the flap bends over the body. It may also be interrupted by snaps, buckles, bar-tacks, or a hangtag hole.
Natural grocer buyers also have a narrower brand fit than general promotional buyers. The bag usually needs to look reusable, practical, low-waste, and credible next to produce, bulk foods, wellness items, and private-label merchandise. Overly large prints, glossy transfers, heavy plastic packaging, and vague sustainability claims can weaken that presentation.
- Define whether the bag is for resale, loyalty, staff, event, or distributor inventory before artwork placement.
- Approve logo position on finished bag dimensions, not only a flat AI or PDF template.
- Check the logo with the intended display method: hanging, stacked, folded, boxed, or shelf-tagged.
- Treat logo placement, barcode location, hangtag location, and packing as one connected retail specification.
Compare logo positions before locking the pattern
The front flap is the most common logo area because it faces the shopper when the bag is hanging or stacked. It is also the highest-risk position because the flap bends, folds, and receives pressure in cartons. A centered logo works well for strong brand visibility. A lower-right mark often feels more like retail merchandise, especially when paired with a small side label.
The front body panel under the flap is flatter, but it is hidden during normal use unless the flap is lifted. The back panel can be useful for staff or outdoor visibility but is not ideal for shelf presentation. Woven labels and inner pocket prints are better for secondary branding, care details, and fiber claims. Strap printing should be used carefully because the strap bends and rubs against clothing.
A buyer should ask the factory to mark all structural features on the pattern before placing the logo. This includes the finished flap edge, seam allowance, snap or magnetic closure, buckle path, strap anchors, pocket line, and hangtag hole if used. Without those marks, the artwork proof may hide practical conflicts that only appear after sewing.
- Best primary position for retail display: centered front flap or lower-right front flap.
- Best subtle branding option: woven side label plus small front flap print.
- Best secondary information area: inner pocket print or care label.
- Avoid main logos over flap fold lines, snap backs, buckle pressure points, and heavy seam intersections.
- Request a marked pattern with finished seam lines before approving screen position.
Canvas choice changes print quality and brand claims
Canvas weight guidance must be treated as supplier-dependent because mills, markets, and finishing methods do not always describe fabric the same way. A practical starting point for many grocery retail messenger bags is 12 oz cotton canvas, often around 400-420 GSM, but the buyer should confirm the exact cloth. Ten-ounce canvas may reduce cost and weight, yet it can wrinkle more on the flap. Fourteen- to sixteen-ounce canvas can feel premium, but it raises sewing difficulty, carton weight, freight cost, and needle-hole visibility.
Fiber content also matters. Natural cotton canvas has seed flecks and shade variation that may suit a natural grocery brand, but it can make print colors appear warmer or duller. Recycled cotton blends may have more variation in shade, yarn strength, and handfeel depending on the source. Organic cotton claims require documentation; they should not be treated as a marketing phrase unless the supplier can provide relevant certification and transaction evidence for the order.
Buyers should specify both the physical fabric and the claim language they plan to use. If the bag tag says recycled cotton, organic cotton, undyed, low-impact, or plastic-free, the sourcing team needs documents that support those statements. The factory may be able to make the product, but the buyer owns the risk of what appears on retail tags and e-commerce listings.
- Request both oz and GSM, plus fiber composition and finish.
- Ask whether the quoted fabric is stock, made-to-order, dyed, washed, recycled blend, or certified organic.
- Review printed color on the actual canvas lot whenever possible.
- Do not approve sustainability claims based only on a casual supplier statement.
- Keep one approved fabric swatch with the buyer and one at the factory for inspection reference.
Use practical logo placement rules
A useful front flap starting point is to keep the logo at least 30 mm from side seams and at least 25-35 mm above the finished lower flap edge. These figures are not universal standards; they are practical spacing targets that must be checked against the final pattern. A short flap, curved flap, front pocket, magnetic snap, or buckle closure can require more clearance.
For a common messenger bag width around 350-380 mm, many grocery retail logos work well at 180-240 mm wide. That range is visible without turning the bag into a billboard. Smaller marks can work for premium resale, but they need enough contrast to read on natural canvas. Larger marks may be acceptable for staff programs or event distribution, but they increase print, drying, and packing sensitivity.
Fine text is a common problem. Taglines, store locations, certification text, and small icon details may fill in or break on textured canvas. A screen print supplier should review minimum stroke width, spacing, and trapping before making the screen. As a rough checkpoint, very fine strokes below about 0.5 mm need careful sampling on the actual cloth.
- Set logo width, height, and distance from finished seams in millimeters.
- Use a placement tolerance such as +/-5 mm only after the supplier confirms it is achievable.
- Measure placement on the closed finished bag, not only the cut panel.
- Ask for empty-bag and lightly filled-bag photos before bulk approval.
- Keep small claim text off the main flap unless it remains legible on the sampled canvas.
Choose the print or label method for the use case
Screen printing is usually the most efficient method for one- to three-color logos on wholesale canvas messenger bags. It gives a matte look that fits natural grocery retail and works well for repeat orders when the artwork is simple. Water-based or pigment systems can provide a softer handfeel, but opacity must be sampled on natural or colored canvas. Plastisol-type systems may improve coverage in some cases, but buyers should consider handfeel and brand presentation.
Heat transfers can hold sharper detail, gradients, and small text, but they may look less natural on canvas and introduce a plastic-like surface. Embroidery can be durable and premium for a small mark, yet it can pucker a large flap logo and increase unit cost. Woven labels are strong for subtle identity and long-term wear, but they create separate label MOQ, color approval, and sewing timing.
A natural grocer program often works best with a modest one-color screen print in dark green, charcoal, navy, or brown on natural canvas, plus a small woven label or inner label for secondary detail. If the buyer needs recycled or organic content messaging, that information may belong on a hangtag or inner label rather than crowding the front logo.
- Use screen print for simple logos, solid colors, and scalable repeat orders.
- Use woven labels for subtle retail branding and durable side identity.
- Use embroidery only after checking puckering and back-side finish on the flap.
- Use heat transfer only when the artwork detail justifies the different surface feel.
- Always sample the final method on the final or approved-equivalent canvas.
Make sustainability and packaging requirements specific
Natural grocery buyers often ask for low-plastic packing, recycled content, organic cotton, undyed canvas, or reduced-waste presentation. These are good goals, but they need operational detail. A paper belly band may look better than a polybag, yet it may not protect the printed flap from moisture, dust, or abrasion during ocean freight. No individual bag can reduce material use, but it can increase dirt marks and print transfer if the cartons are compressed.
The buyer should decide which requirement has priority: retail appearance, warehouse cleanliness, plastic reduction, barcode control, or maximum print protection. In many cases, a recyclable paper sleeve, tissue interleaving, or a recycled-content polybag may be a better compromise than no protection. The supplier should run a packing trial using the actual folded shape, carton quantity, and printed sample.
Sustainability documents should be matched to the exact claim. Recycled cotton may require GRS or another relevant chain-of-custody document if the buyer wants a certified claim. Organic cotton may require GOTS, OCS, or transaction documentation depending on the claim and market. If the supplier can only provide a general mill certificate, the buyer should avoid making a stronger retail claim than the documents support.
- State whether individual plastic is prohibited, discouraged, or allowed only when needed for print protection.
- Require barcode and SKU labels to stay readable on the chosen packing format.
- Ask for packing trial photos before final carton approval.
- Confirm which sustainability certificates apply to the order, not just to the supplier profile.
- Keep claim wording conservative when documentation is limited.
Quote the components separately
Messenger bag quotes can be misleading when suppliers summarize everything into one unit price. One quote may include 10 oz stock canvas, no label, no barcode, and basic bulk packing. Another may include 12 oz canvas, woven label, hangtag, reinforced strap, magnetic snap, tissue protection, and export-grade cartons. Those are not equal offers even if the product name sounds the same.
Ask the factory to break out the main cost drivers: fabric weight, bag size, gusset depth, print colors, print area, label type, closure, hardware finish, strap construction, packing material, inspection, and shipping term. This makes it easier to remove cost without damaging the parts that matter. For example, reducing a large two-color flap print to a smaller one-color mark may save more risk than shaving canvas weight too far.
MOQ also needs component-level detail. A factory may accept 300-500 pieces for a simple natural canvas bag when materials are available, but custom-dyed fabric, custom hardware, woven labels, hangtags, or special packing can have different minimums. These figures vary by supplier and season, so the RFQ should ask for current MOQs instead of assuming a fixed factory norm.
- Request separate MOQs for bag sewing, fabric, printing, labels, hardware, hangtags, barcodes, and cartons.
- Compare quotes only after matching canvas weight, print size, packing, and trade term.
- Ask whether screens, labels, patterns, and approved samples can be kept for reorders.
- Confirm reorder MOQ and lead time before launching a retail SKU.
- Request carton CBM and gross weight so landed cost can be compared, not just unit price.
Approve samples with measurable checks
A pre-production sample should not be a showroom approximation. It should use the actual bulk fabric or a documented equivalent, final print method, final thread, final strap, real closure, real label, and proposed packing. If the buyer approves an approximate sample, the factory has too much room to interpret the final product.
Sample review should include measurement and handling. Measure finished width, height, gusset, flap length, logo size, logo distance from finished edges, strap length range, and pocket position. Put light contents inside the bag, close the flap, and check whether the logo remains centered and visible. Wear the bag briefly to see if the strap twists, the closure pulls the flap, or the hardware touches the printed area.
The buyer should also test obvious failure points before bulk release. Rub the print with a clean white cloth after the supplier’s curing time. Open and close the flap repeatedly. Tug the strap by hand while watching the bar-tacks. Scan barcodes if retail labels are included. These checks do not replace lab testing or final inspection, but they catch practical problems early.
- Approve a measured placement sheet together with the physical pre-production sample.
- Keep one sealed approved sample at the factory and one with the buyer or inspection team.
- Photograph the sample empty, filled, closed, open, hanging, and packed.
- Check barcode scan readability before bulk label printing.
- Do not release bulk printing until color, placement, curing, and packing are approved.
Build QC around defects that matter at retail
A generic inspection checklist is not enough for logo-driven messenger bags. The QC standard should define critical, major, and minor defects before production. Wrong logo, wrong claim label, unsafe hardware, sharp edges, broken strap attachment, missing country-of-origin marking, or unscannable barcode may be critical or major depending on the buyer’s routing guide. Slight thread ends may be minor if they do not affect appearance after trimming.
AQL levels should be agreed with the buyer’s risk tolerance and order value. Many importers use tighter levels for critical defects and standard levels for major and minor defects, but the exact plan should be written into the PO or inspection booking. The key is to make logo placement and print quality measurable. If the requirement only says good print, the inspector has limited authority to reject inconsistent shelf appearance.
Add simple physical checks where relevant. Define a strap pull-load target suitable for the intended use. Agree on a dry and damp rub or crocking method for printed and dyed surfaces. Check shrinkage if the fabric is washed or untreated. Inspect carton drop condition if the shipment will move through courier or mixed distribution. The goal is not to over-test a simple bag; it is to prevent the failures that create retail returns or receiving holds.
- Measure logo placement against a drawing and approved sample.
- Classify wrong branding, unsafe hardware, broken strap, and unreadable barcodes as serious defects.
- Check dry and damp rub performance on dark prints and dyed canvas.
- Use a strap pull target agreed before production, not a vague strength comment.
- Inspect packed cartons because packing can create print creases after sewing has passed.
Plan retail display, SKU, and receiving details early
Natural grocers often sell or distribute bags through store displays, member counters, seasonal promotions, or regional warehouse replenishment. That makes barcode and SKU handling part of the product, not an afterthought. The supplier needs to know whether each bag needs a hangtag, sticker, belly band, inner label, master carton label, mixed-carton mark, or store-specific allocation label.
Display constraints can also change the logo choice. A bag hanging from a peg may show the flap clearly, while a stack on a table may hide the lower flap. A folded bag may cover a side label. A hangtag tied to the strap may block part of a centered print. The buyer should send photos or dimensions of the intended display if shelf presentation matters.
Receiving details should be built into the PO. Cartons should show PO number, SKU, item description, quantity, gross weight, net weight, carton count, country of origin, and any routing labels required by the retailer or distributor. If cartons contain multiple store groups or logo versions, the carton mark must make that clear. These details are not glamorous, but they prevent delays after the product is already made.
- Decide whether barcode placement belongs on hangtag, belly band, polybag, inner label, or carton only.
- Check that hangtags and display hooks do not cover the main logo.
- Use consistent carton quantities unless the routing guide requires mixed allocations.
- Provide country-of-origin and retailer label requirements before final quote.
- Ask for carton label photos and barcode scans before shipment release.
Specification comparison for buyers
| Logo or decoration option | Best use in natural grocery retail | Procurement advantage | Risk to control before bulk |
|---|---|---|---|
| Centered front flap screen print | Primary retail logo when bags hang on a peg, sit in a stack, or appear in member gift displays | High visibility, efficient for one- to three-color logos, easy for shoppers to understand at a glance | Flap curve, snap position, and carton creasing can shift or distort the visible logo; inspect on filled and empty bags |
| Lower-right front flap print | More subtle private-label look for reusable merchandise and loyalty items | Feels less promotional than a large centered logo while keeping brand recognition on shelf | Small logos can become too quiet if the bag is displayed folded or partly covered by a hangtag |
| Front body print under flap | Secondary message, internal campaign mark, or design that should stay flatter during use | Print surface is more stable because it is not on the folding flap edge | Visibility is lower when the flap is closed, so it may not work as the main retail-facing mark |
| Back panel print | Walking visibility for staff, delivery, field marketing, or community events | Large print area and fewer closure conflicts than the flap | Less useful for retail display because the back panel is often hidden in stacks or hanging rows |
| Woven side label | Natural grocer brands that want quiet, durable branding with a merchandise feel | Avoids large ink areas, supports premium presentation, and works well with unbleached canvas | Label MOQ, color approval, and sewing placement must be locked before bag assembly |
| Inner pocket print or care label | Care instructions, recycled-content statement, barcode support, or secondary brand detail | Keeps claims and care guidance available without crowding the outside design | Claims must match documentation; inner prints are easy to miss during receiving unless included in QC checklist |
| Strap print or woven strap mark | Repeat brand pattern or staff-use program where the strap is visible during wear | Adds visibility while leaving the bag body cleaner | Abrasion, alignment, and ink cracking are harder to control than on flat panels |
| Embroidery on flap | Small premium mark, monogram, or limited retail capsule | Durable and tactile, with no ink transfer risk | Large embroidery can pucker canvas, add weight, and raise cost; sample before confirming artwork size |
| Heat transfer logo | Detailed art, small text, gradients, or short runs where screen print cannot hold detail | Sharper edge detail than direct print on coarse canvas | May look less natural, add plastic feel, and fail if adhesion, wash, or flex testing is weak |
Buyer checklist before sampling
- Confirm the retail role first: resale merchandise, loyalty reward, staff bag, grocery member gift, trade show item, or distributor catalog SKU.
- Choose finished bag size, gusset, flap length, closure, strap type, and pocket layout before approving logo artwork.
- Specify canvas by both oz and GSM, and state whether natural cotton, recycled cotton blend, certified organic cotton, dyed canvas, or blended fiber is required.
- Ask the supplier which sustainability documents can be provided, such as GRS, OCS, GOTS, transaction certificates, fiber composition reports, or recycled-content declarations where applicable.
- Select the main logo zone and a backup branding zone: front flap, lower flap corner, front body, back panel, side label, inner pocket, or strap.
- Set print dimensions, distance from finished seams, Pantone or approved color standard, minimum line thickness, and placement tolerance.
- Require a pre-production sample made with actual bulk fabric, ink, thread, strap, hardware, label, closure, and packing method.
- Review photos and measurements on both an empty bag and a lightly filled bag because the flap changes shape in real use.
- Confirm whether panels are printed before sewing or finished bags are printed after sewing, since the choice affects cost, tolerance, and rework options.
- Define low-plastic or plastic-free packing only after confirming it still protects the printed flap from dust, abrasion, moisture, and carton pressure.
Factory quote questions to send
- What exact canvas will be used for the body, flap, gusset, reinforcement, strap, and pocket, including oz, GSM, fiber composition, yarn construction if available, and finish?
- If recycled or organic content is requested, which certificates or transaction documents can you provide, and do they apply to this order or only to your mill or supplier generally?
- Will the logo be printed on cut panels before sewing or on finished bags after sewing, and what placement tolerance can you hold on each method?
- Which print method do you recommend for this artwork on natural canvas, and what minimum line thickness, color count, or trapping changes should we make before sampling?
- What is the MOQ for each component separately: bag sewing, canvas color, screen print, woven label, custom strap, hardware finish, hangtag, barcode label, and carton mark?
- Can the pre-production sample use actual bulk fabric, final ink, final stitching, final strap, real closure, label, barcode, and proposed packing?
- What measurable tests will you perform for strap pull, seam strength, print rub or crocking, shrinkage, colorfastness, hardware security, carton drop, and barcode scan readability?
- Which AQL level do you propose for final inspection, and how do you classify critical, major, and minor defects for logo placement, print quality, stitching, safety, and packing?
- How many bags are packed per carton, what are the carton dimensions, CBM, gross weight, and inner packing materials, and can packing be adjusted to reduce flap creasing?
- Can you support paper belly bands, tissue interleaving, recycled polybags, no individual polybag, or other low-plastic options without increasing print damage risk?
Quality-control points to confirm
- Logo placement on the front flap should be measured against the approved placement drawing, commonly within +/-5 mm horizontally and vertically when the supplier confirms that tolerance is realistic for the chosen construction.
- Logo size, distance from finished seams, and distance from closure hardware should match the approved pre-production sample, not only the digital proof.
- Screen print should show clean edges on canvas texture, with no obvious pinholes, ink pooling, ghosting, smearing, skipped areas, or color contamination visible at normal inspection distance.
- Print color should be compared under consistent lighting against an approved printed fabric swatch; natural canvas shade can change perceived Pantone color.
- Print rub or crocking should be checked with a dry and damp white cloth rub method agreed in advance, with no unacceptable transfer after proper curing.
- Strap attachment should pass the agreed pull-load target for intended use, with dense bar-tacks or box stitching and no broken threads, skipped stitches, or loose reinforcement patches.
- Main seams should maintain consistent stitch density, often around 7-9 stitches per inch depending on canvas thickness and thread, unless the approved sample specifies otherwise.
- Shrinkage allowance should be checked if the bag is washed, garment dyed, or made with untreated canvas; finished dimensions should remain within the approved tolerance after the agreed conditioning method.
- Flap should close evenly without twisting, and the logo should remain visible when the bag is lightly filled with typical retail contents.
- Hardware should be free of sharp edges, rust, poor plating, loose rivets, weak snaps, and pressure points that mark the printed logo area.