Start With the Event Job, Not the Logo
The logo is visible, so it naturally gets attention first. For procurement, the better starting point is the job the bag has to do. A canvas messenger bag for a conference kit may carry a notebook, program guide, badge pack, charger pouch, sponsor inserts, and a tablet. A staff operations bag may be opened dozens of times a day and dragged through registration desks, storage rooms, and venue corridors. A VIP gift bag may need cleaner finishing, heavier canvas, lining, better hardware, and a decoration method that still looks good after the attendee takes it home.
Those are not the same product. They should not be quoted as if they are. The RFQ should explain who receives the bag, what goes inside, how long it will be carried, whether it is handed out empty or pre-packed, and whether the logo must remain visible while the flap is closed. Those answers affect finished dimensions, gusset depth, strap width, flap length, closure, pocket layout, reinforcement, carton packing, and the safe print area.
For wholesale canvas messenger bags for event planners, a strong print proofing checklist treats the bag as event equipment first and branded merchandise second. Ask the event team for the content list. Ask the brand team which mark is mandatory and which sponsor marks are optional. Ask operations whether volunteers need to open cartons quickly at a venue or whether a fulfillment center will build kits before shipping. Plain answers here prevent expensive late discoveries, such as a front pocket interrupting the artwork or a flap hiding the sponsor logo.
- Identify the recipient group: attendee, staff, sponsor, press, VIP, volunteer, speaker, or retail customer.
- List every expected content item with approximate size and weight before setting the bag dimensions.
- Confirm whether the bags are handed out empty, pre-packed, placed on seats, shipped to homes, or sold at a merchandise counter.
- State whether logo visibility matters while the flap is closed, while the bag is worn, and while it sits on a registration table.
- Define whether the bag is meant for one event day, a multi-day conference, staff reuse, or post-event retail-style use.
Turn the Use Case Into a Buying Spec
A supplier quote is only useful when each supplier prices the same construction. The buying spec should include finished body width, height, gusset, flap length, pocket layout, strap width, adjustable strap range, closure, fabric, lining, hardware, reinforcement, decoration method, packing, and inspection expectations. A sketch is helpful, but it is not enough. Use finished measurements because canvas can shrink, relax, and distort during cutting, printing, sewing, washing, pressing, and packing.
Tolerances should be written before production starts. Many buyers use plus or minus 5 mm for small placement or pocket references and plus or minus 10 mm for larger body measurements on sewn textile bags, though the right tolerance depends on the pattern, canvas finish, and print location. Strap length may need more room if an adjuster is used, but the minimum and maximum usable range still need to be defined. Without tolerances, one factory may quote a compact document bag while another quotes a larger laptop-style messenger, and both can appear to be answering the same request.
Straps and closures deserve early decisions because they drive comfort, cost, and failure risk. A 25 mm strap can work for a light giveaway. A 38 mm or 50 mm strap often feels better for heavier kits or staff use. A zipper top improves security but adds labor and more QC points. Magnetic snaps are convenient, yet they must be aligned and firmly set. Buckle-style trim can look premium, but it may slow handout and reduce the clean print area on the flap.
- State finished body dimensions, gusset depth, flap length, pocket dimensions, and measurement tolerance.
- Specify strap width, adjustable length range, slider type, anchor construction, and reinforcement method.
- Define closure style: open top, flap only, snap, magnetic snap, zipper, buckle, hook-and-loop, or combined closure.
- State whether the bag is unlined, self-lined, fully lined, bound internally, or reinforced at the base.
- Include the expected load target and the specific contents that create that load.
Choose Canvas Weight, Finish, and Color Early
Canvas weight is one of the fastest ways to tell whether quotes are comparable. For many event messenger bags, 10 oz to 12 oz canvas, roughly 340 to 407 GSM, is a practical middle range. It gives enough body for most conference kits without making the bag overly heavy or expensive. An 8 oz canvas can work for a light giveaway, but it will feel softer and may wrinkle more under large artwork. A 14 oz to 16 oz canvas can feel more premium and structured, but it can increase material cost, freight weight, sewing resistance, and sometimes MOQ.
Ask suppliers to state both oz and GSM because mills, factories, and markets may use different conventions. Weight is still only part of the fabric spec. Weave density, yarn quality, shrinkage, dye process, washing, and finishing all change the finished bag. Washed canvas can feel softer and more retail-oriented, but it may create more size variation and affect how ink or transfer film bonds. Coated or water-resistant finishes may reduce staining, yet they can create print adhesion issues unless decoration is tested on the actual material.
Color decisions should happen before proofing, not after. Natural canvas may show slubs and shade variation, which can be acceptable when approved in advance. Dyed black, navy, olive, gray, or custom brand colors change ink behavior. A light logo on a dark bag may need an underbase. A dark logo on natural canvas may look softer than it does in a digital proof. Bright sponsor colors can be hard to match on textured fabric. The safest approval is a print strike-off on the intended canvas color.
- Use 8 oz to 10 oz canvas for light giveaways where low weight and low cost matter most.
- Use 10 oz to 12 oz canvas for standard conference kits and most wholesale event messenger bag programs.
- Use 14 oz to 16 oz canvas for premium gifts, staff reuse, retail resale, or heavier contents.
- Ask whether the fabric is raw, dyed, washed, enzyme-washed, brushed, coated, laminated, or water-resistant.
- Request a swatch or printed strike-off on the actual fabric color before approving critical brand colors.
Match Decoration Method to Artwork Risk
Decoration method affects cost, lead time, durability, and reject rate. Screen printing is often the best default for canvas messenger bags with one to three solid colors, bold logos, event names, or sponsor marks. It can be efficient and repeatable when the factory uses a proper jig and fixed placement references. It is less forgiving with gradients, photographic artwork, very fine text, heavy ink coverage, or artwork that crosses seams and hardware.
Heat transfer and digital transfer can reproduce more colors and detail, but buyers need to inspect the hand feel, shine, edge behavior, curing, and adhesion on textured canvas. A transfer may look clean on a flat swatch and still lift at the edge after folding or rubbing if pressure, temperature, dwell time, or material compatibility is wrong. Embroidery can feel durable and premium, but small sponsor text may close up, and dense stitch fields can pucker lighter canvas. Woven labels and patches are useful when branding should feel like a sewn component, but they add their own lead time and placement checks.
The right method depends on the artwork and the event tier. Exact Pantone color, small sponsor names, and longer reuse all justify more proofing. A short-run urgent event may be better served by a stock blank with domestic decoration if the construction already fits the brief. Large flap artwork or full front-panel branding may need printing before sewing, while a small front pocket logo may work well on finished-bag printing.
- Use screen print for bold spot-color artwork and repeatable placement on flat panels.
- Use transfer only after checking adhesion, edge lift, shine, cracking, and dry-rub performance on the selected canvas.
- Use embroidery for premium durable marks, but test small lettering and dense stitch areas before bulk approval.
- Use woven labels or patches for subtle reusable branding, especially when abrasion resistance matters.
- Avoid placing artwork across seams, snaps, rivets, buckles, zipper lines, or heavy folds unless a sample proves it works.
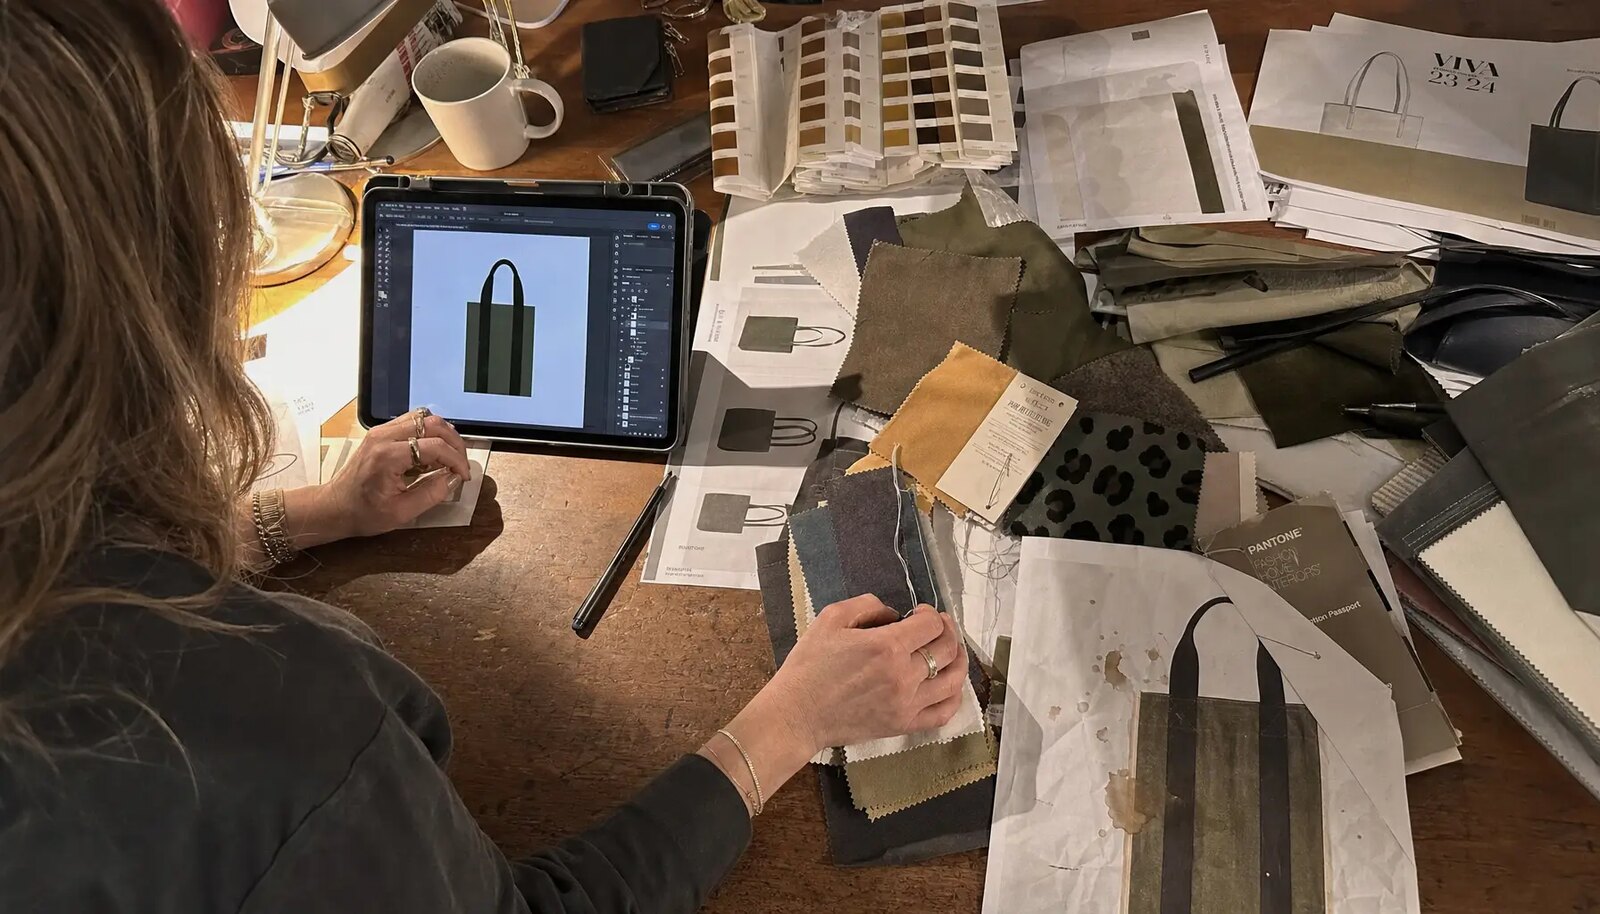
Make the Print Proof a Control Document
A print proof is more than a design image. It is the production instruction for placing artwork on a three-dimensional sewn product. Messenger bags are sensitive because the front face may include a flap, pocket, zipper, seam, gusset, snap, buckle, or curved body. A logo that appears centered on a flat mockup can look too low when the flap closes, too high when the bag is loaded, or slightly off when the strap pulls the body out of shape.
A strong proof names the artwork version, decoration method, print size, ink or thread colors, placement reference points, and tolerance. For example, it may state that the logo is 120 mm wide, centered on the flap, with the top edge 35 mm below the flap seam and a placement tolerance of plus or minus 5 mm. If the logo is on a pocket, measurements should reference the pocket top, pocket side, or body side seam. If printing happens on cut panels before sewing, the proof should show cutting allowance and seam allowance so the finished logo does not drift after assembly.
Color proofing needs the same discipline. Pantone references are useful, but canvas shade, fabric texture, ink opacity, and curing can shift the result. A digital proof can catch spelling, version, and layout problems. It cannot prove opacity, edge sharpness, hand feel, adhesion, or the way a bright color behaves on natural or dyed canvas. For new artwork or a new fabric color, a printed strike-off on the actual canvas is the stronger approval step. For repeat orders with a documented standard, photo-backed first-piece approval may be acceptable.
- Include logo size, print area, placement dimensions, color references, decoration method, and artwork version on the proof.
- Measure placement from fixed features such as flap seam, pocket edge, zipper line, body side seam, or snap position.
- State placement tolerance in writing, commonly plus or minus 5 mm for logo location when the construction allows it.
- Confirm minimum readable text size at actual scale, especially for sponsor logos, URLs, dates, and venue names.
- Keep the approved proof, sample photos, swatch approval, strike-off approval, and final artwork file in one order record.
Use Quote Questions to Expose Real Cost
A low quote is not useful if it leaves out the choices that create cost. A complete B2B quote for wholesale canvas messenger bags should name fabric GSM, canvas finish, color, finished dimensions, lining, strap width, closure, hardware, reinforcement, decoration method, print size, number of colors, sample fee, setup charges, MOQ, packing, trade term, and lead time by stage. When these details are missing, suppliers may look cheaper because they are quoting different assumptions.
MOQ usually comes from the least flexible input. Fabric roll quantity, dyed color minimum, screen setup, transfer film, embroidery digitizing, patch production, custom woven labels, hardware sourcing, and carton requirements can all create minimums. Ask whether MOQ applies per total order, per fabric color, per artwork, per placement, per label, or per shipment destination. A 1,000-piece MOQ is very different if it becomes 1,000 pieces per sponsor logo or per colorway.
Separate one-time charges from recurring unit cost. Screen charges, embroidery digitizing, patch molds, label setup, special packing, and sample fees may make sense for an annual conference but feel high for a one-time regional event. Freight also changes the real landed cost. Heavier canvas can look better and still make air freight painful. A fully lined bag can improve presentation while adding labor and inspection time. Itemized quotes make negotiation cleaner because everyone can see which specification is driving the price.
- Ask whether MOQ applies per style, color, artwork version, placement, label, destination, or total purchase order.
- Separate base bag cost, decoration cost, setup fees, sampling, packing, testing, inspection, and freight assumptions.
- Confirm whether the quote covers panel printing before sewing or finished-bag printing after sewing.
- Ask for decoration setup costs by color, screen, embroidery file, patch, transfer film, or label component.
- Compare fabric weight, lining, strap width, hardware, closure, print method, packing, and trade term before choosing the lowest price.
Approve Samples Under Real Event Conditions
A messenger bag sample should be tested the way the final order will be used. Empty samples can look sharp while loaded bags reveal weak straps, poor flap coverage, body distortion, uncomfortable carry, or logo placement that disappears under the flap. Put the expected contents in the sample: brochure pack, notebook, catalog, tablet sleeve, charger, folded apparel, water bottle, or event documents. Then check whether the bag closes, whether the logo stays visible, whether the strap twists, and whether the body carries the load cleanly.
The sample path should match the risk. For a repeat program using the same construction, same fabric, and same logo, a digital proof plus first-piece photo may be enough. For a new construction, new canvas color, new logo, new decoration method, or premium event tier, a physical pre-production sample is the better standard. A printed strike-off can be approved before the full bag is sewn, which saves time if color, opacity, registration, or adhesion needs correction.
Sample approval should become the inspection standard. Keep one signed sample or a clearly identified retained sample when possible. If the order must be approved by photo, require a ruler in the frame, close-ups of print edges, close-ups of stitching and bar tacks, hardware detail, side view showing gusset and flap, interior view, and a loaded view if function matters. The approval record should include date, approver name, artwork version, fabric reference, and any approved deviation.
- Load the sample with the same contents and approximate weight expected at the event.
- Check strap comfort, strap twisting, flap closure, pocket access, body distortion, and logo visibility while worn.
- Rub the print with a dry white cloth and inspect for color transfer, tackiness, cracking, or surface lift.
- Open and close zippers, snaps, buckles, sliders, and magnetic closures repeatedly before approval.
- Record sample approval with photos, measurements, file version, date, approver, and approved exceptions.
Define QC Standards Before Bulk Starts
Quality control works best when both sides define defects before cutting, printing, sewing, and packing begin. For canvas messenger bags, inspection should cover material, sewing, decoration, function, and packing. Material checks include fabric weight, color, weave consistency, stains, odor, dampness, and shade variation. Sewing checks include dimensions, seam allowance, stitch density, thread tension, bar tacks, strap anchors, pocket alignment, lining, binding, and raw-edge control. Decoration checks include placement, color, opacity, registration, adhesion, edge quality, and readability.
Defect categories should be practical. Critical defects include sharp hardware edges, wrong artwork, broken strap anchors, unsafe metal parts, mold, severe odor, or any issue that prevents use. Major defects include wrong dimensions outside tolerance, severe print misplacement, poor adhesion, missing labels, weak closures, or count errors. Minor defects may include small thread ends, slight natural slubs, or tiny cosmetic marks that do not affect brand appearance or function. Canvas is textured, so the standard should be strict on function and branding while realistic about approved fabric character.
For larger orders, request first-piece production photos before the full batch is completed. These should show the front, back, side, interior, strap anchor, closure, print close-up, and measurement points. In-line inspection can catch placement drift or sewing errors before every unit is packed. Final inspection can follow the agreed sampling plan and AQL target. Many buyers use AQL sampling for bulk consumer goods, but the inspection level and defect limits should be written into the PO or inspection instruction.
- Classify critical, major, and minor defects before bulk cutting, printing, sewing, and packing begin.
- Inspect fabric for wrong GSM, shade mismatch, stains, odor, dampness, weak weave, or excessive unapproved slubs.
- Inspect sewing for skipped stitches, loose bar tacks, uneven pockets, weak strap anchors, poor lining, and wrong measurements.
- Inspect decoration for wrong color, misplacement, smudging, pinholes, ghosting, poor opacity, edge lift, or illegible small text.
- Tie final payment or shipment release to approved first-piece photos, QC report, packing list, or third-party inspection when order risk justifies it.
Control Packing, Labels, and Allocation
Packing is not a back-office detail for event orders. It affects receiving speed, venue setup, damage risk, freight cost, and the amount of labor needed on site. A bag can pass print inspection and still create a procurement problem if cartons are mislabeled, bags are folded through the logo, polybags are missing, SKUs are mixed incorrectly, or the packing list does not match the receiving plan. Event teams often work with short delivery windows, temporary labor, and limited storage. Carton instructions need to be part of the purchase order, not an afterthought.
Specify individual polybagging, bulk packing, tissue, hangtags, barcodes, SKU labels, country-of-origin wording, carton marks, and fold direction. If the logo is large, raised, freshly cured, or placed on a flap, test the fold method so the decoration is not sharply creased or pressed against hardware. Natural canvas can absorb moisture and odor, so long transit routes, humid seasons, or warehouse storage may require stronger cartons, inner poly protection, desiccants where appropriate, and clear storage instructions.
Allocation rules matter when bags ship to multiple venues, sponsors, regions, or fulfillment centers. Provide a carton map that names SKU, artwork version, quantity per inner pack, quantity per master carton, destination, and carton mark format. If mixed cartons are required, define the exact mix. If each site needs a fixed number of bags, avoid vague allocation notes. Before shipment, request photos of closed cartons, carton labels, an open carton, inner packing, barcode placement, and hangtag placement.
- Specify individual polybag, bulk pack, tissue, hangtag, barcode, SKU label, carton mark, and country-of-origin requirements.
- Confirm fold direction and packing pressure so the logo is not creased, transferred, hidden, or marked by hardware.
- State inner pack quantity, master carton quantity, carton dimensions, gross weight, and carton mark format.
- Use a written allocation map for split shipments by venue, sponsor, region, date, or fulfillment center.
- Request carton photos, label photos, open-carton photos, and final packing list before shipment release.
Build Lead Time Around Approval Gates
Lead time for custom canvas messenger bags includes more than sewing. A realistic calendar may include artwork preparation, RFQ clarification, digital proofing, material booking, fabric dyeing or washing, sample production, print strike-off, pre-production approval, bulk cutting, panel printing or finished-bag printing, curing, sewing, trimming, inspection, packing, export processing, freight, customs, domestic delivery, receiving, sorting, and venue transfer. One production lead-time number hides too many dependencies.
Work backward from the required in-hand date, not the factory ship date. Approval gates make the schedule controllable: written specification and artwork freeze, digital proof approval, swatch or strike-off approval, pre-production sample approval, first-piece bulk confirmation, final inspection, and packing release. Each gate should have an owner and a latest approval date. If artwork changes after screens are made or transfer film is prepared, the calendar needs to be reset honestly.
Choose the shipping mode early. Sea freight can be economical for repeat programs but needs more buffer and careful carton planning. Air freight or courier can protect urgent deadlines but may erase savings from offshore production, especially with heavier canvas and bulky cartons. Domestic decoration on imported blanks may be the better option for a tight date if the stock bag fits the brief. A useful print proofing checklist protects the calendar as much as the artwork.
- Plan backward from the in-hand date, then add receiving, sorting, repacking, and event-site transfer buffer.
- Ask for lead time by stage: proof, sample, material, decoration, sewing, inspection, packing, export, and transit.
- Freeze artwork, Pantone references, print size, placement, fabric color, and construction before bulk setup.
- Include time for at least one correction round when the spec, fabric color, supplier, or decoration method is new.
- Compare sea, air, courier, domestic decoration, and staged shipment options before production starts.
Specification comparison for buyers
| Sourcing or production route | Recommended use | Typical control advantage | Buyer risk to check |
|---|---|---|---|
| Direct factory with in-house printing | Repeat event programs, 300 to 5,000 units, one stable bag construction, one to three spot-color logos | Cutting, print jig setup, sewing sequence, first-piece approval, and bulk inspection can be controlled at one site | Confirm the print line is truly in-house, request first-piece photos, and ask who has authority to stop production if placement is wrong |
| Sewing factory with outsourced decorator | Custom sewn bags that need transfer, embroidery, patch, woven label, or specialty decoration | A strong sewing supplier can build the bag while a decoration specialist handles the branding method | Clarify ownership of rejected printed panels, transport time between vendors, curing standards, and who pays for rework |
| Imported stock blank plus domestic decoration | Urgent events where an existing messenger bag meets the functional brief | Decoration proofing may be faster, and buyers can often review samples domestically | Check blank inventory, lot-to-lot shade consistency, decoration suitability, replenishment risk, and higher landed unit cost |
| Trading company coordinating several suppliers | Event kits with multiple bag styles, accessories, sponsor versions, or split shipments | One commercial contact can consolidate documents, packing lists, timelines, and supplier communication | Ask for factory-level QC evidence, approved sample custody, proof sign-off records, and liability for late or defective decoration |
| Fully custom sewn program | Premium conferences, retail merchandise, sponsor gifts, staff operations bags, or reusable brand programs | Buyer controls body size, pocketing, lining, strap, hardware, canvas, reinforcement, and branding location | Expect higher MOQ, longer sampling, stricter artwork freeze dates, and more approval gates before bulk cutting |
| Pre-cut panel printing before sewing | Large front-panel artwork, flap prints, or designs that cannot be applied neatly to a finished bulky bag | Flat fabric improves print access, registration, and pressure control before the bag is assembled | Check panel orientation, cutting allowance, seam allowance, shade matching, and how rejected panels affect the sewing schedule |
| Finished-bag printing after sewing | Simple front pocket or flap logos on stock or semi-custom messenger bags | Setup is often faster when the print surface is flat enough and artwork avoids seams, hardware, and folds | Confirm the bag sits flat in the jig and set placement tolerance from fixed features such as pocket edge or flap seam |
| Woven label, patch, or embroidery program | Durable subtle branding for reusable event bags, VIP gifts, or retail-style merchandise | Branding becomes a sewn component with good abrasion resistance and a more permanent feel | Check label edge finish, stitch density, thread color, minimum readable text, and whether placement competes with the main artwork |
| Dual-source or staged production | Large event calendars, multiple regional events, or orders with critical in-hand dates | Backup capacity and staged shipment can reduce deadline exposure when managed tightly | Lock identical GSM, pattern, finished measurements, artwork files, inspection rules, carton marks, and packing format across both sources |
Buyer checklist before sampling
- Define the event role first: attendee giveaway, conference kit, staff operations bag, sponsor gift, press bag, VIP merchandise, volunteer bag, or retail resale item.
- List expected contents by size and weight, including laptop sleeve, tablet, notebook, catalog, brochure set, charger pouch, apparel, badge pack, water bottle, or printed agenda.
- Specify finished dimensions for body width, height, gusset, flap length, pocket dimensions, strap width, strap length range, closure type, and usable print area.
- Choose canvas weight, weave, color, finish, lining, reinforcement, hardware, and visible stitching color before approving artwork.
- State a target load, such as 3 kg for light conference materials or a higher written requirement for laptops, catalogs, staff tools, or merchandise use.
- Provide final vector artwork, Pantone or brand color references, clear-space rules, minimum readable text size, and artwork version number.
- Define decoration method, number of colors, print size, print area, placement reference points, and placement tolerance in millimeters or inches.
- Confirm whether printing happens on cut panels before sewing or on finished bags after sewing, because this changes timing, reject risk, and approval steps.
- Approve a physical pre-production sample for new specs, new artwork, new canvas colors, or new decoration methods whenever the event date allows.
- If photo approval is used, require ruler photos, fabric close-ups, print edge close-ups, side view, hardware detail, interior view, and loaded-bag photos.
Factory quote questions to send
- What exact canvas weight will be used in oz and GSM, and is it greige, raw natural, dyed, washed, brushed, coated, laminated, or otherwise finished?
- What weave, color standard, expected shrinkage, and fabric shade tolerance apply, and will bulk fabric match the approved sample or swatch?
- Are quoted dimensions finished bag measurements or cutting measurements, and what tolerances apply to body width, height, gusset, flap, pocket, and strap length?
- What is the recommended load target for this construction, and how are strap anchors, bar tacks, rivets, or reinforcement patches built to support it?
- Is decoration done in-house or outsourced, and who controls the digital proof, printed strike-off, first article, bulk approval, and rejected-panel decision?
- What setup charges apply for screens, colors, transfer film, embroidery digitizing, patch mold, woven label, custom hardware, or special packing?
- Does the MOQ apply per total order, per bag color, per artwork version, per print placement, per label, or per shipment destination?
- Which proof stages are included in the quote: digital layout, fabric swatch, printed strike-off, pre-production sample, and first-piece production approval?
- What placement tolerance is acceptable for the logo, and can it be measured from fixed reference points such as flap seam, pocket edge, zipper line, or side seam?
- What print color tolerance or approval standard will be used, especially for Pantone colors printed on natural, dyed, washed, or dark canvas?
Quality-control points to confirm
- Fabric weight matches the approved specification within the agreed tolerance, and bulk fabric is checked by roll or lot before cutting.
- Fabric color, weave, hand feel, and finish match the approved sample, with controlled shade variation across panels and no unacceptable stains, dampness, oil marks, odor, or weak weave.
- Finished measurements meet the written tolerance for body width, height, gusset, flap coverage, pocket size, strap width, strap length range, and closure alignment.
- Seam allowance, stitch density, thread tension, topstitch alignment, binding, and raw-edge control are consistent on visible seams and internal stress areas.
- Bar tacks, X-box stitches, reinforcement patches, rivets, and strap anchors are secure, with no loose stitches, broken threads, seam opening, or distorted hardware under normal pull.
- Print placement matches the approved proof using fixed measurement points, not visual centering alone, and stays within the stated tolerance across the production lot.
- Print color, opacity, registration, edge sharpness, and readability match the approved strike-off or signed sample on the actual canvas color.
- Surface print defects such as smudges, pinholes, ghosting, fisheyes, bleeding, misregistration, scorch marks, transfer shine, cracking, or edge lift stay below the agreed defect limit.
- Dry rub, fold, handling, and adhesion checks show no unacceptable color transfer, tackiness, peeling, or cracking after curing.
- Zippers, sliders, snaps, buckles, rivets, magnetic closures, adjusters, and pullers operate cleanly and show no rust, sharp edges, weak setting, finish peeling, or misalignment.