Start with how the roaster will use the bag
A good specification does not begin with a pretty catalog photo. It begins with the commercial job the bag must do. One coffee roaster may sell wholesale canvas messenger bags as cafe merchandise beside grinders, filters, and whole-bean coffee. Another may issue them to staff for cupping sessions, wholesale account visits, and trade shows. A distributor may want a packed sample kit that carries catalogs, retail coffee bags, tasting cards, and small tools. Those are different products, even if the outside shape looks similar.
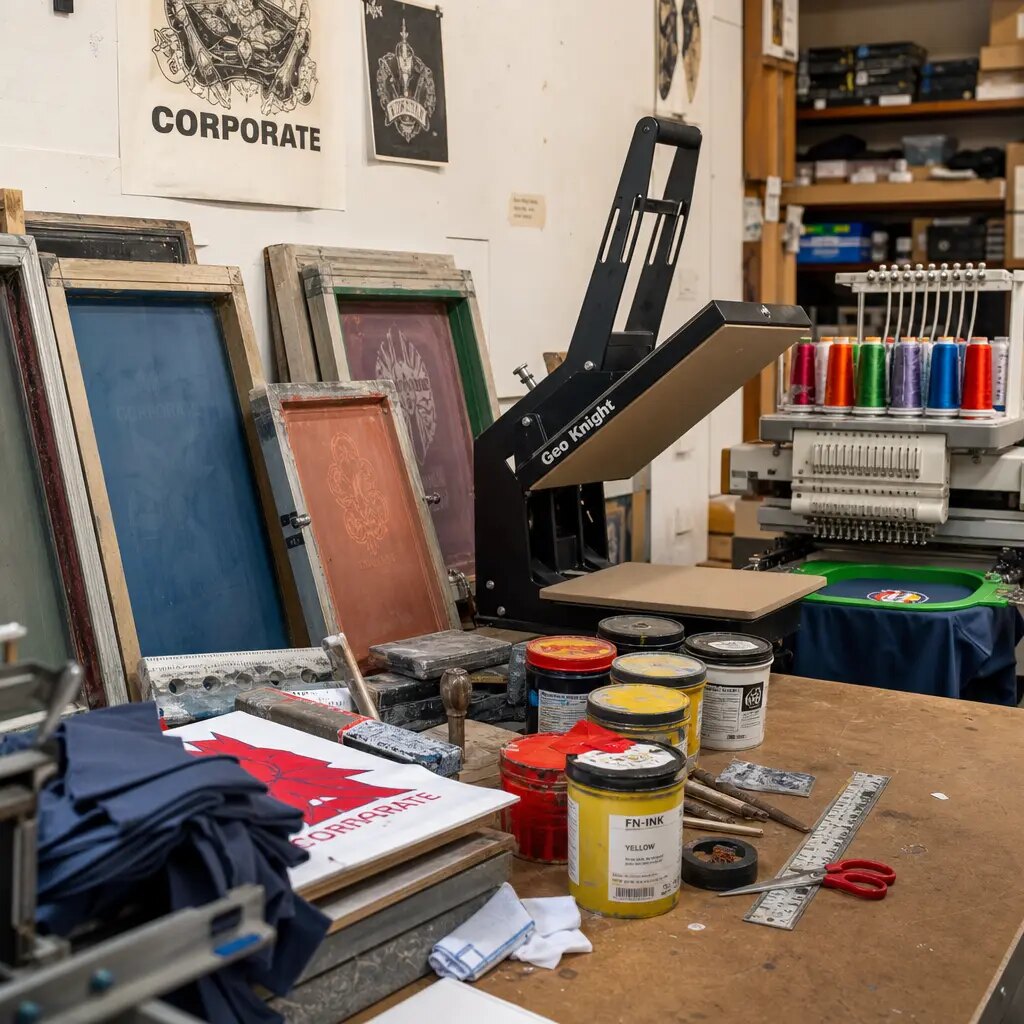
Messenger bags also carry more quality risk than a basic tote. A typical design includes a flap, strap anchors, gusset, buckle or slider, closure hardware, possible zipper, inner pocket, labels, and a more complex folding method for packing. A bag can look fine in a flat front-view mockup and still twist, sag, or pull crooked when loaded. For procurement buyers, the standard has to cover function, retail presentation, and repeatability from carton to carton.
Turn the use case into factory language. Instead of asking for a heavy canvas coffee messenger bag with logo, write something measurable: natural 12 oz cotton canvas messenger bag, finished size 360 x 280 x 90 mm, flap overlap minimum 70 mm, 38 mm adjustable cotton webbing strap, reinforced strap anchors with box-X stitching, one-color screen print centered on flap, individual polybag with barcode, final inspection to agreed AQL. That sentence gives purchasing, design, production, and inspection the same target.
- Define whether the bag is for resale, staff use, wholesale samples, trade show giveaways, subscription programs, or cafe-opening merchandise.
- State the intended contents and approximate load, not just the outside size.
- Identify the retail tier: low-cost promotion, standard cafe merchandise, or premium accessory.
- Ask for photos of the inside, base, gusset, strap anchors, closure, seam finishing, and packing, not only a front view.
- Keep one specification file so procurement, marketing, design, supplier, and inspector work from the same standard.
Specify canvas weight, GSM, finish, and shrinkage early
Canvas is one of the largest cost drivers in wholesale canvas messenger bags for coffee roasters. It is also one of the easiest places for quotes to become misleading. Suppliers may use terms such as 10 oz, 12 oz, 14 oz, heavy cotton, natural canvas, washed canvas, or premium canvas. Those descriptions are not the same. A buying team should ask for the weight in ounces and GSM, then put both into the purchase order.
As a working reference, 10 oz cotton canvas is about 339 GSM, 12 oz is about 407 GSM, and 14 oz is about 475 GSM. The exact value can shift by mill, yarn, weave, and finishing process, so ask the factory to confirm the actual working GSM and tolerance. A plus or minus 5% textile tolerance may be common in some programs, but it is not automatic. If that is the limit you expect, confirm it in writing. For most cafe retail bags and daily-carry merchandise, 12 oz to 14 oz usually gives a more stable structure. A 10 oz fabric can still work for lighter campaigns if the stress points are reinforced.
Finish changes the bag more than many first-time buyers expect. Natural greige canvas gives an organic coffee-brand look, yet small specks and shade variation are easier to see. Dyed canvas needs color control from lot to lot. Washed canvas feels softer but may produce more dimension variation. Pre-shrunk canvas can reduce risk when bags may be exposed to steam, humidity, or later cleaning. A light coating can add body, but it may also change print adhesion. Request a labeled fabric swatch, approve it, and keep it with the sealed master sample.
- Specify canvas weight in oz and GSM, for example 12 oz / approximately 407 GSM cotton canvas.
- Confirm composition: 100% cotton, cotton/poly blend, recycled cotton blend, or another material.
- State finish: natural greige, dyed, washed, enzyme washed, pre-shrunk, pigment dyed, or lightly coated.
- Agree on fabric weight tolerance, shade tolerance, and whether bulk fabric must match the approved swatch.
- For washed or pre-shrunk canvas, ask how shrinkage is controlled and whether finished dimensions are measured after final pressing or washing.
- Do not compare a 10 oz promotional quote with a 14 oz retail quote as if both are the same bag.
Use measurement tolerances that fit sewn canvas goods
Canvas bags are not molded parts. Fabric stretches, pressing changes shape, seams add bulk, and hand handling can introduce small variation. That does not mean size should be vague. It means the buyer needs practical tolerances that an inspector can apply consistently.
For small and medium messenger bags, many buyers work with finished-size tolerances around plus or minus 5 mm for width, height, and gusset, as long as the bag still closes and carries correctly. Strap length may need a wider tolerance, such as plus or minus 10 mm, because webbing cutting and buckle adjustment add variation. Logo placement is usually tighter: plus or minus 3 to 5 mm from agreed reference points is a common target, depending on artwork size and panel shape. Confirm these values with the supplier rather than assuming they are included.
The measurement method matters as much as the tolerance. Define whether width is measured across the top opening, widest body point, or base. Measure height from the top opening to the bottom seam unless the chart says otherwise. Measure flap length from the seam line to the bottom edge. Measure logo position from a stable seam, flap edge, or centered axis, not from a soft curved point. A simple measurement diagram prevents arguments during final inspection.
- Create a measurement table with body width, height, gusset, flap length, flap overlap, strap width, strap range, pocket size, and logo position.
- Use millimeters for production control, even if marketing materials use inches.
- Define the exact reference point for each measurement.
- Use practical tolerances such as +/-5 mm for many body dimensions and +/-3 to 5 mm for logo placement when suitable for the design.
- Check measurements on empty bags and test several filled bags to confirm usable volume and closure alignment.
- Record measurement results during inspection instead of relying on visual judgment.
Match the decoration method to the artwork and fabric texture
Coffee roaster branding often looks simple until it reaches fabric. Circular seals, origin names, cafe addresses, tasting notes, vintage illustrations, and small typography can all behave differently on woven canvas than on a screen. Coarse texture can break fine lines, reduce ink opacity, and make small type hard to read. Decoration should be chosen for repeatable bulk production, not for the cleanest digital mockup.
Screen printing is often the most practical option for bold one- to three-color roastery logos. It can support stable pricing and good opacity on natural or dyed canvas. Still, approve a strike-off on the actual production fabric. Light ink on dark canvas may need an underbase or extra pass. Small type may fill in. A logo printed across a flap fold may crack or distort earlier than one placed on a flat panel.
Embroidery suits small premium marks, patches, or minimal brand details, but it adds tension to the panel. Dense embroidery on 10 oz canvas can pucker unless backing, stitch density, and placement are controlled. Heat transfer may be useful for short runs or complex multicolor artwork, but it must be tested on the chosen canvas. Look closely at transfer edges, gloss level, adhesion, and cracking after flexing.
- Approve artwork at final print size, not just as a high-resolution file.
- Request a strike-off on production canvas for screen print and heat transfer orders.
- For screen print, define Pantone target or physical color standard, ink opacity, registration tolerance, and print placement.
- For embroidery, define thread colors, backing type, stitch density, trimming standard, and maximum acceptable puckering.
- Avoid placing small text across flap folds, seams, heavy curves, or closure stress points.
- Inspect logo placement from fixed edges or seams and set an acceptance limit before bulk production.
Build the strap, flap, base, and hardware around the real load
Messenger bags usually fail where load and movement meet. On this product, that means strap anchors, bottom corners, flap corners, pocket openings, zipper ends, and hardware attachment points. A giveaway bag for documents does not need the same construction as a staff bag carrying coffee samples, cupping spoons, catalogs, and notebooks. Tell the factory what the bag will hold before it quotes the build.
Strap width affects both comfort and perceived value. A 30 mm strap may be acceptable for lighter bags. A 38 to 40 mm strap is often more comfortable for daily carry or heavier contents. Cotton webbing fits a natural canvas coffee aesthetic. Polyester webbing may offer better abrasion resistance, although it can look less organic. Whichever you choose, make the anchor construction visible in the spec: box-X stitching, bartacks, reinforced seam allowance, or a backing patch.
The flap is not only a branding surface. It is the closure system. If overlap is too short, contents show. If snaps or magnets are off position, the flap pulls crooked and the bag looks defective on a retail shelf. A zipper top improves security but adds cost and another inspection point. The base should follow the load requirement: a single layer may be fine for a light campaign bag, while double-layer canvas, bound seams, or a removable bottom board may be better for coffee sample kits and premium retail merchandise.
- Specify strap width, strap material, finished adjustable range, hardware finish, and anchor stitch pattern.
- Require reinforcement at strap anchors, bottom corners, flap corners, zipper ends, and pocket openings.
- Define flap overlap in millimeters and check it while the bag is filled.
- Confirm closure type: open flap, snap, magnetic button, buckle, zipper top, or combined closure.
- Check that buckles and sliders hold position and do not slip under normal loaded use.
- Avoid very thin hardware on bags positioned as premium retail merchandise.
Compare quotes by full specification, not by unit price alone
A low unit price can be useful, but only when every supplier is pricing the same bag. One factory may include 12 oz canvas, individual polybags, barcode labels, and reinforced strap anchors. Another may assume 10 oz canvas, bulk packing, no inner label, and basic stitching. Both quotes may say canvas messenger bag. They are not the same commercial offer.
Create a quote matrix before choosing a supplier. Include canvas weight and GSM tolerance, finished dimensions, lining, base reinforcement, strap material and width, hardware type, decoration method, number of logo colors, logo size, labels, hangtags, packing, carton marks, sample fees, setup charges, MOQ, lead time, Incoterms, and payment terms. Ask suppliers to separate one-time charges from repeat-order costs. Print screens, embroidery digitizing, custom woven labels, fabric dyeing, and sample freight can change the true landed cost.
Timing should also be quoted in stages. Coffee roaster merchandise may be tied to a holiday blend, cafe opening, trade show, subscription box, or wholesale campaign. Ask when the production clock starts. In many factories, lead time starts only after deposit, artwork approval, sample approval, and material confirmation. A quoted 30-day production time can become much longer if fabric booking and sampling are not included in the schedule.
- Require every supplier to quote against the same written specification and artwork version.
- Separate unit price from setup charges, sample fees, packing upgrades, inland freight, export documents, and inspection support.
- Check whether custom fabric color, lining, embroidery, multiple logos, or custom hardware changes MOQ.
- Confirm quote validity and whether material price changes can affect the order before deposit.
- Ask whether the supplier is a direct factory, trading company, or workshop and how it controls repeat orders.
- Compare landed cost under the same Incoterms, such as EXW, FOB, CIF, DAP, or another agreed term.
Use sample approval to freeze what bulk production must match
A sample approval should create a production standard, not just a nice photo in an email. Many quality disputes start when a buyer approves a handmade development sample that does not represent the bulk process. The sample room may use substitute canvas, temporary hardware, hand-cut panels, or extra finishing that will not happen during mass production. That can be acceptable during early development. It is not enough for final approval.
Use staged approval. First, check fabric swatches and hardware options. Next, approve a print strike-off or embroidery sample on the correct canvas. Then approve a pre-production sample made with final materials, final logo, final labels, final strap, final closure, and the intended packing method. Seal one master sample with date, PO number, artwork version, and measurement chart. The factory should keep a duplicate, and the inspector should use the sealed sample during final inspection.
Do not inspect the sample only on a table. Fill it with the intended contents. Wear it on the shoulder. Adjust the strap. Open and close the zipper or snaps. Watch whether the flap remains aligned. Flex the printed area gently to see whether ink cracks or transfer edges lift. Pack it as planned and check whether hardware presses into the logo. These simple actions catch problems a front-view sample photo will miss.
- Approve final fabric, print, strap, hardware, labels, construction, and packing before mass cutting.
- Seal a master sample and reference it in the purchase order.
- Label the master sample with PO number, date, artwork version, fabric weight, and approved measurements.
- List corrections in writing; avoid vague approvals such as approved except minor changes.
- Load-test the sample with actual expected contents, not random filler.
- Confirm whether the approved sample was made by the same workshop or line that will produce bulk goods.
Set AQL, defect severity, and rework rules before inspection
A quality inspection checklist works best when defect severity is agreed before production begins. For canvas messenger bags, critical defects affect safety, legality, or basic usability. Major defects affect function, appearance, retail saleability, or purchase order compliance. Minor defects are small workmanship issues that do not affect use and remain within an agreed limit. If these categories are not defined early, the buyer and supplier may end up negotiating after the goods are already packed.
Critical defects may include broken strap anchors, sharp metal edges, mold, severe chemical odor, contamination, wrong product, or a closure failure that makes the bag unusable. Major defects may include wrong fabric weight, open seams, missing reinforcement, zipper failure, crooked flap, missing labels, significant logo misplacement, large stains, wrong carton quantity, or mixed SKUs without approval. Minor defects may include a small trimmable loose thread, a slight natural speck on unbleached canvas, or a light fold mark inside the approved standard.
If you use AQL, name the standard and inspection level. Many consumer soft-goods inspections reference ANSI/ASQ Z1.4 or ISO 2859-1 sampling plans. Common buyer settings often include 0 critical defects, AQL 2.5 for major defects, and AQL 4.0 for minor defects, but the correct level depends on brand risk, order size, sales channel, and contract terms. The key is alignment. Supplier, buyer, and inspector should all know the reject limits before final inspection day.
- Define critical, major, and minor defects in the purchase order or inspection checklist.
- State the sampling plan and AQL levels, or write a custom sample-size and reject-limit rule.
- Use 0 tolerance for critical defects such as sharp hardware, broken strap anchors, mold, or unsafe contamination.
- Classify wrong fabric weight, nonworking zipper, missing label, severe stain, and major logo misplacement as major defects.
- Agree who pays for rework and reinspection if the shipment fails due to factory-caused defects.
- Require defect photos, carton numbers, sample size, defect counts, and final pass/fail status in the inspection report.
Inspect fabric, sewing, decoration, hardware, labels, and cleanliness in order
Final inspection should follow the way the product is built. Start with carton selection and SKU verification. Then move through fabric, measurements, sewing, reinforcement, decoration, hardware, labels, cleanliness, and packing. Random carton selection is important. If only the cartons closest to the door are opened, an inspector can miss mixed artwork versions, shade variation between batches, or uneven sewing quality from different production groups.
Fabric inspection checks whether bulk material matches the approved swatch in weight, shade, handfeel, weave, and finish. Natural canvas can have small specks, but retail merchandise should not show oil marks, water stains, large slubs, heavy shade mismatch, mold, or strong odor. Sewing inspection covers seam straightness, stitch density, seam allowance, thread color, bartacks, box-X stitching, seam binding, trimmed thread ends, and whether the bag sits square when filled. Strap anchors, bottom corners, zipper ends, and pocket openings deserve extra attention.
Decoration inspection should compare bulk goods with the approved strike-off. Check color, opacity, registration, edge definition, skew, placement, pinholes, smearing, cracking, gloss mismatch, and whether the logo remains centered when the flap is closed. Hardware inspection should be functional, not just visual. Open and close zippers, snaps, magnets, buckles, and sliders more than once. Labels and hangtags should match the PO, sit in the correct position, and remain readable.
- Open cartons from different pallet positions or production batches, not only cartons presented by the factory.
- Measure a defined sample quantity for width, height, gusset, flap, strap, pocket, and logo placement.
- Fill several bags to check shape retention, flap alignment, bottom sagging, and strap balance.
- Operate every inspected zipper, snap, magnetic closure, buckle, and slider during inspection.
- Check the inside of the bag for loose threads, raw edges, missing binding, stains, and needle damage.
- Record each defect by type, severity, quantity, and carton number with clear photos.
Treat packing, barcodes, and carton loading as quality requirements
Packing can protect a good messenger bag or make it arrive looking second-grade. Poor folding can create deep flap creases. A buckle can press a mark into the printed logo. Overfilled cartons can distort gussets and bend flaps. Underfilled cartons can collapse during export handling. Approve the packing method during sampling, not after bulk goods are already finished.
Individual polybags are common for wholesale orders, but they should not force the bag into an undersized fold. Confirm polybag dimensions, warning text where required, barcode placement, and whether protective tissue or silica gel is needed. If the bag has a metal buckle, zipper pull, snap, or magnetic button, check whether a paper insert, tissue wrap, or alternate fold is needed to keep hardware away from printed areas.
Warehouse receiving details belong in the specification. Carton marks should show SKU code, PO number, product name, color, logo version, quantity, carton number, destination, net weight, and gross weight where required. If the order includes several cafe locations or artwork versions, separate them by carton unless mixed cartons are specifically approved. During inspection, barcode scanability and carton count should be checked with the same seriousness as sewing quality.
- Approve the final fold method and packing layout before bulk packing starts.
- Define individual polybag size, barcode type, barcode position, hangtag location, and warning text requirements.
- Set carton quantity, carton dimensions, gross weight target, and carton material standard.
- Protect printed areas from direct pressure by buckles, snaps, sliders, or zipper pulls during transit.
- Prohibit mixed cartons unless the packing list and carton labels clearly identify the mix.
- Check barcode scanability, carton marks, carton count, and SKU separation during final inspection.
Specification comparison for buyers
| Spec decision | Recommended B2B specification | When it fits | Inspection risk to control |
|---|---|---|---|
| Canvas weight | 12 oz to 14 oz cotton canvas, typically about 407 to 475 GSM; allow only agreed mill tolerance, commonly +/-5% if confirmed in writing | Cafe retail merchandise, staff bags, wholesale sales kits, event merch, and commuter-style branded bags | Supplier may quote 10 oz canvas while describing it as heavy canvas; verify by labeled swatch, purchase order spec, and incoming material check |
| Promotional-light option | 10 oz cotton canvas, about 339 GSM, only with reinforced strap anchors, bartacks, and double-layer base if load exceeds light documents | Lower-cost giveaways, short campaign gifts, launch tests, or small bags not intended for daily loaded carry | Fabric can sag, crease at flap folds, distort after printing, and feel below the roaster’s retail positioning |
| Finished size tolerance | Width/height/gusset usually +/-5 mm for small to medium bags; strap length +/-10 mm; logo placement +/-3 to 5 mm depending on print size | Orders requiring repeatable shelf presentation, ecommerce photos, distributor receiving, and reorders | Uncontrolled measurement variation causes uneven flap closure, cartons with inconsistent folding, and customer complaints |
| Canvas finish | Natural greige, dyed, washed, pre-shrunk, or lightly coated canvas declared before sampling; shrinkage target preferably <=3% after agreed wash/steam test where relevant | Natural coffee-brand aesthetics, vintage merch lines, structured retail bags, or bags requiring stable dimensions | Finish changes color, handfeel, shrinkage, print adhesion, odor, and final measurements; bulk must match approved swatch |
| Logo method | Screen print for bold 1 to 3 color logos; embroidery for small premium marks; heat transfer only after adhesion/flex testing on production canvas | Roastery seals, cafe location logos, subscription gift branding, limited seasonal artwork, and distributor programs | Canvas texture can cause pinholes and low opacity; transfers may lift; embroidery may pucker panels under dense stitches |
| Strap and anchors | 30 to 40 mm webbing strap for most messenger bags; box-X stitching or bartacks at anchors; reinforced seam allowance or patch behind anchor | Staff use, wholesale sample carrying, cafe retail bags, notebooks, small coffee packs, and trade show walking use | Weak anchors are major or critical defects; check stitch pattern, thread breakage, anchor symmetry, and pull resistance by agreed test |
| Closure and access | Flap with snap/magnetic button for retail style; zipper top where contents security matters; define flap overlap and closure position in mm | Sales reps carrying samples, customers using bag for commuting, event kits, or bags sold as premium accessories | Misaligned snaps/magnets pull the flap crooked; short flap overlap exposes contents; zipper failure causes functional rejection |
| Reinforcement | Double-layer canvas base, bound seams, reinforced bottom corners, bartacks at pocket openings, and optional removable bottom board | Bags expected to hold roasted coffee bags, catalogs, cupping tools, notebooks, or sample packs | Unreinforced bases twist under load; seam allowances may fray; corners wear early and create return risk |
| Packing | Individual polybag sized to avoid compression, approved fold method, barcode label, carton marks, and carton loading by SKU/logo/color | Ecommerce fulfillment, distributor receiving, cafe retail shelves, chain accounts, and export shipments | Overfilled cartons crush flaps and hardware marks prints; wrong carton labels delay receiving even if product passes visual QC |
Buyer checklist before sampling
- Write the end-use statement first: retail resale, staff carry, wholesale account sample kit, trade show gift, subscription insert, or cafe opening merchandise.
- Confirm the intended load in kilograms or practical contents, such as two 250 g coffee bags plus A4 catalog, cupping spoon set, notebook, sample envelopes, or a light tablet-sized item.
- Lock the finished size in millimeters, including body width, body height, gusset depth, flap length, flap overlap, strap width, strap length range, pocket size, and usable opening width.
- Specify canvas in both ounces and GSM, composition, yarn/fabric type if known, color, finish, shrinkage target, color tolerance, and whether bulk fabric must match the approved labeled swatch.
- Define construction details: lining or unlined, seam binding, stitch density target, thread color, bartack locations, box-X stitching, bottom reinforcement, zipper length, snap/magnet position, and hardware finish.
- State logo method, artwork version, print size, Pantone or physical color target, logo placement from fixed seams or edges, maximum placement deviation, and whether printing across folds or seams is prohibited.
- Require supplier confirmation of dimensional tolerances, typical B2B targets such as +/-5 mm for bag width/height/gusset and +/-3 to 5 mm for logo placement unless another tolerance is agreed.
- Request a fabric swatch, print strike-off on production canvas, hardware sample, label proof, packing mockup, and one sealed pre-production sample before mass production.
- Define AQL or agreed sampling plan, inspection level, acceptable quality limits, and the defect classification for critical, major, and minor defects before production begins.
- Ask for a landed-cost quote that separates unit price, sampling, print screens, embroidery digitizing, labels, hangtags, packing, inland transport, export fees, freight terms, and optional reinspection costs.
Factory quote questions to send
- What exact canvas weight are you quoting in oz and GSM, what tolerance will you guarantee, and can you provide a labeled bulk fabric swatch before cutting?
- Is the canvas 100% cotton, cotton/poly blend, recycled cotton, dyed cotton, washed canvas, or greige natural canvas, and will the bulk lot match the approved sample lot?
- What shrinkage, colorfastness, odor, and shade-variation controls do you use for this canvas finish, and can these be checked before mass cutting?
- What finished bag measurements are included in your quotation, and what dimensional tolerance do you accept for width, height, gusset, flap length, pocket, and strap length?
- Which print or decoration method are you quoting, how many colors are included, what setup charge applies per artwork, and can you make a strike-off on production canvas?
- What placement tolerance do you use for front flap logos, side labels, internal labels, and hangtags, and how do you control skew during production printing?
- What strap width, strap material, thread type, stitch pattern, bartack count, hardware gauge, zipper grade, snap type, and buckle finish are included in the quoted unit price?
- What is the MOQ for the exact quoted specification, and how does MOQ change for custom fabric color, custom lining, embroidery, multiple cafe-location logos, or special hardware?
- Are care labels, woven labels, country-of-origin labels, retail hangtags, barcode stickers, warning text on polybags, and carton marks included or charged separately?
- What is the production timeline after sample approval, separated into material booking, print setup, cutting, sewing, inline QC, packing, final inspection, and export handover?
Quality-control points to confirm
- Canvas weight matches the approved specification within the agreed tolerance, and the fabric handfeel, color, weave, finish, and shade are consistent with the sealed master sample.
- Finished dimensions follow the measurement chart, including width, height, gusset, flap length, flap overlap, top opening, pocket size, strap width, and adjustable strap range.
- Shrinkage-prone or washed canvas is checked against the approved bulk standard so finished bags do not vary excessively from sample to production.
- Panel cutting is symmetrical, with straight top edges, even side panels, aligned flap corners, square gussets, and no twisting when the bag is filled with the intended load.
- Stitch density, seam allowance, thread color, bartacks, box-X stitching, seam binding, and thread trimming match the approved sample and purchase order.
- Strap anchors, bottom corners, flap corners, zipper ends, and pocket openings are reinforced, with no skipped stitches, loose bartacks, broken thread, open seams, or needle damage.
- Print color, opacity, registration, edge sharpness, logo placement, skew, cracking, pinholes, smearing, and fabric show-through are checked against the approved strike-off.
- Embroidery, if used, has correct thread color, backing, density, placement, clean trimming, and no unacceptable puckering or fabric distortion around the logo.
- Heat transfer, if used, is checked for adhesion at edges, gloss consistency, cracking after flexing, and compatibility with rough canvas texture.
- Hardware functions smoothly: zippers open and close without catching, snaps/magnets align, buckles hold adjustment, sliders move correctly, and metal parts have no sharp edges or heavy scratches.