Why craft fair messenger bags need tighter print proofing
A craft fair messenger bag is handled before it is bought. Shoppers open the flap, check the strap, compare colors at close range, and judge whether the print feels like a retail product or a cheap giveaway. That makes proofing more demanding than a basic flat tote order.
The flap is the key surface. It bends over the gusset, rubs against clothing, rests against hardware, and may be stacked under pressure in cartons. A logo that looks centered in a digital mockup can sit too low once the flap hangs. White ink that looks acceptable on a PDF can lose strength over natural cotton flecks. A transfer can photograph well but feel stiff when the flap moves.
For B2B buyers, proofing is not only a design task. It is a procurement control. The order file should define canvas weight, finished dimensions, printable area, logo position, color reference, print method, tolerance, curing expectation, defect classes, and packing method. Those details help suppliers quote accurately and give inspectors a measurable standard.
- Treat the flap as a finished, moving display surface, not a flat rectangle.
- Approve print quality together with fabric texture, sewing tolerance, closure placement, and packing.
- Use millimeter measurements from sewn edges, centerlines, and fold lines.
- Keep signed strike-offs and sealed pre-production samples as the production standard.
- Define acceptable variation before bulk production starts.
Lock the bag construction before final artwork
Start with the physical bag. Finished body width, height, flap length, flap shape, gusset depth, pocket layout, closure type, strap width, strap length range, reinforcement, and hardware finish should be fixed before final print placement is approved. If the construction changes later, the print may still match the artwork file while looking wrong on the bag.
Finished measurements matter more than cut-panel measurements. Canvas panels are turned, stitched, topstitched, pressed, and allowed to relax. Rounded corners reduce usable print area. A deeper gusset changes how the flap falls when the bag is filled. A snap, magnet, or hook-and-loop patch can interrupt the logo-safe zone or press into the print during packing.
Ask for sample photos flat, hanging, and lightly filled. A bag that looks balanced on a factory table may look low or tilted on a booth hook. These views help sales, marketing, and procurement approve the same shopper-facing result.
- Specify finished measurements for body, flap, gusset, strap, pockets, and closure placement.
- Confirm whether the flap is square, rounded, angled, or curved.
- Keep critical text away from topstitching, corners, closures, and the fold line.
- Review the bag lightly filled because gusset depth changes flap angle.
- Do not approve final artwork while flap shape or closure construction is undecided.
Specify canvas weight, GSM, finish, and shrinkage
Canvas is a major cost and quality driver, so avoid casual descriptions. Request both oz/yd² and approximate GSM. As working references, 10 oz cotton canvas is often about 330-350 GSM, 12 oz about 390-410 GSM, 14 oz about 450-475 GSM, and 16 oz about 510-540 GSM. These are not universal conversions; yarn, weave, and finishing can shift the actual number.
For many printed craft fair messenger bags, 12 oz cotton canvas is a practical starting point. It gives the flap more structure than lighter canvas without the seam bulk and freight impact of very heavy fabric. A 10 oz bag may reduce cost and carton weight, but the flap may wrinkle more. A 14 oz or 16 oz option can feel more substantial, but it may require slower sewing, stronger needles, heavier cartons, and extra fold testing.
Finish affects both appearance and print behavior. Natural canvas has flecks and a warm shade that can mute bright ink. Bleached canvas gives a lighter base but may change hand feel and price. Dyed canvas can shift color and may need a white underbase. Washed or enzyme-washed canvas may feel softer but show more shade variation. If the bag will be steamed, pressed, washed, or exposed to damp handling, state how shrinkage and finished measurements will be judged.
- Replace “heavy canvas” with a defined weight and GSM working range.
- Ask whether the canvas is natural, bleached, dyed, washed, enzyme-washed, pre-shrunk, or treated.
- Require shade continuity between swatch, strike-off, and bulk fabric.
- State whether measurements are taken before or after pressing.
- Check carton weight and CBM when comparing heavier canvas options.
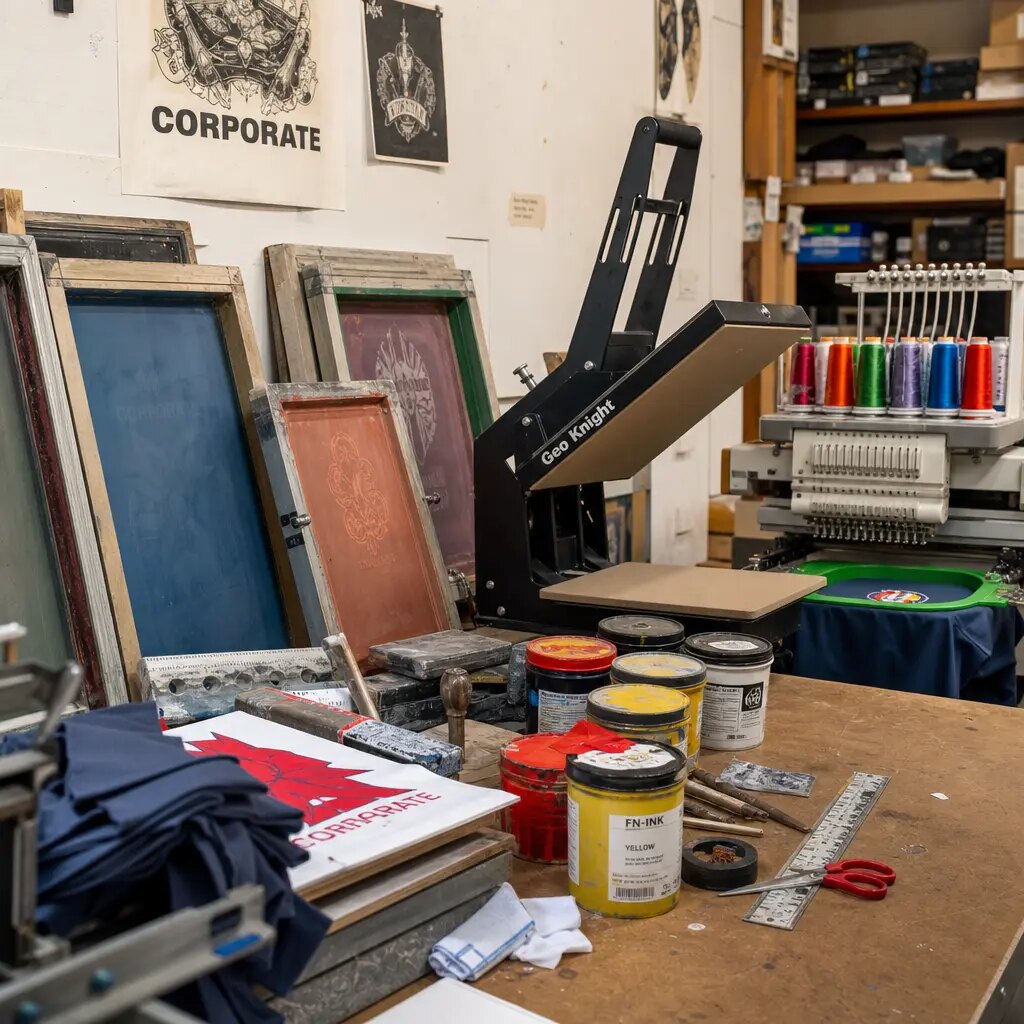
Choose the print method by artwork risk
Screen printing is often the best fit for bold logos, typographic marks, line art, and one-to-four spot colors on canvas messenger bag flaps. It can be durable and economical for repeat orders when ink type, mesh, opacity, squeegee pressure, and curing are controlled. The RFQ should break out screen charges, Pantone mixing, underbase, strike-off costs, and whether screens can be stored for future runs.
Screen print has limits on textured cotton. Slub yarns can break fine lines or small type. White ink on natural or dyed fabric may need an underbase or extra pass, which can improve opacity but increase hand feel. If colors need close registration, define a realistic tolerance and simplify artwork that the factory cannot prove on a strike-off.
Transfer methods such as DTF and heat transfer can suit gradients, full-color art, seasonal designs, and low quantities per artwork. They may reduce screen setup but introduce different risks: visible film edge, heavier feel, heat press marks, edge lift, cracking, and stiffness at the flap. Test transfers on the final flap construction, not only on a loose fabric square.
Embroidery, woven patches, printed labels, and sewn tabs can also work, but each adds controls. Dense embroidery can pucker the flap. Patches need accurate stitching and can mark nearby surfaces in cartons. Woven labels need seam allowance and should not block a pocket or closure.
- Use screen print for bold repeat logos and spot-color artwork.
- Use transfer printing for many colors, gradients, or low design quantities.
- Ask for minimum readable text height and minimum line thickness on actual canvas.
- Confirm whether dark canvas requires a white underbase.
- Test large solid areas for curing, cracking, rub, and offset.
- Review embroidery or patches for pucker, backing, stitch density, and pressure marks.
Build a measurable proof for the finished flap
A professional proof should not say only “center logo on front.” It should state print width, print height, and placement from finished reference points: sewn left and right flap edges, top edge, bottom edge, flap fold line, centerline, topstitching, and closure center. If the flap is rounded or angled, the diagram should show the intended visual center.
For many semi-manual canvas bag productions, ±5 mm from the approved pre-production sample is a practical starting point for print placement on the finished flap. Tighter control may be possible on some post-sewing setups; looser tolerance may be needed on curved flaps or panels printed before sewing. Multi-color registration needs a separate tolerance, often discussed around ±1-2 mm only if the supplier demonstrates it.
Approve the process sequence. Printing before sewing gives a flatter surface, but final logo position depends on cutting and sewing accuracy. Printing after sewing aligns the artwork to the finished flap, but seams, gussets, straps, snaps, magnets, or hardware can interfere with screens or heat presses. The useful question is which method can hold the agreed tolerance on your exact construction.
- State print width and height in millimeters.
- Measure placement from sewn flap edges and centerline, not raw panel marks.
- Define a no-print zone around seams, topstitching, closures, and fold stress.
- Set placement tolerance before mass production.
- Set a separate registration tolerance for multi-color artwork.
- Approve ruler photos of the finished flap with close-ups of key reference points.
Control color, opacity, curing, rub, and fold performance
Pantone matching on cotton canvas is not the same as matching on coated paper. Natural canvas has a warm base and visible flecks. Dyed canvas changes the background under the ink. Washed canvas may absorb ink unevenly. A digital proof can confirm layout, but it cannot prove color, opacity, edge quality, or hand feel.
Use a strike-off on actual production canvas as the color and print standard. If the brand color must be close, identify the lighting condition and keep the fabric base consistent. If natural canvas character is acceptable, define the limit: cotton flecks may show through only when the logo remains legible and consistent with the approved sample.
Curing and rub resistance should be checked before packing. Screen prints need adequate cure; transfers need controlled heat, pressure, peel, and cooling. A print can feel dry but still offset under stacked pressure. QC should include dry rub after the supplier’s stated cure period, light wet rub if required, and fold review along the flap’s natural bend.
Packing should not begin until print stability is confirmed. Large prints should not be stacked print-to-print unless offset resistance has been proven. Transfers need edge-lift and film-outline checks. Screen prints need opacity, cracking, smudging, and odor checks.
- Approve brand color from a production-canvas strike-off.
- Keep the signed strike-off with the PO and inspection file.
- Inspect white and light inks for opacity over flecks and dyed bases.
- Avoid excessive ink buildup that creates a brittle raised surface.
- Run dry rub after the stated cure period; add light wet rub if required.
- Fold the flap along its normal bend and inspect for cracking, whitening, dulling, or edge lift.
Plan MOQ, artwork splits, and quote structure
Craft fair programs often use several designs on one bag style: event names, city editions, seasonal graphics, artist collaborations, or retailer exclusives. To the buyer, this may feel like one order. To the factory, every design may require separate screens, ink mixing, setup, operator control, labels, carton marks, and segregation.
A quote that says “MOQ 500 pcs” is incomplete unless it explains whether that MOQ is per style, fabric color, artwork, print colorway, label, carton mark, or destination. Low split quantities can be workable, but the setup costs and inspection burden should be visible.
A cleaner strategy is to standardize the base bag and vary only the print. One canvas color, one strap width, one closure, one pocket layout, and one packing method are easier to control than multiple fabric colors and hardware sets. Use an artwork matrix listing design name, file version, quantity, print method, color count, Pantone references, base bag color, label, carton mark, and destination.
- Separate MOQ for fabric, sewing, printing, labels, packing, and carton marks.
- Ask whether multiple designs can share one base bag production lot.
- List screen charges per design and color.
- Compare first-order and repeat-order pricing separately.
- Use an artwork matrix to prevent mixed designs and wrong labels.
- Confirm whether overage or shortage tolerance applies by total order or by design.
Compare quotes by landed cost and execution risk
Do not compare wholesale canvas messenger bag quotes by unit price alone. A lower FOB price may exclude strike-offs, revised samples, screen charges, underbase, individual polybags, barcode labels, hangtags, reinforced strap stitching, carton marks, or inspection support. It may also reflect lighter canvas, narrower webbing, cheaper hardware, fewer stitches per inch, or weaker packing.
Messenger bags have more freight exposure than flat totes. Flaps, straps, gussets, closures, sliders, and inner pockets affect carton packing. Heavier canvas and bulky hardware can reduce pieces per carton and increase CBM per 1,000 pieces. If the order must move by air to meet a craft fair date, weight and volume can change landed cost quickly.
Ask suppliers to quote controlled options. If fabric weight is not fixed, compare 10 oz, 12 oz, and 14 oz using the same construction. If artwork is still under review, compare screen print and transfer using the same file. Once approved, the PO should lock fabric, dimensions, print method, tolerance, sample standard, and packing.
- Break out unit price, setup charges, strike-offs, samples, labels, and packing upgrades.
- Request carton dimensions, pieces per carton, gross weight, net weight, and estimated CBM.
- Compare CBM per 1,000 pieces, not only pieces per carton.
- Ask which spec changes trigger requoting after PO release.
- Confirm whether inspection support and defect sorting are included.
- Compare repeat-order cost after one-time setup fees are removed.
Use a disciplined sampling and final QC plan
Sampling should prove the risky variables before bulk production. Start with a fabric swatch and print strike-off to confirm shade, texture, approximate weight, color, opacity, edge clarity, and hand feel. Then approve a full pre-production sample that includes final sewing, print placement, strap length, hardware, closure, label placement, and packing.
Seal, date, photograph, and reference the PP sample to the purchase order. Record artwork file name, version number, Pantone references, finished measurements, print method, print location, tolerance, fabric standard, and approved packing. If a natural slub or textured print edge is accepted, write it down so inspection uses the same standard.
Final inspection should separate print, sewing, hardware, measurement, labeling, and packing defects. Many buyers use ANSI/ASQ Z1.4 or ISO 2859-1, General Inspection Level II, with AQL 0 critical, 2.5 major, and 4.0 minor, but the agreed plan should be stated in the PO. Critical defects may include unsafe sharp hardware, mold, or wrong product identity. Major defects may include wrong artwork, unreadable print, logo shift beyond tolerance, broken strap stitching, missing closure, print transfer, or wrong carton mark.
Add simple test methods to remove argument. Measure finished bags after light pressing. Check dry rub with 10 firm strokes using clean white cotton cloth after cure; visible transfer beyond a light trace should be escalated. Fold the flap along its natural bend 10 times and inspect for cracking, whitening, dulling, or edge lift. Check strap attachment, gusset intersections, flap corners, pocket openings, and hardware function.
- Approve strike-off before bulk cutting when color or texture matters.
- Approve a complete PP sample before mass sewing and printing.
- Keep one sealed PP sample at the factory and one with the buyer or inspector when practical.
- Inspect every artwork version, not only the largest design quantity.
- Treat wrong artwork, wrong barcode, wrong label, and wrong carton mark as major identification defects.
- Define corrective action and reinspection rules when defects exceed agreed limits.
Specification comparison for buyers
| Sourcing decision | B2B specification to request | Typical working range or tolerance | Procurement risk to control |
|---|---|---|---|
| Canvas weight and finish | State oz/yd² and approximate GSM; identify natural, bleached, dyed, washed, enzyme-washed, pre-shrunk, or treated canvas | Working references only: 10 oz often about 330-350 GSM; 12 oz about 390-410 GSM; 14 oz about 450-475 GSM; 16 oz about 510-540 GSM, depending on yarn and finishing | “Heavy canvas” is not enough. Weight and finish affect print opacity, seam bulk, shrinkage, carton weight, and final measurements |
| Finished bag dimensions | Specify finished width, height, flap length, gusset depth, strap length range, strap width, pocket opening, and closure position | Common working tolerance: ±5 mm for simple body/flap dimensions; strap length often ±10-15 mm; tighter tolerances must be proven and agreed | Cut panels change after sewing, turning, pressing, and relaxation. Finished measurements are the only useful retail standard |
| Front flap print placement | Define artwork size and distances from sewn flap edges, centerline, fold line, topstitching, and closure hardware | Common placement tolerance: ±5 mm from approved PP sample for many semi-manual canvas bag runs; multi-color registration may need ±1-2 mm if demonstrated | Digital mockups do not account for rounded flap corners, seam allowance, fold depth, gusset pull, or closure pressure |
| Print method for solid logos | Request screen print on production canvas, including ink type, Pantone mixing, mesh/setup, underbase if needed, and curing controls | Best suited to bold one-to-four-color artwork, repeat orders, and brand marks with clean edges; minimum line thickness must be proven by strike-off | Canvas slub can break fine lines. White ink and light colors may need underbase or extra passes, which can affect hand feel |
| Print method for full-color or low split quantities | Request DTF, heat transfer, or digital transfer with heat, pressure, peel, edge, fold, and rub performance checked on the finished flap | Useful for gradients, seasonal graphics, many artwork versions, or low quantity per design; inspect visible film edge and stiffness | Transfers can lift, crack, show a halo, or change how the flap hangs if settings and packing are not controlled |
| Logo-safe area | Create no-print zones around topstitching, flap corners, snaps, magnets, hook-and-loop tape, rivets, and the natural fold line | Keep critical text and fine lines at least 15-20 mm away from edges, stitching, hardware, and high-stress fold areas where possible | Hardware and seam bulk can create uneven print pressure, heat marks, distortion, or carton pressure marks |
| Strap and hardware | Specify strap material, width, color, length range, slider/buckle material, finish, reinforcement stitch pattern, and corrosion expectation | Common messenger strap widths include 32 mm, 38 mm, and 50 mm; 38 mm cotton webbing is a balanced option for many 12 oz retail bags | Thin straps can look underbuilt on heavier canvas. Metal sliders can mark fabric or press into printed flaps during packing |
| MOQ and artwork splits | Clarify MOQ by bag style, fabric color, artwork, print colorway, label, hangtag, carton mark, and destination | A shared base bag with multiple print designs is usually easier to control than multiple fabric colors and hardware sets | Low MOQ quotes may exclude screen charges, strike-offs, ink mixing, artwork separation, labels, carton segregation, and extra inspection time |
| Sampling sequence | Approve fabric swatch and print strike-off first, then full pre-production sample with final construction, print placement, closure, strap, label, and packing | Keep one sealed approval sample at the factory and one with the buyer or inspection team; record date, artwork version, and accepted deviations | A blank sample plus digital logo does not prove opacity, placement after sewing, fold behavior, rub resistance, curing, or packing protection |
Buyer checklist before sampling
- Issue a written spec sheet before artwork proofing: finished body width, body height, flap length, flap shape, gusset depth, strap width, strap length range, pocket layout, closure type, reinforcement, label placement, and packing method.
- Specify canvas in oz/yd² and approximate GSM range, plus finish: natural, bleached, dyed, washed, enzyme-washed, water-repellent, or pre-shrunk. Avoid terms such as “medium” or “heavy” unless supported by measurable values.
- Define shrinkage expectations if the bag will be washed, steamed, pressed, dyed, or exposed to damp retail handling. State whether finished measurements are taken before or after pressing.
- Provide vector artwork for spot-color printing where possible, with Pantone references, artwork version number, print dimensions in millimeters, and live text converted to outlines.
- Create a finished-bag print placement diagram with distances from left/right flap edges, top edge, lower edge, flap fold line, topstitching, closure center, and bag centerline.
- Set measurable tolerances: for example, logo placement ±5 mm from approved sample, finished body dimensions ±5 mm, gusset depth ±5 mm, strap length ±10-15 mm, and multi-color registration ±1-2 mm if achievable and agreed.
- Require a strike-off on actual production canvas for white ink, dark canvas, fine text, halftones, large solid ink blocks, and transfer prints.
- Confirm whether printing happens before sewing or after sewing, and ask which method gives the factory better control on the finished flap.
- Review ink hand feel, edge sharpness, opacity, underbase requirement, cure status, dry rub, light wet rub if required, and cracking or lift after repeated flap folding.
- Check that snaps, magnets, hook-and-loop tape, sliders, buckles, and strap hardware do not sit under the print or press into printed panels during packing.
Factory quote questions to send
- What exact canvas specification is included: oz/yd², GSM range, yarn or weave description if available, fabric finish, fabric shade, and expected shrinkage?
- Is the canvas natural, bleached, dyed, washed, enzyme-washed, water-repellent, or pre-shrunk, and will bulk fabric match the approved swatch and strike-off standard?
- What finished dimensions and tolerances are included for body width, body height, flap length, gusset depth, strap length, strap width, and pocket opening?
- Will the logo be printed before sewing or after sewing, and what placement tolerance can you hold on the finished flap, measured from sewn edges and centerline?
- Which print method do you recommend for this artwork on cotton canvas, and what are your limits for line thickness, small text height, halftones, gradients, underbase, and color count?
- For screen printing, are screen charges, film output, Pantone ink mixing, setup, strike-offs, revised strike-offs, and screen storage for repeat orders included or separate?
- For DTF or heat transfer, what are the heat, pressure, peel, edge-trimming, hand-feel, fold, and rub-control requirements, and can you test them on the final flap construction?
- Is the quoted MOQ based on total quantity, per bag style, per fabric color, per artwork, per print colorway, per label, per carton mark, or per destination?
- Can multiple craft fair designs share one base bag production lot, and how will you segregate artwork, labels, hangtags, carton marks, and packed cartons to prevent mixing?
- What is the estimated schedule in working days for artwork proof, fabric sourcing, strike-off, pre-production sample, revised sample if needed, bulk cutting, sewing, printing, curing, inspection, and export packing?
Quality-control points to confirm
- Use an agreed sampling plan before production starts. Many soft-goods buyers use ANSI/ASQ Z1.4 or ISO 2859-1, General Inspection Level II, with AQL 0 for critical, 2.5 for major, and 4.0 for minor defects unless the PO states otherwise.
- Define inspection quantity from the lot size and sampling plan. For multiple artwork versions, pull samples from every design and carton mark, not only the largest quantity.
- Finished measurements should be taken on the sewn and lightly pressed bag using the buyer-approved method. Record width, height, flap length, gusset depth, strap length range, strap width, pocket opening, and closure position separately.
- Print position must be checked against finished flap centerline, sewn edge distances, flap fold line, topstitching, and closure position. A placement error beyond the agreed tolerance, such as ±5 mm where specified, should be classified as major if it affects visible branding.
- Pantone or brand color should be judged against the approved fabric strike-off under consistent lighting. Variation caused by cotton flecks, weave texture, natural shade, or dyed base fabric is acceptable only within the buyer-approved standard.
- Ink opacity should be sufficient for the artwork standard without excessive buildup. Inspect white ink, light colors, and underbase layers for weak coverage, pinholes, chalky finish, brittleness, or heavy raised edges.
- Fine lines, small text, and multi-color registration should be inspected both at normal retail viewing distance and close range. Broken lines, unreadable text, and registration beyond the agreed tolerance should be logged separately from acceptable canvas texture.
- Curing should be verified before packing. Check for tackiness, odor, offset marks, smudging, dry rub failure, light wet rub failure where required, and print transfer after stacked storage. A practical dry-rub screen is 10 firm strokes with clean white cotton cloth after the stated cure period; visible color transfer beyond a light trace should be escalated.
- Transfer prints should be checked for edge lift, film halo, heat press outline, scorching, gloss mismatch, cracking at the flap fold, and stiffness that changes how the flap hangs. Rub the transfer edge and fold the flap along its natural bend 10 times for a buyer-approved pass/fail review.
- Seam strength and workmanship should be checked at strap attachment points, side gusset intersections, flap corners, pocket openings, closure reinforcement, and pull points. Loose strap attachment, open seams, missing bartacks, or broken stitching at stress points should be treated as major defects.