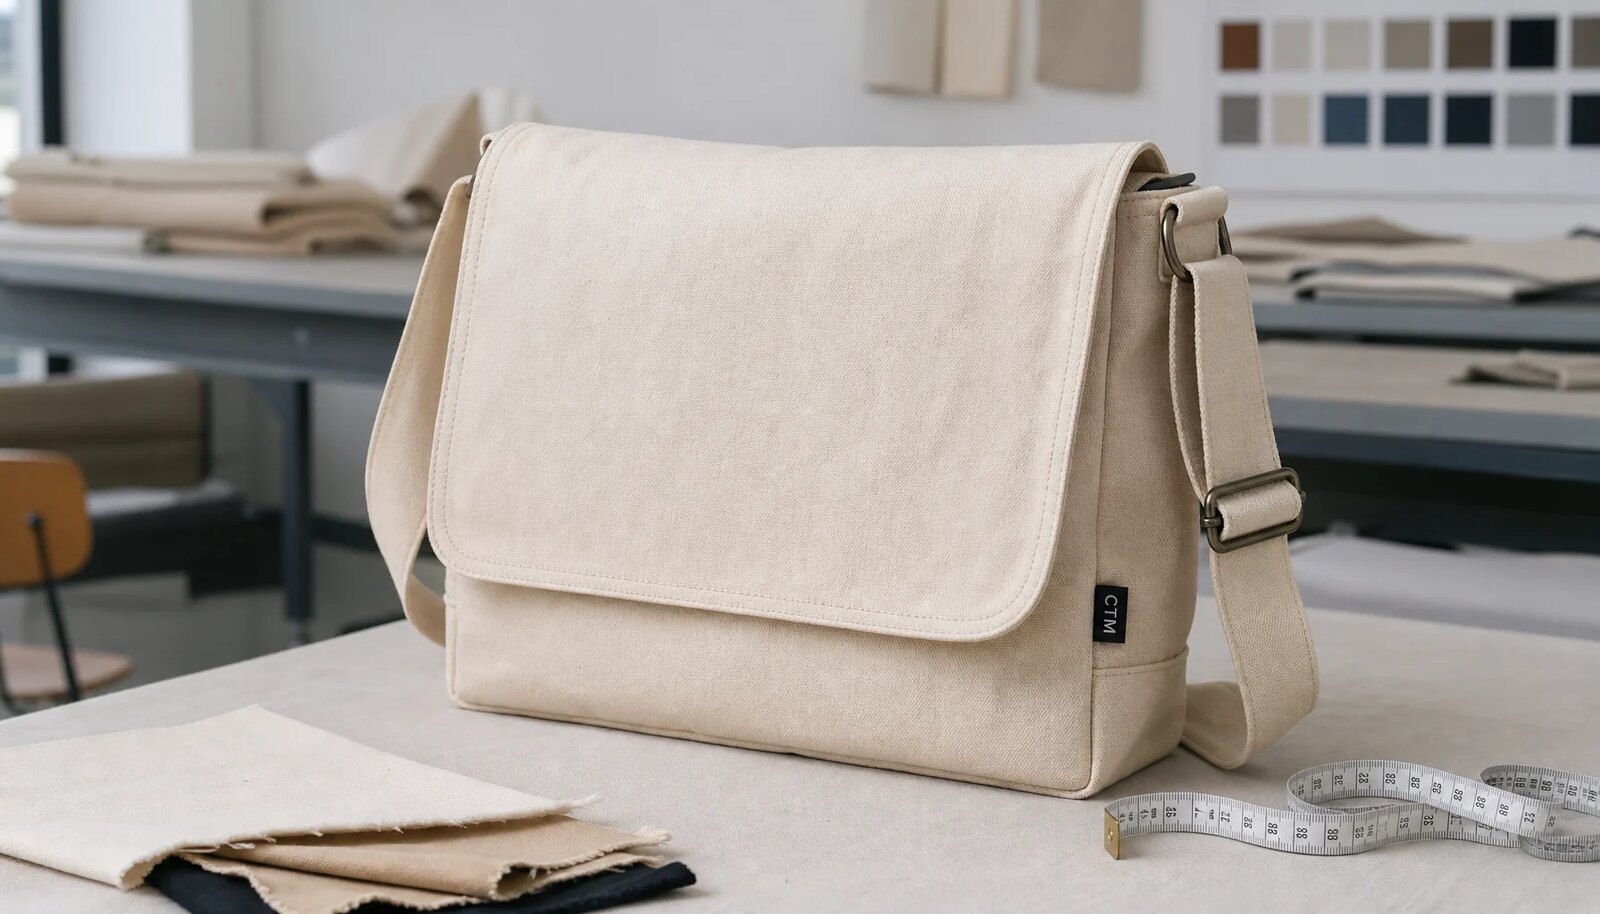
Start With The Real Craft Fair Load
A canvas messenger bag at a craft fair has a harder job than a simple conference tote. One vendor may use it for a phone, POS terminal, cash pouch, receipt book, tape, price tags, pens, scissors, catalogs, a water bottle, and small packaged products. The same style might also sit on a retail table, get handled by shoppers, travel in a van, and return to storage after a weekend event. That mix of work use, resale display, and repeated handling is why wholesale canvas messenger bags for craft fairs need measurable specifications, not only a nice reference photo.
Start the sourcing conversation with the load profile. A staff bag needs strap security and closure function. A retail resale bag needs cleaner sewing, consistent dimensions, neat flap alignment, and better packing protection. A promotional giveaway can be lighter, but the lower load expectation should be written into the RFQ and purchase order. Otherwise one factory may quote a soft 10 oz version while another quotes a reinforced 14 oz product, and the two prices will look comparable when they are not.
Give suppliers the practical details they need to build the right sample. State the normal working load, the higher test load, the likely event duration, and the contents the bag must carry. A 3 kg working load may be enough for brochures and a card reader. A 5 kg working load is more realistic for notebooks, small boxed goods, and a water bottle. The test load should include a margin because end users rarely treat bags gently at busy events.
- Define the product role: resale item, vendor work bag, staff bag, workshop kit, subscription craft kit, or promotional giveaway.
- State normal and test loads, such as 3 kg normal with 5 kg test, or 5 kg normal with 7 kg test.
- List contents by shape and density because bottles, boxes, and tools stress gussets and pockets differently from flat catalogs.
- Tell suppliers whether the bag must stand neatly on a booth table or can be soft, foldable, and more promotional.
- Include handling conditions such as outdoor dust, repeated try-ons, van transport, warehouse repacking, and multi-day event use.
Specify Canvas Weight In Numbers
Canvas weight drives cost, structure, sewing difficulty, print performance, and freight. For many craft fair messenger bag programs, 12 oz cotton canvas, usually about 390-420 GSM, is a sensible starting point. It has enough body for a flap and gusset, feels more substantial than lightweight tote fabric, and still keeps carton weight and sewing complexity under control. If the bag is part of a vendor kit or sold as a durable everyday item, this mid-weight option is often the first sample worth testing.
Heavier canvas has its place. A 14 oz to 16 oz canvas, often around 475-540 GSM, can support a more premium message and may suit maker tool bags or staff bags that carry heavier contents. The tradeoffs are real. Thick folded seams can become bulky, stitch holes can be more visible, flaps can feel stiff, and coarse weave can reduce the sharpness of small printed artwork. Carton gross weight and CBM also rise quickly, which affects landed cost.
Lighter 10 oz to 11 oz canvas, roughly 300-370 GSM, can work for low-load promotional programs, flat brochures, or short event use. It should not be called heavy-duty unless the construction and load test support that claim. A large flap in lighter canvas may curl after packing. Metal snaps may pull on the fabric if reinforcement is missing. Ask for both oz and GSM, set an allowed tolerance such as +/-5%, and keep the approved swatch as the control sample for bulk comparison.
- Use 12 oz canvas when durability, price, printability, and freight all need to stay balanced.
- Use 14 oz to 16 oz canvas for premium resale or heavier vendor contents, but review seam bulk and carton weight before approval.
- Use 10 oz to 11 oz canvas only with a lower working load and reinforced strap construction.
- Specify whether the fabric is greige, dyed, garment-washed, enzyme-washed, pre-shrunk, undyed, recycled cotton, organic cotton, or blended.
- Record approved swatch, GSM tolerance, color standard, hand feel, and shrinkage expectation in the technical sheet.
Control Dimensions, Gusset, And Flap Fit
Shape affects durability as much as fabric weight. A shallow gusset may look clean, but bulky contents push outward against the side seams and flap. A deep gusset improves capacity, yet it increases stress at the corners and can make the bag sag if the canvas is too light. Flap length also needs attention. Too short, and contents are exposed when the bag is loaded. Too long, and the flap may crease, curl, or rub against hardware in the carton.
For procurement, dimensions should be stated as finished measurements after sewing and pressing, not just pattern measurements. Canvas can shrink during finishing, shift during sewing, and compress during packing. A practical tolerance is often +/-1 cm for larger body panels and gussets, with tighter tolerances such as +/-0.5 cm to +/-0.8 cm for pocket openings, closure placement, and logo location when the design allows it. Agree on these numbers before sampling. A reference photo is not a measurement standard.
Always check the sample while loaded. An empty messenger bag can hide problems that appear the moment a bottle or boxed product pushes the gusset outward. The flap may pull to one side. Magnetic snaps may miss their mate. Hook-and-loop may catch only along one edge. Buckles may sit under tension. Measure the bag empty, loaded, and after packing simulation so the approved sample reflects event use rather than showroom stillness.
- Specify finished width, height, gusset depth, flap drop, strap range, pocket opening, and closure placement.
- Set body tolerance separately from logo and pocket tolerance because visible alignment defects need tighter control.
- Check flap alignment with realistic contents inside the bag, not only on an empty sample.
- Confirm whether measurements are taken before pressing, after pressing, or after final packing.
- Photograph the approved sample from front, side, back, bottom, and inside views for factory and inspector reference.
Engineer Straps Before They Fail
Most canvas bag failures do not start in the middle of the fabric panel. They start where load changes direction: strap anchors, side seams, gusset corners, flap base, pocket tops, zipper ends, and closure reinforcements. For craft fair use, strap joints deserve extra attention. The bag is lifted from a car, swung onto a shoulder, adjusted, set under a booth table, and picked up again. A single-line seam may be acceptable on a very light giveaway. It is a weak default for vendor work bags or retail resale goods.
A stronger strap joint usually combines adequate webbing overlap, box-and-cross stitching, and bartack reinforcement where the construction allows it. The reinforcement should sit on a stable area, not too close to a raw edge where stitch holes can create a tear path. Stitch density also needs balance. Loose stitches can pop under load. Overly dense stitches can perforate cotton canvas. Thread size, needle choice, seam allowance, and reinforcement patch size should all match the fabric weight and target load.
Do not ignore pockets. Craft fair vendors put dense objects in them: card readers, phones, coin pouches, scissors, tape, pens, and small tools. A thin inner pocket can fail even when the outer body looks fine. Pocket top edges, zipper stops, and divider seams need reinforcement or careful finishing. Inspect the sample inside and out so hidden construction does not become the weak point in bulk production.
- Require box-and-cross stitching or equivalent reinforcement at both strap attachment points for working bags.
- Define strap webbing width, commonly 38-50 mm, plus fiber content, thickness or weight, color, and adjuster compatibility.
- Check that bartacks and dense stitch areas do not sit too close to raw canvas edges.
- Specify seam allowance, stitch density, thread color, thread strength, binding, overlock, or turned-edge finishing in stress zones.
- Inspect pocket tops, zipper ends, flap base, gusset corners, and side seams after load testing, not only before testing.
Run A Repeatable Durability Test
A durability testing checklist does not need to be complicated. It does need to be repeatable. The goal is not to promise lifetime performance; it is to expose weak construction before bulk production. Start by recording sample measurements and taking close photos of strap anchors, hardware, seams, pockets, closure, logo, and packing. Then test the bag with realistic contents. Flat metal weights are easy to measure, but boxes, a bottle, a notebook, and a small pouch create pressure points closer to actual craft fair use.
Use both a normal working load and a higher test load. If the intended working load is 5 kg, a 7 kg test load gives a practical margin for sample review. Hang the bag by the strap. Carry it on the shoulder. Adjust the strap several times. Lift and set it down repeatedly. Cycle the closure while loaded. After the test, inspect for stitch popping, seam opening, fabric distortion, strap slippage, hardware bending, closure misalignment, pocket tearing, flap curl, and logo scuffing.
Be strict about early warning signs. A sample that survives but shows elongated stitch holes, webbing creep through the slider, puckering around strap anchors, stretched pocket tops, or hardware pressure marks is telling you something. Those small issues can become bulk complaints after shipping, storage, and event use. Put the pass/fail criteria into the PO so the factory knows load testing is part of acceptance, not a casual buyer preference.
- Measure before testing: body width, height, gusset, flap drop, strap range, pocket opening, logo position, and closure alignment.
- Load realistically using flat items and dense items so pressure points appear at gussets, pockets, and flap closures.
- Hang the bag by the strap with the agreed test load and inspect strap anchors, side seams, and hardware afterward.
- Carry the loaded sample for at least 30 minutes if practical, including walking, adjusting, lifting, and setting down.
- Cycle the closure while loaded to verify magnetic hold, hook-and-loop grip, buckle function, or tuck-lock alignment.
- Photograph all post-test changes, including stitch stretch, seam distortion, print scuffing, flap curl, and hardware marks.
Match Branding To Canvas Handling
Decoration is a durability decision as well as a branding decision. Screen printing is usually practical for wholesale canvas messenger bags with one to three solid colors, especially when artwork is bold and quantities justify setup. It can keep unit economics clean, but performance depends on ink type, curing, fabric surface, and placement. A print on a flat front panel may perform well. A print on a flap that bends, rubs against a buckle, or presses against another bag in a carton needs tougher testing.
Heat transfer can reproduce fine detail, gradients, or small artwork splits, but adhesion on heavy canvas must be proven on the exact fabric. Coarse weave, fabric dust, washing treatments, and uneven surfaces can reduce bond strength. Embroidery can look premium, yet it may pucker lighter canvas, add stiffness, and become expensive for large designs. Woven labels are often safer for textured canvas, complex artwork, or multi-logo programs because the same base bag can accept different labels with less print risk.
Placement matters. A flap logo is visible on a retail table, but it bends and rubs more than many buyers expect. A lower front-panel logo may be safer but can disappear under the flap. A side label lowers decoration risk but is less prominent. Record artwork size, color reference, placement tolerance, method, curing or application standard where relevant, and unacceptable defects such as cracking, bleeding, transfer, misregistration, skew, and poor edge definition.
- Use screen print for bold solid logos and bulk craft fair programs where cost control matters.
- Use woven labels for textured canvas, multi-SKU designs, or artwork that is too detailed for clean canvas printing.
- Use heat transfer only after adhesion, rub, and crease testing on the exact bulk fabric.
- Avoid placing fine artwork across seams, flap folds, gusset transitions, or hardware contact points.
- Require dry rub, wet rub where relevant, crease review, color check, and packing-transfer inspection before bulk approval.
Compare Quotes On One Technical Sheet
Messenger bag quotes can vary sharply because small specification changes affect material cost, labor time, defect risk, and freight. A supplier quoting 10 oz canvas, single-line strap stitching, simple plastic hardware, and bulk packing is not quoting the same product as a supplier quoting 14 oz canvas, reinforced strap anchors, metal adjusters, zipper pocket, woven label, and protected packing. Send one technical sheet to every factory and ask for line-by-line confirmation.
Look at MOQ by split, not only by total order quantity. A 1,000-piece order may sound efficient, but four fabric colors, five logos, two hardware finishes, and separate carton marks create many smaller production batches. Dye lots, print screens, transfer films, woven labels, barcode stickers, and inspection sorting all add setup work. Ask for MOQ by fabric color, print design, label design, hardware finish, carton mark, barcode label, and packing version before you approve artwork.
Separate the base bag from optional upgrades. Request add-on pricing for zipper pockets, dividers, key loops, woven labels, hangtags, barcode stickers, individual bags, recycled cotton content, contrast binding, upgraded hardware, custom dyeing, and stronger carton packing. This makes the decision cleaner: which features improve durability or sales value, and which are mostly cosmetic? Compare landed cost with carton dimensions, gross weight, net weight, CBM, inspection cost, and freight impact included.
- Request price tiers at 300, 500, 1,000, and 3,000 pieces using identical material and construction.
- Ask suppliers to confirm every technical sheet line rather than writing quoted as photo.
- Separate setup charges from unit price, including screens, labels, molds, dyeing, sampling, and artwork preparation.
- Confirm overage or shortage tolerance for custom-dyed, custom-printed, or custom-label orders.
- Compare carton quantity, gross weight, net weight, CBM, and packing method because freight can change the true landed cost.
Approve Samples As Control Tools
The approved sample is not just a nice example. It is the control tool for bulk production. It should confirm the canvas, dimensions, strap construction, thread, hardware, closure, decoration, pocket layout, label placement, finishing, and packing. If the sample uses substitute fabric, temporary hardware, approximate logo placement, or a different print method, mark it clearly as a development sample or fit sample. Do not treat it as final pre-production approval for bulk cutting.
A useful sample approval sheet includes numbers. Record finished size tolerance, strap range, pocket dimensions, flap alignment, closure location, logo size, logo placement tolerance, stitch density target, and approved trim details. For many sewn canvas bags, +/-1 cm may be workable for larger body dimensions. Smaller visible elements usually need tighter control. The factory and buyer should agree on the tolerance before production begins, not during final inspection.
For larger or higher-risk orders, consider semi-destructive checks on at least one sample. Cutting a seam to confirm seam allowance, checking hidden reinforcement, or pulling a strap anchor to failure can be cheaper than finding weak construction after finished goods are packed. Keep at least two reference samples: one sealed for buyer comparison and one held by the factory. Use a separate working sample for load and packing tests so the sealed control sample stays clean.
- Approve only samples made with intended bulk canvas, webbing, thread, hardware, closure, decoration method, and packing approach.
- Measure and record width, height, gusset, flap drop, strap range, pocket size, closure position, and logo placement.
- Photograph strap joints, pocket tops, hardware, seam finishing, print details, carton packing, and labels.
- Mark substitute-material samples clearly so sourcing, factory, and QC teams do not confuse them with final approval.
- Attach signed sample notes, artwork files, measurement sheet, packing instruction, and defect standards to the purchase order.
Build QC Around Prevention
Quality control should begin before bulk sewing, not at the final inspection table. Pre-production checks confirm that fabric rolls, webbing, hardware, labels, print materials, and sample standards match the PO. In-line inspection catches early cut-panel problems, strap stitching errors, pocket weakness, closure placement issues, and print registration problems before they repeat across hundreds or thousands of units. Final inspection then verifies finished and packed goods against the approved sample, technical sheet, and carton allocation.
AQL inspection can find dirty canvas, wrong labels, open seams, color variation, missing hardware, and packing errors. Messenger bags also need functional checks. Inspectors should load selected units, pull strap joints within agreed limits, cycle closures, adjust sliders, rub printed areas, and inspect packed cartons for compression or transfer risk. The report should include measurement tables, stress-point photos, defect classifications, and confirmation that carton marks match SKU allocation.
Write defect definitions before production. Critical defects may include broken straps, sharp hardware, rust marks, unsafe burrs, wrong logo, severe contamination, or open seams at load points. Major defects may include weak closure, visible print scuffing, crooked flap, unacceptable dimension variation, loose hardware, or damaged cartons. Minor defects may include removable thread ends or small internal marks within tolerance. Clear classification keeps the conversation focused on prevention rather than argument.
- Use pre-production QC for fabric GSM, color, shrinkage expectation, webbing, hardware, labels, print test, and construction confirmation.
- Use in-line QC for strap attachment, stitch density, pocket reinforcement, closure alignment, logo placement, and seam consistency.
- Use final inspection with AQL plus functional checks for load, closure cycling, print rub, hardware adjustment, and packing protection.
- Define critical, major, and minor defects in the PO so rejection rules are clear before goods are finished.
- Require inspection photos of strap joints, gusset corners, flap alignment, logo position, hardware, pockets, stains, and carton condition.
Pack For Event-Ready Arrival
Packing is part of product quality, especially for craft fair programs. Natural canvas and light dyed canvas can pick up dust, carton fibers, oil marks, water stains, and ink transfer. Messenger flaps can crease if folded too sharply. Metal hardware can press into the front panel or logo during transit. A bag can pass sewing inspection and still arrive unsuitable for retail display if packing is treated as an afterthought.
Flat packing is often safer than hard folding for structured messenger bags, but it increases carton size. The flap should sit smoothly, the strap should be controlled, and hardware should not rub against printed panels. If individual polybags are avoided for sustainability reasons, specify clean carton liners, paper interleaving where needed, and protection between hardware and decoration. If individual packing is used, confirm warning text, ventilation holes, barcode labels, recycled material claims, and destination requirements.
Carton planning affects both landed cost and warehouse execution. Heavy 14 oz to 16 oz canvas can raise gross weight quickly, while wide flaps increase CBM. Over-compression may reduce freight cost on paper, but it can create flap creasing, hardware dents, and print transfer. Approve a packing sample or carton packing photos before mass packing starts, especially when the bags must arrive ready for craft fair season, retail kitting, or regional event allocation.
- Specify flat pack, folded pack, individual pack, or bulk pack, including how flap, strap, and hardware sit inside the carton.
- Protect printed panels from buckles, snaps, sliders, magnetic closures, and rough webbing contact.
- Use clean carton liners or interleaving for natural canvas and light colors to reduce dust, moisture, and carton fiber contamination.
- Confirm pieces per carton, carton dimensions, gross weight, net weight, CBM, carton strength, and carton marks.
- Label cartons by PO, SKU, color, logo version, quantity, destination, and event allocation to reduce warehouse sorting errors.
Specification comparison for buyers
| Procurement decision | Recommended B2B specification | Use case fit | Quote and QC risk to control |
|---|---|---|---|
| Main canvas weight | 12 oz cotton canvas, typically about 390-420 GSM; state allowed tolerance such as +/-5% GSM before cutting | Balanced wholesale canvas messenger bags for craft fairs, vendor kits, retail resale, light tools, notebooks, catalogs, and payment devices | Require actual GSM report or cut swatch weight check; reject vague quotes that say heavy canvas without oz, GSM, or fabric basis |
| Premium canvas option | 14 oz to 16 oz canvas, typically about 475-540 GSM; confirm finished bag weight and folded seam bulk | Retail programs positioning durability as a selling point, maker tool bags, staff work bags, or heavier booth contents | Check needle damage, seam bulk, flap stiffness, carton gross weight, CBM, and print clarity on coarse weave |
| Budget canvas option | 10 oz to 11 oz canvas, typically about 300-370 GSM; only with reinforced strap joints and smaller working load | Low-load promotional bags for brochures, flat samples, simple giveaways, or limited event use | Large flaps may curl or collapse; require loaded sample testing and a written load limitation in the PO |
| Finished size tolerance | Body panels commonly +/-1 cm; small pockets and logo placement commonly +/-0.5 cm to +/-0.8 cm if feasible by design | Needed for resale displays, SKU consistency, carton planning, and logo alignment on flap panels | Tolerance must be agreed before sampling; do not reject bulk against an unrecorded reference photo |
| Strap construction | 38-50 mm webbing; box-and-cross stitching with adequate overlap, bartack where suitable, and no single-line load seam for work bags | Full-day shoulder carry, booth setup, vehicle-to-table handling, and repeated customer try-ons | Inspect strap anchor position, stitch density, thread size, seam allowance, webbing slippage, and fabric tearing after load testing |
| Hardware and adjuster | Metal slider, D-ring, square ring, tuck lock, snap, or reinforced plastic hardware matched to strap width and target price | Adjustable fit for staff, vendors, and resale buyers; premium appearance if finish is consistent | Check burrs, rust, plating marks, sharp edges, deformation, strap creep, and pressure marks on light canvas |
| Closure method | Magnetic snap, hook-and-loop, buckle, tuck lock, or no closure depending on use case and price level | Magnetic snap for clean retail; hook-and-loop for utility; buckle or tuck lock for heritage or premium styling | Test closure alignment with a loaded bag; weak magnets, noisy hook-and-loop, or stiff buckles become user complaints |
| Logo method | Screen print for solid artwork; woven label for texture or SKU splits; embroidery or heat transfer only after sample testing | Screen print is practical for one to three solid colors; labels reduce risk on coarse canvas and multi-logo programs | Require dry rub, crease, adhesion, packing-transfer, color, and placement checks on the final canvas |
| Internal organization | Inner slip pocket plus optional zipper pocket, divider, pen slot, key loop, or cash/card-reader pocket | Useful for craft fair vendors carrying phone, receipt book, POS device, tags, tape, scissors, and small tools | Pocket top edges and zipper ends often fail before main fabric; inspect dense-item pocket loading |
Buyer checklist before sampling
- Define the commercial use first: retail resale, vendor kit, event staff bag, workshop kit, subscription craft box, museum shop item, or promotional giveaway.
- State finished width, height, gusset depth, flap drop, strap length range, pocket layout, and intended working load instead of relying on a reference image.
- Specify canvas in oz and GSM, acceptable GSM tolerance, fabric finish, shrinkage expectation, dyeing method, and whether cotton must be recycled, organic, undyed, washed, or pre-shrunk.
- Set a normal working load and test load, such as 3 kg normal with 5 kg test, or 5 kg normal with 7 kg test, based on real contents.
- Require swatches before sampling and confirm the pre-production sample uses the same fabric, webbing, thread, hardware, closure, print method, and packing plan intended for bulk.
- Define strap webbing width, thickness or weight, fiber content, adjuster type, reinforcement pattern, stitch density, thread type, and attachment overlap.
- Approve logo decoration on actual canvas with placement tolerance, color reference, rub resistance requirement, and restrictions around seams, flap folds, and hardware contact points.
- Measure samples before and after load testing, including flap alignment, gusset depth, pocket opening, strap adjustment range, and logo position.
- Classify critical, major, and minor defects before production so QC teams can make consistent accept/reject decisions.
- Require carton packing photos, carton dimensions, gross weight, net weight, CBM, carton marks, SKU allocation, and protection method before bulk goods are sealed.
Factory quote questions to send
- What is the exact canvas specification: oz, GSM, weave, yarn count if available, fiber content, color process, finishing process, and whether the fabric is washed, pre-shrunk, coated, or unwashed?
- What GSM tolerance can you guarantee in bulk, and will you verify fabric weight before cutting by roll inspection, swatch weighing, or supplier mill report?
- Can you quote 10 oz, 12 oz, 14 oz, and 16 oz versions using identical dimensions so we can compare unit cost, finished structure, carton weight, CBM, and perceived retail value?
- What is the expected shrinkage after washing or finishing, and are finished dimensions quoted before or after pressing and packing?
- What strap webbing width, thickness, material, colorfastness level, adjuster type, reinforcement method, stitch density, thread type, and attachment overlap are included in the price?
- Can you provide close-up photos or a construction diagram for strap joints, including box-and-cross dimensions, bartack count where used, seam allowance, and reinforcement patch if any?
- Which hardware material and finish are quoted, and how will you check burrs, sharp edges, plating defects, rust marks, deformation, and strap slippage?
- Which closure do you recommend for our load and selling price, and how will you test magnetic hold, hook-and-loop grip, buckle function, or tuck-lock alignment when the bag is loaded?
- Which decoration method do you recommend for our artwork, and what dry rub, wet rub, crease, adhesion, curing, or packing-transfer checks can you perform on the final canvas?
- What is the MOQ per fabric color, print design, woven label design, hardware color, carton mark, barcode label, and packing version?
Quality-control points to confirm
- Canvas weight tolerance should be written in the technical sheet, with approved swatch retention and bulk roll verification before cutting.
- Finished bag dimensions should be checked after sewing, trimming, pressing, and packing; body tolerance may be +/-1 cm while pockets and logo placement often need tighter control if the design allows.
- Strap joints should pass the agreed loaded hanging or pull test with no stitch popping, webbing slippage, fabric tearing, hardware deformation, or visible seam distortion.
- Side seams, gusset corners, flap base, pocket tops, and zipper ends should have adequate seam allowance, even stitch density, no skipped stitches, no loose thread nests, no open seams, and no exposed raw edges in stress zones.
- Thread, stitch count, bartack position, reinforcement patch size, and seam finishing should match the approved pre-production sample, not only the reference photo.
- Decoration should pass dry rub and packing-transfer checks and should not transfer to the flap, strap, hardware, carton liner, or adjacent bag during compression and transit simulation.
- Closure alignment should be consistent across inspected units, with no puckering, weak magnetic hold, misaligned hook-and-loop, loose buckle prongs, or difficult operation when the bag is loaded.
- Hardware should be free from rust, burrs, sharp edges, weak plating, inconsistent finish, deformation, and adjustment creep under load.
- Light canvas should be checked for oil marks, chalk marks, dust, water stains, mildew odor, mixed fibers, visible handling dirt, and carton fiber contamination before packing.
- Cartons should protect bags from moisture, crushing, hardware pressure marks, ink transfer, over-compression, strap tangling, and excessive flap creasing during export handling.