Start with the buying risk, not the tote photo
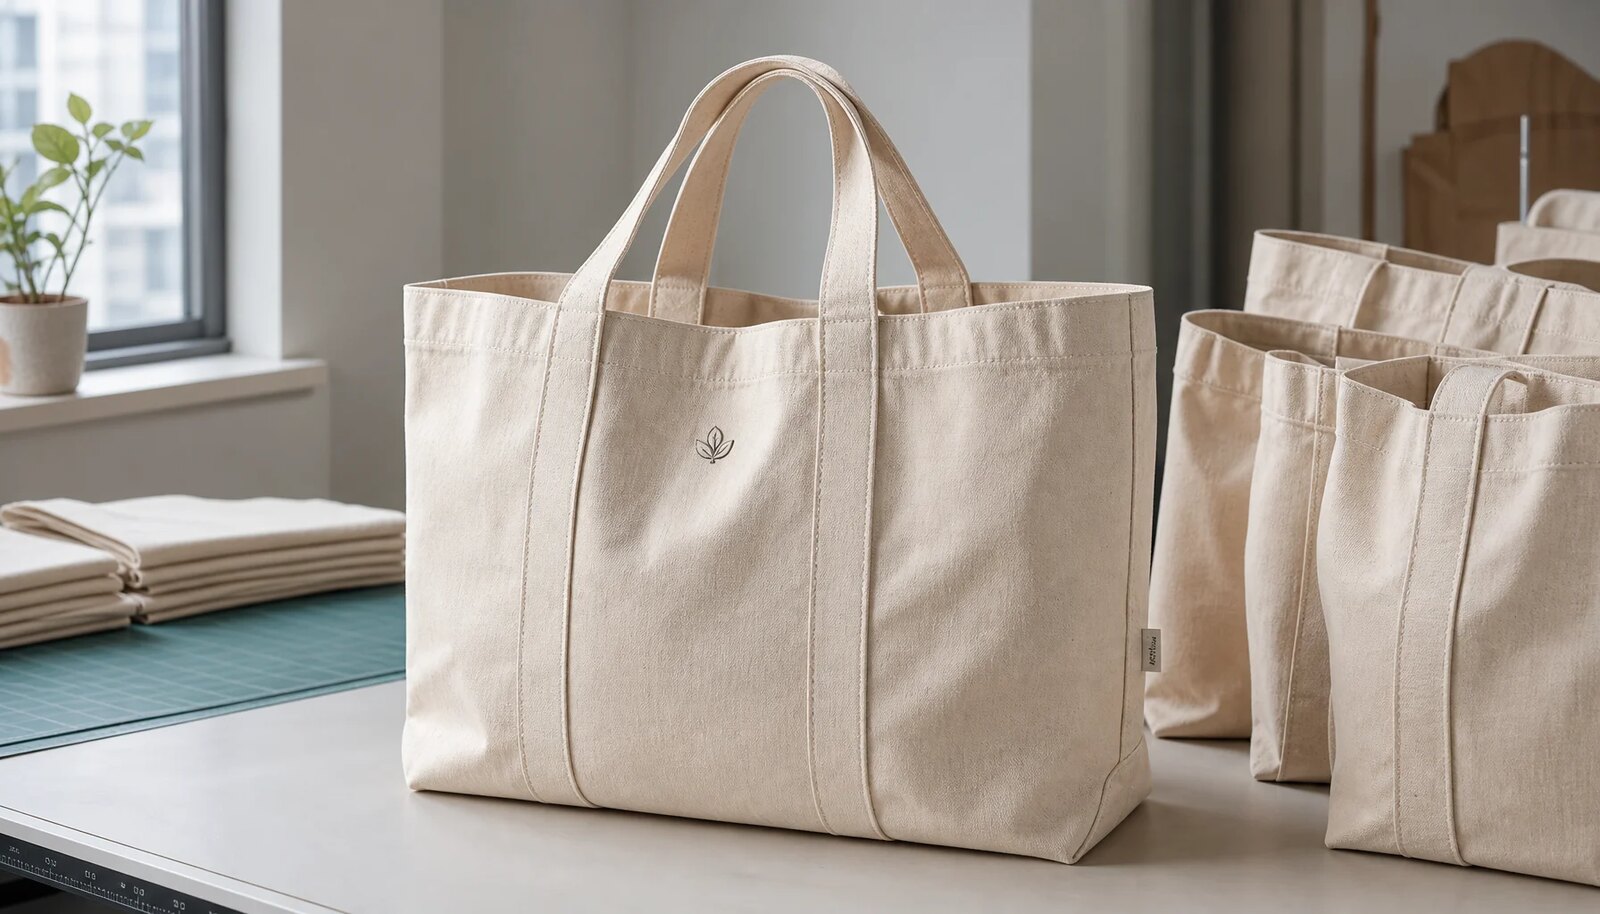
Wholesale canvas grocery totes look straightforward in a product image, but the real sourcing risk sits in the details procurement cannot see on a mockup. Canvas weight, fabric shade, gusset construction, handle reinforcement, print curing, folding, carton marks, and warehouse requirements all affect whether the order arrives ready for retail, wholesale distribution, or e-commerce packing. For eco apparel brands, the tote often carries brand values as much as product. If it feels flimsy, smells of under-cured ink, arrives dusty, or shows an uneven logo, the issue is visible to customers and wholesale partners.
The safest approach is to treat the tote as a manufactured textile product, not as a blank surface for a logo. A digital proof can confirm artwork size and layout, but it does not confirm how ink sits on cotton weave, whether natural canvas shifts the perceived color, whether the print cracks after folding, or whether handles can carry the intended load. Those checks require a physical pre-production sample and a written standard.
Procurement should use proofing to answer four questions before bulk release. First, is the base bag exactly the construction being purchased? Second, is the print method suitable for this artwork on this fabric? Third, can the supplier repeat the approved result across the full order? Fourth, will the packed goods arrive clean, counted, labeled, and usable for the intended channel? When those questions are built into the RFQ, quote review, sample approval, and QC plan, the buying process becomes much easier to control.
- Approve the final tote as a product, not only as artwork on a mockup.
- Keep one signed, sealed, or clearly photographed approved sample as the bulk inspection standard.
- Make proof approval conditional on fabric, construction, print, trim, and packing, not logo appearance alone.
- Write down what is accepted, what is rejected, and what still needs correction before production release.
Specify canvas weight, finish, and construction clearly
Canvas weight is one of the first cost and quality drivers. Many reusable grocery-style canvas totes for apparel brands are specified around 10 oz to 12 oz cotton canvas, often about 340 to 420 GSM before finishing. That range usually gives more structure and opacity than light promotional cotton while staying practical for folding, carton packing, and freight. It is not automatically the right choice for every project, but it is a realistic starting range for retail-facing, repeat-use totes.
Procurement should confirm how the supplier defines fabric weight. Some suppliers quote oz per square yard, some quote GSM, and some reference finished fabric after washing or dyeing. A 12 oz canvas before finishing may not behave exactly like a 12 oz fabric after processing. If the brand is comparing multiple suppliers, ask each one to state the same measurement basis and tolerance. A small difference in weight can change hand feel, print opacity, carton count, and landed cost.
Natural unbleached canvas is common for eco apparel brands because it gives a lower-processed look, but it is not a perfectly uniform white base. It may show seed flecks, slubs, neps, and warmer shade variation. That can be attractive when approved intentionally, but it can also make brand colors appear duller or warmer than expected. Bleached canvas gives a cleaner print base and may support tighter visual consistency. Dyed canvas adds another approval layer because fabric color and print color must be judged together.
Construction must be specified before price comparison. Finished size, gusset depth, bottom shape, top hem, seam type, handle drop, handle width, reinforcement method, stitch density, thread color, label location, and fold method all affect production cost. If those details are missing, one supplier may quote a flat tote with basic handles while another quotes a structured grocery tote with reinforced attachments. Both quotes can be honest, but they are not quoting the same product.
- State canvas as exact oz and GSM, plus fabric composition and finish.
- Confirm whether fabric weight is quoted before or after washing, dyeing, bleaching, or finishing.
- Approve natural canvas shade range with real fabric swatches, not only photos.
- Define finished dimensions, gusset, top hem, handle width, handle drop, stitch type, and reinforcement size.
- Include the intended use: retail sale, apparel store shopping bag, e-commerce insert, event tote, or wholesale account packaging.
Translate brand artwork into production instructions
A print proofing checklist starts with artwork discipline. Send vector files when possible, outline fonts, include linked assets, and identify final print dimensions. If artwork includes small type, thin lines, halftones, gradients, distressed texture, or reversed areas, flag those details early. Canvas is textured, absorbent, and less precise than paper or coated synthetic materials. A mark that looks clean on a PDF can lose definition when printed across weave peaks and valleys.
Screen printing is often practical for bold one- to three-color logos and repeat programs. It can deliver strong opacity and controlled cost when artwork is simple and stable. The buyer should still confirm screen count, ink type, mesh suitability, color sequence, print area, curing process, and whether setup fees are included or separate. For larger solid prints, ask the factory to show how the ink hand feel will affect folding and customer use.
Transfer and digital print methods may be useful for detailed, high-color, or short-run graphics. They can reduce screen complexity, but they create different proofing questions: hand feel, edge film, pretreatment marks, wash or rub behavior, and transfer adhesion. Embroidery can work for small premium marks, side badges, or limited branding, but it is usually not economical or visually appropriate for large grocery tote graphics unless the design is intentionally built around stitch texture.
Placement instructions should use fixed physical references. Do not write only 'center logo on front.' State the print width and height, distance from the top edge, whether it is centered between side seams or centered on the flat front panel, and whether the gusset or fold line is excluded. If the tote has a wide gusset, a graphic that is mathematically centered on the full bag may look visually wrong once filled. The pre-production sample is where those assumptions need to be checked.
- Send final artwork at production scale with fonts outlined and Pantone references clearly labeled.
- State print dimensions, side of bag, orientation, and whether artwork varies by SKU.
- Measure placement from top edge, side seam, center line, or gusset edge.
- Define tolerance for placement shift, registration, and print size before screens or transfers are made.
- Ask the supplier to identify artwork elements that may not reproduce cleanly on canvas.
Use the RFQ to prevent apples-to-oranges quotes
A strong RFQ makes every supplier quote the same tote. It should include fabric weight, finish, dimensions, gusset, handle construction, print method, print area, color count, label details, packing method, carton requirements, order quantity, sample expectation, inspection requirement, incoterm, and target delivery window. When those fields are missing, low quotes often reflect missing quality, lighter materials, smaller print areas, or cheaper packing assumptions.
Ask suppliers to separate line items rather than burying everything in one unit price. Useful lines include sample fee, courier fee, artwork checking, screen or plate cost, print setup, blank bag cost, printed unit cost, individual packing, carton labeling, barcode application, testing, third-party inspection support, export carton marks, and documentation charges. This is especially important when artwork changes after the first quote. If the brand adds a second-side print or increases the logo size, procurement can see exactly what changes.
MOQ should be broken down by base bag, print version, fabric color, handle color, carton label, and reorder. A supplier may offer a low MOQ for one artwork on stock natural canvas but require a higher quantity for dyed canvas, custom handle length, individual barcode stickers, or mixed customer cartons. For eco apparel brands running capsule collections, store-specific artwork, or wholesale account versions, version control can become a bigger cost driver than the blank tote itself.
The RFQ should also ask for practical production assumptions. How many units per carton? What is the estimated carton size and gross weight? What CBM is expected per 1,000 units? Is the quote FOB, EXW, CIF, DDP, or another term? Are cartons bulk packed, inner packed, or individually packed? These details affect landed cost and receiving labor, and they should be visible before the supplier is selected.
- Use one controlled spec sheet for every supplier.
- Require suppliers to list deviations instead of silently substituting materials or construction.
- Separate sample, setup, unit price, packing, labeling, testing, and documentation costs.
- Ask how price changes with print size, color count, second-side print, packing method, and SKU count.
- Compare unit price together with carton volume, setup fees, inspection needs, and delivery terms.
Choose a supplier route based on proof control
The supplier route affects how well procurement can connect the approved proof to bulk production. A direct factory with sewing and printing under one management system may offer clearer control over fabric receiving, cutting, stitching, printing, curing, inspection, and packing. That does not make every direct factory the best choice, but it can make technical communication faster when a logo shifts, ink looks different, or handles need reinforcement.
Trading partners can be valuable when the buyer needs sourcing reach, category breadth, language support, or smaller test orders. The risk is not the trading model itself; the risk is poor visibility. If a trading partner cannot confirm where the sample is made, whether the same facility will produce bulk, who controls printing, or who owns rework responsibility, proof approval becomes weaker. Procurement should ask operational questions and expect operational answers.
A good partner should be willing to share sample-room limitations, production process details, inspection report format, and packing photos. They should also explain which tolerances are realistic. Overpromising exact color on natural canvas, perfect placement on a flexible textile, or identical shade across all cotton lots is not reassuring. A supplier who explains constraints clearly may be easier to manage than one who says yes to everything.
For repeat programs, ask how the supplier stores approved samples, print files, screens, color references, carton standards, and sewing patterns. Wholesale canvas grocery totes often return seasonally with new graphics or reordered core logos. Reorder success depends on documentation discipline as much as initial sample quality.
- Ask who physically sews, prints, inspects, and packs the tote.
- Confirm whether sample and bulk will use the same fabric standard and print workflow.
- Request the inspection report format before ordering, not after defects appear.
- Clarify who pays for rework if bulk does not match the approved sample and written spec.
- For reorders, confirm how approved samples, artwork files, screens, and carton standards are retained.
Review the pre-production sample like a first bulk unit
The pre-production sample should be made from final canvas, final pattern, final handles, final thread, final labels, final artwork, final print method, final ink or transfer, and intended packing method. If it is made from a substitute fabric or a sample-room blank, it can still be useful for design discussion, but it should not be treated as bulk approval. Procurement should label samples clearly: development sample, print strike-off, pre-production sample, or approved standard.
Start sample review with measurements. Check body width, body height, gusset depth, handle drop, handle width, top hem depth, and print placement. Measure from fixed points and record actual results beside the target spec. If the bag is slightly outside target but acceptable, write the accepted tolerance. If it is not acceptable, require a corrected sample or written factory confirmation before bulk cutting.
Then inspect appearance and function. Look at fabric shade, neps, seed flecks, seam straightness, top hem evenness, handle alignment, label placement, print color, edge sharpness, opacity, registration, odor, and print hand feel. Open the tote fully and see whether it stands or collapses as expected. Load it with a realistic weight for the intended use and check handle attachment points. A tote can pass logo approval and still fail as a bag.
Finally, review the packed presentation. Fold the tote as the supplier plans to pack it, leave it under light pressure, open it, and inspect fold marks, print cracking, blocking, or transfer. If the tote will be individually packed, check barcode visibility, suffocation warning if relevant, bag size, and whether the print is protected from scuffing. If presentation matters, approve a packed sample photo or physical packed sample.
- Photograph front, back, inside seams, top hem, handles, label, print close-up, and packed form.
- Measure the sample against the spec sheet and record actual numbers.
- Rub, fold, stack, and reopen the printed area to check practical handling behavior.
- Approve natural fabric character only if it falls within the agreed shade and surface range.
- Do not release bulk from a sample with unresolved comments unless those comments are formally accepted.
Set realistic tolerances before bulk production
Tolerances make the difference between enforceable QC and subjective disagreement. Canvas totes are flexible textile products, so procurement should avoid expecting machine-perfect results, but the acceptable range must still be written. Finished measurement tolerances are commonly expressed in millimeters or centimeters, while fabric weight may be controlled by a GSM range or percentage. The exact tolerance should be agreed with the supplier based on construction, order size, and inspection method.
Print placement tolerance is especially important. A logo that shifts a few millimeters may be harmless on a small chest label, but it can look obvious on a centered grocery tote graphic. Define whether placement is measured from the top edge, side seam, panel center, or gusset edge. For multi-color screen prints, define registration tolerance as well. Tight outlines, borders, and small type need stricter control than a loose illustrated print.
Color tolerance should be practical. Pantone references are useful, but final approval must happen on the actual canvas. Natural canvas can warm or mute ink color; dyed canvas can change contrast; heavy canvas texture can reduce the appearance of sharp opacity. For brand-critical colors, request a strike-off or printed swatch before the full pre-production sample, then keep the approved proof as the reference for bulk.
Defect classification should be agreed before inspection. Critical defects might include wrong artwork, unsafe sharp objects, mold, wet cartons, wrong SKU labels, or severe odor. Major defects might include broken handle reinforcement, wrong fabric, incorrect print position, heavy staining, poor curing, or mixed artwork in cartons. Minor defects might include loose thread, small washable surface mark, or slight shade variation within the approved band. The point is to make shipment decisions consistent.
- Write tolerances for body size, gusset, handle drop, print size, and print placement.
- Define acceptable and unacceptable fabric shade variation for natural or dyed canvas.
- Set print standards for opacity, registration, edge quality, curing, odor, and transfer risk.
- Classify critical, major, and minor defects before final inspection.
- Require the approved sample and spec sheet to be available during inspection.
Inspect sewing strength and everyday usability
Canvas grocery totes are judged by how they carry, not only how they look. The handle attachment is often the highest-risk area because it carries repeated stress. Procurement should specify handle material, handle width, handle drop, attachment length, stitch pattern, stitch density target, and reinforcement method. Box stitches, cross stitches, and bar-tacks can all be appropriate depending on design, but the chosen method must be consistent and clean.
During sample and bulk inspection, check whether handles are symmetrical, whether the drop matches the spec, whether stitches are skipped or broken, and whether the reinforcement catches the full handle width. Needle damage, puckering, loose threads, or uneven top hems may look cosmetic at first, but they can point to poor sewing control. If the tote is intended for groceries or heavier retail purchases, physical handling checks should be part of approval.
The bottom and gusset deserve attention too. A grocery tote often needs enough depth to carry folded apparel, boxed items, or daily goods without collapsing awkwardly. If the gusset is too shallow, the tote behaves like a flat bag. If the bottom seam is weak or poorly aligned, the filled shape looks cheap. The pre-production sample should be loaded and set down to see how the bag behaves in normal use.
Labels and trims should be treated as controlled components. Side labels, interior labels, hangtags, barcode stickers, belly bands, and customer-specific tags can create receiving or compliance problems if swapped casually. Ask the supplier to confirm label material, size, print, position, attachment method, and SKU mapping before bulk. During final inspection, verify that labels match the correct artwork and carton.
- Check handle width, drop, alignment, reinforcement size, and stitch consistency.
- Reject broken bar-tacks, skipped stitches at stress points, loose handle ends, and uneven attachments that affect strength.
- Load the tote with a realistic target weight during sample review and inspect stress points afterward.
- Review gusset shape, bottom seam alignment, top hem straightness, and whether the tote hangs evenly.
- Match labels, hangtags, barcodes, and carton SKUs to the approved packing list.
Control print curing, folding, and packing interaction
Print quality does not end when the logo looks good on the press table. Canvas grocery totes are folded, stacked, packed, compressed, shipped, unpacked, and handled by warehouses or customers. Under-cured ink may feel tacky, smell strong, rub off, or transfer to adjacent bags. Excess ink deposit may look opaque but feel stiff or crack along fold lines. Transfers may show edge film or adhesion issues if folded too tightly.
Ask the factory what practical checks are performed after printing. Useful checks include rub testing by hand or cloth, fold-and-open review, stack pressure review, odor check after packing, and inspection for blocking or transfer. These are not substitutes for formal lab testing when required, but they catch many real-world problems before shipment. For retail programs, the buyer may request additional testing based on customer requirements.
Folding method should be approved with the print in mind. A fold across the center of a heavy screen print can create a permanent crease. Folding printed faces against each other can create transfer risk. Folding in a way that hides the barcode can slow warehouse receiving. If the tote must fit a specific carton or e-commerce insert size, the fold should be tested during sampling, not improvised during packing.
Packing material decisions should balance protection, cost, volume, and sustainability goals. Individual polybags protect from dust and scuffing but add plastic, labor, and CBM. Bulk packing reduces material but may require tissue, interleaving, or print-facing rules. Grouped inner packs can be a middle option. The right choice depends on print method, customer channel, warehouse requirements, and brand packaging standards.
- Check cured print for tackiness, odor, cracking, transfer, pinholes, and rough edges.
- Fold the sample exactly as planned for bulk packing and inspect the print after reopening.
- Approve whether printed faces can touch, need tissue separation, or require individual packing.
- Confirm polybag size, warning language if needed, barcode placement, and inner pack count.
- Include packed sample photos in the approval record for warehouse and supplier alignment.
Make cartons and receiving requirements part of the spec
Cartons are often treated as logistics detail, but for B2B procurement they are part of the product program. Incorrect carton marks, mixed SKUs, weak cartons, missing barcodes, or inconsistent unit counts can delay receiving even if the totes themselves are acceptable. A wholesale customer may care as much about correct PO labels and carton counts as it does about print quality.
Before bulk packing, confirm units per inner pack, units per master carton, carton dimensions, net weight, gross weight, carton strength, sealing method, carton mark layout, PO number, SKU, color, artwork version, destination, and barcode requirements. If the buyer has a routing guide, share it before quote finalization. Reworking carton labels after packing wastes time and can introduce new errors.
Freight comparison also depends on packing. A heavier canvas or larger fold may reduce units per carton and increase CBM. Individual polybags or belly bands may improve presentation but change carton volume and labor cost. A quote that looks cheaper per unit may lose that advantage if carton dimensions increase freight, storage, or handling costs. Procurement should review FOB price and estimated landed cost together.
Final inspection should include cartons, not only product. Inspectors should verify carton count, carton condition, SKU separation, labels, barcode readability, and packed quantity. They should open representative cartons and compare contents against packing list and approved sample. Wet marks, odor, dust, crushed cartons, weak sealing, or mixed artwork should be reported before shipment release.
- Lock carton dimensions, units per carton, gross weight, net weight, and estimated CBM before final price comparison.
- Confirm carton marks, PO numbers, SKU labels, destination codes, and barcode requirements in writing.
- Keep artwork versions separated by inner pack and carton where warehouse receiving requires it.
- Check carton dryness, cleanliness, sealing, crushing, odor, and label accuracy before shipment.
- Use packing data to compare landed cost, not only the factory unit price.
Specification comparison for buyers
| Spec decision | Recommended option | When it fits | Buyer risk to check |
|---|---|---|---|
| Canvas weight | 10 oz to 12 oz cotton canvas, commonly about 340 to 420 GSM before finishing | Retail grocery totes, apparel store bags, branded merchandise, and repeat-use programs needing structure and opacity | Supplier may quote a lower fabric weight, post-finish weight, or mixed standard; confirm test method, tolerance, and whether weight is before or after washing or finishing |
| Fabric finish | Natural unbleached canvas with an approved shade band, or bleached canvas when print color accuracy is more important | Eco apparel brands that want an honest cotton look but still need repeatable logo color and retail presentation | Natural cotton can show seed flecks, neps, and lot shade variation; approve the fabric on real cloth instead of judging from a white-paper Pantone target |
| Construction | Gusseted grocery tote with reinforced handle attachments, clean top hem, and agreed seam type | Totes expected to carry apparel, groceries, boxed goods, or customer purchases repeatedly | A flat promotional tote may be cheaper but not equivalent; lock gusset depth, handle drop, handle width, stitch density, and reinforcement size before quote comparison |
| Print route | Screen print for bold limited-color artwork; transfer or digital print for detailed/high-color artwork; embroidery for small marks only | Brand logos, seasonal graphics, store-specific versions, or premium subtle branding | Fine lines, small reversed type, gradients, large ink areas, and tight registration can fail on textured canvas; proof on the final fabric and inspect curing and fold behavior |
| Print tolerance | Written tolerance for size, placement, color, registration, opacity, and edge quality | Wholesale programs where multiple cartons, stores, or customer accounts will inspect consistency | Without written tolerances, disputes become subjective; define acceptable placement shift in millimeters and practical color tolerance before bulk |
| MOQ structure | Separate MOQ for blank base bags, printed bags, artwork variants, colorways, and reorders | Brands testing capsule drops, wholesale account versions, or multiple seasonal graphics | A low MOQ may rely on stock fabric, manual placement, higher setup cost, or mixed packing compromises; ask what changes at reorder volume |
| Sample standard | Pre-production sample made from final fabric, final construction, final artwork, final print method, final trims, and intended packing | Any custom retail-facing tote, especially where brand color, handle strength, or warehouse packing matters | A sales sample, stock blank, or digital mockup does not prove bulk print position, stitch quality, fabric shade, shrinkage, or carton presentation |
| QC plan | In-line checks plus final inspection against approved sample, spec sheet, and defect classification | Orders with wholesale delivery windows, retail display needs, or multiple SKUs | Final inspection alone may catch issues too late; require photos or reports at cutting/sewing, print setup, curing, packing, and carton labeling stages |
| Packing method | Flat packed or controlled fold with approved inner pack, print protection, carton count, barcode plan, and carton marks | Warehouse replenishment, e-commerce inserts, store distribution, or retail resale | Overpacking increases cost and CBM; under-protection can cause scuffing, print transfer, moisture, odor, dust, and receiving delays |
Buyer checklist before sampling
- Confirm exact canvas weight in oz and GSM, fabric composition, yarn/construction if available, finish, shrinkage expectation, and whether quoted weight is before or after washing, dyeing, or other finishing.
- Lock finished body width, height, gusset depth, bottom construction, top hem, seam allowance, handle drop, handle width, reinforcement method, stitch density target, label placement, hangtag, barcode, and bottom board requirements before requesting final price.
- Send editable vector artwork, outlined fonts, Pantone references, final print dimensions, artwork orientation, print location from fixed physical points, and allowed placement tolerance for pre-production sample and bulk.
- State whether the print is one side, two sides, same artwork both sides, different artwork by side, mixed artwork by SKU, or variable by customer account, because each version can affect setup, MOQ, packing, and inspection.
- Request a pre-production sample made from final canvas, final construction, final thread, final labels, final print route, final ink or transfer, final artwork file, final handle build, and the intended folding or packing method.
- Ask for a proofing checklist covering fabric shade, print color, print size, edge sharpness, opacity, registration, ink deposit, curing, hand feel, odor, crocking or transfer risk, fold behavior, and print position on the actual tote body.
- Require the quote to separate sample fee, courier fee, screens or plates, artwork checking, print setup, unit price, packing materials, carton labeling, testing, third-party inspection support, and export documentation charges where applicable.
- Confirm MOQ separately for blank bags, printed bags, fabric color, handle color, artwork version, carton label version, and future reorder using the same base construction.
- Ask for master carton dimensions, units per carton, inner pack count, gross weight, net weight, estimated CBM, carton mark format, pallet assumptions if needed, and maximum carton weight for warehouse handling.
- Build a timeline that separates artwork review, digital proof, physical sample, buyer comments, revised proof, material booking, cutting, sewing, printing, curing, inspection, packing, shipment booking, and transit.
Factory quote questions to send
- What exact canvas weight are you quoting in oz and GSM, and is that greige, finished, washed, dyed, or ready-for-cutting weight?
- Can you share the fabric composition, yarn count or construction if available, finished fabric width, expected shrinkage, and finish used for this tote?
- Is the price based on natural, bleached, dyed, washed, or pre-shrunk canvas, and what shade tolerance can you maintain between approved sample and bulk?
- What are the finished measurements for body width, height, gusset, handle drop, handle width, top hem, and seam allowance, and what measurement tolerance do you apply?
- Are handles self-fabric or cotton webbing, what is the handle width and drop, and how are the attachments reinforced with box stitch, cross stitch, bar-tack, or another method?
- Is the quote based on screen print, transfer, digital print, embroidery, or another method, and how many colors, screens, transfers, print positions, and setup steps are included?
- What is the maximum recommended print area for this tote construction, and what minimum distance do you require from seams, handles, gussets, folds, and top hem?
- What print placement tolerance can you hold in bulk, measured from the top edge, side seam, center line, or another agreed physical point?
- Can you produce the pre-production proof on the same fabric standard, same construction, same print method, and same production workflow planned for bulk?
- What tests or checks do you perform for curing, rubbing, print transfer, fold cracking, odor, opacity, and registration on canvas?
Quality-control points to confirm
- Fabric weight should match the approved spec within a written tolerance, often managed as an agreed percentage or GSM range; excessive variance changes drape, opacity, print result, carton quantity, and perceived retail value.
- Fabric shade should be checked against the approved sample or approved shade band, especially for natural canvas where seed flecks, neps, and lot variation are normal but still require buyer-approved limits.
- Finished measurements should be checked for body width, body height, gusset depth, handle drop, handle width, top hem depth, and print location; tolerances should be written in millimeters or centimeters before bulk cutting.
- Print placement should be measured from fixed physical points such as top edge, side seam, center line, or gusset edge; logos should not drift toward handles, seams, folds, or gussets unless approved by design.
- Print color should be compared under consistent lighting against the approved proof; Pantone references should be treated as targets adapted to textured cotton canvas, not as guarantees from coated paper.
- Print registration should be checked for each color layer; misregistration is especially visible on outlined logos, small type, borders, and two-color lockups.
- Ink coverage should be checked for pinholes, uneven opacity, heavy buildup, poor curing, cracking, tackiness, transfer marks, rough edges, and weave-related gaps that exceed the approved sample standard.
- Curing should be verified through practical handling checks, including rub, fold, stack, odor, and transfer review; under-cured prints can block, smell, or mark adjacent bags.
- Stitching should be checked for skipped stitches, loose threads, broken bar-tacks, needle damage, seam puckering, uneven top hems, and weak handle attachment that affects strength or retail appearance.
- Handle pull strength should be checked on pre-production, in-line, and final samples, with special attention to attachment points, top hem joins, and consistency between handles.