Why durability matters more than headline price in gift shop sourcing
Gift shop canvas grocery totes sit between a souvenir item and a daily-use carry bag. Buyers need them to feel substantial on the shelf, survive repeated customer use, and still fit a gift shop margin. That combination is why the cheapest quote is rarely the best quote. If the handles stretch, the seam opens, or the print starts to crack after a few uses, the store absorbs the cost in returns, replacement inventory, and a weaker brand impression at checkout.
For procurement, the real buying question is not whether a tote looks good in a sample photo. It is whether the bag can survive the use pattern your customers actually create: a book, a bottle, a small gift box, a few grocery items, or a combination of all three. That is why a durability testing checklist matters. It lets the buyer translate soft claims like “strong canvas” into concrete decisions about fabric weight, reinforcement, print method, carton packing, and hidden cost.
This is also where wholesalers and factories can sound more similar than they are. Two quotes may both say “canvas tote,” but one may use a lighter cloth, lower stitch density, cheaper ink, and a less protective carton plan. On paper the quotes look close. On a shelf, or after a week of carrying, the differences become obvious. A useful sourcing process should expose those differences before you place a bulk order, not after a store manager calls to report failures.
The easiest way to keep the order commercial is to define a bag around use, not around a catalog description. Decide what the bag must carry, how often it will be reused, whether it needs to fold flat, and how premium it should feel in the hand. Then ask suppliers to quote to that standard. The savings come from matching the spec to the use case, not from taking the lightest canvas you can find.
- A bag that fails on handle stress is usually more expensive than a slightly heavier fabric would have been.
- A gift shop tote must balance shelf appeal, repeat carry, and a landed cost that still leaves margin.
- The right spec should be written around the customer’s fill weight, not around the supplier’s default catalog size.
Choose the canvas spec first, then compare factories
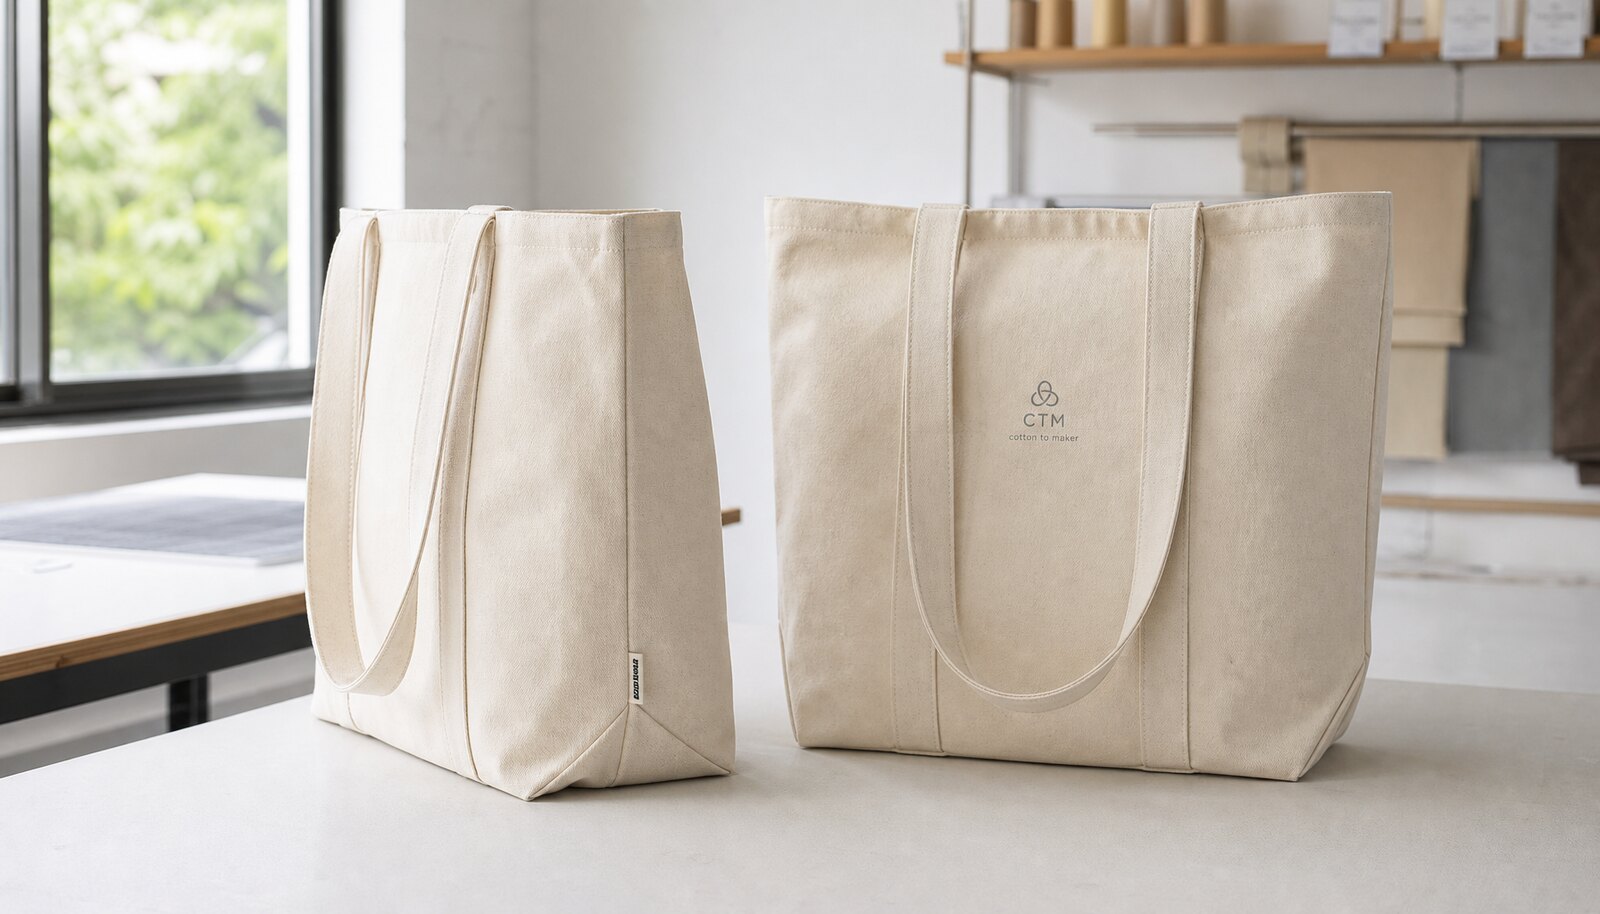
Canvas grocery totes are often quoted as if the only variable is price, but the fabric spec is usually where the biggest value gap appears. For most gift shop programs, 10 oz to 12 oz canvas, or roughly 340 to 407 GSM, is the most commercially balanced range. It gives the tote enough body to stand on a shelf, enough structure to support a useful load, and enough surface stability for a clean logo print. Lighter cloth can work for low-fill souvenir use, but it narrows the margin for seam error and increases the chance of visible collapse once the bag is filled.
If the tote is meant to replace a plastic shopping bag and carry groceries, books, or bottled gifts, do not start below the middle of that range unless the price point forces it. Heavy fabric is not automatically better. A 14 oz+ bag may feel premium, but it also raises freight cost, makes folding less elegant, and can be overbuilt for a gift shop customer who only carries one or two items. Procurement works best when the fabric weight matches the sell-through pattern.
The fabric finish matters almost as much as the fabric weight. Natural or greige cloth is easy to source and often cheaper, but it can vary more in shade, surface lint, and visual uniformity. Bleached fabric gives a cleaner retail look and stronger contrast for logos, but it can show stains and lot variation more clearly. Enzyme-washed or softened canvas often improves hand feel and drape, but buyers should watch for shrinkage or a looser visual hand that changes the finished dimensions after processing.
A supplier quote should never stop at “canvas.” Ask for composition, weave, finished weight, finish type, and whether the cloth is pre-shrunk or washed after sewing. Those details affect not only appearance, but also how the bag performs under load, how much it costs to ship, and how likely it is to match the sealed sample later in production.
- Use exact fabric weight in the RFQ; avoid vague phrases like heavy canvas or premium canvas.
- Ask whether the fabric is greige, bleached, dyed, pre-shrunk, or enzyme-washed.
- If the tote will be folded and displayed on shelves, ask for a finished size tolerance that accounts for fabric relaxation.
Compare print and branding methods with durability in mind
A tote’s decoration method changes both the marketing value and the failure mode. Screen print is usually the most economical option for simple logos, one-color seasonal art, and repeated reorder programs. On natural canvas, it gives strong opacity and a classic retail look. But it still needs testing: thick canvas can show ink pooling or weak edge definition, and poor curing can lead to transfer or early wear on the print face. Buyers should not assume that “screen print” alone equals durability.
Heat transfer can be useful for small runs or art with more detail, but it often needs tighter control over adhesion, edge lift, and fold cracking. On a bag that will be stuffed, folded, and carried repeatedly, a transfer that looks sharp on day one may become the first defect buyers hear about after launch. If the design has fine lines, ask the supplier how those details will survive the weave texture of canvas and what happens after rubbing or repeated creasing.
Woven labels, side labels, and seam labels can be a smart alternative when the brand wants a cleaner aesthetic. They reduce the risk of print-related cracking and can look more premium on a quiet, minimalist tote. The tradeoff is that labels introduce their own QC risks: crooked placement, loose stitching, frayed edges, and color inconsistency in the label weave. Those risks are usually easier to manage than a weak front print, but they should still be inspected by the same standard as the rest of the bag.
The buyer should compare decoration methods on the basis of setup cost, visual impact, and expected wear. A low-cost quote that omits print size, number of colors, or placement details is not comparable to a full quote. Ask exactly what is included and then test the approved sample with rub, fold, and handling checks so you know whether the decoration will still look presentable after a few customer uses.
- Use screen print for bold, simple graphics when unit cost matters.
- Use heat transfer only when the artwork detail justifies the added durability risk management.
- Use woven or seam labels when the brand wants a quieter look and less ink on the fabric face.
Compare sourcing routes: factory direct, trading company, and stock program
The sourcing route affects more than price. Factory direct usually gives the buyer the clearest view of the sewing line, fabric source, reinforcement standard, and carton pack logic. That matters for a tote program that may reorder every season. If the same bag has to be consistent across multiple deliveries, direct communication with the factory makes it easier to hold the approved sample as the reference point. The tradeoff is that the buyer must be more precise with the spec and more disciplined about approval steps.
A trading company or agent can help if you need fast coordination, mixed categories, or support with language and follow-up. It can also be useful when your team does not want to manage factory communication directly. But buyers should not accept vague “we can do it” quotes without asking where the actual production happens, who controls the fabric, and what inspection the agent really performs. If the route is less transparent, the buyer must ask for more documentation, not less.
Stock programs are helpful when time is tight or the order is a trial. They can reduce the wait for fabric sourcing and lower the friction of starting a new tote line. The downside is that stock often means limited color choice, fixed dimensions, and less control over the actual cloth lot. In practice, a stock tote can be a good test purchase, but it should never be treated as proof that a custom repeat program will behave the same way.
When comparing these routes, do not focus on the unit price alone. Ask how samples are charged, whether the quote includes artwork or label setup, who pays for re-sampling, and whether split shipments or partial deliveries create price changes. Hidden costs often show up in these details rather than in the per-unit line.
- Factory direct is strongest for repeat programs and stricter QC control.
- Trading routes are useful when communication and consolidated purchasing matter more than deep spec control.
- Stock programs are good for speed, but they require confirmation of the exact stock SKU and lot conditions.
Build a real durability testing checklist, not a generic approval note
A useful sample test should mimic the way the tote will actually be used. Start by confirming the basics: finished size, handle length, shoulder drop if applicable, seam symmetry, and overall shape. Then move into load testing. If the bag is sold as a grocery tote, fill it with a realistic weight and carry it repeatedly. For many gift shop programs, that means testing with items in the 5 to 8 kg range, then comparing how the handles, top seam, and opening behave after repeated carries. If the tote is intended for lighter gift carry, use a lower weight but keep the load high enough to reveal seam stress.
Do not rely on a single hand test. A stronger process uses a small sample lot, ideally at least five units from the approval sample and five more from the first production batch or a second carton if available. That gives the buyer a chance to see whether the bag is consistent or whether the sample was unusually good. The test should include repeated lift-and-set cycles, a short static hang, and a check for shape recovery after the bag is emptied. A tote that only looks good when empty is not ready for a grocery-style retail program.
Rub and fold checks are particularly important on printed bags. Canvas texture can hide minor print issues in a photo, but those same issues show up after the bag is handled. Rub the print face with a dry white cloth, then repeat with a slightly damp cloth to see whether pigment transfers or fades. Fold the bag along the normal pack line and then open it again several times. If the print cracks at the fold or the bag develops a permanent crease that distorts the artwork, the decoration method needs rework before production.
For premium programs, also check odor, lint, and surface cleanliness. These sound minor, but they matter in gift retail. A tote that arrives with a strong finishing odor or visible lint in the fold can be rejected by a buyer even if the seams are fine. The sample should reflect what the customer will actually open from the carton, not a hand-finished showpiece that only exists for approval photos.
- Test at least five pieces when possible, and compare units from different cartons or sample rounds.
- Use the intended filled weight, not a generic lab number, when carrying the bag repeatedly.
- Inspect the print after both dry and slightly damp rub tests, then check whether folding creates cracks or transfer.
Use measurable pass/fail criteria so the factory knows what acceptable means
One of the biggest causes of tote disputes is fuzzy approval language. “Looks fine,” “good quality,” and “acceptable” are not enough when the supplier is sewing thousands of units. A buyer should write a short acceptance standard that covers the visible and functional points that matter most: exact size range, acceptable shade variation, reinforcement style, print position, and packaging condition. The goal is not to create a lab manual. The goal is to remove ambiguity before the purchase order is signed.
A practical standard should name the defect types that are not acceptable: skipped stitches, broken handle reinforcement, crooked side seams, major print smearing, oil stains, dirt marks, label shift, and obvious carton crushing. It should also define which small issues are tolerable and which are not. For example, a few trimmed thread ends may be acceptable if they do not affect use, but loose thread tails at handle junctions are a warning sign. If the buyer never states the difference, the factory will interpret it to its own production comfort level.
The same logic applies to measurements. Write down body width, height, handle length, and handle drop, and then specify a practical tolerance band. That gives the factory a clear target while allowing for normal production variation. The best acceptance criteria are simple enough to enforce at the receiving dock and specific enough to guide the sewing line. If the QC team cannot measure it in a few minutes, the standard is probably too abstract for an everyday tote order.
If the order involves a retail brand or a gift shop chain, consider preserving the approved sample in sealed condition and labeling it clearly by version. The sample should be traceable to the quote, the art file, the fabric lot if known, and the production date. That makes future reorders easier to evaluate and reduces arguments about whether the factory changed something without approval.
- Define size, handle, print, and packing tolerances in writing before the PO.
- Name the defects that trigger rejection, not just the characteristics you like.
- Keep a sealed reference sample tied to the exact quote and artwork version.
Check the quote line by line so hidden costs do not erode margin
A tote quote should be read like a cost map, not a single unit number. First, confirm whether the price is based on final fabric weight or a lighter placeholder cloth. Then check whether decoration setup is included, whether the quote assumes one-color or multi-color print, and whether the artwork placement is fixed. A common mistake is assuming that a low base price includes the same construction as a higher competitor quote. Often it does not.
Sample charges are another place where procurement cost gets blurred. Ask whether the first sample is free, whether it is credited against the bulk order, and who pays shipping for samples and replacements. If there are multiple approval rounds, ask what a second or third sample will cost. The same question applies to production terms: is the lead time counted from deposit, from artwork approval, or from final sample sign-off? If the factory cannot answer clearly, the schedule risk is not under control.
Packing and freight can also hide cost. A quote that looks competitive per bag may be worse on a landed basis if the carton dimensions are inefficient, the pack count is low, or the unit folds are bulky. Ask for gross weight and outer carton size, then calculate the freight effect before making a decision. For gift shops, where the tote may sit next to other items in a seasonal program, small packing inefficiencies can hurt margin more than a modest unit-price difference.
Finally, ask how the factory handles special terms. If you need split deliveries, rush production, label changes, or mixed shipment dates, the supplier should state the surcharge or scheduling impact in advance. Buyers often accept a price without asking what happens when the calendar changes. That is where the real overrun starts.
- Verify what is included in the base quote: fabric, print, labels, packing, and artwork setup.
- Ask the sample charge question early, including whether re-samples are billed separately.
- Check carton size and gross weight, not just per-piece price, when estimating landed cost.
Quality-control steps buyers should ask for before shipment
In-line QC is more useful than end-of-line sorting alone, especially for canvas totes where stitch problems can be introduced early and hidden later by folding. Ask whether the factory checks stitch integrity while the bags are being sewn, not just after they are packed. On a good line, operators and inspectors should catch crooked seams, needle damage, and handle placement issues before the bags reach final packing. That reduces rework and lowers the chance of a carton full of near-miss units.
At final inspection, the buyer should expect at least four checks: dimensions, appearance, construction, and packing. Dimensions cover body size and handle length. Appearance covers stains, shade variation, print quality, and loose threads. Construction covers seam strength, reinforcement, and label placement. Packing covers the fold, carton count, carton marking, and whether the bags are protected from dirt or crushing. If any one of those areas is skipped, the buyer is relying on luck rather than process.
For canvas grocery totes specifically, inspect handle junctions with extra care. The most common failure is not the center of the bag; it is the stress point where the handle joins the top edge. If the sewing line uses a box stitch or X-box pattern, check that the shape is complete and symmetrical. If the reinforcement is a bar-tack, make sure the tack length, placement, and thread tension are consistent across units. A good-looking top seam is not enough if the reinforcement is weak underneath.
Packing QC should be equally practical. Cartons should close cleanly without forcing the totes to bend sharply, and the bag mouth should not be crushed in a way that permanently changes the opening. If the order is destined for retail shelves, ask for unit presentation as part of the packing spec. A tote that arrives clean but folded badly can still create extra labor at receiving, which is another hidden cost for the buyer.
- Ask for in-line checks on seam formation and handle reinforcement, not only final sorting.
- Verify shade, stains, print, dimensions, and loose threads at final inspection.
- Open cartons after drop or compression checks to confirm the bags still hold shape and stay clean.
Practical failure examples buyers should look for during sample review
A good checklist becomes more useful when the buyer knows what failure looks like. On a light canvas tote, the first sign of weakness may be slight handle stretch after a few loaded carries. That can lead to crooked handle drop and an unattractive bag profile, even before the handle breaks. In thicker canvas, the issue may be seam puckering or a rough fold that makes the tote hard to present neatly on a shelf. In both cases, the visual problem is a warning that the construction is not optimized.
Printing failures also show up in specific ways. If the ink sits too thick on the fabric, it can crack along fold lines. If the print is under-cured, it may smear when rubbed or transfer onto adjacent bags in the carton. If the artwork placement was not tightly controlled, the logo may look subtly off-center, which matters a lot in a gift retail environment where products are displayed face-out. These are not abstract defects; they are the exact issues that generate slow-moving stock or customer complaints.
Carton damage is another useful signal. A tote may pass all visual checks at the factory, yet arrive with compressed handles or stained folds if the carton was overfilled or dropped in transit. Buyers should open at least one carton after shipping simulation or receiving to see whether the pack method protected the bag face and opening. If the carton marks are inconsistent, that is also a warning sign: it often means the packing process is not fully standardized.
The point of these examples is not to overcomplicate approval. It is to teach the team where to look. The faster a buyer can identify the likely failure mode, the easier it is to ask the supplier for a correction before full production. That saves more time than broad complaints after the order is already in transit.
- Handle stretch, seam puckering, print cracking, and carton compression are common tote failure patterns.
- A tote can look fine flat on a table and still fail once it is carried or folded for packing.
- Review at least one carton as-packed and one carton after transit-style handling when possible.
How to structure a buyer-friendly sample approval and reorder process
A strong sample process has two layers: approval of the first sample and protection of the repeat order. The first sample proves the concept. The reorder process proves consistency. Ask the factory to label the sample with the exact fabric, finish, print file version, and date. If the order is approved, store that sample in a way that purchasing and QC can access it later. The sample should be a real reference, not a photo buried in an email thread.
Before bulk production, confirm that the approved sample matches the purchase order in every material detail. That means the fabric weight, finish, decoration method, handle style, packing method, and carton size should all be identical unless you explicitly approved a change. If a supplier says the “same quality” will be used later, ask them to define same in writing. Buyers lose consistency when the factory substitutes a similar-looking but different cloth lot or changes the print method to save time.
For reorders, request a short confirmation on what changed and what did not change. The best suppliers will tell you if fabric lot, carton size, or label inventory differs from the original run. That transparency helps gift shop buyers protect continuity across seasons. If you sell the tote as a signature item, continuity is part of the product value. A reorder that looks different can damage the item’s sell-through even if the new version is technically acceptable.
This is also the point where procurement should review service terms. If the supplier missed an agreed spec on the first run, what happens on the second? Do they remake, credit, or replace the affected quantity? Asking this before the PO keeps the supplier focused on accuracy and reduces last-minute dispute language after shipping.
- Label and archive the sealed approval sample by version and date.
- Require written confirmation of any reorder changes to fabric, finish, or pack method.
- Agree in advance on remake, credit, or replacement terms for spec failures.
Specification comparison for buyers
| Procurement decision | Option to compare | Tradeoffs buyers should weigh | Cost impact | Testing implication |
|---|---|---|---|---|
| Fabric weight | 8 oz–9 oz canvas | Lower unit cost and lighter carton weight, but reduced structure and lower margin for error at handle stress or seam weakness | Lowest material cost; freight usually lower | Needs stricter load and handle fatigue checks because light canvas can deform or tear sooner |
| Fabric weight | 10 oz–12 oz canvas | Best balance of hand feel, print stability, and everyday carry strength, but unit cost and carton weight rise versus lighter cloth | Moderate cost increase; often the most commercially efficient range | Should pass repeat carry, seam pull, and shape-retention checks with fewer failures |
| Fabric weight | 14 oz+ heavy canvas | Premium feel and stronger structure, but higher sewing difficulty, higher freight weight, and sometimes stiffer shelf presentation | Highest material and freight cost; may reduce margin | Test for handle attachment, seam puckering, and print cracking on thicker folds |
| Fabric finish | Natural / greige look | More economical and easy to source, but shade variation and lint can affect shelf consistency | Lower cost; lower finishing complexity | Check carton-to-carton shade consistency and surface cleanliness |
| Fabric finish | Bleached / white canvas | Cleaner retail appearance and better branding contrast, but more visible staining and more sensitive lot variation | Usually higher finishing cost | Inspect color variance, yellowing, and stain spots under bright light |
| Fabric finish | Enzyme-washed / softened canvas | Improved hand feel and a more retail-friendly drape, but finishing can change shrinkage and shade lot behavior | Adds finishing cost and can extend lead time | Test shrinkage, handle distortion, and print adhesion after wash or cure |
| Handle construction | Self-fabric handles with box stitch or X-box reinforcement | Clean appearance and good value, but quality depends heavily on stitch density and reinforcement size | Moderate; low-cost if line controls are tight | Requires handle pull, bar-tack, and stitch count checks |
| Handle construction | Webbing handles | Can improve durability and reduce stretch, but may look less integrated with an all-canvas aesthetic | Can be slightly higher depending on webbing grade | Check webbing edge fray, attachment alignment, and seam bite into canvas |
| Decoration | 1-color screen print | Best cost-to-impact ratio for bold logos and simple art, but thick canvas and curing quality affect durability | Low setup cost per color; efficient at scale | Need rub, fold, and adhesion checks |
Buyer checklist before sampling
- Define the tote’s use case before quoting: light gift carry, grocery-style load, or premium retail gift bag.
- Lock the target fabric weight in oz or GSM, plus an acceptable tolerance range, before sampling starts.
- Specify finished size, handle drop, print size, and fold/pack method so suppliers quote the same build.
- Require a pre-production sample using the final fabric, final decoration method, and final handle construction.
- Ask for a stitch standard: stitch count per inch, reinforcement type at handle bases, and seam allowance target.
- Set measurable acceptance criteria for load, rub resistance, shrinkage, shade variation, and carton condition.
- Verify carton dimensions, carton count, gross weight, and pallet or export packing assumptions before confirming the PO.
- Clarify sample charges, artwork setup fees, re-sample fees, and whether sample freight is credited or refunded.
- Confirm whether MOQ is per color, per artwork, or per size; do not rely on the headline MOQ alone.
- Ask how the factory handles rejection: repair, remake, credit, or replacement shipment, and who pays freight in each case.
Factory quote questions to send
- What exact fabric composition, weave type, finished weight, and finishing process are you quoting, and what lot tolerance should we expect?
- Is the quoted price based on one-side or two-side decoration, and does it include artwork setup, screen fees, or transfer plate costs?
- What is the stitch specification at the handle attachment, including stitch count, reinforcement shape, and seam allowance?
- How many sample rounds are included, what does the first sample cost, and are sample charges refundable against bulk production?
- What is the MOQ by color, by size, and by artwork version, and does stock fabric change the MOQ or lead time?
- What packing configuration is included in the quote: unit fold, inner poly or tissue, carton count, carton size, and gross weight?
- What in-line and final inspections are performed before shipment, and can you share the acceptance criteria for size, stitching, print, and stains?
- What is the production start point: deposit, artwork approval, sample approval, or fabric arrival?
- If you quote an urgent schedule, which steps are compressed and which steps are not, such as cutting, printing, curing, or packing?
- What hidden costs should we expect for rush orders, split shipments, special labeling, or carton marking changes?
Quality-control points to confirm
- Fabric weight should be verified against the approved spec using the supplier’s stated measurement method; if weight is not checked, a lower-cost cloth substitution can slip through unnoticed.
- Finished dimensions should be measured on multiple units from different cartons, not only on the top carton, because fold compression can mask size drift.
- Handle attachment needs a visual and physical check: confirm symmetry, reinforcement shape, stitch density, and whether the seam bites evenly into the body fabric.
- Seam inspection should look for skipped stitches, broken thread, needle damage, loose thread tails, and puckering at stress points.
- Measure seam allowance on a sample unit to confirm the factory is not sewing too close to the edge, especially on thick or heavily loaded bags.
- Check shrinkage after wetting or heat exposure if the tote will be washed, steam-pressed, or sold in a climate with high humidity; look for handle twist and opening distortion.
- Verify color variation by comparing multiple units under consistent light; acceptable shade on one bag is not proof that carton-to-carton variation is controlled.
- Inspect print density, edge sharpness, alignment, and cure quality; rub the print with a dry cloth and a slightly damp cloth to look for transfer or cracking.
- For abrasion checks, rub the printed face and corners against a neutral cloth or carton surface and note whether the image powders, smears, or loses opacity.
- Open, fold, and re-fold a sample tote several times to see whether the bag holds shape or becomes permanently distorted at the gusset, corners, or mouth.