Start with the tote’s job, not the mockup
A roaster tote can be a retail SKU, a wholesale account add-on, a subscription pickup bag, an event giveaway, or a reusable grocery-style carryall. Those uses may look similar in a mockup, but they require different decisions on canvas weight, handle drop, decoration, packing, and inspection. A tote sold at the café counter needs cleaner presentation and more consistent finishing than a one-day promotional handout. A tote intended for coffee plus groceries needs stronger construction than a lightweight brand flyer in bag form.
Procurement teams should describe the program before asking for price. A request such as “natural canvas grocery tote for café resale and wholesale partner shops, carrying several coffee bags plus light groceries” gives the supplier a clearer basis for recommending fabric weight, gusset depth, handle reinforcement, and packing. It also helps prevent a quote comparison where one supplier prices a retail-ready bag and another prices a light promotional tote.
The most common proofing error is approving artwork before the product is controlled. A digital image can hide the real issues: a logo too close to the bottom fold, small type filling in on textured canvas, a fold crease through a solid print, or handles that visually crowd the design. The print proofing checklist should therefore begin with the tote’s job and construction, then move to artwork placement.
- Define the channel: resale, giveaway, wholesale merchandise, loyalty program, event, or subscription pickup.
- State the expected load in buyer-friendly terms, such as two to four coffee bags plus light groceries.
- Identify how the totes will be displayed: folded, stacked, hung, bundled, or packed into kits.
- Decide whether hangtags, barcodes, care labels, origin labels, or individual packing are required.
- Note whether this is a one-time run or a replenishment program that must repeat consistently.
Freeze construction before approving print placement
A grocery tote is not a flat rectangle once it has a boxed bottom, side folds, top hem, seams, and handle attachments. Those details change the visible print area. If the gusset depth or handle position changes after artwork approval, the printer may follow the old proof and still deliver a bag that looks wrong.
The RFQ should specify finished dimensions, not only a general bag size. Include finished width, height, bottom gusset depth, side gusset if applicable, handle length, handle drop, handle width, top hem width, seam type, and label position. Handle drop deserves special attention because it determines whether the bag works in the hand, over the forearm, or on the shoulder. For grocery-style roaster totes, buyers should also confirm whether the bottom opens cleanly when filled and whether the bag stands or collapses as expected.
Use one dimensioned drawing as the control document. It can be simple, but it should show the front panel, gusset folds, handle attachment points, top hem, label location, no-print zones, and print measurements. The same drawing should travel with the quote request, sample approval, purchase order, and inspection checklist. That prevents separate teams from working from slightly different assumptions.
- Specify finished measurements for width, height, gusset, handle length, handle drop, and top hem.
- Confirm whether measurements are taken before or after sewing, pressing, washing, or finishing.
- Set dimensional tolerances with the supplier; practical soft-goods tolerances may be around ±1 cm to ±2 cm unless tighter control is quoted and approved.
- Keep logos away from bottom folds, side gussets, pockets, labels, and handle reinforcement areas.
- Define whether artwork is centered to the full panel, visible panel, or the space between handles.
Choose canvas weight and color with physical references
Canvas weight affects structure, print behavior, sewing, carton weight, and perceived value. For many coffee roaster grocery tote programs, 12 oz to 14 oz cotton canvas, roughly 400 to 475 GSM when specified as finished fabric, is a practical starting range. It usually has more body than light promotional canvas without becoming overly stiff or costly. This range is not a universal rule; the correct fabric depends on the intended load, retail positioning, supplier capability, and approved sample.
A lighter 10 oz or 11 oz canvas may be suitable for events, inserts, or low-cost promotions when heavy grocery loading is not expected. A 15 oz or heavier canvas may suit a premium retail tote, but buyers should check seam bulk, handle comfort, foldability, needle marks, and freight impact. Heavier fabric does not automatically make a better product if the construction is not adjusted for it.
Clarify the fabric weight language in writing. Some suppliers quote ounces per square yard, some quote GSM, and some refer to greige fabric before finishing rather than the finished fabric used in the bag. Two “12 oz” samples can feel different because weave, yarn, finishing, and processing vary. Use the number for quote comparison, but use approved swatches and pre-production samples as the real quality reference.
Natural canvas is popular with coffee brands because it fits café, bakery, market, and grocery positioning. However, natural cotton shade can vary by lot and can change the appearance of cream, tan, brown, orange, red, and green inks. If a strict brand color is required, approve the ink on the actual fabric shade, not only on a white digital proof.
- Use lighter canvas only when the tote is not expected to carry heavy grocery loads.
- Use 12 oz to 14 oz canvas as a common starting point for reusable grocery-style roaster totes.
- Treat 15 oz and heavier canvas as a premium choice that requires checks for seam bulk, fold marks, and handle comfort.
- Request swatches for natural, bleached, black, or dyed canvas before final artwork approval.
- For dyed canvas, ask about MOQ, lab dip timing, shade tolerance, and colorfastness checks.
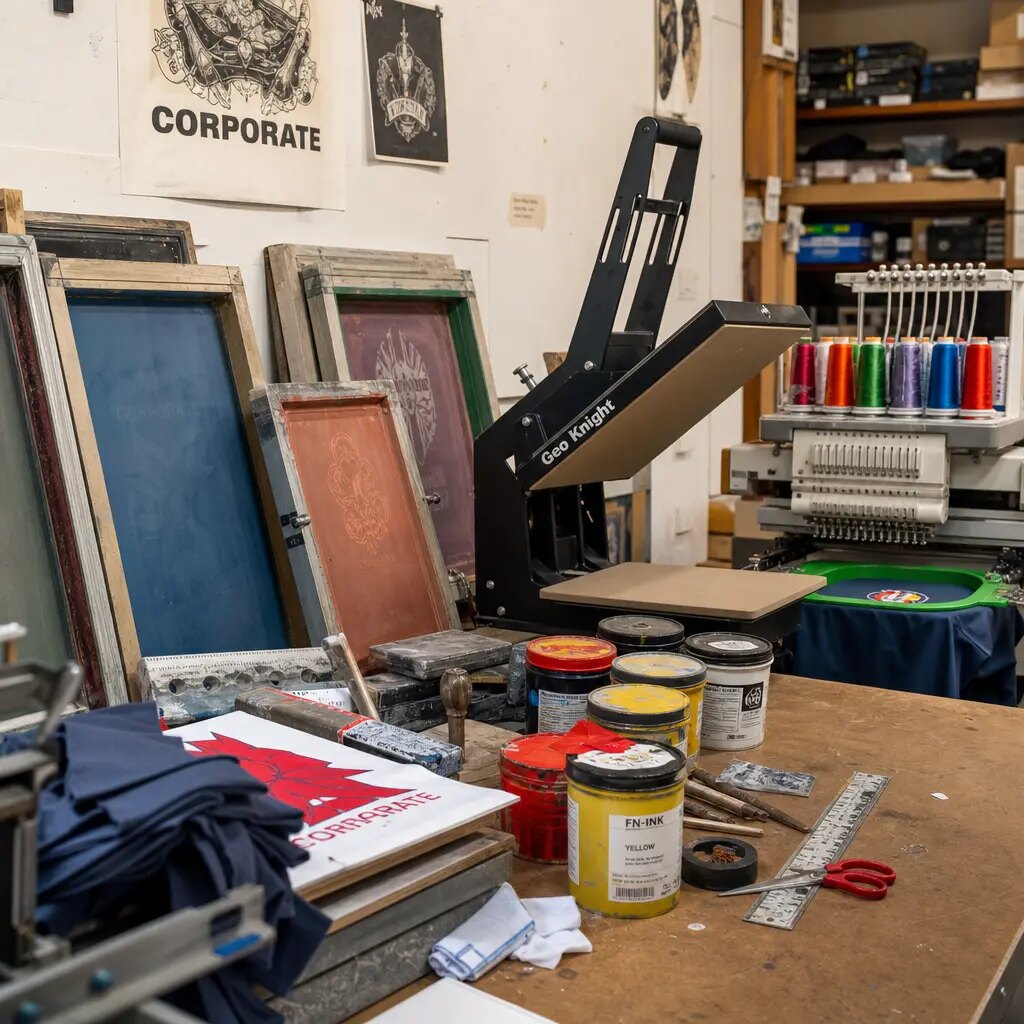
Match the print method to the artwork risk
Screen printing is often the practical default for wholesale canvas grocery totes. It works well for bold roaster logos, one-color marks, slogans, origin graphics, badges, and limited-color artwork. For one to four spot colors, it can offer a strong balance of cost, opacity, and repeat-order control.
Canvas texture creates limits that may not appear in a PDF. Thin strokes can break, small serif type can fill in, distressed textures can become muddy, and reversed lettering can close up. Circular seals, roast-note graphics, and certification-style icons should be checked at actual size. If the text contributes to retail value, it must remain legible at normal viewing distance after printing and folding.
Digital and transfer decoration can be useful for full-color illustrations, gradients, and specialty runs, but buyers should check different risks. Large transfers may change handfeel. Digital printing may need review for opacity, edge definition, and performance on the chosen canvas. For dark canvas, an underbase may be required and may count as an additional color or process step. The right method is the one that matches the artwork, order quantity, fabric color, and quality expectation.
- Ask for minimum line weight and minimum text size on the selected canvas.
- Use screen print for bold spot-color artwork and repeat wholesale orders.
- Request a strike-off for small type, borders, badges, distressed effects, gradients, or reversed-out text.
- For dark canvas, confirm whether an underbase is needed and whether it is included in the quoted color count.
- Review print handfeel for large solid areas, digital prints, and transfers.
Make the proof measurable enough for production
A print proof should be a production control document, not a presentation image. It should list artwork size, print method, fabric color, color references, placement measurements, safe print area, bag dimensions, and the approved artwork file version. A lifestyle mockup can help internal stakeholders visualize the tote, but it should not be the only document used for production.
Avoid vague instructions such as “center front” unless the supplier also defines what “center” means. On a gusseted grocery tote, the logo may be centered to the full front panel, the visible panel after side folds, or the space between handle attachments. A better instruction is measurable: for example, print width 230 mm, placed 130 mm below the top edge, centered on the visible front panel, with at least 35 mm clearance from side seams and no print crossing the gusset fold. The exact numbers will vary by tote size, but the proof must provide fixed reference points.
Color proofing also needs a physical reference. Pantone numbers help communication, but ink on natural cotton canvas will not match ink on coated paper. For strict brand colors, request a strike-off or pre-production sample on the final fabric. For repeat orders, keep the approved proof, swatch, and sample photos together so the next run is not matched from memory.
- Show print width, print height, distance from top edge, center line, side seam, bottom fold, and gusset fold.
- Mark no-print areas around seams, folds, pockets, labels, and handle attachments.
- Set placement tolerance with the supplier; ±5 mm to ±10 mm is a common practical range for many tote programs, but it depends on construction and process.
- Approve print color on final fabric, especially for natural, dyed, black, or bleached canvas.
- Use dated or versioned proof files to avoid production from the wrong artwork.
Approve a physical pre-production sample before bulk
A digital proof cannot confirm fabric body, handle balance, seam finish, print opacity, ink handfeel, or packing creases. The pre-production sample should use final fabric, final decoration method, production thread, handle reinforcement, labels, and intended fold method. If substitute fabric, substitute ink, or approximate packing is used, treat the sample as developmental rather than bulk approval.
Inspect the sample flat and filled. Flat review checks dimensions, logo position, stitch neatness, labels, and visual presentation. Filled review shows whether the bottom opens properly, side seams twist, handles feel balanced, and the logo distorts under a realistic load. For a coffee roaster tote, a practical trial could include several retail coffee bags plus light grocery items. Any load test should be treated as an internal evaluation unless the supplier provides a formal standard and written result.
Fold the sample the way production will be packed. This is often missed until cartons arrive. A tight fold can create a hard crease through a solid logo or make a resale tote look worn before it reaches the shelf. If retail presentation matters, approve the fold method with photos and include it in the packing instructions.
- Measure the sample against the spec sheet instead of judging only by appearance.
- Photograph the sample flat, filled, inside seams, handle reinforcement, label position, and folded packing state.
- Record corrections with measurements, such as “move print up 12 mm,” rather than subjective notes like “logo feels low.”
- Confirm that sample approval covers fabric, print, stitching, labels, and packing, not artwork alone.
- Keep the approved sample available for inspection and repeat orders.
Normalize supplier quotes before comparing price
MOQ and unit price can change with fabric color, bag size, canvas weight, print color count, number of placements, labels, hangtags, barcodes, and packing method. A natural canvas tote with one-color front print is not the same product as a dyed tote with multiple café names and retail packaging. If those differences are not separated, the lowest quote may simply be quoting a lighter or less finished bag.
Ask suppliers to break pricing into comparable lines: base bag, decoration, setup charges, screens, sample fees, labels, hangtags, packing labor, carton cost, and freight assumptions. Also request quantity breaks for pilot order, replenishment order, and estimated annual program volume. This helps coffee roasters decide whether to launch with a smaller run, consolidate versions, or plan a larger replenishment order.
Multi-location roasters should clarify artwork versions early. Ten café names, regional badges, or wholesale partner marks may create separate setups, separate MOQs, separate carton labels, and separate inspection records. A supplier may be able to combine production efficiently, but buyers should not assume every version is included in one simple price. Compare landed cost and operational fit, not only ex-factory unit price.
- Request quantity breaks for pilot, reorder, and annual program volumes.
- Separate unit cost from setup, sample, screen, labeling, packing, and freight costs.
- Confirm whether multiple artwork versions are combined or treated as separate runs.
- Ask about overage/shortage tolerance and how final invoicing handles it.
- Compare construction, sample standard, packing, and inspection scope before awarding on price.
Qualify supplier controls for repeatable roaster programs
A capable tote supplier should do more than accept a logo file. Before award, ask which steps are handled in-house and which are subcontracted: cutting, sewing, printing, labeling, folding, and packing. Subcontracting is common and not automatically a problem, but responsibility must be clear if print, sewing, packing, or labeling issues appear before shipment.
Canvas printing experience matters. A supplier familiar with cotton canvas should warn buyers about small type, underbase needs, registration limits, ink coverage, print placement near gussets, and fold marks before bulk production. They should also be able to recommend whether a design should be simplified, enlarged, moved, or tested with a strike-off.
Repeat-order control is especially important for multi-location cafés, wholesale partner merchandise, and seasonal replenishment. Ask how the supplier stores approved specs, artwork files, swatches, sample photos, inspection results, and carton instructions. Reorders should not depend on one salesperson remembering the previous run. The strongest suppliers can provide a dimensioned spec sheet, approved proof, sample approval record, packing instructions, and pre-shipment inspection format.
- Ask whether cutting, sewing, printing, labeling, and packing are in-house or subcontracted.
- Review supplier experience printing on cotton canvas, not just smooth fabric or paper-like materials.
- Request examples of inspection report format, carton label format, and sample approval process.
- Confirm how approved swatches, proof files, and production specs are stored for repeat orders.
- Ask who is responsible for correcting print, sewing, packing, or labeling issues before shipment.
Inspect handles, seams, print, and packing before shipment
Handles and seams determine whether the tote works in real use. Specify handle material, width, length, drop, attachment position, and reinforcement pattern. Self-fabric handles can look cohesive; cotton webbing can create a different feel or contrast. Either option should match the approved sample. Do not rely only on general terms such as “reinforced handles” because bar-tack, box stitch, and X-box reinforcement can vary by factory.
The inspection checklist should reference the approved proof and physical sample. For construction, check dimensions, gusset depth, top hem, handle drop, seam security, skipped stitches, loose threads, raw edges, puckering, and missing reinforcement. For print, check placement, tilt, color, opacity, registration, legibility, smudging, pinholes, ink spread, and whether folded packing creates severe creases through the design.
Packing inspection is just as important for B2B receiving. Confirm fold method, inner bundle count, carton quantity, carton marks, SKU separation, hangtags, barcode labels, and polybag rules if used. For retail programs, poor packing affects shelf presentation. For wholesale distribution, mixed cartons or unclear carton labels slow receiving and can create inventory errors. Keep inspection records and sample photos with the order file so future replenishment can be checked against the same standard.
- Inspect handle drop consistency, skipped stitches, loose threads, open seams, raw fraying edges, and severe puckering.
- Measure sampled units for dimensions, gusset, print placement, handle length, and handle drop.
- Check print color, opacity, legibility, tilt, registration, and placement against the approved proof.
- Verify carton quantity, inner bundles, carton marks, SKU separation, labels, and packing fold.
- Classify major defects in advance, including wrong artwork, missing reinforcement, open seams, severe print misplacement, mixed SKUs, wrong carton count, or missing labels.
Specification comparison for buyers
| Option | Best use for coffee roaster programs | Main advantages | Tradeoffs to proof before approval |
|---|---|---|---|
| Natural 12 oz cotton canvas with 1-color screen print | Core café merchandise, customer grocery carry, wholesale partner resale, and repeat replenishment programs | Balanced structure, familiar coffee-shop aesthetic, simpler sourcing than dyed fabric, and a good match for bold logos or slogans | Natural shade can vary by lot; approve an actual fabric swatch and print strike-off instead of relying only on a digital mockup |
| Natural 14 oz cotton canvas with reinforced handles | Premium resale tote, heavier market-bag positioning, and roaster merch where perceived value matters | More body than lighter promotional canvas; better retail feel when seams, top hem, and handle reinforcement are clean | Higher material and freight cost; seam bulk, handle comfort, and folded packing must be checked on the physical sample |
| 10 oz to 11 oz canvas with simple front print | Events, light giveaways, low-cost promotions, and short-term campaigns where heavy loading is not expected | Lower unit cost and carton weight; easier to distribute in large promotional quantities | May sag with coffee plus groceries; avoid calling it a heavy grocery tote unless load expectations and sample testing support that use |
| Dyed canvas with screen print or transfer | Brand-color merchandise, seasonal drops, dark tote programs, and premium café retail SKUs | Distinct shelf presence and stronger brand alignment when the tote color is part of the concept | MOQ, lab dips, shade tolerance, underbase needs, rubbing/colorfastness checks, and approval lead time can add cost and schedule risk |
| Screen print on canvas | Most 1–4 spot-color roaster logos, origin graphics, badges, slogans, and repeat orders | Cost-effective for bulk runs; strong opacity when artwork is designed for canvas texture | Fine lines, reversed type, distressed effects, and tight registration require actual-size proofing and strike-off approval |
| Digital or transfer decoration | Full-color illustrations, gradients, short specialty runs, and artwork with many tones | Can reproduce more color detail than basic spot-color screen printing | Handfeel, edge quality, opacity on canvas, film effect, and wash/rub behavior should be reviewed on the final fabric |
| Bulk packed totes | Giveaways, internal distribution, simple café counter replenishment, and non-retail shipping | Lower packing cost and less packaging waste | Can create creases, mixed counts, or slow receiving if fold method, bundle count, and carton rules are vague |
| Retail folded with hangtag or barcode | Café resale, wholesale account shipments, multi-SKU merchandise programs, and inventory-controlled launches | Cleaner presentation, easier receiving, and better SKU separation | Adds labor, label approval, barcode checks, carton marking, and additional inspection points |
Buyer checklist before sampling
- Define the tote’s commercial use: café resale, giveaway, wholesale partner merchandise, subscription pickup, event tote, employee kit, or reusable grocery carry.
- State the expected load in practical terms, such as two to four coffee bags plus light groceries, bottles, books, mugs, or apparel.
- Specify finished width, height, bottom gusset, side gusset if any, handle length, handle drop, handle width, top hem, seam type, and label position.
- Clarify fabric weight terminology: ounces per square yard, GSM, greige fabric, finished fabric, or finished bag material after processing.
- Approve fabric color from swatches or sample fabric before judging print color, especially on natural, bleached, black, or dyed canvas.
- Send vector artwork and include brand color references; do not rely only on JPG, web logo, or small raster files.
- Require an actual-size print proof with dimensions from fixed reference points, not just a lifestyle mockup.
- State whether the logo is centered to the full panel, visible panel after gusset folding, or the space between handle attachments.
- Approve a pre-production sample using final fabric, print method, ink, stitching, handle reinforcement, labels, and packing fold.
- Confirm carton quantity, inner bundle count, fold method, labeling, SKU separation, carton marks, and inspection standard before production starts.
Factory quote questions to send
- What fabric weight, weave, finished GSM or oz, and fabric color are included in this quote?
- Does the stated fabric weight refer to greige fabric, finished fabric, or the final bag material after processing?
- Can you provide swatches or lab dips before the pre-production sample, and what approval lead time applies?
- What are the finished bag dimensions, gusset depth, top hem, seam type, handle length, handle drop, and reinforcement pattern?
- What dimensional tolerances do you normally hold for this construction, and can they be written on the spec sheet?
- Which print method are you quoting, how many colors and placements are included, and what setup charges apply?
- What minimum line weight, minimum text size, and registration tolerance do you recommend on this canvas?
- Can you provide an actual-size proof and a pre-production sample using final fabric, final decoration, and final packing?
- How do you control repeat orders so fabric shade, print placement, handle length, and carton packing remain consistent?
- Can you provide inspection photos or a pre-shipment inspection report covering dimensions, print, stitching, labels, and packing?
Quality-control points to confirm
- Fabric weight should be checked against the approved specification and supplier-agreed tolerance; a commercial target such as ±5% may be used by some programs, but it should be confirmed in writing.
- Fabric color should be compared with the approved swatch or sample under consistent lighting; natural cotton variation should be judged against an agreed acceptable range.
- Finished bag dimensions should be measured after sewing and finishing, including width, height, gusset, handle length, and handle drop.
- Print placement should be measured from fixed reference points such as top hem, side seam, center line, bottom fold, and gusset fold.
- Print tilt should be checked because a technically centered logo can still look unacceptable if visibly slanted beyond the approved tolerance.
- Ink coverage should match the approved sample, with no unacceptable pinholes, smudging, weak solids, heavy ink spread, or patchy logo areas.
- Small text, thin strokes, reversed lettering, borders, and distressed details should remain legible at normal viewing distance.
- Print color should be checked against the approved proof, strike-off, or Pantone reference while allowing for ink behavior on cotton canvas.
- Handle stitching should match the approved reinforcement pattern, with no missing bar-tacks, skipped stitches, loose threads, or uneven placement.
- Packing should be checked for correct fold, carton count, inner bundle count, SKU separation, carton marks, labels, and avoidance of severe print creasing.