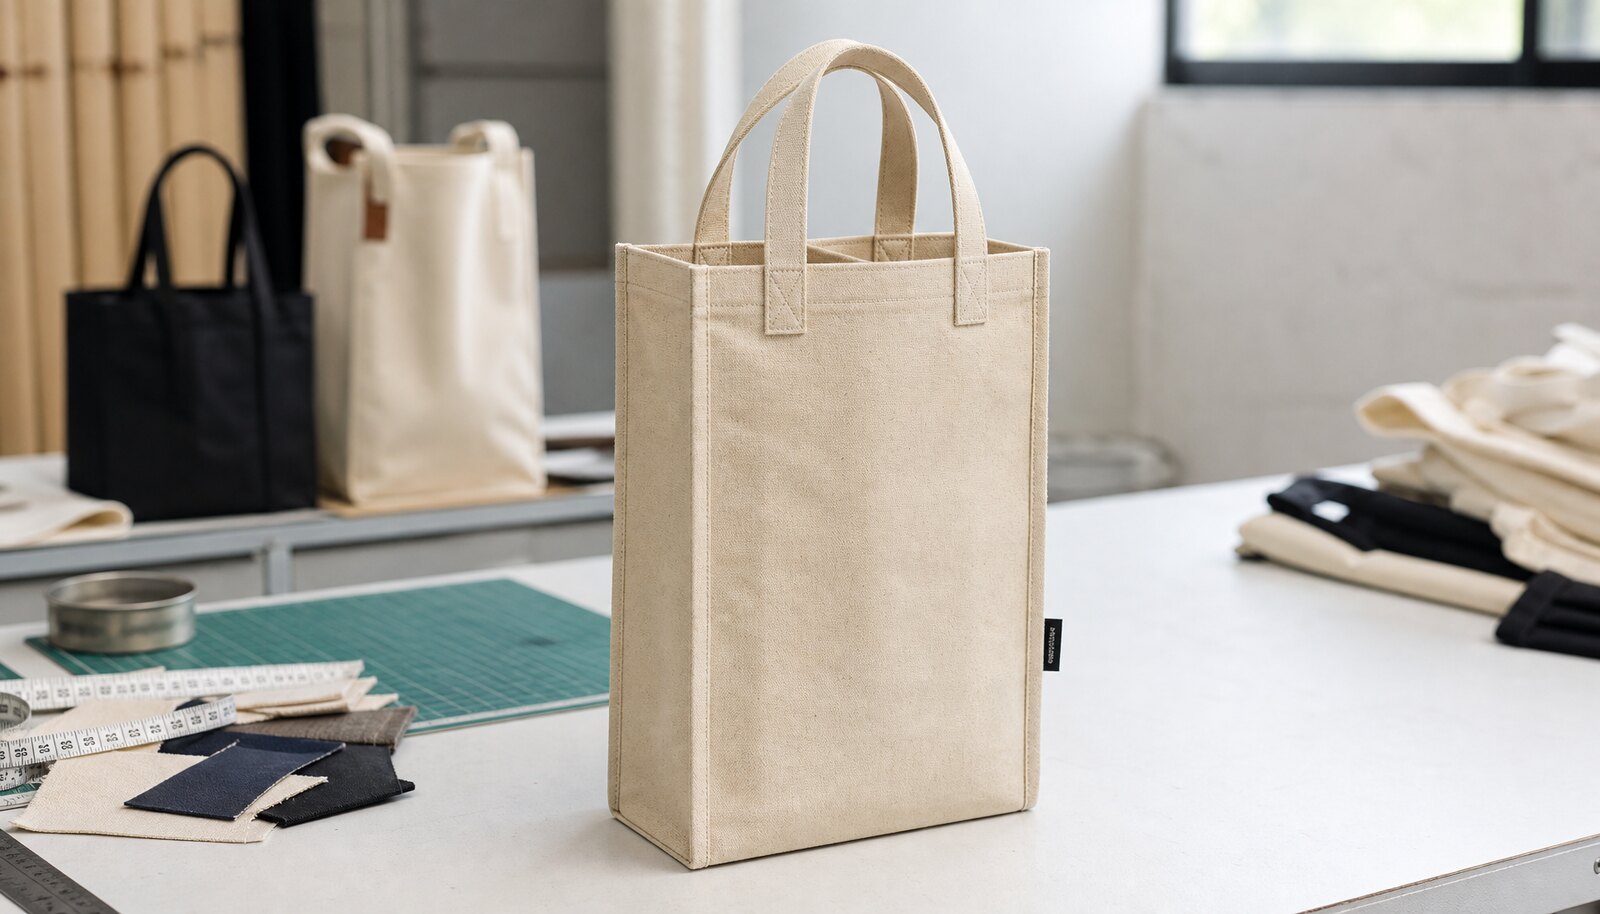
Start with bottle fit, not with the bag category
Two bottle wine bags are judged on three things: fit, carry stability, and presentation. The bag has to protect glass, load cleanly, and still look acceptable on shelf or in a gift kit. If the carrier is too tight, bottles scuff each other or stress the side seams. If it is too loose, the bottles swing, the base sags, and the bag feels cheap even when the print is clean.
The first sourcing decision should be the bottle envelope, not the bag style. A pair of standard 750 ml Bordeaux bottles usually starts around 165-175 mm internal width, 85-95 mm depth, and 360-390 mm height, with 25-40 mm of headroom above the shoulder. Burgundy and champagne bottles need more width and front-to-back room because their bodies are broader and the shoulder shape is less forgiving. If you are adding a sleeve, ice pack, or bottle gift wrap, leave extra clearance from the start.
Do not let the supplier quote from the phrase two bottle wine bags alone. Give the filled bottle weight, the bottle family, and the intended handling method. A bag used for one-time gifting can lean more toward presentation and structure, while a bag meant for repeated carrying needs a bit more allowance around the bottles and a more disciplined handle build.
- Measure the maximum bottle diameter and not just the label diameter.
- State whether the bottles are Bordeaux, Burgundy, champagne, or a mixed range.
- Add headroom for closures, sleeves, or chilled bottles before you freeze the spec.
Choose the construction before you compare prices
Most two bottle wine bags fall into four practical construction families. The open-top divider tote is the simplest and usually the easiest to price, pack, and decorate. It works well for retail promotions and corporate gifting when the bottles do not need a closure. A zip-top or flap-top carrier adds a more finished feel and can improve perceived value, but it adds sewing steps, hardware or closure cost, and more chances for variation.
Structured gift carriers sit at the premium end. They often use a board base, a firmer side wall, a lined interior, and more precise edge finishing. That build makes sense when the bag must sit upright in a retail display or become part of a gift set. For pure transport, the extra structure can be more expensive than necessary. For presentation, it may be exactly the right spend.
The divider is not optional in most glass-bottle programs. It is what keeps the bottles from knocking together and it helps the bag hold shape. If the design uses a simple internal wall, ask how the wall is sewn into the base and side seams. If the bag is insulated or padded, insist on a seam map so you can see whether the factory is building the divider as a real structural element or just folding in extra fabric.
- Use an open-top divider tote when cost, speed, and simplicity matter most.
- Use a zip or flap closure only when presentation or bottle retention justifies the extra work.
- Use a structured carrier when the bag must stand on shelf or anchor a gift set.
Match fabric weight and build quality to the route to market
Material choice should follow the commercial job of the product. Cotton canvas is the easiest path when you want printability, clean edges, and a straightforward sewing process. As a working starting point, 240-280 GSM is reasonable for lighter promotional programs and 300-340 GSM is a safer zone for retail-facing bags that need more body and a more premium hand feel. Jute gives a rustic look and can read as gift-ready, but it needs better edge finishing and more attention to odor, fiber shed, and alignment.
Nonwoven still has a place in budget programs, event giveaways, and temporary promotions. It is not the right choice when the bag must behave like a retail accessory. If you use nonwoven, keep expectations tight on shape retention, print durability, and handle reinforcement. Buyers often over-spec the artwork and under-spec the construction, then wonder why the bag does not feel sturdy when loaded.
Look beyond the headline fabric name. The real durability comes from seam allowance, stitch quality, reinforcement patches, and the way the factory cuts the panels. For canvas, a 3-5 mm seam allowance with double topstitching is a sensible baseline. For heavier jute, 5-7 mm and edge binding or a lined seam are often more forgiving. Handles should be reinforced at the top seam and at the stress point where the user lifts the load.
- Ask for GSM or ounce weight instead of accepting a generic fabric description.
- Confirm whether the bag is lined, laminated, or fitted with a board insert.
- If the carrier is for repeated use, pay more attention to reinforcement than to decorative hardware.
Branding should follow the seam map, not just the artwork file
Two bottle wine bags are usually branded simply, and that is often the right decision. One-color screen print is efficient when the panel is flat and the logo is not too detailed. Woven labels, sewn side labels, and small PU patches are useful when you want a cleaner premium look without relying on large-area printing. Embroidery can work on heavier canvas, but it needs discipline. Too much stitch density can distort softer fabric and make the panel buckle around the design.
The print layout has to respect the construction. If a divider line, side seam, or top fold runs too close to the artwork, the logo can land in a crease or disappear into the seam allowance. Ask the supplier for a print template and a strike-off on actual fabric before the run is approved. On jute or coarse canvas, artwork that looks clean on screen can spread in the weave, so a real fabric sample matters more than a digital mockup.
Keep the branding brief. If the bag surface is textured, the logo should usually be scaled for clarity rather than forced into a large area with thin lines. A clean one-color mark, a centered label, or a simple woven patch usually survives production better than a dense multi-color treatment. If your brand system needs exact colors, specify the Pantone target and ask how the factory will control ink consistency across the full order.
- Keep artwork away from seams and top folds so the design does not distort.
- Approve a strike-off or printed fabric swatch before bulk production.
- Use woven labels or sewn patches when the material surface is too rough for clean print.
Use the right comparison table, not just a short supplier list
A useful comparison table should tell you more than which supplier is cheapest. It should show you what each route is actually buying, what the MOQ is likely to be, and where the hidden risk sits. A low-cost stock route can look attractive until you discover the size is wrong for your bottle shape or the material is too thin to hold two full bottles without distortion. A direct factory quote can look more expensive until you realize it includes better structure, a smaller freight carton, and less rework at your warehouse.
The point of the table is to separate sourcing paths by commercial use, not just by price. If the bag needs exact bottle fit and repeat orders, direct factory control matters. If you only need a pilot or event stock, stock-plus-decoration can be enough. If the order combines several bag styles, a trading company can simplify communication, but only if you still get factory disclosure and a clear breakdown of where the cost sits.
The best comparison happens when every quote is anchored to the same dimensions, the same pack count, and the same incoterm. If one supplier quotes a flat-packed 50-piece carton and another quotes a heavier 30-piece carton, the headline unit price is not a real comparison.
- Compare like with like: same size, same carton pack, same artwork, same incoterm.
- Read the table as a sourcing decision tool, not as a price-only list.
- Ask where the risk sits: in fit, in sewing, in packing, or in freight volume.
How to compare EXW and FOB without fooling yourself
The right way to compare two bottle wine bags is landed cost, not factory price alone. A supplier that quotes EXW may look cheaper until you add origin handling, inland transfer, export paperwork, freight, destination charges, duty, and any inspection or rework cost. A supplier quoting FOB can still be cheaper on a landed basis if the carton packs more efficiently or the factory has already absorbed some origin-side cost into the quote.
A simple example makes the point. If Supplier A quotes EXW at 1.28 dollars per bag, and you add 0.07 dollars for export packing and inland movement, 0.03 dollars for origin handling, 0.18 dollars for freight and destination fees, and 0.11 dollars for duty and brokerage, your landed cost is 1.67 dollars. Supplier B may quote FOB at 1.34 dollars and still land cheaper if the carton is smaller, the pack count is better, or the freight cube is lower. The lesson is not that one incoterm is better. The lesson is that the same quote basis must be used for all suppliers.
This matters even more when the bag is physically bulky. A minor change in carton dimensions can have more impact on total landed cost than a small change in unit price. If one bag packs flat and another arrives semi-formed, the freight math changes. That is why carton size, gross weight, and pack count belong in the first round of quoting, not as a late-stage packing note.
- Put every supplier on the same incoterm before comparing price.
- Add freight cube, duty, and destination handling to the unit cost view.
- Watch for a cheap unit price hiding a bigger carton or lower pack efficiency.
Sampling should prove fit, not just appearance
The sample process is only useful if it reproduces actual use. Empty bags hide weak handles, awkward divider placement, and base sag. Use the exact bottles you plan to ship and test the sample as a filled bag, not as a display piece. If the product will be sold chilled or used with sleeves, include that condition in the sample review because moisture and surface friction change how the bag behaves in the hand.
A good approval flow has three stages. The reference sample locks the appearance, the material hand, and the brand placement. The pre-production sample confirms the final fabric lot, trims, seam execution, and carton pack. The shipment sample or inspection then checks that bulk output still matches the approved standard. If you skip one of those gates, the common failure is not a dramatic defect. It is a quiet drift in fabric weight, label position, or packing density that creates friction later in receiving or retail.
Keep a signed golden sample and do not treat it as a nice-to-have. If the factory has to resolve a dispute later, you want one physical standard with a date, a signature, and a clear note about what was approved.
- Test the sample with the actual filled bottles and the actual carrying method.
- Approve the fabric lot, print placement, and carton pack before bulk starts.
- Keep one signed golden sample so the bulk line has a fixed reference.
Quality control should use numbers, not just opinions
QC for two bottle wine bags becomes much easier when the buyer sets measurable thresholds. Size tolerances, stitch density, load testing, and print registration are all controllable if you define them before the order starts. Without those thresholds, the inspection team has to rely on visual judgment, which is exactly how borderline goods pass one batch and fail the next.
The most useful tests are simple. Measure the finished dimensions and compare them to the approved spec. Check the handles and reinforcement points under static load. Inspect the divider alignment and base flatness. Review print consistency under rubbing and light handling. If the bag has a closure, cycle it several times. If the bag is made from jute, pay extra attention to odor, dust, and edge finishing because those issues are easy to miss in a quick line check.
The same goes for packaging. A carton that is a little too heavy or a little too tight may survive production but cause warehouse damage. Set a gross-weight target and keep carton count within a range that protects the product rather than maximizing the number of units per master carton.
- Use plus or minus 5 mm as a practical size tolerance for canvas and plus or minus 8 mm for jute or nonwoven unless your own standard is tighter.
- Set stitch-density expectations in the quote stage so the inspector can verify them later.
- Treat print, carton, and finish as quality items, not packaging afterthoughts.
Packing and cartons change both freight and shelf behavior
Packing is part of the product. Flat packing is usually best for canvas and nonwoven because it saves cube and lowers freight cost. Semi-formed packing can help when the bag must keep a sharper shape or when the fabric has strong memory. For jute and heavier structured bags, a little extra support, such as tissue, a paper board, or a light internal insert, can prevent the product from arriving crushed or skewed.
The carton spec should be written into the quote. Ask for master carton count, carton dimensions, gross weight, carton material, and label placement. If the cartons are too dense, the bags arrive compressed and the first customer sees wrinkles or distorted edges. If the cartons are too light or too large, freight cost climbs and handling becomes less efficient. For export programs, keep master cartons under 15 kg where possible. Above roughly 18 kg, manual handling risk rises and damage tends to increase.
Pack count should follow thickness, not the supplier's preference. A thin nonwoven run may fit 100-200 pcs per carton, a typical canvas carrier may work better at 50-80 pcs, and a structured lined bag may need only 20-40 pcs to stay presentable. If the goods are going into humid shipping lanes or if the bag uses jute, add moisture control and confirm whether the factory will use desiccant or an extra inner wrap.
- Match carton count to product thickness instead of maximizing count at all costs.
- Keep carton weight in a handling-friendly range, especially for retail distribution.
- Ask for moisture protection if the material is jute or the lane is humid.
Write the RFQ so suppliers cannot quote different products
A clean RFQ removes room for interpretation. Start with the bottle profile, then give the finished or internal dimensions, the material weight, the construction type, the handle spec, the divider layout, the print method, and the final packing target. Add the incoterm, destination, and sample standard so the supplier knows exactly what they are pricing. If you leave any of those items open, each supplier will fill in the blanks with a different default and the price comparison becomes noisy.
The best RFQ is not long for the sake of being long. It is complete in the places where factories tend to improvise. That means dimensions, reinforcement, artwork box, carton count, and acceptance standard. If the order includes multiple colors or SKUs, list each one separately. If one SKU is a premium structured carrier and another is a flat promotional tote, do not allow them to blur together in a single blended quote.
Ask for proof where it matters. A photo of similar construction, a fabric swatch, a strike-off, or a short line video is more useful than a general promise. You are buying a repeatable product, not just a nice sample.
- Put bottle type, size, and filled weight at the top of the RFQ.
- Separate each SKU by construction, color, and pack count.
- Request written confirmation of anything the quote excludes.
Specification comparison for buyers
| Spec decision | Recommended option | Typical MOQ / price signal | When it fits | Construction detail to demand |
|---|---|---|---|---|
| First custom run | Direct factory with a pre-production sample | Often 500-1,000 pcs/color; unit price usually sits in the middle because sampling and setup are spread out | You need exact bottle fit, logo placement, and a repeat order path | Ask for a divider tote or structured carrier with locked fabric GSM, sample-approved color, and final carton spec |
| Lowest MOQ pilot | Stock body plus local decoration | Often 50-300 pcs; lowest setup cost but usually the least flexible on shape | You need a market test or event stock quickly | Use simple one-color print or a sewn label on an existing bag body |
| Premium retail look | Structured canvas or jute with lining and board insert | Usually 1,000+ pcs; higher unit cost because of lining, insert, and more sewing steps | The bag must sit on shelf or anchor a gift set | Specify double-layer handles, board base, neat edge finishing, and flat, centered branding |
| Complex divider or insulated layer | Direct factory only | Usually 1,000+ pcs and more expensive than a simple tote | You need a sewn divider, thermal lining, or foam/board structure | Demand a sewn-in divider height that matches the bottle shoulder and a clear seam map |
| Simple one-color logo | Direct factory or a capable local decorator | Often 300-1,000 pcs; lower setup cost if the panel is smooth | The artwork is flat and the bag is not heavily textured | Use screen print or a woven label, and lock the print box away from seams |
| Mixed SKU program | Trading company with factory disclosure | Pricing is easier to bundle, but the unit number often hides margin | You are combining colors, sizes, or bag styles in one order | Ask for a spec sheet by SKU and a separate price for each construction |
| Repeat annual order | Direct factory with frozen spec sheet | MOQ can be stable but the real value is consistency, not the lowest quote | You need the same bag for seasonal or year-round replenishment | Freeze GSM, color standard, label artwork, carton count, and incoterm |
| Fastest quote comparison | Any supplier route that can quote the same EXW or FOB basis | Choose the route that can answer cleanly and quickly, not just cheaply | You need apples-to-apples pricing across 3 to 5 sources | Force all suppliers to quote the same dimensions, pack count, and sample standard |
Buyer checklist before sampling
- Measure the exact bottle envelope: bottle style, height, maximum diameter, shoulder shape, and filled weight.
- State the use case up front: retail resale, tasting room carry, corporate gifting, or gift-set packaging.
- Start the RFQ with internal dimensions, not just bag style. For two standard 750 ml Bordeaux bottles, a practical starting point is 165-175 mm internal width, 85-95 mm depth, and 360-390 mm height. Burgundy or champagne pairs usually need more width and depth.
- Choose the construction first: open-top divider tote, zip-top or flap-top carrier, or structured gift carrier with board insert.
- Lock the material spec before you ask for price: cotton canvas, jute, nonwoven, or a blended build with lining or lamination.
- Ask for the exact fabric weight in GSM or ounces. As a starting point, 240-280 GSM suits lighter promotional canvas and 300-340 GSM suits retail-facing canvas.
- Define the handle build: self-fabric or webbing, handle width, handle drop, reinforcement patch, and whether the handle is double-layered.
- Specify branding method, artwork size, Pantone target, print panel, and how far the print must sit from seams and top edge.
- Ask for MOQ by color, by artwork, and by carton pack. Do not accept only one total MOQ number.
- Request a pre-production sample with the actual filled bottles you plan to ship, not empty bags or dummy weights.
Factory quote questions to send
- What is the unit price at each MOQ band, and what exactly changes between those bands?
- Is the quote EXW, FOB, or another incoterm, and which charges are excluded from the unit price?
- What is the sample fee, plate fee, setup fee, and any special packaging fee?
- What fabric spec is included: GSM or ounce weight, weave, finish, pre-shrink status, lining, and board insert if any?
- What is the finished size, internal size, and tolerance range on width, depth, and height?
- What stitch density will you use on the main seams, and how are the handles reinforced?
- How are the dividers built and positioned so the bottles do not rub against each other or against a seam?
- What print method is included, how many colors are allowed, and what is the registration tolerance?
- What carton count, carton size, and gross weight are planned for the bulk pack?
- Can you share pre-production photos or a short video of the sample and the sewing line before shipment?
Quality-control points to confirm
- Measure the finished bag size against the approved spec. Set a practical tolerance of plus or minus 5 mm for canvas and plus or minus 8 mm for jute or nonwoven unless your own packing standard is tighter.
- Test the bag with the exact filled bottles you will ship. The carrier should hold the load without seam pop, base distortion, or handle pull-out.
- Check handle reinforcement. Look for two rows of stitching or a clear reinforcement patch at each stress point, with no skipped stitches, puckering, or loose thread tails longer than 5 mm.
- Set a stitch-density target and inspect it on the first cartons. A common working range is 7-9 stitches per inch for canvas and 6-8 stitches per inch for heavier jute, unless the sample is approved otherwise.
- Verify divider alignment and base flatness. The two bottles should stay separated, sit level, and not press into a seam or fold line.
- If the bag has a closure, cycle it repeatedly before release. Zippers, snaps, and flaps should open and close smoothly after at least 20 cycles.
- Inspect branding against the master sample. For simple print, keep placement within 2-3 mm of the approved position, and reject visible ink spread, cracking, or color drift.
- Use a static load test before bulk approval. A practical buyer threshold is at least 3x the expected filled weight for 60 seconds without failure.
- Check rub resistance on the print. A dry cloth rub test of 10 strokes should not leave unacceptable transfer or visible breakdown.
- Review carton quality. Cartons should match the PO count, dimensions, markings, and gross weight, and the finished cartons should survive a basic drop or corner-handling check without crush damage.