Why museum tote programs need a different QC lens
Museum buyers do not source tote bags in the same way a promotional buyer does. The product may sit in a retail shop next to books, exhibition catalogs, stationery, or premium gifts, but it still has to survive real use once the customer leaves the museum. That means the sourcing brief needs to balance appearance, carrying strength, sustainability claims, and pack efficiency. A bag that looks acceptable in a sample photo can still disappoint if the handle seam fails under load or the print loses clarity after folding.
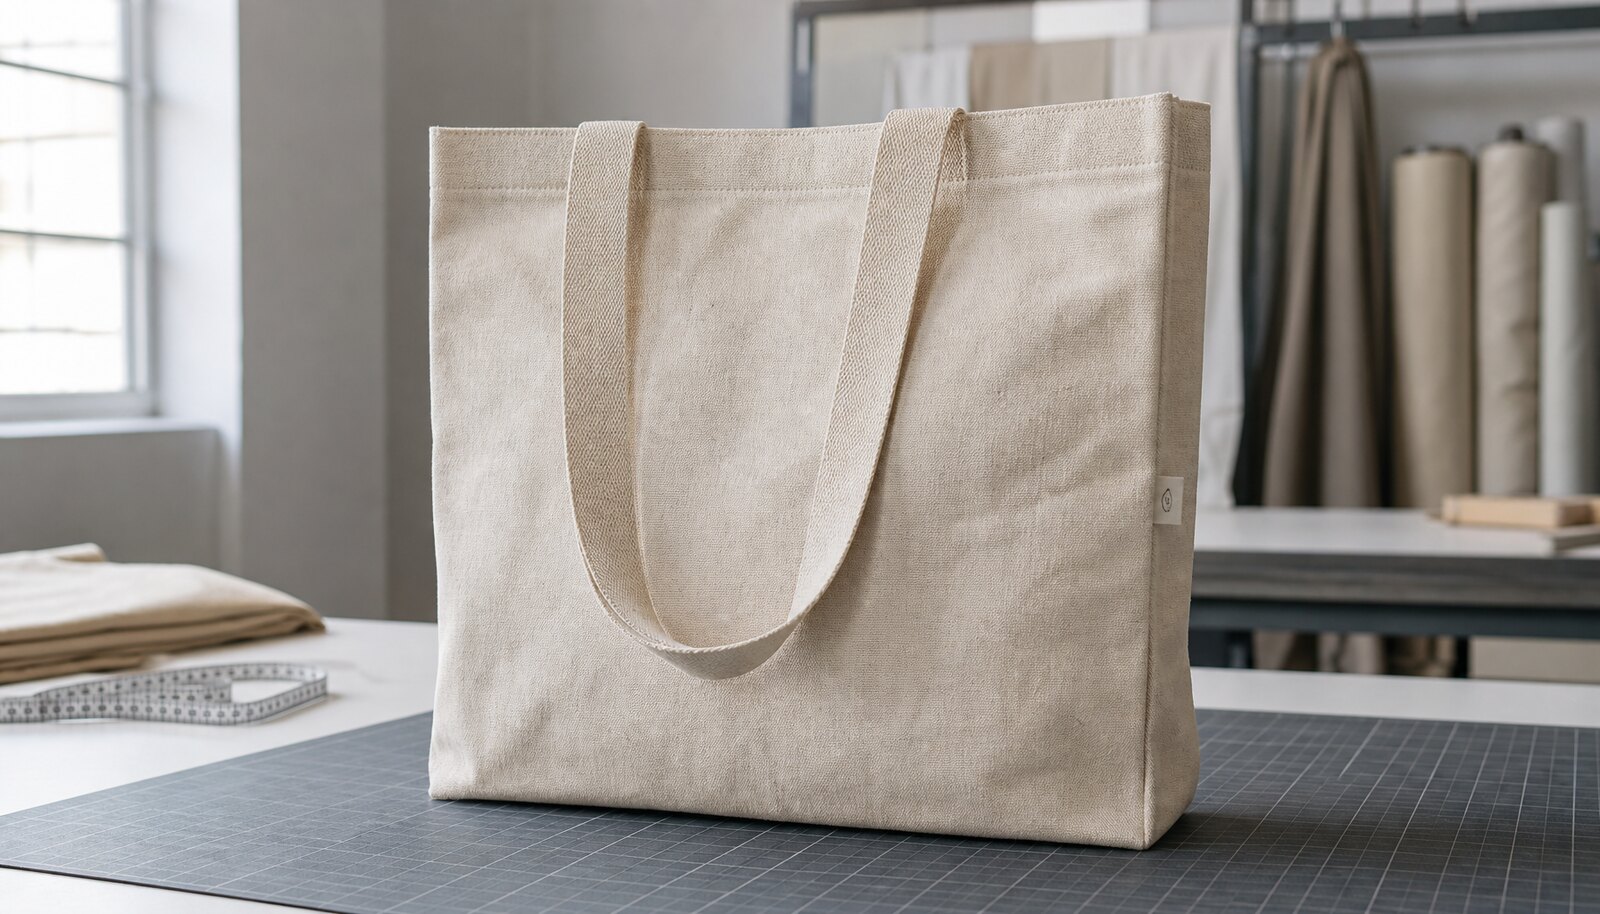
The main procurement mistake is to treat recycled canvas totes for museums as a simple logo item. In reality, buyers are often sourcing for two different jobs at once: shelf presentation and daily carry. A tote for museum retail has to feel deliberate, not generic. The buyer should care about the body of the bag, the way the seams finish, how the print sits on the weave, and whether the bag keeps its shape after pressing, packing, and unpacking. If those details are not written down, the quote comparison will favor the cheapest-looking line item rather than the most dependable supplier.
The QC approach should also reflect how the bags will be sold. A visitor giveaway bag may tolerate more softness, lighter fabric, and simpler packing. A paid retail bag usually cannot. Once the selling price rises, the bag itself becomes part of the museum’s brand experience. Buyers who set quality rules at that level tend to ask better supplier questions, get more honest pricing, and avoid the common trap of approving a pretty sample that cannot be repeated in bulk.
- Retail-facing museum bags usually need cleaner finishing and a more consistent silhouette than event giveaways.
- A bag that will carry books, catalogues, or boxed merch needs stronger handles and bottom corners than a bag used only for light handouts.
- Artwork matters, but it should never be the only approval point; fabric, seams, and packing are what decide whether the item feels premium or cheap.
Start with fabric weight, recycled claim, and weave consistency
For most museum retail programs, a useful starting point is 12 oz to 14 oz recycled canvas, which is roughly 340 to 475 GSM. That range usually gives enough structure for a bag to stand upright on a shelf, yet still fold into carton pack efficiently. Below that range, the tote may feel soft or collapse when merch is inserted. Above that range, the bag can feel sturdy but become bulky, slower to pack, and more expensive to ship. There is no universal best weight; the right choice depends on whether the tote is a premium retail item, a high-turn visitor bag, or a heavier carry bag for catalogs and hard goods.
The recycled content claim should be written as a sourcing requirement rather than a marketing phrase. Buyers should ask what the canvas actually is: recycled cotton canvas, a recycled cotton blend, or a recycled-fiber canvas construction with supporting documents. The supplier should be able to explain whether the claim is tied to yarn input, fabric composition, or mill certification. If the answer is vague, the risk is not only compliance language. Mixed or unstable lots can create shade differences, handle shrinkage variation, and print inconsistency from one production batch to the next.
Weave consistency matters because it affects both appearance and decoration quality. A tighter, more even face usually gives the logo cleaner edges and more predictable ink coverage. A looser weave can be acceptable if the brief is cost-driven, but the buyer should expect a more textured print and a softer hand. If you are comparing quotes, ask the supplier to send the actual fabric swatch used for the order, not a generic sample of similar weight. Two fabrics with the same GSM can still behave very differently once cut and printed.
This is also the point where repeat-order buyers should think ahead. If the museum expects replenishment during a season or for a continuing retail program, shade control becomes part of the spec. Ask whether the factory can hold the same fabric lot, or at least stay within a documented shade band. For recycled canvas, that question is not optional. A slightly uneven tone may be acceptable for a casual promo bag, but a retail bag with panel-to-panel mismatch looks unfinished on the shop floor.
- Lock fabric spec in both oz and GSM to reduce quote ambiguity.
- Ask for the exact recycled claim wording the supplier will use on paperwork and product labeling.
- Request a sample swatch from the same fabric lot planned for production, not a substitute cloth from stock.
Choose the print method based on artwork, handling, and shelf life
Museum logos are often simple, but the decoration choice still affects cost, visual quality, and defect risk. Water-based screen print is usually the strongest option for one- to three-color artwork because it gives a clean, direct look on canvas and can handle repeated use when the ink build is controlled correctly. If the design contains tiny text, fine linework, gradients, or a high number of colors, heat transfer may solve the artwork problem faster. However, it brings its own acceptance questions: will the edge stay flat, will the print crack where the bag folds, and will it still look tidy after the tote has been packed and unpacked many times?
The buyer should tie the decoration method to the real use of the bag, not to what the factory happens to run most easily. A tote that will be folded for shipping needs print durability at the fold line. A tote that will sit in a museum shop display needs sharp centering and color consistency. A tote sold at a premium price often benefits from a smaller, cleaner decoration approach, such as a woven side label, sewn patch, or restrained embroidery, rather than a large front graphic that can dominate the bag. That said, premium decoration only makes sense if the supplier can control placement and stitching quality closely enough to look deliberate.
A strong RFQ should make the decoration rules measurable. Instead of asking for a “nice print,” specify print location, maximum shift, acceptable color variation, and whether first-fold cracking is a rejection. If the art includes a border, specify the allowable border drift. If the logo needs to sit centered over a gusset seam or pocket seam, say so directly. These details save time because the factory can quote the right production method and the inspector knows exactly what to measure later.
One practical sourcing tip: ask for a decorated pre-production sample, not only a blank sample. A plain bag can prove sewing quality but still hide print problems. Museum buyers often discover the real issue only after decoration, especially if the fabric texture is open enough to affect ink coverage. The sample stage is the cheapest place to catch that problem.
- For simple logos and repeat orders: screen print is usually the cleanest value choice.
- For fine detail or short-run tests: heat transfer may be acceptable only if sample folding and durability are verified.
- For a premium retail look: woven label, sewn patch, or small embroidery can work better than a large full-front print.
- If the artwork has borders or small type, define the print registration tolerance in millimeters before approving production.
A practical comparison of sourcing routes and supplier behavior
Not every supplier quotes museum totes the same way, and the sourcing route changes both price structure and control. Some buyers work directly with a cut-and-sew factory that manages fabric, stitching, decoration, and packing in one place. Others use a trading company or sourcing agent that consolidates multiple workshops. A third route is buying from a stock-base supplier who customizes in-stock blanks. None of these routes is automatically better. The right choice depends on order size, timeline, quality tolerance, and how much technical coordination your team can handle internally.
A direct factory quote can be the best option when the museum wants repeatability, traceability, and tighter control over fabric and trim. The tradeoff is that the buyer needs to be more precise in the RFQ and more active during sample approval. A trading-company route can be easier for smaller teams because it reduces communication friction and may help with artwork changes or lower MOQs, but the buyer needs to watch for vague material descriptions and inconsistent production ownership. Stock-base customization can work for quick-turn or test programs, but it usually offers fewer options on weight, color, and handle style.
The real decision trigger is not just the unit price. It is whether the supplier can reproduce the same bag in six months with the same appearance and the same risk profile. For museum retail, that matters. Reorders are common, and a bag that looks slightly different on the next PO can create assortment problems in the shop. Ask each supplier how they control lot traceability, shade matching, label sourcing, and sample retention. If the answer is “we will do our best,” the quote is not as strong as it looks.
The table below is a sourcing shortcut for buyer teams that need to compare factory-direct, trading, and stock-base options on the same screen.
How MOQ logic affects unit cost, decoration fees, and repeatability
MOQ is not just a factory rule; it is the point where the supplier decides whether the order is efficient enough to run cleanly. In recycled canvas tote programs, unit price usually improves when the order is large enough to spread fabric setup, cutting, screen prep, sewing line changeover, and packing labor across more pieces. A 500-piece order with a single logo may still be viable, but it should not be priced or managed like a 3,000-piece replenishment order. Buyers often compare only the headline piece price and miss the actual cost of getting the right bag to market.
The more variants you add, the more the MOQ logic changes. If the museum wants different exhibit names, language versions, or two handle colors, ask whether the supplier treats each version as a separate MOQ or as one combined order with extra setup. Some factories keep the MOQ low but charge screen fees, label fees, extra fabric loss, or small-run labor premiums that push the real price higher than a cleaner, larger quote. If the design split is important for merchandising, get those extra charges written into the quote in advance.
For museum buyers, the better decision trigger is often the service model rather than the smallest MOQ. If you need an exact repeat order later, a supplier with a slightly higher minimum may be a safer long-term partner because they can keep the fabric standard and decoration method stable. If the tote is for one exhibit only, a flexible low-MOQ source may be enough even if it costs more per piece. In procurement terms, the cheapest first order is not always the best total program cost.
A good comparison should show not just MOQ but the practical consequences of that MOQ: how many designs can be split, whether screens are reusable, whether fabric is reserved, and whether the sample approval process resets if the order is delayed. Those details change the buyer’s true landed cost.
- Clarify whether MOQ applies per design, per color, per fabric lot, or per total order.
- Ask if one artwork change triggers a new screen fee, new cutting batch, or new sample approval.
- Compare landed unit cost, not only EXW or FOB piece price.
- If reorders matter, prioritize suppliers who can document fabric and trim continuity over suppliers who only quote aggressively on the first PO.
Quality checkpoints that prevent the most common tote failures
The best inspection checklist is specific enough that the factory can prevent defects before bulk production starts. For recycled canvas totes, the recurring problems are predictable: weak handle attachment, crooked top edge, print misregistration, inconsistent bag size, and shade mismatch across panels. These are not small issues when the tote is sold through a museum shop. A crooked or poorly stitched bag can look off-brand even when the logo itself is correct. A handle failure is not a cosmetic defect at all; it is a functional failure that can turn into a complaint or return.
To make the inspection useful, separate defects into critical, major, and minor categories before production begins. Critical defects are the ones that affect safety, function, or product identity: open seams, broken handle reinforcement, wrong artwork, or size outside the approved tolerance. Major defects are those that make the bag unsuitable for retail sale even if it still functions: obvious print drift, heavy shade mismatch, twisted top line, or poor shape retention. Minor defects are things that a buyer may tolerate in limited numbers if the bag still looks retail-ready, such as slight thread tails or small label skew inside a narrow allowance.
AQC and AQL should work together. The supplier may tell you they “inspect to AQL 2.5,” but that alone is not enough. Buyers need their own defect definitions and pass/fail rules. For example, a batch may pass a standard visual AQL but still fail the museum’s standards if the logo is off-center or the handle drop is inconsistent. In other words, the inspection standard should not replace the product spec; it should enforce it. The best practice is to define measurable tolerances first, then apply the sampling plan to those tolerances.
If the order is large enough to matter financially, ask the factory to sort a pilot lot before bulk packing and to hold the approved master sample at line-side for reference. That simple control often catches recurring issues early, especially when multiple sewing operators are involved. For a museum tote program, consistency across the lot is usually more valuable than perfection on one sample piece.
- Critical: broken handle stitch, open seam, wrong artwork, or finished size outside tolerance.
- Major: obvious print shift, heavy shade difference, warped top line, poor shape retention, or visible puckering in the body.
- Minor: small thread trim issue, slight wrinkle, or tiny label skew within the approved allowance.
- Ask the supplier to inspect beginning, middle, and end cartons separately so quality drift is easier to spot.
- When possible, keep the approved master sample with the factory and with your receiving team so both sides are judging against the same reference.
Sample approval should test more than appearance
A good sample process for museum totes should include three stages: material swatch confirmation, pre-production sample approval, and a short functional test on the actual decorated bag. A blank sample can prove the pattern and stitching, but it does not confirm how the print sits on the canvas, how the handles respond under load, or whether the final folded bag still looks clean after pressing. Buyers should ask for a sample process that reflects real use, not just a pretty photo.
The functional test does not need to be complicated. Load the tote with books, catalogs, or equivalent weight and check the handle attachment, seam drag, and shape recovery. Fold the bag several times in the way it will be packed for shipment. Then inspect the decorated area for cracking, edge lift, or print distortion. If the tote will be displayed open in the shop, stand it upright and check whether it holds its shape or collapses at the mouth. Those checks tell you more than a single flat-lay photo ever will.
Approval records should be visual and dated. Keep front, back, inside, seam detail, bartack close-up, print close-up, label position, and overall size photos. If the bag includes a woven side label or internal brand mark, check it at this stage rather than after shipment. A lot of avoidable disputes happen because the sample approval was verbal, the artwork changed slightly, or the buyer assumed the factory would remember the earlier version. In practice, the approved sample becomes the contract reference when something is unclear.
This stage is also where buyers can reduce future rework. If the sample shows a handle that sits too high, a logo that crowds the seam, or a seam allowance that distorts the silhouette, fix it before production starts. The cost of a revised sample is usually much lower than the cost of a full lot with the same problem.
- Test fold lines for print cracking if the tote will be packed flat.
- Load the sample with realistic items, not just an empty bag check.
- Approve dimensions, logo position, and label placement together rather than treating them as separate approvals.
- Keep a dated photo record of the approved sample and send the same reference to both production and receiving teams.
A buyer-grade inspection checklist with pass/fail examples
A procurement checklist becomes useful when it tells the factory what acceptable means in measurable terms. For recycled canvas totes, that means setting simple but explicit pass/fail criteria before production. If you leave the rules too open, the factory may pass bags that look fine on a bench but fail when the museum merch team opens the cartons. The inspection standard should cover dimensions, sewing, decoration, color, and packing as separate checks.
Use a measurement tolerance that fits the program. For a museum retail tote, finished width, height, and gusset should be checked after pressing or conditioning. If the tote is sold as a premium item, a small drift in logo position can be enough to downgrade the whole lot even if the bag is technically functional. For handle length, confirm not just the measured number but the carry experience: does it sit correctly on the shoulder, and do both handles match? That practical check matters because a few millimeters of mismatch can make a tote look crooked when worn.
A clear defect definition helps the QC team act quickly. Critical defects should stop the lot: broken seam, open handle bartack, wrong artwork, missing logo, or bag size outside the customer-approved tolerance. Major defects should trigger hold-and-review: obvious shade mismatch, print misregistration beyond the allowed millimeter range, or a top edge that appears visibly warped. Minor defects can be counted and tracked, but only if they stay below the buyer’s limit and do not affect retail appearance. If you need to standardize the process, use the checklist below as your base acceptance rule and adjust it to your own brand standards.
For AQL planning, many buyers use a standard visual sampling plan for general inspection and then add buyer-specific critical defects. That combination works well for tote bags because it catches random defects without ignoring the brand-sensitive details that matter in museum retail. The key is to define the defect list in advance and keep it short enough that the inspector can actually apply it in the factory.
- Critical: open seam, handle failure, wrong logo, wrong bag size outside tolerance, missing reinforcement.
- Major: visible print drift, heavy shade mismatch, twisted body, bad shape retention, incomplete stitching line.
- Minor: loose thread tails, slight wrinkle, small label skew within the approved limit, light packing crease.
- Pass/fail should be recorded by lot, not only by sample piece, so the team can see whether the issue is isolated or repeated.
- If the tote is sold in a museum shop, decide whether cosmetic defects are acceptable at all; in many cases, the answer is no.
Packing, carton rules, and how to avoid warehouse damage
Packing quality is part of product quality. A tote can leave the sewing line in good condition and still arrive with deep creases, scuffed print, or moisture damage if the packing method is not controlled. Flat packing is usually the most efficient option, but the fold direction should be fixed and repeated across the whole lot so the decoration does not rub against itself. If individual polybags are used, specify them clearly. Otherwise, some suppliers will add them by default and change both the cost and the appearance of the bag at opening.
The carton spec should be practical for the warehouse team that receives the goods. Count per carton, carton size, and gross weight need to work together. A museum retailer may prefer smaller cartons that are easier to lift and store, while a distribution center may want a higher count per carton for efficiency. The buyer should not leave that choice to the factory. Ask for a packing mock-up or at least a photo of the folded bag in carton format before bulk shipment. That small check can prevent expensive rework when the bags arrive compressed too tightly or packed in the wrong orientation.
Moisture protection is worth specifying when the shipping route is humid, the storage period is long, or the carton may sit in transit during a seasonal congestion window. Canvas absorbs and shows handling marks more easily than many buyers expect. Over-compression can also create a permanent-looking crease that does not disappear once the bag is unpacked. If the tote is a retail item, that crease can be enough to reduce sellability on arrival.
Do not forget carton markings. If the order includes multiple colors, styles, or exhibit names, the packing label should make sorting easy. The warehouse should be able to identify the carton contents without opening each box. That is a small administrative detail, but it prevents a lot of receiving errors and mistaken counts.
- State whether bags are flat packed, half-folded, or rolled.
- Set carton count by weight and by handling convenience, not by factory habit.
- Use moisture protection if the route includes humid warehousing, long storage, or sea freight.
- Ask for carton markings that identify style, color, size, and batch number clearly.
- Avoid over-compression; deep crease recovery is not guaranteed on recycled canvas.
Lead time risk comes from sample loops, not sewing alone
Factories often quote lead time as if sewing is the only variable, but tote programs usually slip because of sample revisions, fabric sourcing, print screen approval, and packing changes. That is especially true for recycled canvas, where the supplier may need to confirm the lot, shade, or recycled claim documentation before cutting. If your artwork is not final when you request a quote, the schedule can move even when the sewing line itself is available.
A realistic schedule should separate pre-production sample time from bulk production time. Pre-production takes longer when the buyer needs a new decoration method, special packing, or a revised handle. Bulk sewing is only one part of the timeline. Printing and finishing can become the bottleneck if the design requires multiple colors or precise registration. The supplier should tell you what part of the order is most likely to delay the shipment: fabric confirmation, print approval, sample revision, trimming, or carton packing. If they cannot name the risk, they may not be managing the order closely enough.
The simplest way to reduce schedule risk is to freeze the three things that cause the most rework: fabric weight, print method, and packing format. Once those are fixed, the factory can cut, print, and sew with fewer interruptions. If the museum changes handle length, logo placement, or label type after approval, the order should be treated as a new revision. That does not mean the supplier is slow; it means the buyer changed the production reference. Good procurement teams plan for that and avoid promising a delivery date that depends on an unstable spec.
If the tote must land by a museum opening, seasonal sale, or exhibit launch, build in buffer time for sample sign-off and one correction loop. That buffer is often the difference between a clean launch and a rushed shipment that looks okay on paper but fails the receiving inspection.
- Break lead time into sample approval, material confirmation, bulk production, and packing.
- Treat artwork changes after sample sign-off as a schedule risk event.
- Ask the supplier to name the single most likely delay point before you release the PO.
- Build extra time if the order depends on shade matching or on recycled-content paperwork that has to be confirmed upstream.
Specification comparison for buyers
| Sourcing / spec decision | Recommended option | When it fits | Buyer risk to check | Cost implication / decision trigger |
|---|---|---|---|---|
| Fabric weight | 12 oz to 14 oz recycled canvas, or about 340 to 475 GSM | Museum retail shops, exhibit sales, and premium visitor bags that need shape and a better hand feel | Too light can collapse at the shelf and hide weak sewing; too heavy raises freight, packing bulk, and unit cost | Move up in weight only if the tote must carry books or hard goods; stay lighter if the bag is a giveaway or event carryall |
| Fabric source route | Mill-confirmed recycled content with lot traceability and shade control | Programs that need repeat orders, color consistency, and documentation for sustainability claims | Unclear claim wording, mixed fiber lots, and unstable dye lots can create quote and QC disputes | Direct mill or tightly managed factory sourcing is worth it when replenishment and consistency matter more than the lowest first quote |
| Print method | Water-based screen print for simple logos; heat transfer only for short runs or complex art | Gift shops and museum stores with one- to three-color artwork and repeat SKUs | Transfers may crack or edge-lift after folding; screen print can shade shift if ink build is not controlled | Use screen print when the design is stable and repeatable; use transfer only when artwork complexity outweighs long-term flex durability |
| Handle construction | Reinforced self-fabric or web handles with bartack reinforcement at the stress points | Tote programs that will carry books, catalogs, and retail purchases | Short stitch length, weak bartacks, or poor handle set height can cause early failure | Pay more for reinforcement when the tote is a retail item or intended for heavier loads; do not economize on bartacks |
| Closure style | Open top for lowest cost; zipper only when merchandise security is required | Museum retail with simple merchandising needs, or premium tote programs that justify the extra labor | Zippers add cost, sewing time, and inspection points; zipper tape mismatch can affect appearance and glide | Choose zipper only if theft deterrence, contents protection, or premium perception is part of the buying brief |
| Lining | Unlined for value programs; cotton or recycled polyester lining for premium presentation | Higher-end museum retail where interior neatness matters or dark contents should not show through | Lining increases labor and can create puckering if shrinkage and seam allowance are not controlled | Add lining when the tote is sold as a gift item or higher-margin retail accessory, not for low-ticket distribution |
| MOQ route | 500 to 1,000 pcs per color/design for custom production; lower MOQ only if using in-stock base goods | First-time programs, seasonal exhibits, or test orders before a larger retail rollout | Low MOQ often means higher unit cost, fewer fabric choices, and less room for pre-production correction | If you need more than one artwork variant, compare MOQ by design and screen setup, not just total order size |
| Packing method | Flat pack with measured carton counts and moisture protection; avoid over-compression | Export orders, warehouse intake, and retail distribution where count accuracy matters | Over-tight packing causes deep creases; loose packing increases carton movement and scuffing | If the tote will sit on a retail shelf straight from carton, insist on pack instructions that preserve shape and print face |
| Inspection standard | AQL-based visual and functional inspection with buyer-specific critical defects | Any order that will be rebranded, sold at retail, or distributed through museum channels | If defect definitions are vague, factories may pass bags with weak seams, print misregistration, or short handles | Set defect thresholds before production starts; the tighter the retail requirement, the more you need explicit pass/fail criteria |
Buyer checklist before sampling
- Define the use case in writing: gift shop retail, exhibit merchandise, member mailer, event handout, or visitor resale, because load, finish, and price target change by scenario.
- State the recycled content claim you need in writing, including whether the fabric must be recycled cotton canvas, recycled cotton blend, or recycled-fiber canvas with supporting documents.
- Lock fabric weight in oz and GSM, plus the acceptable tolerance range, so the factory does not quote a lighter cloth to hit price.
- Specify the weave face you want: tighter weave for a cleaner logo, more open weave if you prioritize lower cost and softer drape.
- Set finished size, handle drop, seam allowance, and gusset depth before artwork is finalized; changing size after print approval often means rework.
- Choose whether the tote must be unlined, partially lined, or fully lined, and state if interior overlock, binding, or turned seams are acceptable.
- Name the print method, number of colors, print location, and minimum readability rules for small text or fine lines.
- Write fold direction, carton count, polybag use, carton markings, and master carton gross weight limit into the packing instructions.
- Require pre-production sample approval and ask for a photo set of the key details: seam, bartack, print, label, and overall size.
- Define acceptable defect categories for critical, major, and minor issues before mass production starts, and include who has final say on borderline lots.
Factory quote questions to send
- What exact recycled canvas construction are you quoting, including fiber composition, GSM, weave type, and whether the recycled content claim is supported by mill documentation or only supplier declaration?
- Is the quoted price based on screen print, heat transfer, embroidery, woven label, sewn patch, or no decoration, and what is the unit price at each print color count?
- What is the MOQ by color, by artwork, and by order style, and how does the price change if we split the order into two print variants or two handle colors?
- What seam reinforcement do you include at the handle and bottom corners, and is bartack reinforcement standard, optional, or only added at extra cost?
- What are the finished size tolerance, handle length tolerance, gusset tolerance, and print placement tolerance you will hold during inspection?
- What is your acceptable shade variation policy for recycled canvas, and do you work to a sealed approval sample, shade band, or lot reference for repeat orders?
- What sample stage do you provide first: fabric swatch, blank pre-production sample, or decorated pre-production sample, and how long does each stage take?
- How do you pack the tote bags for shipment, including folding method, individual polybag yes/no, carton count, and carton dimension estimate?
- What carton compression or stacking guidance do you recommend so the bags do not arrive creased, scuffed, or pressed flat beyond recovery?
- Which defects do you classify as rejectable for this tote, and what inspection standard or AQL level do you normally use for retail orders?
Quality-control points to confirm
- Fabric weight must match the approved GSM or oz range. A practical buyer rule is to reject any lot that is visibly lighter, softer, or more transparent than the approved sample when panels are compared side by side under normal inspection light.
- Inspect fabric consistency across front, back, gusset, and handle panels. Reject obvious thin spots, slubs in the logo zone, or panel-to-panel weave changes that make the bag look mismatched.
- Color must stay within the approved shade band. Use the same light source for all inspection points, and treat obvious front/back shade mismatch as a major defect on retail-facing orders.
- Handle attachment must include clean reinforcement. Reject missing bartacks, loose thread chains, skipped stitches, or any handle base that shifts under manual pull testing.
- A useful handle check is a short pull test on sample units from the lot. If stitching opens, distorts, or pops under a realistic hand pull, classify it as critical rather than cosmetic.
- Print must be centered within the agreed tolerance. For retail bags, a visible offset can be a major defect even if the logo is technically readable.
- Reject pinholes, smearing, ink bleed into the weave, and first-fold cracking on decorated areas. If the tote is packed flat, fold-line durability matters as much as color density.
- Set print registration rules before production. For logos with borders or small text, even a few millimeters of shift can make the bag look cheap or off-brand.
- Seams must be straight, secure, and free from open ends. Bottom corners should not pucker, twist, or show uneven seam allowance after the bag is loaded.
- Define a finished size tolerance for width, height, and gusset. A practical rule is to reject lots that fall outside the agreed tolerance once the bag is measured after pressing and conditioning.