Start With The End Use, Not The Tote Category
A canvas bag for a subscription box and a canvas bag for an event giveaway solve different problems. The subscription box version has to fold flat, survive compression in a carton, and still look clean when the customer opens the package. The event giveaway version has to be comfortable in hand, carry samples or brochures without seam stress, and keep the brand visible in a crowded environment. If you start with a generic tote request, you usually overbuy on decoration or under-spec the parts that affect performance.
The fastest way to write a useful brief is to describe what goes in the bag, how the bag is packed, how the bag is handed over, and whether it is expected to be reused after first contact. That one paragraph gives the supplier enough context to propose the right cloth weight, handle type, print area, and packing method. It also helps procurement separate useful options from features that sound premium but do not improve the buyer outcome.
- For a box insert, prioritize foldability, print durability, and carton efficiency.
- For a trade show or launch event, prioritize handle comfort, load stability, and brand visibility in hand.
- If the bag is meant to replace a disposable gift bag, spec it as a reusable item rather than a throw-in item.
Choose Fabric Weight, Weave, And Finish For The Load It Will Carry
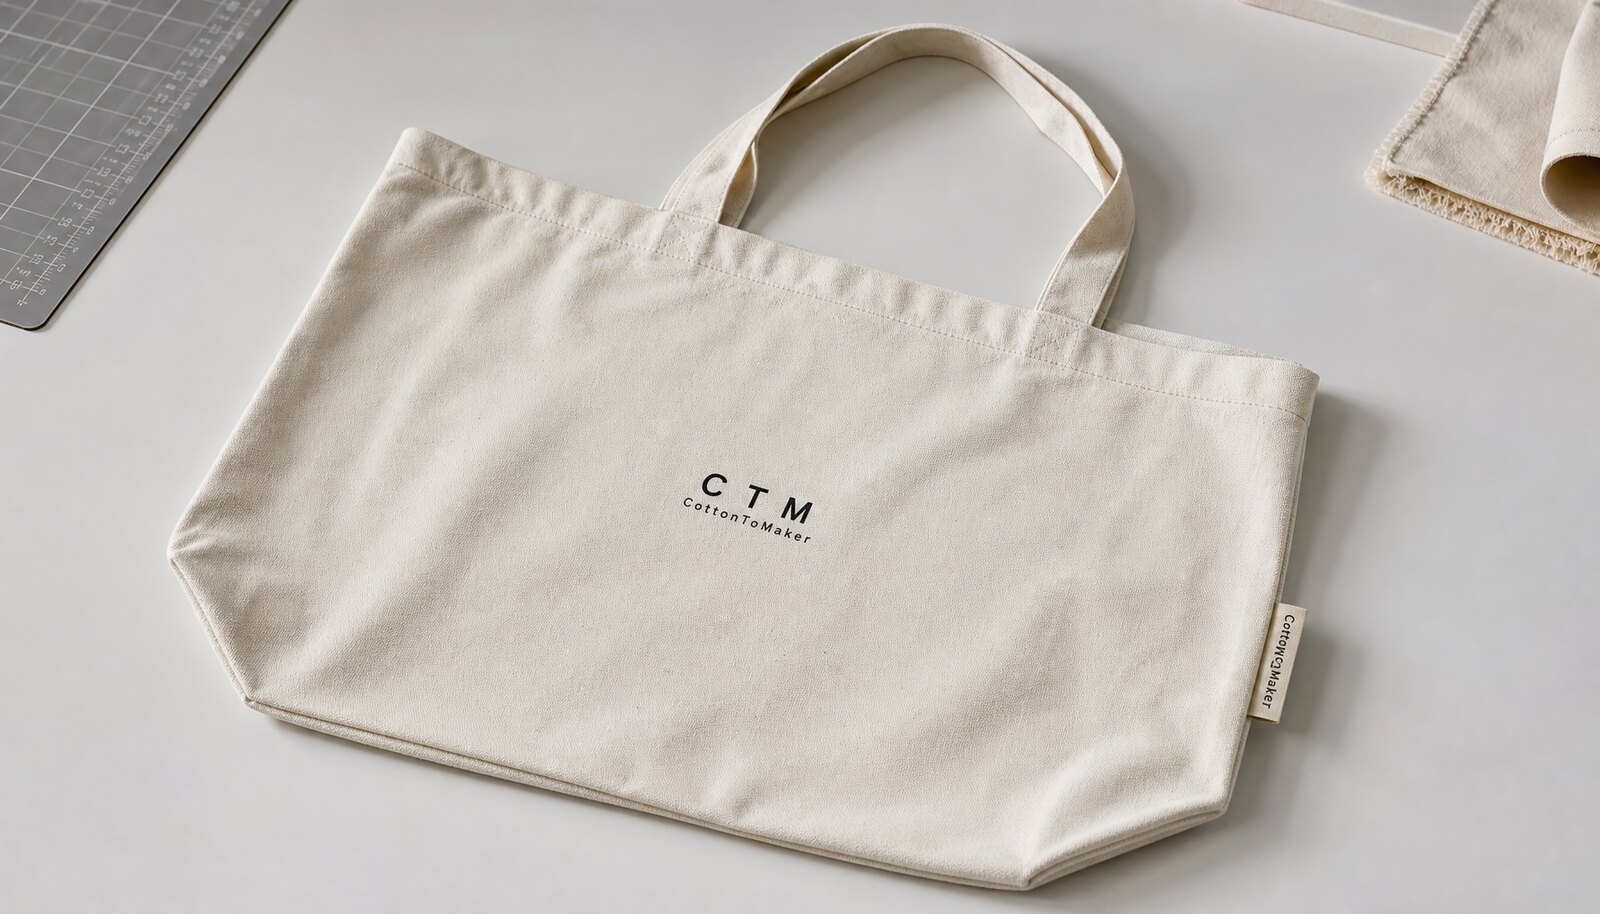
Canvas weight drives both perception and cost. For a light subscription box add-on, 6 oz to 8 oz canvas, or roughly 200 to 280 gsm, is the practical range because it folds cleanly, prints well, and does not create unnecessary freight weight. If the bag will hold heavier samples, bottles, or a larger event kit, a heavier cloth may be justified, but the buyer should expect the unit price, carton size, and shipping cost to rise with it. The goal is not the thickest tote available. It is the lightest tote that still works for the actual use case.
Gsm alone is not enough to compare offers. Two suppliers can quote the same weight and still deliver very different results if one uses a loose weave and the other uses a tighter cloth or a different finishing process. A loose weave can show print unevenly and may distort along the seam after sewing. Ask the supplier to identify the cloth source, the finish, and any pre-shrink treatment. If the order is brand-sensitive, keep a physical reference sample and tie the bulk run to that sample rather than to a PDF image.
- 6 oz to 7 oz is usually enough for light inserts and short-life promotional use.
- 8 oz is the safer baseline when the bag is likely to be reused.
- Heavier cloth makes sense only when carry performance matters more than compact packing.
- Ask for shrink allowance and shade variation limits before approving the cloth.
Select The Print Method After The Artwork Review, Not Before
The decoration method changes the real cost and the real durability. Screen printing is usually the best fit for solid logos, one to three colors, and medium to larger runs because it gives strong opacity and a predictable finish on canvas. Transfer methods can handle gradients or full-color artwork, but they often feel different on canvas and can become the first point of failure if the bag is folded, rubbed, or packed tightly. Embroidery can look premium, yet it adds cost and can change the way the fabric hangs, which matters on lighter canvas.
For procurement, the important detail is not whether the artwork looks good on screen. It is whether the supplier can translate the artwork into a stable production spec. Lock logo size, print area, color references, and whether the bag gets one side or two. Then ask for a physical strike-off or printed sample because canvas texture changes how the ink sits and how the edge registers. A clean one-side print is often enough for subscription boxes, while a larger print area may make sense for event giveaways where the bag needs visibility from a distance.
- Use screen printing when the logo is simple and the run is not tiny.
- Use transfer only when the artwork complexity justifies the tradeoff in hand feel or durability.
- Keep the print spec tied to a physical strike-off, not a PDF alone.
- Confirm opacity, registration tolerance, and rub resistance before bulk approval.
Qualify The Supplier Before You Compare Numbers
A good tote quote is only useful if the seller can actually deliver the production plan behind it. Direct factories are usually the cleanest route when you want control over cutting, printing, sewing, and packing in one place. That matters for repeat programs, strict carton dimensions, or orders that need fast issue resolution. Trading companies and sourcing agents can still be useful when you need multi-item coordination or a smaller order, but they may not expose the real production constraints. A quote that does not explain who owns each step is not ready for a controlled branded program.
The supplier qualification check should be practical, not ceremonial. Ask for a process map, recent production photos that show the actual line, and clear answers on whether the cloth is bought in-house or supplied by another party. If the order is high visibility, ask for a recent inspection summary or audit document if the supplier has one. What matters most is not the paper trail itself. It is whether the supplier can explain the current production capacity, the quality checkpoints, and the escalation path if the approved sample and bulk output diverge.
- Ask who buys the cloth, who prints the bags, and who packs the cartons.
- Request a recent sample from the same line that will run your order.
- Confirm whether the supplier owns the print screens or digital files after the job.
- Treat unclear ownership of process steps as a sourcing risk, not a minor detail.
Build The Quote So Hidden Costs Cannot Hide
The most common pricing mistake is comparing only the unit bag price. For this product, the quote needs to show fabric gsm, handle type, print method, setup charges, packing format, carton size, and shipment term. Once those details are visible, procurement can compare landed cost instead of a headline number that hides the true spend. That matters because a lower bag price can disappear once setup, folding labor, carton volume, inland freight, and duty assumptions are added back in.
The best internal quote sheet is one that forces every supplier into the same structure. Use one row for construction, one row for print, one row for packing, one row for shipping terms, and one row for sample cost. If a supplier refuses to specify gsm, carton count, or print setup, the quote is not detailed enough for a purchase decision. The buyer should not have to reverse engineer the offer. The supplier should make the production assumptions visible enough that two offers can be compared directly.
- Compare EXW, FOB, and DDP only after the same spec sheet has been sent to every supplier.
- Add setup, packing, and freight into one landed-cost view before choosing a winner.
- Reject incomplete quotes that hide GSM, print method, or carton detail.
- Ask whether artwork changes, color changes, or packing changes trigger a new setup charge.
Set MOQ Around Material Reality, Not The Bag Label
Minimum order quantity is usually driven by material choice, color complexity, and packing method rather than by the tote category itself. Stock natural canvas, one print location, and bulk folding usually support a lower MOQ because the factory can use existing cloth and a simple setup. Custom-dyed fabric, multiple print colors, sewn labels, retail-style individual bagging, or pre-kitting can push the minimum up quickly because the factory has to absorb more labor and more non-recoverable setup cost. Two bags that look similar in a catalog can have very different buying thresholds once the spec is written correctly.
For planning purposes, split the spec into must-have and nice-to-have items before you ask for quotes. If the bag goes into a subscription box, simplicity often wins because the outer box already carries the presentation. If the bag is being handed out at an event, a larger print area or a more finished handle may justify the extra spend. The point is to buy only the customization that changes the buyer experience. Every extra variable can raise MOQ, extend lead time, and create another chance for mismatch between sample and bulk output.
- Lower MOQ usually comes from stock cloth and a single print color.
- Multiple colorways or custom labels push MOQ upward quickly.
- The fastest way to reduce MOQ is to remove non-essential customization.
- A simpler spec often improves both pricing and production reliability.
Design Packing For Kitting Efficiency And Shelf Appearance
Packing is where otherwise acceptable bags can lose value. For subscription boxes, bulk folding is usually the right choice because it keeps freight efficient and lets the kitting team place the bag exactly where it belongs in the carton. In that setup, the fold direction should avoid hard creases across the logo, and the packing method should be consistent enough that warehouse staff do not have to refold the bags on arrival. If the program needs a more premium presentation, individual polybags can be justified, but they should be used deliberately rather than as a default.
Carton detail matters more than many buyers expect. Ask for units per carton, carton dimensions, gross weight, and outer marks before you approve the production plan. Those numbers affect ocean freight, warehouse handling, and how efficiently the goods move through the fulfillment center. A cheap bag can still be a good buy if it packs tightly and lands in efficient cartons. A premium bag can become a bad buy if the packing is wasteful, the carton count is inconsistent, or the fold makes the printed area look damaged when the box is opened.
- Use bulk folding when the bag will be repacked into a subscription box.
- Use individual polybags only when print protection or presentation justifies the cost.
- Lock fold direction and carton count before production starts.
- Ask for carton dimensions and gross weight before comparing freight terms.
Approve Samples As Production References, Not As Friendly Gestures
A sample is only useful if it proves the details that will matter in bulk. Start with a blank sample to verify finished size, handle length, seam alignment, and whether the cloth weight feels right in hand. Then request a printed strike-off or pre-production sample with the actual logo because canvas can change the way the color reads and how the edges register. If the artwork is sensitive to color, approval should happen on a physical sample rather than on a screen. A monitor cannot show cloth texture, ink opacity, or stitch tension accurately.
The approval note should be written as a reference record. State the approved fabric, print position, color reference, handle drop, and fold direction. If a shift is acceptable, say exactly how much shift is allowed and where it becomes a defect. If the buyer wants the bulk run tied to one specific sample version, write that version number into the approval. That avoids the common problem where the factory treats a visible change as normal because the sample never had a formal acceptance trail.
- Approve one blank sample before bulk printing begins.
- Approve a printed strike-off for color, placement, and opacity.
- Record the sample version, date, and approver so the bulk run is tied to the right reference.
- Never use a vague sign-off like "looks good" for a branded order.
Use Test Standards And Acceptance Limits The Factory Can Actually Hold
For branded tote programs, the quality plan should include more than visual inspection. Ask the supplier what internal tests it uses for handle strength, seam integrity, and color transfer, and then write the pass/fail threshold into the order. Many buyers use a simple static handle pull test as the starting point, with the load set according to the intended use. A light subscription insert may justify a lower threshold than a reusable retail tote. The important part is not the exact number alone. It is that the number is agreed before production starts and is tied to the actual use case.
Use the inspection plan to define what counts as a major, minor, or critical defect. A major defect might be a crooked print, an open seam, or a handle attachment that does not match the approved sample. A minor defect might be a thread tail or a small shade variation inside the allowed range. If you need a formal incoming standard, many procurement teams use an AQL-based plan, but the supplier still needs the specific defect list and the test method. Otherwise the inspection becomes subjective and the bulk run is harder to reject when it should be rejected.
- Set a handle pull test load that matches the expected use, not a generic factory default.
- Write the seam, print, and shade acceptance limits into the purchase order.
- Define major, minor, and critical defects before the first bulk run.
- If AQL is used, specify the sampling plan and defect categories in writing.
Plan Lead Time Around The Risk Points, Not The Sewing Time
The delivery date is usually determined by everything except sewing. Fabric booking, sample approval, print setup, cutting, sewing, inspection, packing, and shipment each add time, and one delay can push the whole program out of window. The biggest risk is usually not the stitching line itself. It is the first approval cycle or a late correction to artwork, packing, or cloth availability. A supplier who gives only a single lead-time number without showing the steps is glossing over the critical path.
Build the calendar backward from the event date or the box ship date, then add buffer for sample revisions and freight variability. If the order is seasonal or tied to a launch, do not plan around the fastest case. Plan around the realistic case and assume one round of review may be needed. If the supplier can share a step-by-step schedule, that is useful. If not, ask for the dates that matter most: sample due date, production start date, finish date, inspection date, and ship date. Those checkpoints tell you more than a vague promise of speed.
- Ask for a step-by-step production schedule, not a single lead-time number.
- Add buffer for sample revisions and freight delays.
- Use the event or ship date as the real deadline, then work backward.
- Make artwork approval and packing approval separate gates so one issue does not block everything.
Specification comparison for buyers
| Spec decision | Recommended option | When it fits | Buyer risk to check |
|---|---|---|---|
| Sourcing route | Direct factory with in-house cutting, printing, sewing, and packing | Best for repeat programs, controlled QC, and orders where the carton spec and print approval matter | Confirm which steps are actually in-house; a brokered quote can hide added handling and slower issue resolution |
| Fabric weight | 6 oz to 8 oz canvas, roughly 200 to 280 gsm | Good for subscription box inserts, light retail gifting, and giveaway bags that need structure without excess bulk | Check the approved sample after printing and folding; loose weave can feel lighter than the quoted gsm suggests |
| Fabric finish | Natural or lightly bleached cloth with pre-shrunk or stabilized finish | Useful when you want predictable print appearance and lower shrink risk during packing | Ask for shrink allowance and color variance limits; untreated cloth can drift in size and shade across lots |
| Print method | Screen print for one to three solid colors, transfer for complex full-color artwork | Choose based on logo shape, run size, and durability target instead of artwork preference alone | Require opacity, registration tolerance, and rub resistance to be stated before approval |
| Handle construction | Self-fabric handles for compact folding, webbing handles for heavier carry | Use self-fabric for low-cost inserts and webbing when the bag will be reused often or loaded heavily | Measure handle drop and seam reinforcement on the physical sample; handle length often changes in production |
| Packing format | Bulk folded for kitting, polybagged only when protection or presentation is required | Best for subscription box packing, warehouse kitting, and pallet-efficient shipping | Polybags raise carton volume and cost; confirm fold direction and crease risk before release |
| Inspection standard | Written AQL with defined major, minor, and critical defects | Appropriate for branded programs that need repeatable acceptance rules | If the supplier cannot name its defect classes and test method, the inspection plan is too vague |
| Quote basis | Compare EXW, FOB, and DDP on the same spec sheet | Useful when procurement needs a real landed-cost comparison across suppliers | A low unit price can still lose once setup, packing, inland transport, duty, and freight are added |
Buyer checklist before sampling
- Define the end use first: subscription box insert, event handout, retail-style reusable tote, or kitting bag.
- Lock the finished dimensions to the box or insert size before asking for quotes.
- Specify canvas weight, weave or finish, shrink allowance, and whether the cloth must be pre-shrunk.
- Choose the handle type, handle drop, attachment style, and reinforcement pattern before sampling.
- Approve the artwork size, placement, Pantone references if used, and print method in writing.
- Decide whether the bags will be bulk folded, individually polybagged, or pre-kitted with inserts.
- Ask for a blank sample, printed strike-off, and pre-production sample if the order is branded or time-sensitive.
- Put acceptable defect limits, test methods, and carton specs in the purchase order or spec sheet.
- Request supplier credentials that match the risk level of the order, such as process map, recent inspection report, or third-party audit if required.
- Compare quotes on the same terms and calculate landed cost instead of relying on the headline unit price.
Factory quote questions to send
- What exact fabric gsm, weave, and finish are you quoting, and what size tolerance do you allow after sewing and folding?
- Which production steps are in-house, and which steps are outsourced?
- What is the MOQ by fabric color, print color count, and packing method?
- Can you provide a blank sample, a printed strike-off, and a pre-production sample timeline?
- What print method are you quoting, and what are the setup charges by color, side, or artwork change?
- What is your handle pull test threshold, seam test method, and pass/fail criteria for this bag type?
- What carton size, units per carton, gross weight, and pallet pattern will you use?
- Which defects do you classify as major, minor, and critical, and what AQL do you apply?
- Can you quote the same specification as EXW, FOB, and DDP so I can compare landed cost?
- If I change artwork, packing, or label placement, which setup costs or lead times reset?
Quality-control points to confirm
- Finished size matches the approved sample and stays within the agreed tolerance, typically around plus or minus 5 mm on small totes and no wider than the PO spec on larger formats.
- Fabric weight and hand feel remain consistent with the approved sample; the cloth should not feel visibly thinner after print curing or final pressing.
- Handle length, handle drop, and attachment placement match the approved sample, with no uneven sides or twisted assembly.
- Seams are straight, secure, and free from open stitches, skipped stitches, broken needle holes, or loose thread tails longer than the agreed limit.
- Reinforcement at handle stress points uses the approved stitch pattern, such as bartack or box-X, with no missing reinforcement on random inspection.
- Print registration, placement, and color match the approved strike-off within the agreed tolerance; small shifts are acceptable only if the PO allows them.
- No visible oil stains, glue marks, odor issues, fabric holes, or contamination on the bag body or handles.
- Carton count must be exact, carton markings must match the approved shipping label, and inner pack counts must reconcile with the packing list.
- If polybags are used, they must not crease the print, trap moisture, or create adhesive marks on the canvas surface.
- Random cartons should be opened during inspection to confirm that fabric shade, print quality, and fold direction are consistent across the lot.