Start With the Handout Load
School giveaways are rarely about the bag itself. They are about what the bag has to carry, who will hand it out, and how many times it will be lifted before it reaches the student or parent. A tote that only needs to hold a brochure and a pen can stay relatively light. A tote that will carry a folder, a water bottle, a notebook, and a few promotional items needs a stronger body, a wider gusset, and handles that do not cut into the hand. If you buy the wrong bag for the load, the problem shows up at the event, not in a spreadsheet.
The buyer should start by writing the use case in plain language. Is this bag for open house registration, a PTA fundraiser, a back-to-school distribution, or a multi-campus welcome kit? Each one creates a different failure mode. A bag packed at a central warehouse and delivered to several schools needs more predictable carton counts and labels than a tote handed out from a single table. Once the use case is clear, the rest of the spec becomes easier to defend, and the supplier is less able to steer the order toward a generic promotional tote that only looks similar on paper.
- Light handout kits can use a flatter tote if the contents will not push on the seams.
- Mixed kits need a gusset so notebooks and folders do not force the side panels open.
- Heavier kits justify stronger handles and a seam construction that can survive repeated carrying.
Turn the Event Brief Into a Bag Spec
A useful spec does not describe the bag as a marketing object. It describes dimensions, load, and handling. Write the finished width, height, and gusset depth, then add handle length and handle width. If the bags are going to adults, a comfortable handle drop matters more than a few millimeters of decorative margin. If the bags will be used by students for a short walk, the load limit may be lower, but the order still needs a clear tolerance so the factory is not guessing.
Do not let the drawing stop at the outside dimensions. Ask whether the bag must stand upright when loaded, whether the bottom seam has to carry books, and whether the print must stay clear of the side seam. Those details affect how the factory cuts panels and places the logo. They also affect cost. A larger print area, a deeper gusset, or a shaped bottom panel may add material and sewing time, but they can remove the need for a second bag style later in the school calendar. It is cheaper to write the bag around the event than to redesign the event around a bag that will not hold up.
- State the expected contents in the RFQ, not just the bag size.
- Include finished dimensions, gusset depth, handle drop, and handle width.
- If the bag must stand upright, ask the factory to confirm the cut and seam construction before sampling.
Choose Fabric Weight and Construction Together
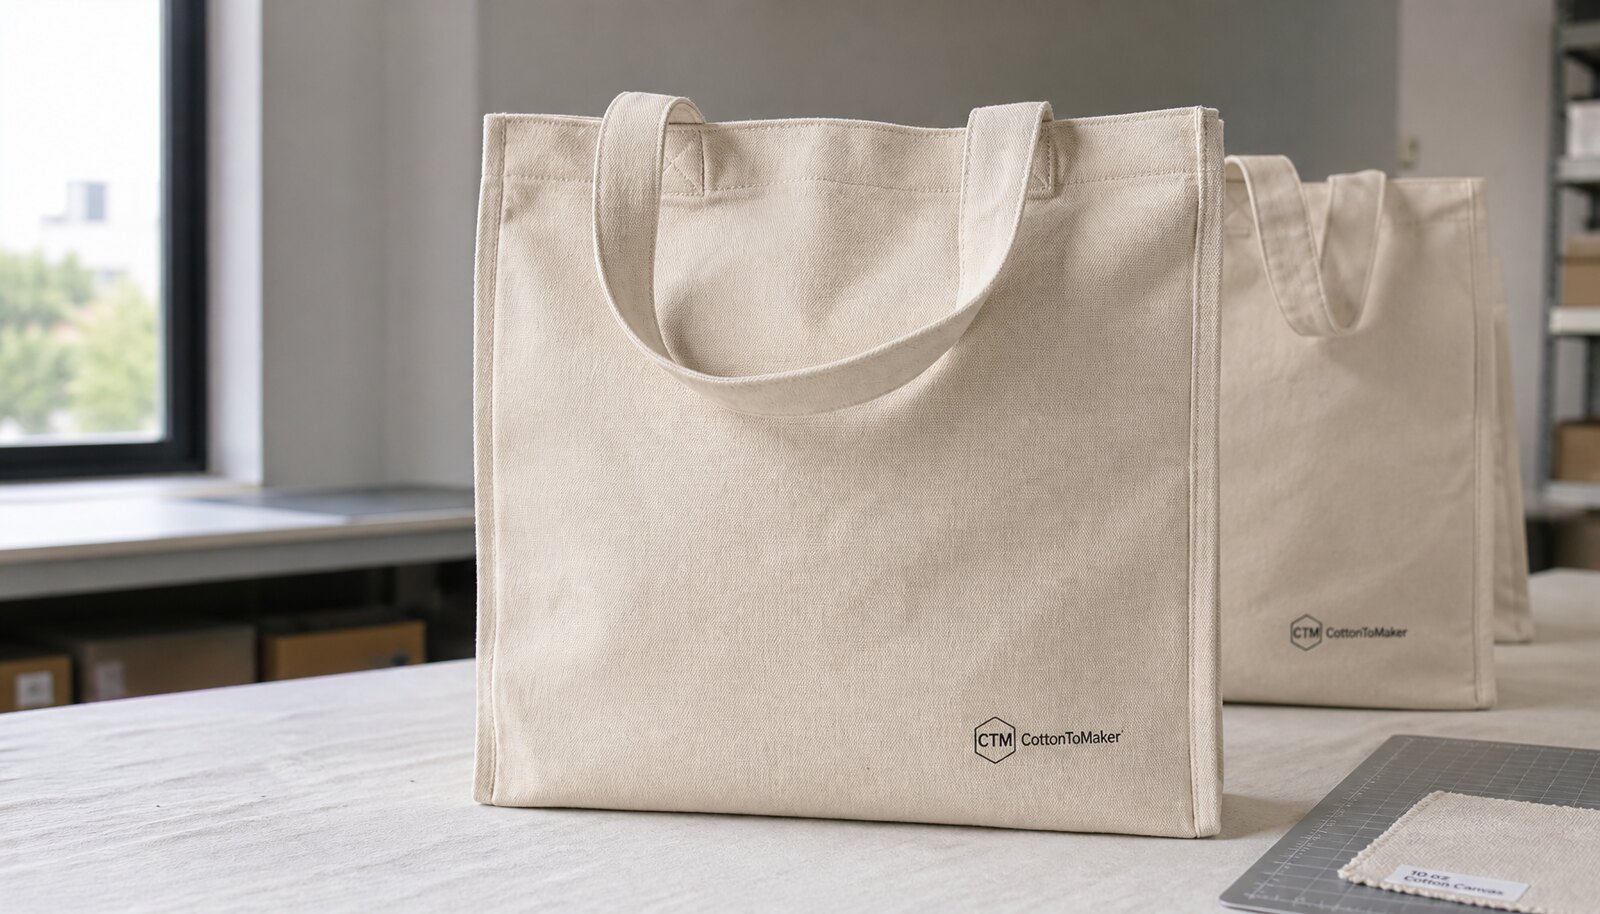
Canvas weight is the first number buyers compare, but it is not the only number that matters. A loose 10 oz canvas can feel weaker than a tighter 8 oz weave, and a heavy bag with weak seams can still fail at the handle join. For most school event giveaways, 10 oz canvas is the practical center point because it balances structure, printability, and freight cost. It usually gives enough body for brochures, notebooks, and light merch without making the bag expensive to move around the supply chain.
Use 8 oz only when the contents are light and the event is highly volume-driven. Use 12 oz or higher when the tote has to carry books, bottles, or a more durable reuse case. The tradeoff is not just unit cost. Heavier canvas raises freight, increases carton weight, and may add sewing difficulty if the supplier is not set up for thicker material. Construction matters just as much. Ask for reinforced handle attachment, a clean top hem, and seam finishing that will not unravel after the first few uses. If the buyer saves money on fabric but loses it in returns or replacements, the order was not actually economical.
- 8 oz canvas is usually enough for flyers, thin booklets, and small giveaway items.
- 10 oz canvas is the safest all-around choice for mixed school kits.
- 12 oz canvas makes sense when the tote must carry books, bottles, or heavier merchandise.
- Ask the supplier to confirm whether the fabric is pre-shrunk and what shrinkage they expect after finishing.
Match Print Method to the Artwork
Printed canvas shopping bags for schools work best when the decoration is simple and intentional. School names, event titles, mascots, and short taglines usually print cleanly with one-color or two-color screen printing. Canvas has texture, so fine gradients, tiny reversed text, and photographic detail are where cheap orders begin to look cheap. Screen print is also easy to inspect: coverage, registration, and edge sharpness can all be checked against the approved sample without special equipment.
Heat transfer, DTF, or digital methods become useful when the art has more colors or when the school insists on detail that would be inefficient to separate into screens. That does not make them wrong, but it changes the risk profile. Transfers can crack or lift if the cure is weak or if the bag is folded tightly in packing. Digital decoration can struggle with opacity on darker canvas. The buyer should ask the supplier to print on the same canvas weight and color that will run in production. A sample on a smoother or lighter substrate is not a real approval sample.
If the logo has a long school name, ask whether the line can be shortened or broken into two lines. If the mascot has many gradients, ask whether the supplier can simplify the art without losing brand recognition. It is usually better to keep the bag legible at a distance than to over-design it for a proof file.
- Use vector artwork whenever possible.
- State Pantone targets if the school brand colors are fixed.
- Approve a print on bulk fabric, not on a different test material.
- Avoid tiny type, hairlines, and complex gradients unless the print method can truly support them.
Compare Supplier Types Before You Compare Price
A low quote means very little unless you know what kind of supplier is standing behind it. A direct factory with in-house sewing and printing can usually control fabric, stitching, and carton packing more tightly than a reseller, and that matters when the event date is fixed. A trading company or sourcing agent can be helpful when the order includes multiple items or multiple delivery sites, but it adds another communication layer. A local decorator is often the fastest route when stock bags are already available and the deadline is too close for overseas production.
The real supplier test is not the brochure. It is whether the vendor can prove the working setup. Ask for time-stamped photos or a live video showing the sewing area, print area, and finished-goods inspection in the same facility. Ask who signs off on the bulk sample, who owns the production records, and whether the quoted factory can repeat the same spec on a reorder six months later. For school programs, repeatability matters. If the first order goes well and the second order comes from a different workshop with different fabric, the institution loses consistency and the quote loses credibility.
Qualification should also include a short list of similar work. You do not need a fake case study; you need evidence that the factory has produced canvas totes with similar print complexity, handle reinforcement, and packing format. A close-up photo of the seam and print area is more useful than a polished lifestyle image.
- Direct factory: best when you need control and repeat orders.
- Trading company: best when the order is complex or split across vendors.
- Local decorator: best when stock bags are available and time is tight.
- Request proof of where sewing, printing, and final packing happen.
Read the Quote as a Landed Cost Sheet
Do not compare unit price alone. For procurement, the only useful number is landed cost, and landed cost starts by separating the major components. Ask for the bag body, print setup, decoration, sample charge, packing, carton cost, origin handling, freight, duty, brokerage, and inland delivery as separate lines whenever possible. A quote that only gives one number can hide a lighter fabric, a smaller print area, a different handle, or a packing format that creates more work at the warehouse. If the supplier will not break the price down, they are making comparison harder on purpose or by habit, and both are a problem.
The same line-by-line logic should apply across all bidders. Every supplier should quote the same finished size, fabric weight, print area, handle spec, carton count, and Incoterm. If one supplier includes a sample and another does not, that gap should be visible. If one quote is FOB and the other is DDP, they are not directly comparable. The best buying practice is to force each vendor to answer the same spec sheet line by line, then compare the total cost, the delivery window, and the risk of substitution. If a lower price depends on changing the construction, it is not the same bag.
A practical rule: if a quote is dramatically lower than the others, assume something important changed until the supplier proves otherwise. It is usually fabric weight, print area, packing, or freight term.
- Compare like-for-like spec sheets, not just totals.
- Separate sample, setup, packing, freight, duty, and inland delivery.
- Use the same Incoterm across every bid.
- Ask what changed when a quote is materially lower than the rest.
Approve Samples With Measurable Acceptance Criteria
A sample should prove the production method, not just the silhouette. A blank sample can confirm size and handle feel, but it will not prove print opacity, cure quality, shrinkage, or seam behavior after finishing. The better approval path is a pre-production sample made from the bulk fabric, with the final print process and final packing format. That sample should become the golden reference for production. If the supplier cannot build the sample from the same material route, the sample is too optimistic to be useful.
Set the acceptance criteria before the sample arrives. Measure the finished bag, inspect the gusset, check the stitch density, review the print placement, and compare the color to the approved art or physical master. If color matters to the school brand, define the tolerance in writing instead of relying on a memory of a screen image. For a practical procurement standard, many buyers will want size within plus or minus 1/4 in, print placement within plus or minus 1/8 in, and no visible ink lift after a tape pull or rub test. Those numbers can be adjusted, but the point is to make the approval decision objective.
If the supplier offers revisions, keep the loop tight. One change round is normal. Multiple sample rounds are a warning sign unless the artwork itself is being simplified. A school event order is rarely the place to discover process uncertainty.
- Approve a pre-production sample from bulk fabric with the final print method.
- Measure finished size, gusset depth, and handle drop against the drawing.
- Use a physical master or Pantone target for color approval if color consistency matters.
- Require a simple rub or tape pull test on the printed area before bulk release.
Specify Packing for the Receiving Team
Packing should be designed for the warehouse, not for the product page. The team receiving the cartons is usually not the end user, so the packing format should make counting, storage, and distribution easier. For most school giveaway orders, bulk packing in master cartons is the cleanest choice. Fixed counts such as 25 or 50 pieces per carton make inventory checks faster, and clear carton labels make it easier to route bags to different campuses or event zones. If the order is split across schools, cartons should be labeled before they leave the factory, not after they land.
There is a tradeoff between protection and handling. Individual polybags can help when cartons sit in damp storage or when one bag must be protected from scuffing during transit, but they add waste and handling time. For a normal school giveaway, the better approach is a clean master carton with the correct count, a packing list, and a moisture barrier if needed. Keep cartons within a manual handling limit that your staff can safely move. Many buyers try to save on freight by packing too densely and then pay for it in the warehouse when cartons are awkward to lift or impossible to stack cleanly.
Carton dimensions should also be controlled. Big variation makes palletizing messy and creates rework at receiving. Ask the supplier to confirm the outer carton spec, gross weight, and label format before production starts.
- Use fixed carton counts so the warehouse can reconcile inventory quickly.
- Label cartons by SKU, quantity, destination, and event name when shipping to multiple sites.
- Avoid retail-style individual packaging unless the use case truly needs it.
- Keep gross carton weight within a practical manual handling limit for the receiving team.
Work Backward From the School Calendar
Lead time is not one number. It is a chain of approvals, sample production, bulk production, inspection, and freight. The most common failure in school event planning is assuming the sewing schedule is the only schedule that matters. In reality, art correction and sample approval are often where the calendar slips. If the event date is fixed, the buyer should work backward from the handout date and put a buffer around every approval point. That buffer is not padding; it is the cost of being wrong about how long a revision really takes.
For any order inside a short window, simplify the spec before you rush the freight. A stock-size tote with one-color screen print is far more reliable under pressure than a custom-sized bag with special handles and a detailed mascot. If the deadline is under 30 days, the safest move is usually a stock body, a simple decoration method, and a packing format the warehouse can use immediately. If the deadline is longer, you can buy more complexity, but only if the school has enough time to approve the sample and still recover from a correction cycle. The lesson is straightforward: the earlier the school calendar is locked, the more leverage the buyer has over cost and quality.
A practical sourcing calendar should also account for holiday shutdowns, port congestion, and campus receiving limits. If the supplier cannot show how the schedule handles those constraints, the date is not actually protected.
- Freeze artwork early so the factory is not waiting on revisions.
- Allow at least one correction cycle for size, print placement, and packing details.
- Use a backup freight plan if the order is crossing regions or borders.
- If the event is under 30 days away, simplify to a stock body and a simple print process.
Write the RFQ So Every Bid Is Comparable
A strong RFQ is a control document. It should not read like a shopping wish list. It should tell suppliers exactly what they are quoting and how the buyer will compare the bids. Include the event type, bag contents, destination, quantity by school or drop point, finished size, gusset, handle spec, canvas weight, print method, color count, print area, carton count, and target delivery date. If there are split shipments, say so. If the school needs labels or carton marks, say that too. The more concrete the RFQ, the less room there is for hidden substitutions.
The RFQ should also force suppliers to state what they are not including. Ask for sample charges, setup charges, freight term, overruns, underruns, and any expected substitutions. A vendor who is serious about the job can answer those questions directly. A vendor who avoids them will create surprises later. For procurement buyers, the best outcome is not just a low number. It is a quote that can survive internal review, be compared against the sample, and be converted into a purchase order without a second round of detective work.
If you need a simple internal process, route the RFQ through three steps: spec lock, sample approval, then PO release. Do not collapse all three into one email thread. That is how school giveaway orders drift into ambiguity.
- Include finished size, fabric weight, handle spec, print method, and print area in the RFQ.
- State the exact delivery window and last acceptable ship date.
- Ask suppliers to list exclusions and potential substitutions clearly.
- Use one spec sheet for all bidders so the quotes remain comparable.
Specification comparison for buyers
| Decision area | Best default | Tradeoff / cost or lead-time impact | Buyer risk to check |
|---|---|---|---|
| Supplier route | Direct factory with in-house sewing and printing | Usually removes one handoff and can shorten sample-to-bulk coordination by several days; also makes rework easier to isolate | Confirm the factory actually owns the sewing and print steps, not just the quote |
| Supplier route | Trading company or sourcing agent | Useful when the order combines bags, inserts, and multi-site delivery, but it adds coordination time and margin | Ask which factory is behind the quote and who signs off on QC |
| Supplier route | Domestic decorator or local printer | Fastest for short deadlines if stock bags are already on hand, but unit cost is usually higher and decoration options are narrower | Check stock availability, print capacity, and whether the bag body can be matched to the approved sample |
| Fabric weight | 10 oz canvas, about 320-350 GSM | The most balanced choice for school kits; heavier options raise freight and can add cost without improving the use case | Do not let a low quote hide a lighter fabric or looser weave |
| Fabric weight | 8 oz canvas, about 250-300 GSM | Often cheaper and lighter to ship, but it can sag or show wear sooner when the bag carries books or bottles | Confirm the bag will only hold flyers, thin booklets, and light handouts |
| Fabric weight | 12 oz canvas, about 380 GSM and up | More durable for heavy kits, but higher fabric cost and more freight weight can push landed cost up quickly | Check whether the school actually needs that much structure |
| Print method | 1-2 color screen print | Best for school names, mascots, and simple logos; setup cost is spread over volume and print is easy to inspect | Make sure the artwork is clean enough for a textured canvas substrate |
| Print method | Heat transfer, DTF, or digital decoration | Good for more detailed artwork, but can add setup complexity and may be more sensitive to folding, abrasion, or curing errors | Ask for a print on the same canvas weight, not a generic sample substrate |
| Packing route | Bulk pack in master cartons with clear count labels | Usually the lowest waste and easiest for warehouse teams; can reduce handling time at the receiving dock | Check carton count, carton weight, and whether destination labels are applied before export |
Buyer checklist before sampling
- Define the event format, what the bag must carry, and the maximum loaded weight before you ask for quotes.
- Lock the delivery date, receiving window, and last acceptable ship date before artwork starts moving.
- Specify finished size, gusset depth, handle drop, handle width, and target fabric weight in oz or GSM.
- Send vector artwork, Pantone references if color matters, print area, and whether one side or both sides are printed.
- Choose the decoration method based on the artwork, not the other way around.
- Ask for the MOQ on the exact spec, not a generic canvas tote MOQ.
- Request proof that the supplier can sew and print in the stated facility, or disclose the subcontracted steps clearly.
- Require a pre-production sample made from bulk fabric with the final print method and final packing format.
- Ask for written tolerances on size, color, stitch density, print placement, and carton weight before approval.
- Compare landed cost, including setup, sample, packing, freight, duty, and inland delivery, on the same Incoterm.
Factory quote questions to send
- Which facility is sewing the bags, which facility is printing them, and where does final inspection happen?
- What exact finished size, gusset depth, handle length, and handle width are you pricing?
- What canvas weight, weave, and pre-shrink process are you using, and how will you verify it?
- How many print colors, print sides, and what print area are included in the quote?
- What print method are you using, and are screens, plates, or setup fees reusable on repeat orders?
- What stitch density, seam construction, and handle reinforcement do you build to on this bag?
- What MOQ applies to this exact spec, and which changes drive the MOQ higher?
- What sample type will you provide, from which fabric lot, and what does the sample cost cover?
- What are the allowed tolerances for dimensions, color, print placement, and carton weight?
- What overrun or underrun tolerance do you allow, and how will you handle short shipment?
Quality-control points to confirm
- Finished size, gusset, and handle drop should match the approved sample within plus or minus 1/4 in, or the written tolerance agreed in the PO.
- Fabric weight should match the stated GSM or oz target, with the factory able to identify the fabric lot or mill spec used.
- Stitch density on main seams should meet the agreed spec, commonly 7-9 stitches per inch for canvas, with no skipped stitches or broken thread.
- Handle attachment should use box-X, bartacks, or an equivalent reinforcement pattern, with no loose thread or seam pop when pulled by hand.
- Print placement should stay within plus or minus 1/8 in of the approved location unless the artwork intentionally crosses a seam.
- Color should match the approved physical master or Pantone target under daylight and typical indoor event lighting; if color is critical, define a Delta E limit in writing.
- Curing or adhesion should pass a tape pull or rub test with no visible ink lift, cracking, chalking, or tackiness after folding.
- Canvas panels should be clean and free of stains, oil marks, holes, odor, shade blotches, or twisted panels that distort the print area.
- Carton count should be exact, with carton labels showing SKU, quantity, destination, PO number, and event name when split shipping is required.
- Carton dimensions and gross weight should stay within the approved packing spec, with a practical weight cap for manual handling at receiving.