Why museum buyers need a stricter sample approval process
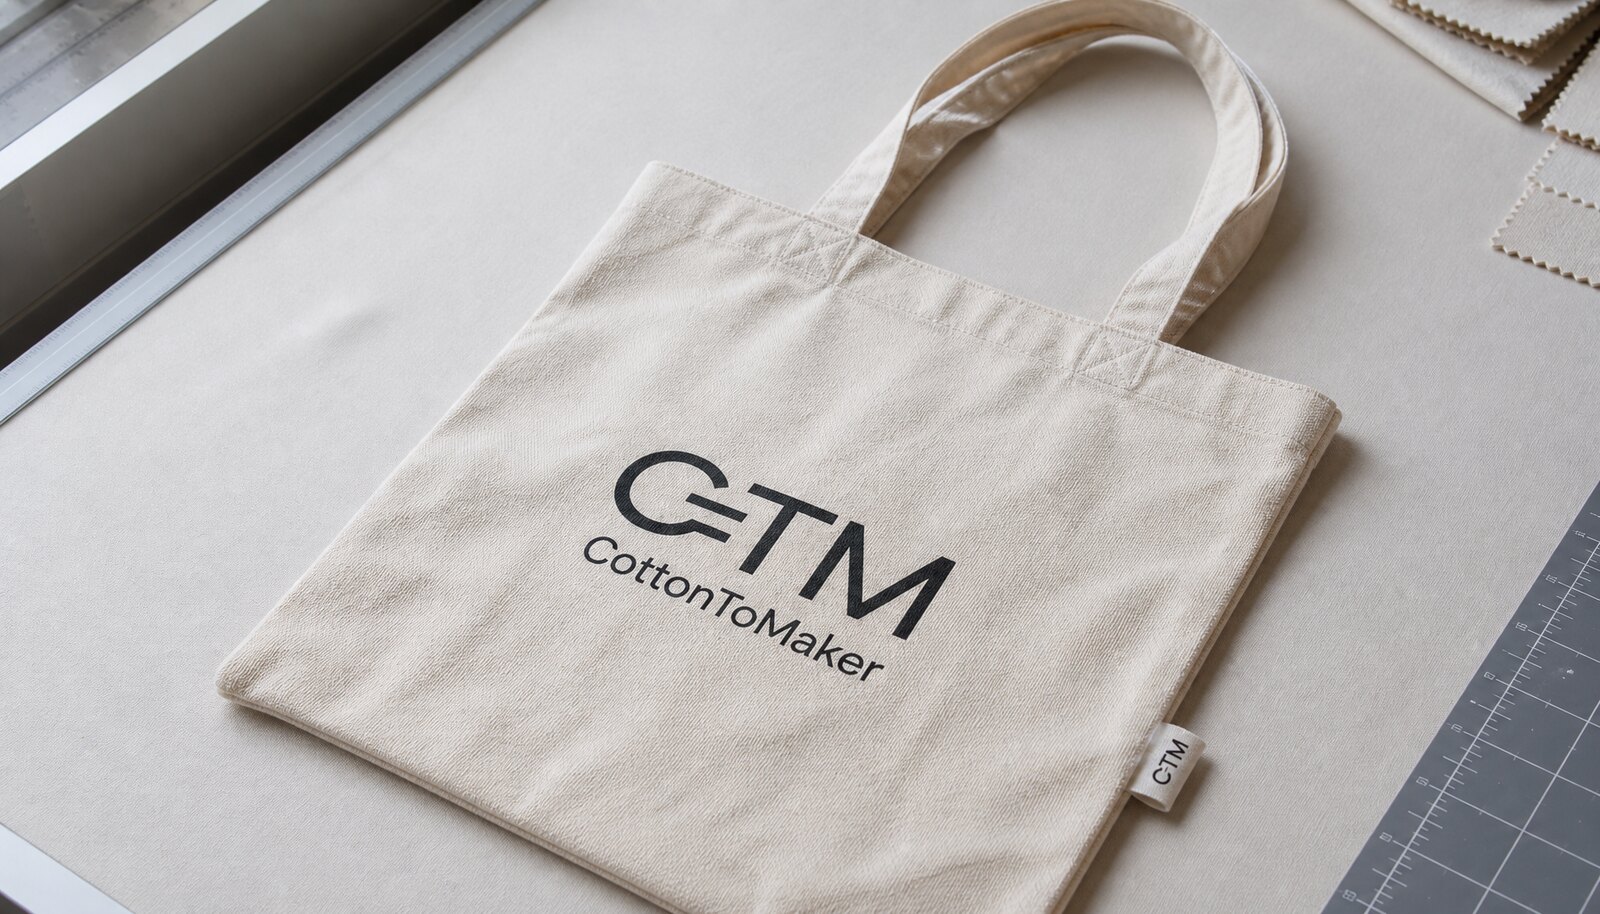
Printed canvas shopping bags for museums sit in a different category from ordinary promotional totes. They are sold in gift shops, carried through galleries, photographed by visitors, and often reordered when a launch performs well. That makes them both a merchandise item and a brand asset. A bag that looks acceptable in a sales photo can still fail in procurement if the fabric is too soft, the print is off-center, or the handles feel weak once a customer loads a catalog or boxed souvenir.
Museum procurement teams usually have to balance three pressures at once: brand presentation, retail durability, and replenishment consistency. The sample stage is where those pressures can be resolved before any bulk order is released. If the museum approves only on appearance, the supplier may deliver a bag that looks right but performs poorly at the cash wrap. If the museum approves only on price, the result may be a lower-grade fabric or simplified construction that weakens the perceived value of the shop.
The most useful way to handle the sample is to treat it as a contract reference, not a courtesy sample. It should confirm the base cloth, print method, stitch pattern, label position, compliance documents, carton pack, and approved tolerances. If those points remain vague, the production line will fill in the gaps according to its own standard. That is how small differences become repeated purchase complaints.
For museum retail, the sample also needs to answer a merchandising question: will this bag sit comfortably beside books, posters, postcards, and premium gifts without looking out of place? A more structured canvas tote can support premium branding; a softer bag can work for light-duty handouts or low-price items. The wrong choice does not just affect QC. It affects how the entire shop looks to visitors.
Before a PO is released, buyers should ask for evidence that the supplier can actually repeat the approved standard. That means a measured spec sheet, the identity of the actual production site, the name of the QC owner, and proof that the sample came from the same process route intended for bulk production. If the supplier cannot show that chain of traceability, the approval is only partial and should not be used as a release trigger.
- Use the sample to lock the product standard, not just the artwork appearance.
- Tie approval to measurable specs, production traceability, and pack details so future reorders stay consistent.
- Match the bag level to the museum’s actual retail use: giveaway, everyday souvenir, or premium resale item.
Start with the retail use case before choosing the bag spec
Museum shops do not all need the same tote. A heritage museum selling thick exhibition catalogs and boxed gifts needs a different bag than a contemporary art store selling postcards and enamel pins. The wrong starting point is to ask only for a printed canvas shopping bag size. The right starting point is to define what the bag must carry, how it will be displayed, and how long the institution expects the SKU to remain in range.
For light retail items, an 8 oz bag may be enough if the shop needs a lower entry price and the tote is mainly an add-on or brand handout. But many museum buyers discover that a lightweight bag can feel too relaxed on a shelf and may crease or deform after printing. For most repeat retail programs, 10 oz is the commercial baseline because it gives better body, cleaner print presentation, and less risk of handle or seam problems.
For a more premium shop, 12 oz canvas often justifies itself visually. The bag stands up better on display, supports heavier gifts, and carries the museum’s identity with more authority. The tradeoff is higher cost, a stiffer fold, and more weight in carton packing. If a museum distributes to several branches or sells through a central warehouse, the buyer should also check carton density and finished dimensions so the tote is still efficient to stock and ship.
The most useful question is not “which canvas is best” but “what performance level does this bag need to reach to remain acceptable after real customer use?” That framing prevents overbuying for a low-load item and underbuying for a retail SKU that will be judged beside books and framed prints. It also helps the buyer define a realistic acceptance band before the supplier quotes a price that looks attractive only because it assumes a lighter cloth or simpler construction.
A practical museum brief should name the primary merchandise load. If the tote must carry catalogues, the bag should be tested with the heaviest likely retail combination rather than a single postcard pack. If it is mainly for event distribution, the buyer may prioritize low weight and foldability over handle reinforcement. The commercial answer changes with the use case, and the sample should be judged against that use case rather than against a generic tote standard.
- Light-duty museum use: 8 oz can work, but only with controlled expectations.
- Standard retail SKU: 10 oz usually offers the best balance of price and presentation.
- Premium or heavy-load use: 12 oz gives more structure and better shelf impact.
Match the canvas base and finish to the artwork, not the other way around
The fabric is not just a cost driver; it changes how artwork prints and how the finished bag is perceived. Natural canvas with a visible weave can look authentic and museum-friendly, but it may soften fine detail or allow slight texture show-through in large solid areas. Bleached or brightened canvas gives a cleaner print base and often improves the look of logos with white space or thin lines. Dyed canvas can create a stronger branded effect, but it adds risk around shade consistency and contrast.
When reviewing the sample, inspect the weave under light and ask whether it matches the artwork style. A logo with large flat colors usually needs good ink opacity and a relatively stable surface. Fine typography or detail work benefits from a tighter weave and a print process with cleaner registration. If the museum artwork includes a specific Pantone requirement, the supplier should confirm whether the canvas color and print ink can realistically reproduce it or whether a slight visual adjustment is unavoidable.
Do not assume that a brighter base fabric is automatically better. A museum gift shop may actually prefer natural cloth because it feels more tactile and less commercial, especially for art and heritage brands. But natural cloth can vary more from batch to batch. That means the buyer should ask for the acceptable shade range and view the sample under neutral lighting before sign-off. For dyed cloth, the risk shifts from raw-fiber appearance to shade consistency, crocking, and re-order matching; those points should be documented before any bulk order is approved.
The sample approval checklist should also consider finish. Some canvas bags have a softer, washed feel; others are stiffer and more structured. Either can be correct, but it should be intentional. A washed finish may suit a lifestyle museum shop. A crisp finish may work better for a flagship retail item. The decision belongs in the RFQ, not in the factory’s default process. If the museum wants a premium finish effect, the buyer should ask how the finishing step affects print clarity, seam slippage, and carton compression during shipping.
This is also where procurement teams should separate visual preference from production risk. A special finish may look ideal in a single hand sample but become inconsistent in a larger run if the supplier cannot control wash, dye, or coating uniformity. Ask the supplier what variation is normal, what variation is not acceptable, and how they sort or block out out-of-spec panels before sewing. That evidence matters more than a polished sales sentence.
For buyers comparing natural canvas, bleached canvas, and dyed canvas, the practical difference is simple: natural cloth gives an authentic, textured look; bleached cloth gives a cleaner print base; dyed cloth gives a more branded body color but usually needs tighter shade control. Choosing the right base early keeps the quote accurate and the sample readable.
- Ask for the exact fabric base: natural, bleached, dyed, washed, or coated finish.
- Check whether the weave supports fine detail, solid fills, or large artwork areas.
- Approve the finish for retail feel and shelf appearance, not just for a fabric swatch.
Print method decisions: what museum logos usually need in production
Most museum shopping bags rely on screen printing because it handles simple logos, typography, and one- to three-color artwork efficiently. For many retail programs, screen print remains the best choice because it creates a solid, familiar look and is usually more durable than decorative transfer methods. But the artwork needs to fit the process. Very fine lines, gradients, and photo-like artwork may need a different method or a simplified design.
Heat transfer can solve short-run or complex-art problems, but it should not be chosen just because it is convenient at sample stage. A transfer can look clean initially but may have a different feel, shine level, or crack risk over time. That matters if the museum wants the bag to be a long-life retail item rather than a one-season promotion. Digital print may help when the artwork has complex color variation, but the buyer should confirm whether the print sits well on the chosen canvas and whether the finish matches the museum’s brand standard.
For procurement teams, the decision threshold is simple: if the artwork is a solid logo, a short typographic line, or a clear exhibit mark, screen print is usually the safest path. If the bag requires detailed illustration or a complex, multi-tone design, ask the factory whether it can reproduce that artwork without losing the museum’s visual identity. If not, the better commercial decision may be to simplify the artwork rather than force a decorative process onto a retail item that will be handled daily.
The sample should prove the print in the same context as production. That means on the final fabric, with the final ink system, and at the final print size. A small “sample-only” print on different cloth can hide problems with opacity, edge sharpness, and registration. The sample approval checklist should therefore include both visual review and measurement, not one or the other.
Museum buyers should also ask how the print will age. If the tote will be sold for years, the print needs to survive folding, shelf rubbing, and repeated use without heavy fading or cracking. The supplier should be able to explain whether the ink is intended to sit on the fiber, soak into the weave, or cure on top of the surface. The exact chemistry may not matter to every buyer, but the effect on resale appearance does. If the factory cannot describe the process clearly, that is a sign the buyer should request a different sample or a simpler print layout.
When the artwork contains multiple elements, the buyer should define what matters most: color match, edge sharpness, or durability. A museum logo with fine type may prioritize clarity over large ink coverage. A bold exhibit graphic may prioritize color density and visual impact. That tradeoff should be settled before the sample is approved so the supplier does not optimize one element at the expense of another.
- Screen print suits most museum logos and repeat retail programs.
- Heat transfer or digital print should be used only when the artwork truly requires it.
- Approve the sample on the final cloth and final print size, not on an easier substitute.
Bag size, gusset, and handle design: practical tradeoffs buyers should test
Museum totes are frequently judged by what customers can fit inside them. If the bag is too narrow, buyers will overfill it and stress the seams. If it is too shallow, books will protrude and the bag loses its premium retail look. This is why finished dimensions matter more than nominal size labels. A bag described as “large” may still be the wrong choice if the museum sells thick catalogues or boxed items.
A medium format around 14 x 16 inches or 15 x 16 inches is common for gift shops, but the useful dimension depends on gusset depth. A gusset can make a major difference in product fit and shelf presentation. A 3- to 4-inch gusset often gives enough volume for retail books and mixed souvenirs while still keeping the tote manageable. Wider gussets improve capacity but may change how the bag folds, stack counts, and hangs on display. Buyers should check whether the expanded shape will still fit the museum’s POS bagging station or stockroom shelves.
Handle design affects both comfort and retail perception. Self-fabric handles often look more integrated with the bag and can be cost-efficient, but they need proper reinforcement where they attach. If the bag is intended for shoulder carry, handle length needs to be long enough to sit naturally without pulling the top opening closed. If the bag is mainly hand-carry, a shorter handle may be fine, but the buyer should confirm comfort with a loaded sample, not by eye alone.
A common mistake is approving handle length from a flat sample. Once the bag is filled with catalogs or wrapped gifts, the handle angle changes and the effective comfort changes too. Ask the factory to show how the bag hangs when loaded. If the bag twists, collapses inward, or pinches at the shoulder, the handle pattern or attachment point needs revision before bulk production. Buyers should also check the handle width: a wider handle typically spreads the load better and feels more premium, but it can increase material usage and change print clearance near the top edge.
The handle attachment method is a sourcing decision, not just a design detail. Sewn-in handles, cross-stitched handles, and bartack reinforcement each create different performance outcomes. The buyer should ask which stitch pattern will be used and whether the production sample shows the same reinforcement that will appear in bulk. If the museum expects shoppers to carry heavy books, the bag should be tested under load long enough to reveal seam fatigue rather than just a one-time lift.
For better traceability, write the bag spec in the same sequence the factory will build it: fabric, size, gusset, handle, print, label, and pack. That order reduces ambiguity and makes it easier for the supplier to quote the exact product instead of a vaguely similar tote.
- Define finished size and gusset depth in writing; do not rely on nominal naming alone.
- Test handle comfort with a realistic retail load, not an empty bag.
- Use gusset depth to solve capacity problems, but confirm packing and shelf impact before approval.
Comparison table: bag options, performance differences, and buyer implications
A useful product comparison table should help procurement teams choose among real bag structures, not just sourcing routes. The same museum artwork can work on several canvas tote formats, but each one changes cost, load capacity, shelf appearance, and risk. Use the table below when you are deciding what to request in an RFQ or what to accept during sample review.
If the museum shop is carrying books, exhibition guides, or bulky boxed gifts, the tradeoffs move quickly toward heavier cloth and stronger seams. If the order is meant as a lower-cost retail add-on, the light or standard tote may be enough. The important thing is to avoid mixing these product types in the same quote without naming the intended use case. A quote for a giveaway tote should not be compared against a quote for a retail tote that will sit beside hardback books. The more exact the brief, the easier it is to judge value.
How to read supplier quotes without missing hidden cost drivers
A museum buyer can only compare quotes reliably if the inputs are identical. The biggest source of confusion is a quote that looks cheaper because it quietly changes the bag specification. One supplier may price on 8 oz cloth, another on 10 oz. One may include a simple one-color print while another priced a two-color design. One may quote folded bulk packing while another includes individual polybags. These are not equivalent offers.
A strong RFQ should force all suppliers to quote against the same fields: finished size, fabric weight, print method, artwork count, handle type, label position, packing format, carton count, and freight basis. Ask for the unit price plus setup charges, because setup may disappear from a headline quote and reappear later in the sample or pre-production invoice. For museum procurement, the landed cost is more useful than the factory floor price, especially when the order is shipped to a warehouse, a museum network, or a retail distributor.
It also helps to ask for the supplier’s assumptions. If a quote looks unusually low, ask whether the pricing assumes a different fabric finish, reduced print area, smaller gusset, or a weaker handle attachment. If the factory cannot explain the variance in plain language, the quote is not yet procurement-ready. You are not just comparing prices; you are comparing what will actually arrive at the receiving dock.
A practical buying threshold is to reject any quote that does not state the same spec language used in the artwork brief and sample approval form. When the wording changes, the product usually changes too. That is the cheapest way to prevent later disputes about whether the supplier delivered the same bag that was approved. For larger museum programs, ask the supplier to show how they handle reorder continuity: do they archive screens, retain approved shade standards, and keep the same production line notes? Those details matter when the tote becomes a recurring SKU.
You should also ask what evidence supports the quoted lead time. A supplier that says “25 days” should be able to explain whether that clock starts at artwork approval, sample approval, deposit receipt, or PO release. If the lead time excludes setup, printing, drying, or packing, the buyer needs to know before the purchase is approved. That clarity is especially important for museum seasonal launches and exhibition opening dates, where missing the window can turn a good tote into unsold inventory.
Finally, ask which items are included in the sample cost and which are not. Some suppliers absorb the first development sample but charge separately for correction samples, screen changes, or revised labels. That is normal, but it should be visible. Procurement teams should not discover those charges after the artwork has already been signed off.
- Require the same spec fields from every supplier so quotes are comparable.
- Separate recurring unit price from one-time setup or tooling charges.
- Reject quotes that use vague wording instead of the exact approved spec language.
Factory vs trading company: how to verify who can really control the order
Museum buyers often receive similar-looking quotes from both factories and trading companies. The difference matters because it affects how much control you really have over production. A direct factory is usually better for repeat orders, color control, sewing consistency, and sample-to-bulk alignment. If you want the same bag to be reordered for years, the factory should be able to show how it will keep the same cloth, print standard, and carton pack.
A trading company can still be useful, especially when the museum needs a smaller trial order, a mix of bag formats, or a faster sourcing bridge. The risk is not that the trading route is always worse; the risk is that the buyer may not know which factory will actually sew and print the order. If the intermediary cannot identify the production site or cannot show a production-grade sample from the same source, the buyer has less control over quality and corrective action.
To verify claims, ask for more than a verbal promise. Request the factory name, site photos, a measured spec sheet, and images of the actual sewing and printing area. Ask who will conduct in-line inspection and final packing check. If the supplier resists sharing basic production proof before PO release, that is a warning sign. For museum merchandise, transparency is worth paying for because a small quality issue gets amplified when the bag carries the institution’s logo.
A useful rule is this: if the order is likely to repeat, prioritize the source that can document consistency. If the order is one-off or highly urgent, prioritize the source that can prove control over schedule and pack-out. In both cases, the sample should come from the same production route as the bulk order, not a substitute channel. For procurement records, note the factory name, address, and the specific line or workshop if available. That traceability helps when a future reorder needs the same standard.
Before PO, request documentation that can be filed alongside the approved sample: business license or equivalent registration, factory audit summary if available, restricted substance or material declaration when relevant, and the contact details for the responsible merchandiser and quality lead. Not every purchase requires the same compliance pack, but every museum buyer should know which evidence is available and what is missing. If the supplier makes a strong claim, ask for the document behind it rather than a sales paraphrase.
The goal is not to turn a tote order into a legal investigation. The goal is to avoid buying from an unknown source when the product will represent the museum brand at retail. A clear paper trail is often the difference between a smooth reorder and a disputed shipment.
- Ask who will actually sew, print, inspect, and pack the order.
- Request factory identity, site photos, and a measured spec sheet before approval.
- Treat the sample as valid only if it comes from the same production route as bulk goods.
Supplier verification before PO: the documents and proof buyers should request
A good sample is not enough if the supplier cannot prove its production capability. Before a purchase order is issued, museum buyers should request documents that match the claims in the quote. That includes the actual production site, basic registration details, and, where relevant, audit or compliance evidence. If the bag will be sold in a museum store, the buyer needs confidence that the production route is stable and repeatable.
At minimum, ask for a measured spec sheet that shows fabric weight, dimensions, print placement, handle length, carton pack, and approved tolerances. Then ask for the sample traceability: which fabric lot was used, which print method was applied, who approved the pre-production sample, and whether the same stitching and packing standard will be used in bulk. If the supplier cannot answer those questions clearly, the buyer does not yet have a controlled product.
For compliance claims, do not accept generic wording. If a supplier says a material is certified, ask for the certificate or test report. If they say the factory is audited, ask for the audit summary or date. If they mention social compliance, ask who conducted the audit and when. If they say a material is low odor or free of a certain substance, ask for the declaration or laboratory report that supports it. The document may not need to be reviewed by legal for every small order, but procurement should know what exists before the order is committed.
Traceability is especially important for printed canvas shopping bags for museums sample approval checklist workflows because the sample can be misleading if it is made from special cloth or handled by a different line than the final production run. Ask the factory how it labels samples, how it stores approved swatches, and how it keeps the bulk run aligned to the sample. A supplier that can answer those process questions usually has better control than one that can only promise quality in general terms.
Buyers should also verify lead time, not just hear it. Ask what production slot is reserved, what the longest step is, and whether the printing or drying stage is the bottleneck. For seasonal museum launches, a lead time that sounds adequate on paper may still be risky if it is based on an optimistic packing schedule. Request a stage-by-stage timeline so the museum can judge whether the item will arrive before the event or exhibition opens.
If the supplier uses subcontracting, ask for that disclosure before PO. Subcontracting is not automatically disqualifying, but hidden subcontracting is a problem because it breaks sample traceability and makes corrective action harder. The buyer should know whether the same facility that approved the sample will also run bulk production.
A concise procurement file for the tote should include: approved sample photos, signed spec sheet, supplier quote with assumptions, factory identity, compliance documents where applicable, packing standard, and lead time confirmation. That file is not paperwork for its own sake; it is the control system that protects the next reorder.
- Request the actual production site, not just a brand name or sales office address.
- Ask for proof behind compliance claims: certificates, audit summaries, or declarations.
- Verify sample traceability, lead time assumptions, and subcontracting status before PO release.
Sample approval checklist: what to inspect, test, measure, and sign off
A sample approval checklist should be more than a yes-or-no form. It should show what was checked, how it was checked, and what the acceptance threshold was. For printed canvas shopping bags for museums, the sample needs to prove both visual quality and practical performance. That means examining the bag flat, checking it in hand, and loading it to test whether the construction survives a realistic retail use case.
Begin with dimensions. Measure finished body width, height, and gusset depth against the approved sheet. Then verify print placement from the top hem and side seam. If a museum logo sits too high or drifts left, it can look careless even if the print itself is sharp. After that, inspect stitch quality, handle reinforcement, label position, and any internal seams that could affect durability. Finally, pack the sample the way it will ship in bulk to see whether the fold and carton method still protect the appearance.
It helps to write the sign-off language before approval. A procurement note can say, for example: “Approved as production standard subject to no change in fabric weight, print method, placement, handles, label position, or carton pack.” That sentence becomes the control point for bulk production. If revisions are needed, note them on the sample and resubmit the corrected version before release.
The checklist below is the practical version of that process. It is intended for museum buyers, gift shop managers, and sourcing teams that need a defensible approval record. Keep the checklist with the approved physical sample or high-resolution photos so the team can compare future production against the same reference.
For museum programs with multiple stakeholders, it also helps to add a sign-off column for design, merchandising, and operations. The design team may care most about print fidelity, while operations may care most about carton count and fold style. The checklist should capture both, but the approval should only be final when all required approvers have signed the same version. That avoids the common problem where one team approves artwork and another discovers the bag does not fit the stockroom or receiving process.
The best checklist is simple enough to use and strict enough to prevent ambiguity. If a field is not important, leave it out. If it is important, measure it and tie it to a pass or fail decision. That discipline is what turns a sample into a reliable production standard.
- Measure dimensions and print placement before doing a visual sign-off.
- Test the bag under realistic load, not just as an empty display piece.
- Write approval language that clearly freezes the production standard.
Specification comparison for buyers
| Bag option | Typical spec profile | Best museum use case | Performance difference | Buyer implication |
|---|---|---|---|---|
| Light promo canvas tote | 8 oz canvas, one-color screen print, self-fabric handles, no gusset or narrow gusset | Event giveaways, membership desks, low-load visitor handouts | Lowest cost, soft body, easier to fold, but less shelf structure and more show-through on dark artwork | Use only when the tote is a handout or add-on item; it is usually not strong enough for books or boxed gifts |
| Standard retail canvas tote | 10 oz canvas, one to three colors, reinforced handles, optional 3- to 4-inch gusset | Core gift-shop SKU for postcards, catalogs, and small souvenirs | Balanced hand feel, better shelf presentation, acceptable durability, easier carton packing than heavier cloth | Best starting point for many museum procurement teams because it balances cost, print quality, and retail appeal |
| Premium museum tote | 12 oz canvas, tighter weave, heavier thread, reinforced stress points, cleaner finish | Flagship museum-brand bag, premium shop display, higher-value retail program | More structured look, stronger seam stability, cleaner drape, better perceived quality | Higher unit cost and carton weight, but often the safest choice for a brand-led retail item |
| Heavy-load tote | 12 oz to 14 oz canvas, wider handles, reinforced bottom, stronger stitch pattern, larger gusset | Museum stores that sell books, exhibition catalogs, or combined gift sets | Best load performance and handle recovery under heavier use | Requires stricter testing on seam strength, handle attachment, and carton weight before approval |
| Foldable or flat-pack tote | 10 oz to 12 oz canvas, simplified profile, controlled fold spec, sometimes no gusset | Back-up SKU, promotional pack-in, or distribution-friendly reorder program | Better carton efficiency and easier warehouse handling, but usually less premium on shelf | Define fold style and crease tolerance in the RFQ because packing affects appearance and receiving quality |
| Special-finish tote | Bleached canvas, pigment-dyed body, oversized print area, woven label, hangtag, or branded trim | Exhibition launches, seasonal collections, or design-forward gift shops | Stronger visual identity but higher risk of color variation and finish mismatch | Needs sample approval for both the base cloth and the print outcome because finish changes the final look |
Buyer checklist before sampling
- Submit vector artwork with Pantone references, minimum line thickness, exact print size, and print placement measured from the top hem, side seam, and centerline.
- State finished dimensions, not nominal size labels, and confirm whether measurements are taken before or after sewing and hemming.
- Confirm fabric weight in oz or GSM, weave type, and color basis: natural, bleached, dyed, washed, or coated.
- Define handle length, handle width, attachment method, and whether the tote must carry on the shoulder, by hand, or both.
- Request a pre-production sample made with the same fabric, same ink system, same thread color, same label position, and same packing method as bulk production.
- Inspect print quality under neutral light for sharp edges, color density, registration, and seam distortion near the artwork area.
- Check seam quality at the handle joins, top hem, side seams, and bottom seam using a realistic load test before approval.
- Confirm gusset depth and verify that the bag opens evenly without twisting, puckering, or collapsing at the corners.
- Inspect the back side of the print for strike-through, ghosting, or ink bleed that could affect resale appearance.
- Approve packing details in writing: fold style, polybag use, carton quantity, carton marks, carton dimensions, gross weight, and barcode or item label if required.
Factory quote questions to send
- What exact fabric weight are you quoting in oz or GSM, and will the sample and bulk order use the same cloth lot or the same approved fabric standard?
- Is the print method screen print, heat transfer, digital print, or another process, and what is the maximum number of colors included in the unit price?
- What is the finished bag size, gusset depth, handle length, seam allowance, and handle attachment style used in your costing?
- What reinforcement is included at the handles and bottom seam, and what stitch pattern will be used in production?
- What is the MOQ by artwork, by colorway, and by size, and does the MOQ change if I request shared fabric booking or multiple museum branches in one run?
- What exact sample will you submit for approval, and how will you prove it matches the bulk fabric, thread, label, print method, and packing standard?
- Can you provide a measured spec sheet with dimensions, print placement, carton pack details, and approved tolerances before I confirm the PO?
- What are the included and excluded costs: artwork setup, screen or plate fees, packaging, inserts, hangtags, compliance paperwork, and freight?
- What is the production lead time after sample approval, which step usually causes delay, and what evidence can you provide to verify the stated lead time?
- Can you share factory photos of the sewing line, print area, in-line QC, final inspection, and carton packing before shipment?
Quality-control points to confirm
- Fabric weight should stay within the approved band: accept within ±5% of the approved oz or GSM target; reject if the cloth is noticeably lighter, slacker, or more translucent than the sealed sample.
- Fabric weave should be even, with no obvious slubs, holes, oil marks, shade bars, or panel-to-panel tone jumps that would look poor on a retail shelf.
- For natural canvas, expect mild shade variation; accept only if the variation stays within the approved sample range and does not create a visibly mismatched front and back panel.
- For bleached or dyed canvas, shade consistency should be tighter; reject if the panels differ enough to be obvious under neutral light from 1 meter away.
- Print placement tolerance should be stated in the RFQ; as a practical pass band, keep placement within ±5 mm for small logos and ±8 mm for larger artwork, measured from the approved reference points.
- Print edges should stay crisp under close inspection; reject blurred edges, pinholes, faint banding, or visible misregistration between colors.
- For solid logos, color density should be opaque enough that the base fabric does not strongly show through; reject weak coverage, patchy fills, or obvious roller marks.
- If the design includes text, the smallest text should remain legible at arm’s length; reject any text that closes up, breaks apart, or loses counter spaces.
- Stitching should be straight and even, with no skipped stitches, loose thread tails, broken seams, or uneven bartacks at the handles.
- Handle reinforcement should be tested by loading the bag with a realistic retail weight; reject handle pull-out, seam opening, or twisting after the load is removed.