Why museum buyers need a different canvas bag spec
Printed canvas shopping bags for museums are not generic promotional totes. They sit between retail packaging and long-use merchandise, which means the spec has to satisfy brand presentation, carrying performance, and procurement control at the same time. A bag that works for an event giveaway can feel too thin or too informal in a museum shop. A premium tote that looks impressive in a mockup can become expensive once sewing, decoration, packing, and freight are added.
For procurement teams, the important point is that the bag is judged on the shelf and at the checkout counter, not only in a product photo. Museum stores sell different items from different channels: exhibition catalogs, art books, postcards, membership gifts, and seasonal merchandise. Those use cases drive different requirements for structure, print method, and acceptable cost. The right brief starts with the retail role of the bag, then matches decoration and fabric to that role.
- Retail-facing museum bags need cleaner print placement and better edge finishing than event bags.
- The bag should stand up enough for display, but still pack efficiently for warehouse handling.
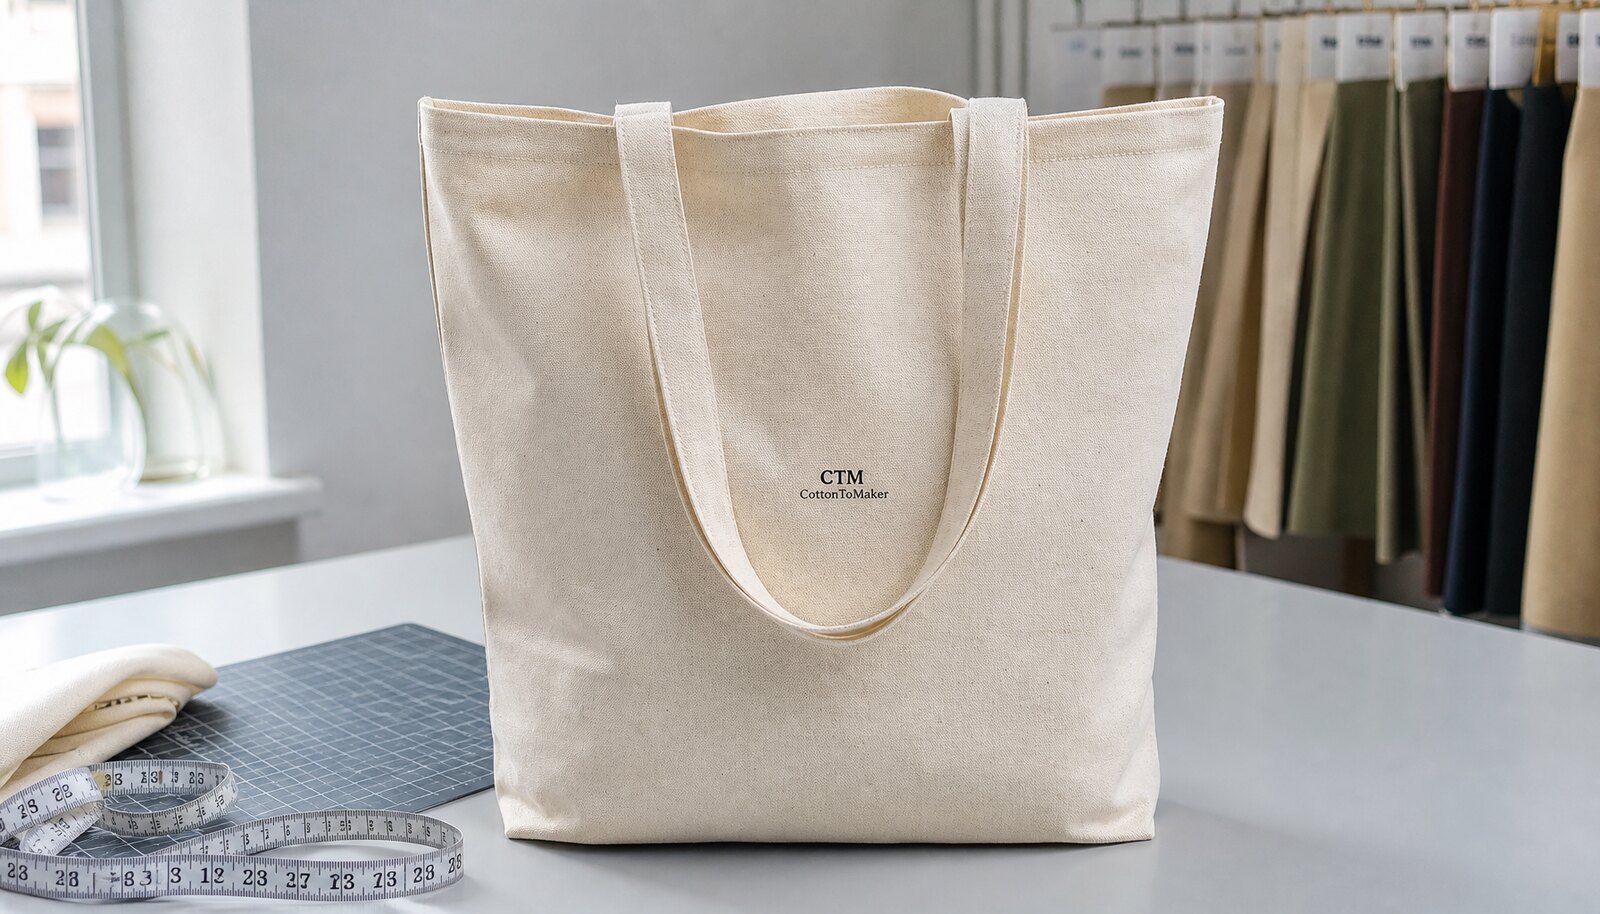
- A museum logo may include fine text, dates, or exhibition-specific artwork that can fail on the wrong print method.
Start with fabric weight and construction before choosing decoration
For most museum shop programs, 10 oz to 12 oz canvas is a practical starting point because it gives a balanced retail feel without pushing sewing cost and freight too far. If the bag is expected to carry books, catalogues, or heavier purchased items, 14 oz to 16 oz canvas usually provides a firmer hand and a more structured silhouette. Lighter fabric can work for small souvenir bags, but it usually reads as more promotional than retail unless the design and finishing are unusually controlled.
Fabric choice affects the print outcome as much as it affects the bag's strength. Softer canvas can show uneven ink absorption and allow large solid areas to look slightly mottled. Heavier canvas gives a flatter print surface, but it also increases thread consumption, sewing time, and carton weight. If you are comparing quotes, ask whether the weight is measured before or after finishing, whether the fabric is pre-shrunk, and whether the supplier is using natural, bleached, or dyed canvas. Those details change both appearance and landed cost.
- 10 oz to 12 oz: common balance for museum retail, cost control, and acceptable body.
- 14 oz to 16 oz: better for books, catalogues, and a more premium shelf presence.
- Pre-shrunk fabric can reduce size drift after steaming or washing, but often costs more.
- Natural canvas usually gives the most authentic museum-shop look, while bleached canvas can make lighter artwork appear brighter.
Print method comparison: choose for artwork, durability, and reorder control
The print method should be selected from the artwork and the reorder plan, not from habit. Screen print is usually the most defensible option for simple museum logos, exhibition titles, dates, or one- to two-color graphics. It tends to give strong opacity on natural canvas, and once the screens are approved it is often the most repeatable route for future reorders.
Digital transfer and direct digital print solve a different problem. They are useful when the artwork contains gradients, many colors, or small illustrated details that would be difficult or expensive to separate for screen printing. The tradeoff is that the buyer needs to inspect handfeel, edge sharpness, ink or film durability, and batch-to-batch consistency more carefully. Embroidery and woven labels can improve perceived value, but each adds cost and introduces its own placement and QC issues.
- Screen print is usually the best value for simple branding, strong coverage, and reorder consistency.
- Digital transfer is often the more practical route for complex art on smaller runs, but the finish can feel less integrated with the canvas.
- Direct digital print depends heavily on the factory's pre-treatment, curing, and equipment control.
- Embroidery works best for small premium marks, not large fills or fine text.
- Woven labels are useful as a stable brand device, but they should be treated as a supplement, not a replacement for the main decoration method.
How each decoration method performs in real procurement terms
Screen print is the most common route because it can deliver strong opacity, good cost control, and predictable reorders when the design is simple. For a museum that wants a clean front logo, an exhibition title, or a date range, screen print is usually the least risky option. The buyer should still ask about mesh count, ink thickness, and line weight limits because extremely fine text or thin strokes can disappear on textured canvas. Multi-color screen work can also add registration risk, so the artwork should be built with a realistic tolerance for alignment.
Digital transfer, often used for short runs or highly detailed art, can reproduce complex graphics that are not practical for screens. This makes it useful for exhibition merchandise with illustration, gradients, or small type. The procurement issue is that the decoration is more dependent on the exact transfer film, heat application, and substrate than a simple screen print. If the supplier changes film source or process settings between orders, the feel and durability can shift. Ask the factory what rub testing it uses and whether the transfer sits on top of the canvas or is partially bonded into the surface.
Direct digital print is attractive when the artwork needs high color complexity and the supplier has the right equipment for canvas. It can work well on prepared or treated substrates, but it is not a universal answer. The buyer should ask whether the fabric requires pre-treatment, how the ink is cured, and what the wash or rub behavior is on the exact canvas weight being quoted. Direct digital can be efficient for artwork changes, but the final look depends on process control. That matters if the bag will be re-ordered for multiple exhibitions or seasonal updates.
Embroidery creates texture and a more premium perception, which is why it can be effective for membership gifts or higher-priced museum retail items. It is not a substitute for printed art when the design contains small text or detailed graphics. Stitch density, backing material, and placement all matter because embroidery can pucker light canvas or distort the panel if the area is too large. Use embroidery when the design is intentionally small and the museum wants tactile value rather than visual complexity.
Woven labels are often the most stable branding element across multiple bag styles. They are useful when the museum wants a consistent mark on different canvas weights, different colors, or different retail programs. The limitation is that a label can only do so much. It should support the main decoration method rather than replace it. For procurement, the label matters because it adds sewing operations, placement tolerance, and extra approval points. If the bag includes a woven label, confirm the label size, edge finish, fold, and whether the label is sewn before or after the final press.
- Screen print: best for strong color blocks, cleaner unit cost, and consistent reorders.
- Digital transfer: best for complex art in smaller quantities, with more finish verification needed.
- Direct digital print: useful when the supplier controls pre-treatment and curing well.
- Embroidery: best for small premium marks, with strict limits on size and detail.
- Woven label: best as a stable brand element, not as the only decoration on a museum retail tote.
Use case matching: catalog carriers, exhibition merch, and membership gifts
Museum buyers get better quotes when the supplier understands how the bag will be sold. A catalog carrier is mainly functional: it needs width, handle strength, and enough print clarity to read as museum retail. A bag used for exhibition merchandise has to support visual identity more directly, which may justify a more detailed design or a slightly more premium finish. Membership gifts often sit at the top end of the range because they are meant to feel deliberate and keepsake-worthy.
For catalog and book carriers, heavier canvas and a simple screen print are usually the most reliable combination. The buyer should focus on gusset depth, load support, and handle reinforcement because the bag must survive the weight of publications. For exhibition merch, direct digital or transfer can make sense if the artwork is central to the show and the design includes fine detail. For membership or donor gifts, a mixed approach such as screen print plus woven label, or a small embroidered crest, can create a more elevated presentation without overcomplicating the whole bag program.
- Catalog carrier: prioritize gusset, seam strength, and print clarity over decoration complexity.
- Exhibition merch: prioritize artwork fidelity and a controlled color reference process.
- Membership gift: prioritize perceived value, touch, and a restrained but premium mark.
- General museum shop tote: prioritize reorder consistency and cost discipline.
What to put in the RFQ so quotes are comparable
A museum RFQ should not be a logo-only inquiry. If the supplier has to guess the bag size, fabric weight, decoration method, and packing format, every quote will include different assumptions and the comparison will be weak. Procurement teams should lock the finished dimensions, handle length, gusset, canvas weight, print area, number of colors, and any secondary decoration such as a woven label or embroidery before asking for pricing. That is the minimum needed to compare apples to apples.
It also helps to describe the sales context. Say whether the bag is for a gift shop counter, an exhibition launch, an e-commerce shipment, or a membership campaign. That tells the supplier how much emphasis to place on presentation versus cost. If the museum requires shelf-ready packing, barcode labels, or a specific fold size, the RFQ should include those details. Otherwise the supplier may quote bulk packing while the warehouse expects retail-ready units.
- Include finished size, not cut size.
- Specify canvas weight in oz or GSM and ask whether the quoted weight is finished or unfinished.
- State the exact decoration method or list acceptable alternatives in order of preference.
- Identify the artwork complexity: simple logo, multi-color illustration, fine text, or gradient.
- State packing requirements: bulk, polybag, insert card, barcode sticker, or carton label.
- Ask for the factory's preferred maximum line thickness and minimum text size if the artwork is detailed.
MOQ logic and reorder planning for museum programs
Museum buyers often need more than one version of a bag: a permanent logo tote, an exhibition-specific version, and sometimes a seasonal or membership edition. That is where MOQ logic becomes important. Screen printing usually rewards scale because the setup is spread across more units, but every additional color or print position can add setup time and reject risk. A second decoration location can change the quote more than buyers expect, especially if it requires a separate screen or a second inspection pass.
If the order is small or the design changes often, a digital transfer or direct digital route may be more flexible. That does not automatically make it better. The buyer should compare the full landed cost and the risk of finish variation on reorder. For a museum with an ongoing retail program, it is often smarter to standardize one base construction and keep only the artwork variable. That reduces fabric fragmentation, simplifies warehouse receiving, and makes it easier to reorder without a new development cycle.
- More colors or print positions usually mean more setup and more QC checkpoints.
- Multiple bag sizes split production efficiency and raise unit cost.
- A stable base bag makes reorder planning easier across exhibitions and seasons.
- MOQ should be discussed separately for the bag body, decoration method, and any secondary branding element.
Sample approval: how to control color, placement, and finish
Museum tote bags are highly visual, so sample approval should be treated as a gate, not a formality. The pre-production sample should be made on the exact fabric weight, with the same handle construction, and with the same decoration method intended for bulk. A sample on different cloth or with a different ink system only proves the design concept; it does not prove bulk stability. If the supplier proposes a shortcut sample, the buyer should ask for a second sample on the correct material before approving production.
The sample review should check more than overall appearance. Measure print placement from the top edge and side seam. Check whether large filled areas look even on the natural texture of the canvas. Look at how the handles pull the bag body out of square. If the design includes a woven label, embroidery, or side tab, confirm that the added element does not interfere with folding, stacking, or the front retail view. Keep one signed master sample or a sealed reference bag so future reorders can be compared against an approved standard.
- Approve artwork on actual bag panels, not only on a flat art proof.
- Verify finished dimensions after sewing and pressing, not only cut dimensions.
- Confirm the exact artwork scale and placement in writing before mass production.
- If brand color is critical, require a physical color reference or an agreed tolerance range.
- Keep a signed sample or reference bag in the procurement file for reorder checks.
QC acceptance criteria for museum retail bags
Generic QC language is not enough for a commercial buying guide. Museum buyers need measurable acceptance criteria that can be used during sample approval and final inspection. Start with print registration. For a clean front logo, ask the supplier to hold placement within a narrow tolerance, typically around 2 to 3 mm from the approved position unless the artwork is intentionally loose or oversized. For multi-color work, confirm that the registration does not create visible halos, stepping, or misalignment at the edges of type and line art.
Next, define the color and finish standard. If the factory uses a spectrophotometer, ask what Delta E range it is willing to guarantee on the agreed substrate and ink system. If the factory does not measure color instrumentally, require a signed visual match against a physical reference under agreed lighting. For durability, ask for dry and wet rub results or the factory's standard equivalent on the same canvas and print method. Embroidery needs its own check: stitch density, backing, trim quality, and a simple pull test on the handle and label attachment points. Finally, inspect carton quality. The buyer should verify carton count, outer marks, net and gross weight, carton dimensions, and whether the pack format protects handles from excessive fold stress.
- Print placement tolerance: define it in mm and check against the approved sample.
- Color control: use a physical reference or agreed Delta E target for spot-color work.
- Durability: require dry and wet rub evidence for printed panels when reuse matters.
- Embroidery: check stitch density, backing, puckering, and pull resistance.
- Cartons: confirm counts, dimensions, weight, and outer marking before shipment.
- Do not accept a different print method or different fabric without written approval.
Packing, lead time, and launch risk management
Packing details matter because they affect warehouse handling, presentation, and freight cost. Bulk packing is usually the lowest-cost option, but it can create stronger fold marks on heavier canvas if the fold method is not controlled. Individual polybags improve retail presentation and reduce dust exposure, but they add cost and labor. Museums that replenish stock through a warehouse and then move bags to a gift shop often choose a defined fold method with bulk packing, plus retail inserts only where the sales channel requires them.
Lead time should be broken into sample time and bulk time. For screen print, the schedule may include artwork review, screen preparation, strike-off approval, and production. For digital transfer or direct digital, the setup may be faster, but the file-prep and color-review step still matters. The biggest risk in exhibition-linked orders is not sewing; it is late artwork changes. A bag tied to a show opening, store refresh, or membership launch should have a frozen artwork deadline. If the art or packing changes after approval, the buyer should treat it as a schedule reset rather than a minor revision.
- Bulk pack is usually cheapest; polybagging is better when presentation is part of the SKU value.
- Ask for carton dimensions that protect the handles and preserve the fold line.
- Separate sample lead time from bulk lead time in the schedule.
- Treat art changes, size changes, and packing changes as approval resets.
Specification comparison for buyers
| Buying decision | Best-fit method | Tradeoff to compare | Procurement note |
|---|---|---|---|
| Simple museum logo, dates, or clean line art | Screen print | Strong opacity on natural canvas, usually the cleanest unit cost for repeat orders, but fine detail depends on mesh count and artwork prep | Ask for a strike-off on the exact canvas color and lock artwork scale before screen making |
| Illustration, gradients, small text, or multi-color exhibit art | Digital transfer or direct digital print | Better for complex artwork and short runs, but handfeel, edge sharpness, and repeat consistency depend on the factory process and substrate treatment | Verify rub performance and confirm whether the transfer film, pre-treatment, or curing step changes the finish |
| Premium small emblem or membership gift bag | Embroidery | Adds texture and perceived value, but can distort light canvas and is not efficient for large fills or fine text | Set an embroidery size limit and require stitch density and backing to be approved on the sample |
| Small brand mark that should stay consistent across multiple bag styles | Woven label | Stable across reorders and useful for premium branding, but it adds sewing steps and does not replace printed artwork | Confirm label size, fold method, placement tolerance, and whether the label is sewn before or after final pressing |
| Retail program that needs both brand clarity and visual depth | Mixed method: print plus woven label or small embroidery | Raises cost and QC complexity, but can improve shelf presence for museum shops with higher price points | Treat each decoration layer as a separate approval item so reorders do not drift |
| Standard museum shop carrier for books, postcards, and impulse purchases | 1-2 color screen print on 10 oz to 12 oz canvas | Usually the best balance of cost, durability, and reorder consistency, provided the art is not too detailed | Use this route when the design needs to survive repeat use and the museum wants predictable replenishment |
Buyer checklist before sampling
- State the finished bag size, gusset depth, handle drop, and canvas weight in oz or GSM before requesting any quote.
- Define the decoration method by artwork type: screen print for simple marks, digital transfer or direct digital for complex art, embroidery for small premium marks, and woven label for stable branding.
- Ask the supplier to confirm whether the fabric is natural, bleached, dyed, or pre-shrunk, and whether the weight is measured before or after finishing.
- Send artwork as vector where possible, and specify whether the job must match a spot color, a visual reference, or an agreed tolerance window.
- State the retail use case: catalog carrier, exhibition merchandise bag, membership gift, or general museum shop tote, because that changes construction and print expectations.
- Request a pre-production sample on the exact fabric, construction, and decoration method intended for bulk production.
- Agree on packing format, carton quantity, carton labels, and whether bags need inserts, polybags, or retail tags before production begins.
- Confirm whether the factory can provide photo approval, carton counts, and final inspection records before shipment.
Factory quote questions to send
- Which print method do you recommend for this exact artwork, and why is it the best fit for the canvas weight and retail use?
- What is the exact cost difference between screen print, digital transfer, direct digital print, embroidery, and woven label decoration on this bag?
- What setup charges apply for each method, including screen fees, file prep, transfer film, embroidery programming, or label weaving?
- What is your MOQ by bag size, colorway, and decoration method, and how does MOQ change if we add a second artwork version?
- Will the sample use the same canvas, same ink or thread, and same sewing construction as the bulk order?
- How do you control print placement, color consistency, and repeatability across reorders?
- What is included in your packing quote: bulk pack, fold method, polybag, barcode sticker, insert card, and carton marking?
- What inspection checks do you complete before shipment, and what is the rework path if print or sewing falls outside spec?
Quality-control points to confirm
- Set a print registration tolerance in writing. For most museum tote artwork, ask for a centered placement tolerance of about 2 to 3 mm on the finished bag, unless the design has a larger intentional off-center layout.
- For spot colors, agree on a color reference method before production. If the supplier uses spectrophotometer matching, ask for a target Delta E range that both sides accept for the substrate and ink system.
- Require a visual check for ink coverage on the exact canvas weight used for bulk. No visible pinholes, patchy solids, bleeding at the edges, or broken fine lines should be accepted without approval.
- If the bag will be reused or washed, request dry and wet rub testing on the printed panel using the factory's normal test method or an agreed standard. The result should be documented, not described informally.
- For embroidery, require a stitch pull test and confirm backing type, stitch density, and whether the embroidery causes puckering on the canvas face.
- Check finished bag dimensions after sewing and pressing, not only cut dimensions. Measure width, height, gusset, and handle drop against the approved sample.
- Inspect handle attachment points for symmetry, stitch count, and bartack or reinforcement quality. Loose thread trimming should be clean and consistent.
- Verify carton specs at packing: correct count per carton, carton dimensions, gross weight, outer marks, and no crushed corners or collapsed panels.
- Keep one approved master sample or sealed reference bag for reorder comparison.