Why ecommerce brands need a packaging specification, not just a tote design
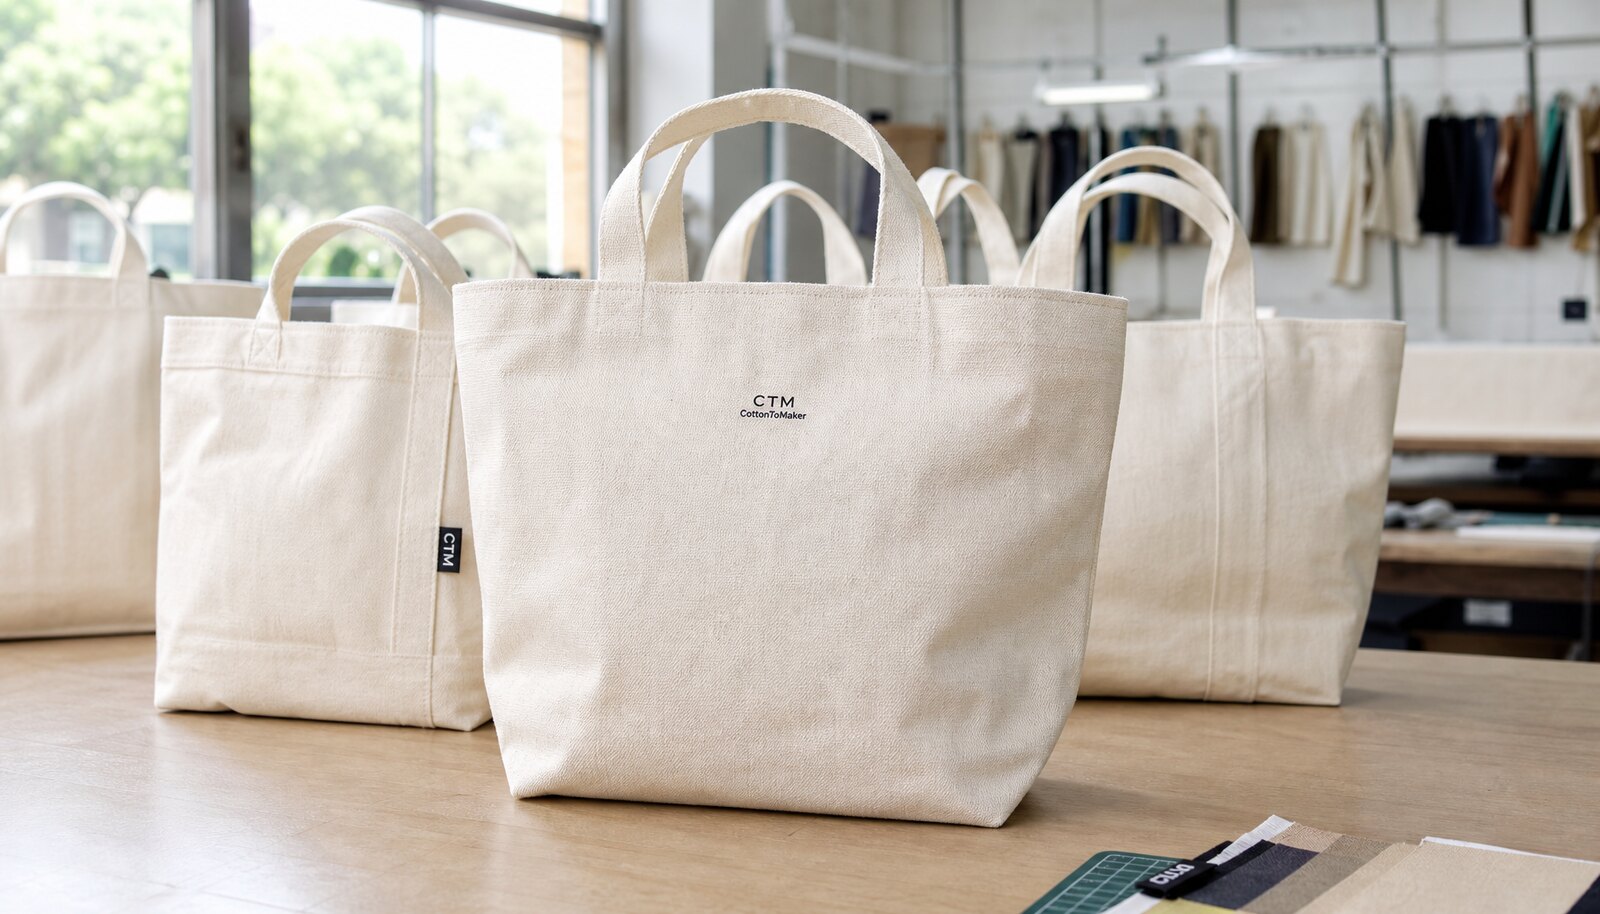
Printed canvas shopping bags for ecommerce brands packaging projects often start with a logo file and end with a production problem. The mockup looks clean, the price looks acceptable, and the buyer assumes the tote is simple. Then the bulk order arrives with a bag that is too thin, too bulky for the carton plan, or too soft to hold its shape on the unboxing table. The fix is not to design harder. It is to spec the bag like packaging, not like a graphic.
For procurement teams, the buying decision is really about fit, feel, and repeatability. Does the bag support the product presentation in the fulfillment flow? Does it survive handling and reuse? Can the factory repeat the same bag on reorder without shade drift or seam variation? Those answers come from a specification sheet, not from a logo approval alone.
A useful spec should connect the tote to the actual channel. A DTC insert bag may need to pack flat and keep carton weight low. A retail resale tote may need cleaner stitching, stronger handles, and a more premium print finish. A gift-with-purchase bag may need a lower unit cost but still enough body to look intentional. Once the use case is clear, the rest of the decisions become easier to compare.
Procurement buyers should treat the tote as a component with measurable characteristics. That means defining finished size, canvas weight, print method, handle construction, seam type, tolerance, packing, and QC checks before quote review. When those fields are set, price differences become easier to explain. When they are not, every supplier is quoting a slightly different bag.
- Tie the bag to the channel: DTC insert, retail resale, subscription pack, or promotional giveaway.
- Do not approve based on artwork alone; lock the structure and packing spec first.
- Use the same written spec for samples, quotes, and bulk production.
- A reusable tote that looks premium but packs poorly can raise both freight and warehouse costs.
Start with bag structure: size, gusset, handle dimensions, and carry behavior
The first decision is not the print method. It is the structure. Finished size determines whether the bag holds the intended contents without wasting material or carton space. Gusset depth controls capacity and shape. Handle length changes how the bag carries. Handle width changes comfort and load distribution. If you lock these variables early, the supplier can quote a bag that actually fits your process.
For most ecommerce packaging programs, 12oz to 16oz canvas covers the practical middle ground. A 10oz bag can work for lightweight promo use or short-life packaging, but it often feels too soft for customer-facing resale or repeated handling. At the other end, heavier canvas gives more body and a better premium impression, but it also adds cost, weight, and bulk. That bulk matters when you are fitting bags into master cartons or shipping them to a fulfillment center.
Gusset depth deserves more attention than it usually gets. A 6 cm to 10 cm gusset is common in medium totes, but the right number depends on what is going inside. Flat apparel packs, mailers, and small gift sets may not need much depth. Boxes, jars, or mixed SKU kits often do. Too much gusset can make the tote stand up nicely but waste carton volume. Too little gusset can make the bag hard to load and distort the print panel.
Handle spec also affects quality perception. A narrow handle may be acceptable on a promo bag, but it can twist, dig into the hand, and look underbuilt on a customer-facing tote. For many medium canvas bags, a 2.5 cm to 3.8 cm handle width is a practical range. Longer handle drops work for shoulder carry; shorter ones suit retail hand carry or compact packaging inserts. The best length is the one that matches the way the buyer will actually use the bag, not the way it looks in a styled image.
- Use 12oz canvas for lighter packing or lower-price programs; use 14oz to 16oz when the bag needs better body.
- Specify gusset depth only if the contents need volume; extra depth raises material and freight cost.
- Ask for handle width and handle drop, not just handle length.
- Tie finished dimensions to actual packed contents and carton limits.
Choose the canvas and finishing based on appearance, durability, and reorder consistency
Canvas is not one material in a procurement sense; it is a family of construction choices. Buyers should ask whether the cloth is natural, bleached, or dyed, whether it is 100% cotton or a blend, and whether the finish is intended for a crisp retail look or a softer packaging feel. The surface tone matters because it changes how the print reads. Natural canvas can make a printed logo feel warmer and more organic, while bleached or white cloth usually gives stronger color contrast.
Weight alone does not tell you everything. Two bags labeled 12oz can feel different if the weave density, yarn thickness, and finishing process differ. One supplier may quote a finished weight after wash and shrink control; another may quote a loom-state weight before finishing. That is why buyers should ask for a clear definition of the measured weight and request a sample from the same fabric lot whenever possible.
Shrinkage and shade consistency are worth spelling out in the spec. If the bag will be folded, warehoused, or reused, shrinkage can affect final size and print placement. If the order is repeated later, the buyer also needs to know how the supplier handles lot-to-lot variation. A reorder that looks close on paper but shows a darker or yellower cloth tone will be obvious to the end customer.
If you need a more premium retail feel, ask whether the cloth has been calendered, preshrunk, or brushed. Each finish changes texture and cost. If you need a more utilitarian packaging bag, a simpler finish may be enough. The main point is to match the finish to the channel. A luxury retail tote and a warehouse insert do not need the same fabric treatment.
- Ask whether fabric weight is quoted before or after finishing and shrink control.
- Request fabric composition, weave density, and finish type instead of relying on the word canvas alone.
- Define the acceptable shade range between sample approval and bulk delivery.
- Check whether the supplier can keep the same cloth tone on reorders.
Use the print method to fit the artwork, not the other way around
Print method should be chosen after the artwork and fabric are both understood. For simple logos, screen print usually gives the best balance of opacity, sharpness, and unit cost. It handles solid blocks and single-line brand marks well, especially on natural canvas where you want the logo to read cleanly from a distance. If the artwork is small, the linework is very fine, or the order is short and varied, digital or transfer methods may be more practical, but they need a careful proof on the actual cloth.
Canvas texture changes how artwork behaves. The weave can break up fine details and make light inks look thinner than they do on paper. Small type can fill in, white text can lose edge clarity, and very large solid areas can show uneven coverage if the ink, mesh, or curing is not controlled. Buyers should ask for a sample that reflects the real bag surface and the real print location, not a loose swatch on a smooth test cloth.
A good quote should state the number of colors, the print area in centimeters, the print side, and the curing method. If the supplier quotes a low unit price but leaves out the setup charge, the quote is not comparable. If the artwork is likely to change later, ask how much it costs to revise film, screen, or digital setup. That question matters more than many buyers realize because small changes can happen after marketing sign-off.
For ecommerce packaging, keep the print as intentional and readable as possible. Centered logos, controlled margins, and one clear brand mark usually perform better than crowded compositions. If you need a side mark, care label, or recycled-content statement, make sure it does not compete with the main logo or push the print area into an awkward fold line.
- Screen print is usually the default for simple brand marks on canvas.
- Ask for the exact print area and number of colors on the quote.
- Approving a print on paper is not enough; approve on actual canvas.
- Limit artwork complexity unless the brand program truly needs it.
Construction details that protect the bag in use: seams, stitches, reinforcements, and trim
Construction quality is where many tote quotes diverge in ways that are not obvious from a photo. A bag can look similar at first glance while one version uses basic stitching and another uses reinforced side seams, cleaner edge finishing, and stronger handle anchors. Procurement buyers should ask for the exact seam type and reinforcement method because that is where load performance lives.
At minimum, request the seam construction in clear terms: overlocked edges, double-stitched seams, boxed corners, or bartack reinforcement at stress points. If the bag will carry heavier items or will be reused often, handle anchors need extra attention. The factory should explain how many rows of stitching are used, where reinforcement is placed, and whether thread color matches or contrasts with the bag body.
Stitch count is a practical number to ask for. There is no single universal value that works for every factory, but buyers should still ask how many stitches per inch or per centimeter are used on the seam and where that density changes. A vague answer like “strong stitching” is not enough for a purchase order. You need to know whether the line is tight enough to resist opening, but not so tight that it puckers the fabric or cuts into the weave.
Trim quality also matters. Loose thread tails, skipped stitches, uneven top edges, and crooked hems are visible on a customer-facing tote. If the bag uses a sewn-on label, ask how the label is secured and whether the label edge is folded or raw. If there is a contrast thread or decorative binding, verify that it is intentional and consistent. Small construction details often tell you more about a factory’s discipline than the print itself.
- Ask for seam type, reinforcement points, and stitch density in the quote.
- Check handle anchors separately from the side seam.
- Inspect trim ends, loose threads, and edge finish on the sample.
- Do not accept “strong stitching” without a construction description.
Packing specification: flat pack, inner bundle, carton count, labeling, and warehouse fit
Packing can make a good tote expensive or a cheap tote easy to receive. For ecommerce brands, flat packing is usually the most efficient format because it reduces carton volume and simplifies warehouse counting. The factory should state the fold method, the number of bags per inner bundle if any, and the number of bags per master carton. If the buyer does not specify these items, the supplier may default to a retail style pack that looks neat but wastes space.
Inner polybags are not automatically better. They help if you need dust protection, moisture control, or a retail shelf presentation, but they add labor and plastic. In many fulfillment programs, a clean flat fold and a carton label are enough. The quote should say whether the bags are bulk-packed loose, stacked in bundles, or individually bagged. Those differences affect both labor cost and inbound handling.
Carton dimensions matter more than many first-time buyers expect. A tote that is only slightly larger can force a carton size change, reduce pallet efficiency, and raise freight. Ask for gross weight as well as carton size, because some warehouses have receiving limits by carton weight. If the bags are being shipped to a 3PL or distribution center, confirm whether they need barcode labels, carton marks, SKU separation, or pallet labels in a specific format.
A buyer should also request pack-out verification before shipment. That means the factory checks carton count, confirms the SKU label matches the contents, and verifies that the fold and orientation match the approved standard. A pack-out error can turn into a receiving issue even when the bag itself is correct.
- Specify flat pack if the bags will move through a fulfillment workflow.
- Ask for carton dimensions, gross weight, and unit count per carton.
- Do not add inner polybags unless there is a real need for dust or retail presentation.
- Request pack-out photos and carton labels before dispatch.
A practical supplier-selection check: who can hold the spec without handholding?
For this category, supplier selection is less about finding the lowest quote and more about finding the factory that can repeatedly produce the same tote without constant clarification. A strong supplier can read the spec, restate it correctly, and flag the points that are risky before the order is placed. A weaker supplier may accept every request, then improvise during sampling or bulk production. Procurement should favor the supplier that asks precise questions early, not the one that says yes to everything.
One useful signal is how the factory handles fabric sourcing. Ask whether the cloth is woven in-house or sourced from a nominated mill, and whether the supplier can show the source of the exact canvas weight they are quoting. If the answer is vague, the bag may still be fine, but reorder consistency becomes harder. The same applies to print control: the better supplier can explain curing, ink coverage, and how they keep shade and registration aligned across lots.
Another helpful test is whether the supplier can quote the same bag in more than one program format. For example, ask for a lean fulfillment version and a slightly upgraded retail version. If the factory can clearly explain which changes affect material, labor, and packing, that is a sign of real process control. If every variation sounds like a new custom project, the supplier may be fine for a one-off but less reliable for repeat orders.
Look for operational specificity rather than broad promises. Good signals include named QC checkpoints, documented sample stages, carton packing photos, and clear lead time by step. If the supplier cannot explain where their production bottlenecks are, or how they manage reorders, that is a warning sign for brands that plan to restock the tote regularly.
- Prefer suppliers who can restate the spec clearly and identify risks before sampling.
- Ask who sources the canvas and how they control lot-to-lot consistency.
- Compare a lean version and a premium version to see whether the factory understands cost drivers.
- Favor suppliers with visible sample, print, and packing checkpoints rather than broad promises.
A buyer’s quote worksheet that makes offers comparable without turning the RFQ into filler
The easiest way to get a useful quote is to force every supplier to answer the same fields. A loose email exchange invites confusion because one supplier includes labels, another excludes them, and a third quotes a different fabric weight without saying so. That makes the unit price look comparable when it is not. A spec-driven worksheet lets procurement compare total landed cost, not just the bag price.
The worksheet should separate the bag body from the non-bag costs. Ask for fabric, printing, sewing, trim or label, packing, sample, and freight assumptions as separate items if the supplier can provide them. Even when a factory refuses to fully itemize labor, it should at least confirm what is included in the ex-works price. That helps the buyer identify which quote is really cheaper and which one is simply less transparent.
Decision thresholds also help. If you are choosing between two suppliers, decide in advance what matters more: lower ex-factory price, tighter color control, faster lead time, or better reorder consistency. Otherwise the award gets delayed by endless revisions. Procurement teams do better when they define what would justify paying more and what would not.
The point is not to generate a long RFQ. The point is to ask enough detail that you can compare factories without guessing. If a supplier cannot answer the basics in one pass, the quote is not ready for award.
- Ask for fabric, print, sewing, labels, packing, sample, and freight assumptions separately where possible.
- Clarify what the ex-works price includes and excludes.
- Set a value rule before quotes arrive: price, speed, color control, or reorder stability.
- Use the same worksheet for every supplier so the comparison is real.
Sample approval should test the real bag, not a logo placement proof
A real sample is the buyer’s best control point. A print proof or fabric strike-off tells you only part of the story. It does not show whether the tote stands correctly, whether the handles sit evenly, whether the seams pull when loaded, or whether the bag folds neatly for packing. For a packaging program, the sample has to represent the full construction, not only the branding surface.
When you review a sample, check the bag as a working object. Open and close it. Fold it the way your warehouse will fold it. Measure the finished size. Look at the print under normal room lighting and under brighter inspection light. Check whether the logo is centered after seam allowance and whether it still looks centered once the bag is held or hung. These are practical details, not cosmetic extras.
If the sample is approved, keep it with a dated record of what was accepted. Note the fabric weight, print method, artwork version, and packing method. That reference becomes very useful if the bulk order drifts. Many disputes start because the buyer remembers the sample one way and the supplier remembers it another. A signed, labeled reference sample removes that ambiguity.
For a first order, it is worth asking for a pre-production sample and, if the order is larger or more brand-sensitive, a photo set of the first bulk output before full shipment release. That does not replace inspection, but it helps catch obvious drift early. The key is to make sample approval measurable, not subjective.
- Approve the sample only after measuring size, checking print placement, and verifying seam finish.
- Use the same lighting and handling conditions you expect in real use.
- Keep a dated approved sample for reorder reference.
- If the sample differs from the bulk plan, stop and reconcile the spec before production continues.
QC criteria procurement teams should write into the order, not leave to interpretation
Quality control for canvas totes should be written as concrete acceptance criteria. General phrases like “good workmanship” or “no visible defects” are too open-ended. A serious order should define what counts as a major defect, what counts as a minor defect, and how many defects are allowed under the inspection plan. If your supplier already uses AQL, ask which level they apply for appearance, dimensions, and packing. If they do not propose one, specify it in the PO or quality agreement.
Size and construction checks are the first layer. The factory should measure width, height, gusset, and handle dimensions against the approved spec and keep the results within the agreed tolerance band. For many tote programs, a tolerance of plus or minus 0.5 cm to 1 cm is practical, but the buyer should set the number based on size and use case. A compact insert bag may need tighter control than a loose retail tote.
Print QC needs more than “looks okay.” Ask for registration tolerance, coverage expectations, and defect examples that will be rejected. For example: obvious misregistration, broken lines, smudging, ink pooling, pinholes in solid fill, and visible cracking after normal flexing should all be defined. If the bag is customer-facing, ask the factory to compare the bulk output against the approved sample under standard light and to record any shade drift.
Packing QC is equally important. Verify unit count per carton, inner bundle count, barcode or SKU label placement, carton marks, and whether cartons are sealed and palletized correctly. A bag can pass sewing inspection and still fail receiving if the carton count is wrong or the labels are mixed. For import buyers, this is one of the most common avoidable problems because the bag looks simple and packing is treated as routine.
The checklist below gives a useful QC baseline. It is not a substitute for your own quality plan, but it is far better than a one-line defect note. If you need a stricter standard, apply it before production starts, not after the cartons are already closed.
- Use AQL and define major/minor defect categories in writing.
- Check size, print, seam, and pack-out as separate QC steps.
- Require visual comparison against the approved sample under standard light.
- Verify carton labels, unit count, and SKU separation before shipment release.
Specification comparison for buyers
| Spec area | Buyer-side recommendation | Why it matters | Quote field to request |
|---|---|---|---|
| Fabric weight | 12oz to 16oz for most ecommerce packaging use; 10oz only for light promo or low-duty inserts | Controls body, hand feel, print opacity, carton efficiency, and overall perceived quality | State target oz/GSM and whether the weight is finished fabric or pre-finish cloth |
| Fabric type | 100% cotton canvas unless you need a blend, recycled content, or a special finish | Affects shrinkage, texture, print behavior, and reorder consistency | Ask for fiber composition, weave type, fabric finish, and whether the cloth is bleached, dyed, or natural |
| Finished size | Set width, height, and gusset from the actual packed product and fulfillment workflow | Oversized bags waste carton space; undersized bags create packing friction and distort the print panel | Request finished dimensions with tolerance for width, height, gusset, and handle drop |
| Handle construction | 2.5 cm to 3.8 cm handle width for most medium totes; wider for heavier carry programs | Handle width, anchor style, and stitch pattern determine comfort and failure risk | Ask for handle width, handle drop, handle length, fold-back method, and anchor stitch pattern |
| Seam construction | Double-stitched side seams or overlocked interior seams with reinforcement at stress points | Weak seams fail at corners, gusset joins, and handle anchors | Request seam type, stitch count per inch, and reinforcement method at load-bearing points |
| Print method | Screen print for simple logos; digital or transfer only when artwork or run size requires it | Print method changes opacity, registration, unit cost, and durability | Ask for ink type, number of colors, print area, curing method, and registration tolerance |
| Color control | Approve against Pantone only if the supplier can hold repeatable match on the chosen cloth | Canvas texture and fabric tone change color appearance | Request an approved strike-off or lab dip reference and a visual match standard |
| Packing format | Flat pack for fulfillment efficiency; add inner polybag only when needed for dust or retail presentation | Packing changes carton count, freight cost, and warehouse receiving speed | Ask for inner pack count, fold method, carton dimensions, gross weight, and label placement |
| QC standard | Use measurable pass/fail criteria including AQL, size tolerance, print defect limits, and pack-out checks | A vague QC note is not enough for bulk acceptance | Request inspection plan, AQL level, defect classification, and pre-shipment photo report |
Buyer checklist before sampling
- Define the use case first: fulfillment insert, retail resale, gift-with-purchase, subscription packaging, or promo giveaway.
- Lock the finished size, gusset depth, handle length, and handle width before asking for pricing.
- Specify fabric weight in oz or GSM and clarify whether the quote is based on finished fabric or pre-shrink fabric.
- State the exact print method, print area, number of colors, Pantone targets, and acceptable registration tolerance.
- Require a pre-production sample made from final fabric, final ink, final stitch construction, and final packing format.
- Confirm carton pack count, carton dimensions, gross weight, barcode label position, and palletization if needed.
- Request QC criteria in writing, including AQL level, size tolerance, print defect limits, and pack-out verification.
- Ask for a line-item quote so you can see what changes the price: fabric, print, trim, labeling, packing, and freight assumptions.
Factory quote questions to send
- What is the exact canvas specification you are quoting: fiber content, finished weight, weave type, and whether the weight is measured before or after finishing?
- Please list the finished size, gusset depth, handle width, handle drop, and seam construction in your quotation.
- Which print method will you use for this artwork, and what are the setup charges, per-color charges, and reprint charges if artwork changes?
- What is your MOQ for one size and one artwork, and how does the unit price change if we add a second print color, second size, or custom label?
- Will the pre-production sample use the same fabric lot, print ink, thread, and folding/packing method as bulk production?
- What are the carton pack count, carton dimensions, gross weight, and label format, and can you provide a carton packing photo before shipment?
- What QC standard do you use for this item, including AQL level, major/minor defect criteria, and pre-shipment inspection steps?
- If we repeat this order, how do you handle color matching and reorder consistency across fabric lots?
- Which cost elements are included in the ex-works price, and which ones are separate line items such as labels, polybags, samples, or tooling?
- What parts of the schedule are the most common delay points for your production line, and what lead time do you need after sample approval?
Quality-control points to confirm
- Use an agreed AQL plan for bulk inspection; define acceptable major and minor defect levels before production starts.
- Fabric weight check: verify incoming cloth against the target oz/GSM and reject rolls that fall outside the approved tolerance band.
- Color deviation: compare print and fabric color against the approved sample under standard light; set a visual approval standard or measurable tolerance if the supplier can support it.
- Print quality: check for pinholes, banding, poor edge coverage, misregistration, ghosting, ink bleed, and cracking after controlled flexing.
- Wash or rub fastness: if the bag is intended for repeated consumer use, ask for a rub-fastness or wash-resistance test standard and record the result against the approved sample.
- Needle and trim control: check for broken needles, loose threads, sharp trim ends, skipped stitches, and untrimmed seams at handle anchors and gusset corners.
- Dimensional tolerance: verify finished width, height, gusset depth, and handle length against the signed-off spec sheet, not against a verbal description.
- Stitch construction: inspect stitch count, seam overlap, bartack placement, and reinforcement at load-bearing points.
- Odor and contamination: reject bags with oil stains, mildew smell, lint clumps, metal fragments, or dust contamination that would affect retail presentation.
- Pack-out verification: confirm carton count, SKU label, barcode placement, inner fold direction, and mixed-lot separation before shipment release.