Start With the Campaign Job, Not the Mockup
Printed canvas shopping bags for charity campaigns should be spec'd around how the bag will be used, not around the cleanest art proof. A donor premium, a sponsor event handout, and a retail-style charity tote all place different pressure on the print method. One campaign may need low cost and fast fulfillment. Another may need a cleaner face, tighter registration, and a bag that still looks presentable after repeated use and folding. The right decoration choice follows that use case.
Procurement teams often over-focus on the logo image and under-spec the distribution reality. If the bag is going to be handed out in bulk at an event, the decoration has to survive carton pressure, handling, and quick folding by volunteers. If it is going on a shelf or in a donor pack, the finish matters more and the buyer may need tighter color control, cleaner edge work, and a more stable handfeel. Those are different jobs, so they should not use the same buying logic.
The easiest way to avoid a bad quote is to define the campaign outcome in plain terms. State whether the bag needs to read well in photos, whether it must be reused, whether it will carry only lightweight inserts, and whether the sponsor mark must match a fixed brand color. That context changes which print method is acceptable and which one is only cheap on paper.
- Choose for event use, reuse, and schedule certainty, not just for a clean mockup.
- Treat gradients, sponsor seals, and tiny text as higher-risk decoration, not the default.
- Match the decoration method to how the bags will be folded, packed, and handed out.
Freeze the Base Bag Spec Before You Price Print
Print cost does not sit on top of a neutral bag. Canvas weight, weave tightness, color, wash treatment, and sewing construction all influence how the decoration behaves. A loose weave can make even a good screen print look soft at the edges. A heavier canvas body can improve presentation and durability, but it can also change how heat transfers bond and how digital ink sits on the surface. If the fabric choice is still moving, any quote is provisional.
For charity campaigns, 10 oz to 12 oz canvas is often enough for simple handout bags. If the bag is meant to feel more retail-like, or if the team expects the bag to be reused, 12 oz to 16 oz usually gives a firmer body and more predictable print behavior. Weight alone is not the whole story. A tightly woven 10 oz can print cleaner than a slubby 12 oz, and a washed canvas can shift size enough to move the print position if the factory has not already compensated for shrinkage.
The construction spec matters as much as the cloth. Handle length, gusset depth, seam allowance, and reinforcement patches all affect the print zone. If the logo sits too close to a side seam, the print may distort, or a transfer may fail at the stitch ridge. Write the finished dimensions, the artwork location, and the bag color in the spec as controlled data, not as a reference image the factory has to interpret.
- Use 10 oz to 12 oz for standard handout bags and 12 oz to 16 oz for premium or reusable bags.
- Keep artwork away from seams, gussets, and handle stitch lines unless the factory has already shown that layout on the same construction.
- Write the bag color in the spec as natural, bleached, dyed, or washed canvas, not just as a sample photo.
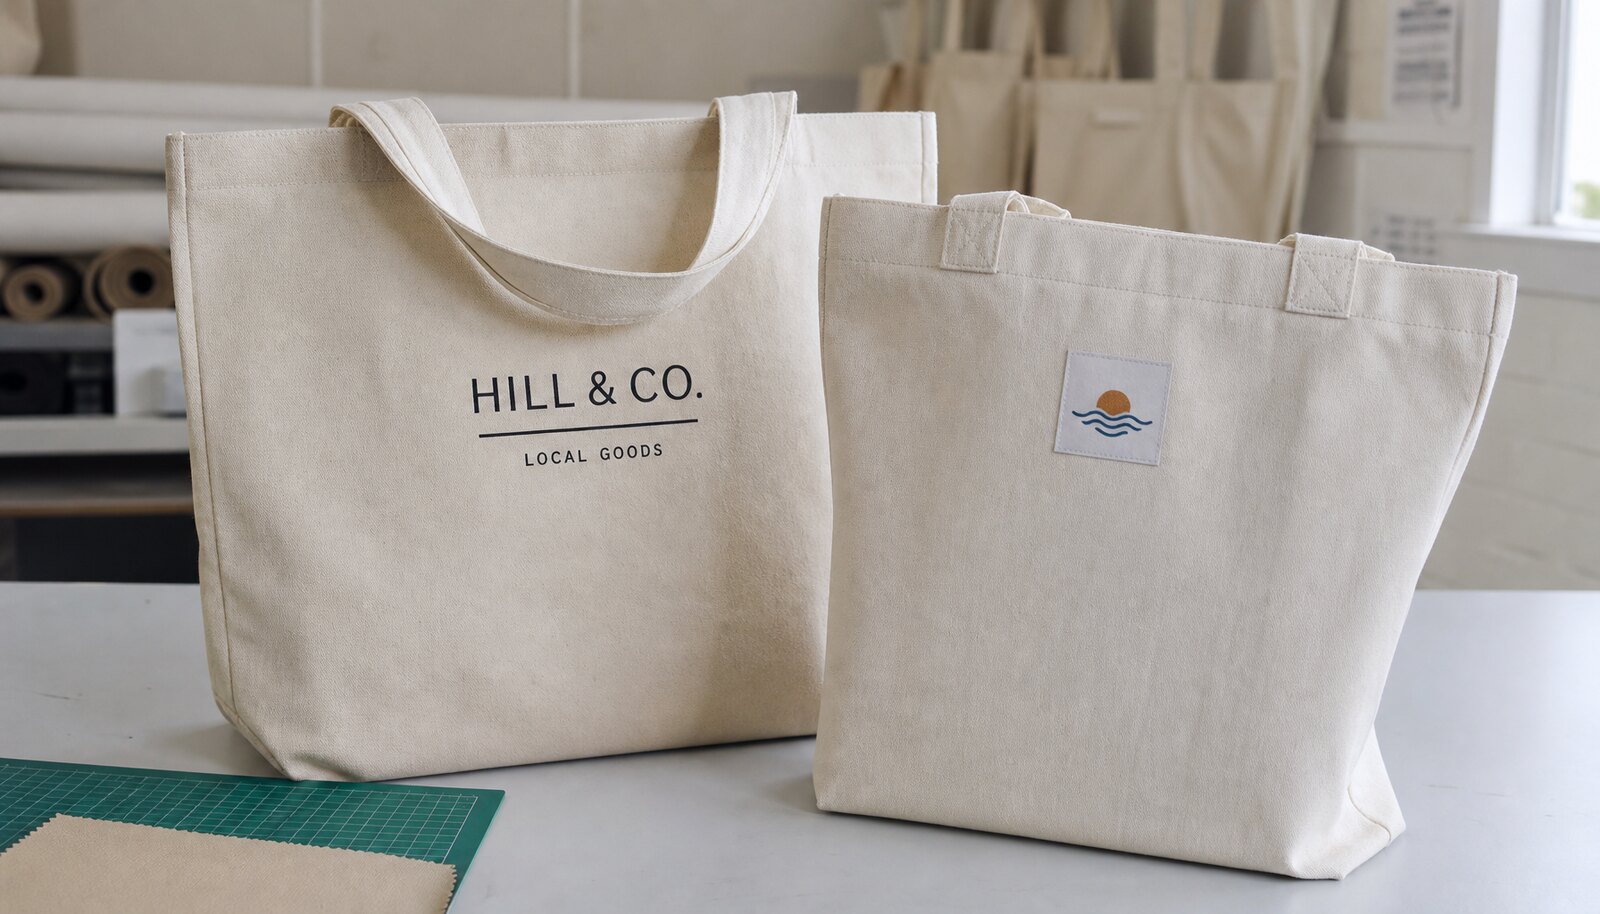
Screen Print: Best Default for Fixed Logos
Screen print is usually the strongest option when the charity campaign has a fixed logo, one to three spot colors, and a meaningful quantity. Once screens are made, the unit cost tends to fall faster than the other decoration choices. It also gives a bold, familiar look that holds up well in handling and stacking, which is why it remains the default for many tote programs. If the artwork is stable, screen print often gives the best balance of cost, durability, and repeatability.
The factory setup is worth asking about because not all screen rooms are the same. Printing on cut panels before sewing usually gives cleaner registration and better access to the print area. Printing on finished bags can work, but it needs the right platen size and more careful placement because seams, gussets, and handles interfere with the press. On dark canvas, the plant may need an underbase to keep the logo visible. That can improve contrast, but it also increases ink thickness and raises the risk of a heavier handfeel or cracking if the cure is poor.
Screen print is less forgiving when the fabric is rough or inconsistent. Thick slub yarn, open weave, or heavy lint can cause small breaks in the ink film, especially on fine text. If the design depends on sharp small type or sponsor legal lines, the buyer should ask the factory to prove the result on the exact canvas weight, not a smoother substitute. A screen job that looks perfect on paper can still fail when the cloth itself is too coarse for the art.
- Best fit: repeat charity runs, sponsor logos, and one to three spot colors.
- Ask whether the factory prints on cut panels or on finished bags, because the risk profile changes.
- Require the supplier to state the cure method, drying standard, and whether an underbase is needed on dark canvas.
Transfer and DTF: Useful, but Test the Edges
Transfer decoration is useful when the campaign is short-run, when the sponsor list keeps changing, or when artwork arrives too late for full screen setup. It is often the practical choice when procurement needs speed more than absolute unit cost. For printed canvas shopping bags for charity campaigns, the main question is not whether transfer looks good on a flat sample. It is whether the image survives folding, carton pressure, and handling on the exact bag construction.
The failure modes are specific. On rough or uneven canvas, the film edge can stay visible after pressing. On bags with thick side seams or reinforcement patches, the bond can be incomplete around the ridge. If the artwork sits across a fold line, the image can crease permanently or start to lift after the first few uses. That is why transfer should be tested on the real bag, not a spare swatch. A good-looking swatch is not evidence that the finished tote will hold up.
For buyer-side quoting, ask what adhesive or carrier system is used, what temperature and dwell time are required, and how the plant checks peel strength. Some suppliers can press a sample fast, but that does not mean the process is stable. Ask whether the press operator uses the same pressure map across the bag face, because uneven pressure is a common reason the edges hold while the center lifts. If the campaign bags will be distributed in public or handled by volunteers, fold and stack the sample before approval.
- Best fit: short runs, variable sponsor versions, late artwork changes, and fast-turn campaigns.
- Require fold testing on the actual bag construction, not only on a flat swatch.
- Reject the method if the artwork crosses a seam or if the pressed edge shows lift after stacking.
Direct Digital Print: Best for Complex Art on the Right Cloth
Direct digital print is the strongest option when the artwork has many colors, gradients, or photo-like detail that would be expensive or awkward to build with screens. It also reduces setup friction when the design may change late in the project. For the right charity campaign, that flexibility is valuable. The tradeoff is that digital is more sensitive to canvas texture, pretreatment, and color control than many buyers expect.
This method works best on smoother, tighter-weave canvas. On a coarse natural tote, small type can soften and gradients can look flatter than expected because the weave interrupts detail. That does not make digital a bad choice; it just means the buyer needs to know when the substrate supports the artwork and when it does not. Ask the factory whether they pre-treat the panels, how they manage ink curing, and how they keep shade repeatability from sample to bulk. If they cannot explain the process clearly, the production risk is too high for a time-bound campaign.
Digital can be the right answer for smaller quantities where screen setup would eat too much budget. It can also be the right answer for multi-color sponsor graphics that would otherwise need many screens and too much alignment work. But the buyer should not assume it is automatically the most premium finish. On a rough canvas tote, a well-controlled screen job may still look cleaner and last longer. The right decision depends on the cloth, the art, and the production line.
- Best fit: complex artwork, gradients, and many colors on smoother canvas.
- Ask about pretreatment, ink curing, and color control before comparing prices.
- Treat rough natural canvas as a detail risk when the artwork has tiny type or thin rules.
Compare Quotes by Process, Not by Headline Price
A useful quote is built on identical assumptions. If one supplier prices a 10 oz natural tote, printing on cut panels, with bulk folding, and another prices a 12 oz washed tote with individual polybags and finished-bag printing, the numbers do not describe the same product. Procurement needs a like-for-like comparison. Otherwise the lowest number is often the quote that quietly removed the most value from the spec.
Ask the supplier to break the price into components. Base bag, decoration setup, color count, artwork conversion, sample charges, packing, and any rush or rework allowance should be visible. For multi-sponsor charity programs, ask for each version as its own line item. If the quote is bundled too aggressively, it becomes hard to see whether the price movement is coming from the bag, the print method, or a hidden assumption about defect rates. A transparent quote is easier to audit and easier to renew next season.
The factory should also tell you how the print-room is being loaded. If one quote assumes a manual press and another assumes an automatic line, the throughput and waste profile are not equal. If one supplier charges for screens and another charges for a bundled artwork fee, ask what happens on reorder. The best procurement decision is not the cheapest first shipment. It is the cheapest acceptable bag that can be repeated without re-arguing the setup.
- Compare the same bag size, fabric weight, print area, color count, packing method, and delivery term.
- Require setup charges to be separated from unit price.
- Reject quotes that change the fabric weight or pack format without calling it out.
Ask the Factory How the Print Will Be Built
This is where buyer-side sourcing usually gets stronger or weaker. The question is not only what print method will be used, but how the factory will physically execute it. For screen print, ask whether the line prints on panels before sewing or on finished bags after sewing, what mesh range they use for the artwork detail, and how they cure the ink. For transfers, ask what press settings they use and how they prevent seam ridges from blocking adhesion. For digital, ask about pretreatment and lot-to-lot color management.
The print room layout also matters. A plant with dedicated panel printing, a drying tunnel, and final sewing control usually has better repeatability than a site that treats decoration as an add-on to garment stitching. If the factory says it will print on finished bags, confirm that the platen can support the bag size without stretching the handles or distorting the seam line. If the artwork must remain in a fixed location, the supplier should be able to explain how it locates the print center every time and how it handles off-center rejects.
Be alert to setup decisions that hide risk. If the supplier proposes a darker underbase than the sample showed, a narrower press than the bag width, or a heat press that cannot cover the logo in one pass, the final result may not match the approved proof. A clean buyer spec should force the factory to name the setup, not just the decoration method.
- Ask for panel-print versus finished-bag-print setup details, not just the decoration label.
- Confirm the platen, drying, and registration plan for the exact tote size.
- Reject a setup if the factory cannot explain how it prevents seam interference or print drift.
Treat Sampling as a Gate, Not a Formality
A serious sample flow has three distinct gates. First is the artwork proof, which locks spelling, layout, sponsor order, and print area. Second is the strike-off or decorated sample, which shows line sharpness, color density, and edge behavior. Third is the pre-production sample, which should be made on the same canvas, the same sewing line, and the same packing method as the bulk order. If the supplier only sends a loose print swatch, the buyer still does not know how the image behaves on the finished bag.
The sample needs to be measured and handled, not just viewed. Check logo position from a fixed seam or edge, fold the bag once and twice to see whether the print cracks at the crease, and rub the surface with a white cloth after the agreed cure time. If the tote will be distributed in cartons, compress the sample in a box and inspect for offset, blocking, or transfer. If the campaign is sensitive to sponsor branding, compare the sample against the approved reference in daylight, not under a warehouse lamp only.
This stage is also where rejection scenarios should be made explicit. If the sample reveals blur on the rough canvas, if the transfer edge lifts after folding, or if the print sits too close to a seam to stay centered in bulk, the order should stop until the factory reworks the process. That is cheaper than fixing a full carton at destination. Sampling is not a box-tick. It is the decision point that prevents a bad lot from becoming a deadline problem.
- Approve artwork, decorated sample, and pre-production sample as separate gates.
- Measure logo placement from a fixed edge or seam reference, not by eye alone.
- Test folding, rubbing, and carton stacking before giving final production approval.
Set QC Limits, Rejection Scenarios, and Packing Rules
Visual acceptance alone is too weak for a campaign order. The buyer should define acceptable variation before the factory starts production. A practical starting point is +/-0.5 cm on body dimensions, +/-1 cm on handle length, and about +/-5 mm on critical logo placement, with the tighter end used when the sponsor mark is small or legally sensitive. If your organization uses AQL, make the defect classes clear in the PO so the factory knows which faults are major and which are minor.
QC should cover the specific failure modes that matter on canvas. Reject visible misregistration, pinholes, banding, ghosting, underbase halo, or color bleed where the art depends on a clean edge. Reject tacky or blocked prints that transfer onto the carton or onto another bag after stacking. Reject seam issues such as skipped stitches, loose thread tails, or a logo that runs into a stitch line and loses its shape. On transfer jobs, reject edge lift, seam bubbles, or a print that marks the fold after compression. On digital jobs, reject soft small type or color drift across the same run if the campaign needs a controlled brand look.
Packing rules should be written with the same clarity. If the bags are bulk folded, state the fold direction so the print face does not crease into a permanent line. If the bags are polybagged for retail or donor presentation, state the bag type, label location, and carton count. Require the first production carton to match the approved sample before the remaining cartons ship. That one gate catches more problems than a late destination inspection ever will.
- Set size and print-placement tolerance before production starts.
- Use a dry rub standard such as AATCC 8 grade 3 or better for giveaways and grade 4 or better for premium bags.
- Reject tacky, offset, cracked, or edge-lifting prints even when the logo is still readable.
- Require the first production carton to match the approved sample before the rest of the lot ships.
Plan Landed Cost and Reorder Risk, Not Just Unit Price
Packing and freight can change the economics of the entire order. Bulk fold packing is usually the most efficient route for event distribution because it keeps carton volume lower and reduces labor. But the fold direction matters. If the print face folds over a sharp crease, the bag may carry a visible line after opening. Retail-style charity bags may need individual polybags, barcode labels, or size stickers, and those choices improve presentation and counting at the cost of more labor and shipping volume.
Landed cost should include the cost of an acceptable bag delivered on time. That means decoration setup, packing method, freight mode, duty treatment, and rework risk all belong in the comparison. A low ex-factory quote can become the expensive one if it needs reprints, a second shipment, or a rushed local touch-up near the event date. For a charity campaign, schedule risk is a real cost. If the bags arrive late, the savings on paper do not matter.
If the program may repeat, ask the factory to retain the art setup and the material spec. On screen jobs, that means screens, ink references, and registration notes. On transfer jobs, it means press settings and film specs. On digital jobs, it means color profiles and pretreatment references. That is what makes the next reorder faster and less argumentative. A good procurement file is not just a quote. It is the production record that lets the next order start from a known state.
- Use bulk packing for mass handout and polybag packing only when presentation or cleanliness requires it.
- Make the factory state carton count, gross weight, and carton dimensions before you compare freight.
- Compare landed cost on the same delivery term, not a mix of EXW, FOB, and DDP numbers.
Specification comparison for buyers
| Decoration option | Best fit | Typical cost profile | Durability and handfeel | Setup and production notes |
|---|---|---|---|---|
| Screen print | Repeat charity runs with a fixed logo and one to three spot colors | Lowest unit cost once screens are made; setup rises with each color and each artwork version | Best abrasion resistance when fully cured; can feel heavier on dark bags with an underbase | Works best on cut panels or flat bag bodies; loose weave and thick slub yarn can blur fine type |
| Transfer / DTF | Short runs, variable sponsor names, late approvals, and multiple artwork versions | Moderate to high unit cost with lower setup than multi-screen work; price holds better when artwork changes often | Clean initial appearance, but edge lift and crease memory are common on rough canvas and repeated folding | Needs controlled heat, pressure, and dwell time; seams, stitch ridges, and textured canvas can cause weak adhesion |
| Direct digital print | Photo art, gradients, and many colors on tighter weave canvas | Usually the highest unit price, but no screens and lower setup for complex art | Soft handfeel when pretreatment and cure are right; detail drops on coarse natural canvas | Best on smoother, lighter canvas; color repeat depends on ink control and lot consistency |
| Material | 8-12 oz cotton canvas, 120-220 gsm cotton, recycled cotton, or blended fabric selected by use case and target price | Before price comparison | Different cloth weights, backing, or certification claims make quotes hard to compare | |
| Construction | bag size, gusset, handle drop, seam allowance, stitch density, reinforcement patch, and loading expectation | Before sampling | Weak stress points create returns and failed inspections | |
| Decoration | screen print, heat transfer, embroidery, woven label, or hangtag matched to fabric texture and brand durability needs | Before artwork approval | The wrong method can crack, bleed, pucker, or fail on the chosen fabric | |
| MOQ | Base MOQ plus change drivers | During quote review | Custom colors, trims, and packing can change minimums | |
| Sample | Physical sample with close-up photos | Before bulk cutting | Photo-only approval can miss hand feel and seam issues |
Buyer checklist before sampling
- Write the finished bag size, gusset depth, handle length, canvas weight, and color in the spec before asking for prices.
- Attach the artwork in vector form, plus a raster reference if the design includes gradients, seals, or small type.
- State the exact print area, print position reference, number of colors, and whether sponsor versions will be separate SKUs.
- Decide whether printing will happen on cut panels before sewing or on finished bags after sewing.
- Ask for a physical sample on the same canvas weight and construction that will be used for bulk production.
- Set the packing format, fold direction, carton count, carton marks, and whether inner polybags are allowed.
- Define QC rules for print placement, cure, rub resistance, seam strength, and carton appearance before production starts.
- Confirm who owns the cost of rework, replacements, or missed-event freight if the approved sample is not matched.
- State the ship-to destination, Incoterm, and required arrival date in event terms, not just calendar terms.
- If the order may repeat, ask the supplier to save screen counts, ink formulas, transfer settings, or digital profiles for reorder consistency.
Factory quote questions to send
- Is the decoration done fully in-house, or is any print step subcontracted to another plant?
- Will you print on cut panels before sewing, or on finished bags after sewing? What is your preferred method for this bag shape?
- What canvas weight, weave density, and bag construction are you pricing against? Please quote only against that exact spec.
- Which ink system, transfer film, or digital ink set will you use, and how is it cured or fixed?
- How many screens, color separations, films, plates, or artwork conversion steps are included in the quote?
- What is the MOQ for each print method, each color count, and each sponsor version?
- What are your dimensional tolerances for bag size, handle length, and logo placement?
- What is your rejection process for misregistration, pinholes, underbase halo, edge lift, seam strike-through, stains, or blocked cartons?
- What sample will you send before bulk production, what does it cost, and is any of that charge refundable against the order?
- Can you share a photo of the actual print line, drying setup, and packed sample from the same bag construction?
Quality-control points to confirm
- Canvas weight and weave match the approved spec, with variance held within the buyer's stated tolerance, commonly around +/-5% on weight.
- Finished bag dimensions, gusset depth, and handle length stay within tolerance, commonly +/-0.5 cm for body measurements and +/-1 cm for handles.
- Logo position stays within the approved placement tolerance, commonly +/-5 mm for critical front logos and tighter if the sponsor mark is small.
- Ink coverage is even, with no pinholes, banding, ghosting, underbase halo, color bleed, or visible edge lift.
- Printed surface is fully cured, dry to the touch, and shows no tackiness, blocking, or offset after stacking.
- Dry rub performance meets the agreed threshold, such as no visible transfer after 10 firm white-cloth rubs or an AATCC 8 dry crocking result of grade 3 or better for giveaway bags and grade 4 or better for premium bags.
- If washing is part of expected use, ask for a wash test on the approved canvas weight and reject visible cracking, peeling, or image distortion after the agreed cycle count.
- Handle reinforcement, side seams, and bottom seam show no skipped stitches, loose thread tails, seam rupture, or weak anchor points.
- Carton count, fold direction, carton marks, and any inner bagging match the approved packing spec.
- The first production carton matches the pre-production sample before the rest of the lot ships.