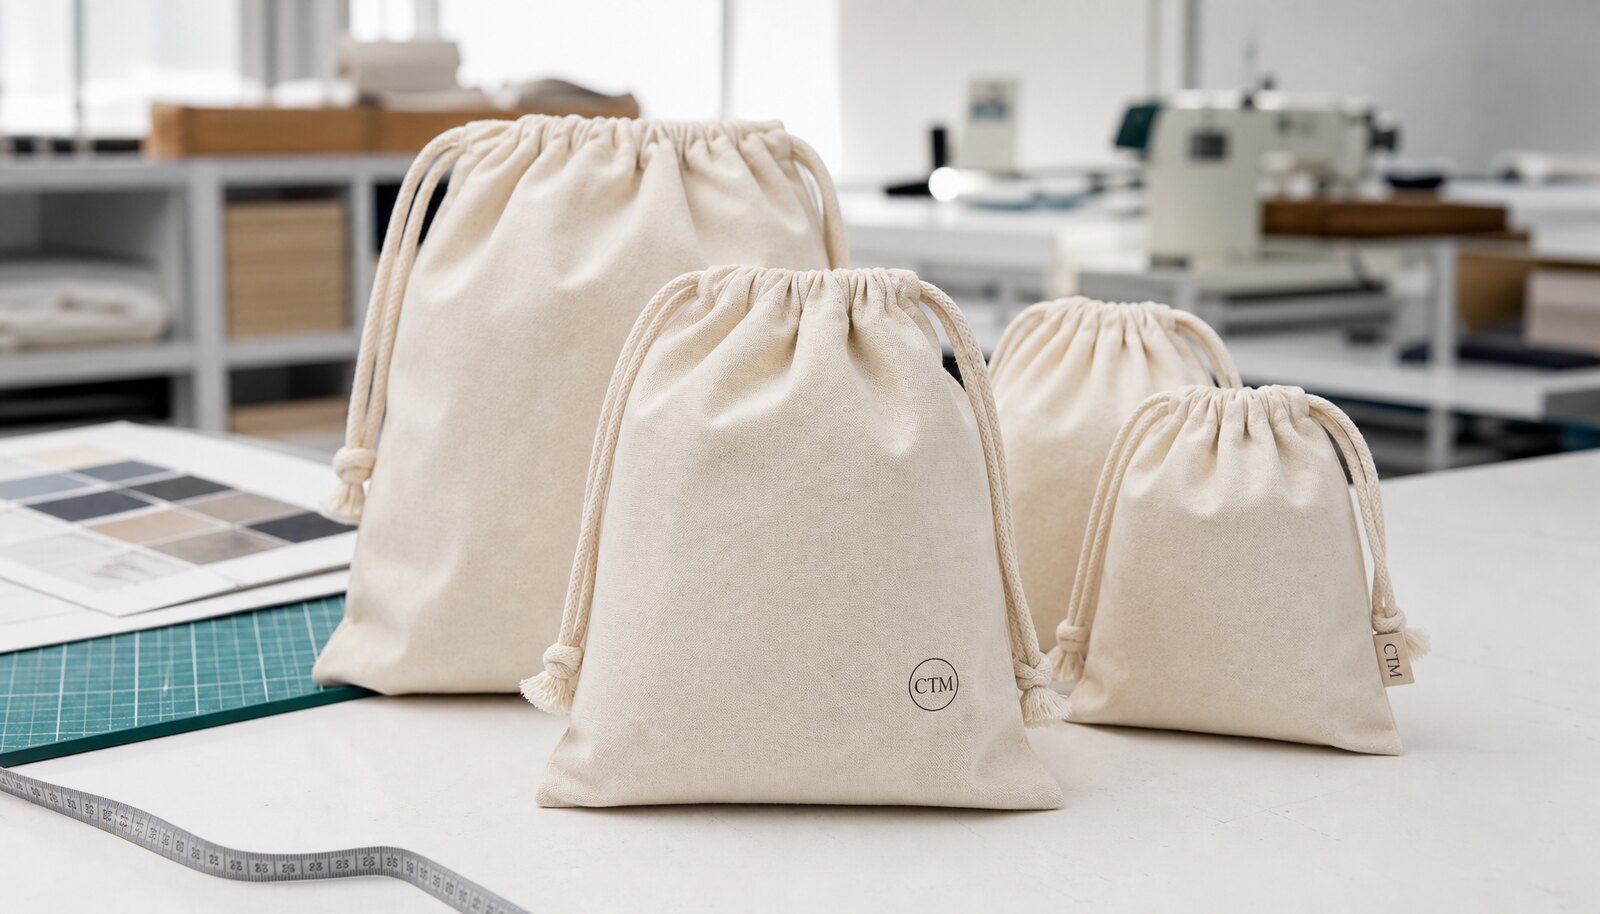
What buyers actually need from a personalised canvas drawstring bag
A personalised canvas drawstring bag is not just a branded pouch. It is a packaging component that has to close reliably, protect the contents, carry the right brand impression, and stay consistent across reorders. If the spec is loose, the bag can look acceptable in a sample photo and still fail in use because the canvas is too soft, the cord binds in the channel, the print sits too close to a seam, or the bag loses shape once it is filled.
The useful way to brief this product is by use case, not by generic bag type. A pouch for jewellery or a sample kit has different requirements from a bag holding candles, bottles, or boxed sets. If you do not define load, lifecycle, and presentation standard, the supplier will fill in the blanks with its own default build. That is where avoidable defects start: a promo bag that sags, a premium gift bag that feels flimsy, or a retail insert that changes shade from one carton to the next.
- Define the primary job first: retail presentation, product protection, event giveaway, sample packaging, or ecommerce fulfilment.
- Match the build to the load, not the logo size.
- Decide whether the bag is disposable, reusable, or part of the retail product itself.
The build spec that drives cost and performance
Fabric weight is the first major cost lever, but it is not the only one. For most personalised canvas drawstring bag programmes, 8 oz to 10 oz cotton canvas is the practical middle ground because it balances structure, print clarity, and sewing efficiency. Lighter cloth can be fine for low-cost promotions, but it tends to collapse around heavier contents and can look less premium. Heavier cloth improves hand feel and durability, but it adds cost, weight, and sometimes stiffness that makes the opening harder to use.
Do not let suppliers quote canvas in vague terms. Ask for gsm or oz, weave description, finish, and whether the cloth is greige, bleached, dyed, or prewashed. Two bags both called '8 oz canvas' can still behave differently if one mill uses a tighter weave or different finishing. If finished dimensions matter, also ask about shrinkage. A bag that starts within tolerance can drift after pressing or after the first handling cycle if the fabric was not controlled upstream.
- 6 oz to 7 oz: lower cost and softer drape, suitable for lightweight inserts and short-life promotional use.
- 8 oz to 10 oz: the most balanced range for retail, gifting, and private label packaging.
- 10 oz to 12 oz: better structure and a more premium feel, but higher sewing effort and freight weight.
- Ask whether the fabric was washed or pre-shrunk if finished size is important.
Construction details decide whether the bag feels solid or cheap
Once the fabric is set, the rest of the build controls how the bag actually functions. The top channel, cord diameter, seam allowance, stitch density, and corner reinforcement all affect whether the bag closes cleanly or starts to twist and bind. If the cord is too thick for the channel, the bag becomes awkward to cinch. If the channel is too loose or the top hem is uneven, the opening looks weak and the cord can pull the cloth out of shape over time.
This is also where failure examples become predictable. A light bag with weak back-tacking can split at the top seam after repeated pulls. A narrow bottom seam can let boxed goods press through the corner and distort the base. A poorly balanced cord can fray at the knot or unravel at the cut end. When buyers want consistency, they should specify the construction in the RFQ rather than relying on the factory's standard pattern.
- State the cord material, diameter, length, and finish at the cut end.
- Specify whether the top channel is single or double folded.
- Call out seam allowance and whether the corners need reinforcement.
- Ask for stitch density and back-tack detail at stress points.
Decoration choices change the whole quote, not just the artwork
Decoration is part of the manufacturing route, not an afterthought. Screen printing is usually the best fit for a simple logo and repeat ordering because it is durable and economical at scale. It works well on natural canvas when the mesh, ink, and curing are matched to the fabric. The risk is over-specifying the artwork. More colours, more print positions, or a larger logo all increase setup time and raise the chance of misregistration.
Heat transfer, digital printing, and embroidery each have their own place, but each also has a failure mode that buyers should test on the actual bag. Transfer can crack when the bag is folded and handled hard. Digital print can look clean on a flat proof but sink into the weave differently from the approved image. Embroidery can add value, yet it can also pucker lighter canvas and distort the bag opening if the stitch density is too high. For any method, approve from a strike-off on the real fabric, not from artwork alone.
- Screen print: strongest choice for simple logos and repeat volumes.
- Heat transfer: useful for small runs and artwork changes, but test for cracking after folding.
- Digital print: flexible for detailed graphics, but verify coverage on textured canvas.
- Embroidery: premium look, but check for puckering and opening distortion.
Use the comparison table to choose the right bag build
The table below compares bag options on a like-for-like basis, which is the only way to make a meaningful procurement decision. A lightweight promotional bag, a standard retail bag, and a premium heavyweight bag are not the same product, even if the logo looks identical. If the use case is low-cost event distribution, there is no reason to pay for heavy cloth. If the bag is carrying candles or boxed sets, saving a few cents by using thinner cloth can create product damage and complaints later.
Sustainability-led programmes need extra discipline. A recycled or certified canvas bag is not just a price premium; it is a claim that has to be traceable. If the fabric is certified but the trim, label, or print house is outside scope, the claim may not hold for the finished bag. Buyers should move up or down the spec ladder based on function, claim requirements, and reorder risk, not based on a single headline quote.
- Choose the lightest bag that still protects the contents and prints cleanly.
- Upgrade the fabric weight before adding complex decoration if the bag feels too flimsy.
- Treat certified or recycled builds as a claim-management exercise, not just a fabric choice.
Compare quotes on the same spec, or the numbers will mislead you
A quote only becomes useful when it prices the same build. If one supplier is quoting a 7 oz natural bag with bulk packing and another is quoting a 10 oz prewashed bag with individual polybags, those numbers are not comparable. The first task is to split the cost into four buckets: base bag, decoration, packing, and freight-ready handling. That makes hidden differences visible immediately.
The common traps are easy to miss. A supplier may quote stock fabric instead of custom production. Another may leave out barcode labels, carton marks, or inner pack division. A third may be using a different print method that looks similar in a mockup but behaves differently in production. Once you remove those variables, the real price gap often narrows. Ask for repeat-order pricing separately from first-order pricing so you can see what the programme will cost after the initial setup is absorbed.
- Quote the same fabric weight, colour, cord spec, print method, and packing format across suppliers.
- Separate one-time setup fees from recurring unit cost.
- Ask whether the quote assumes stock fabric, reserved fabric, or fresh weaving.
- Do not compare bulk-packed and retail-packed quotes as if they were the same item.
Fabric origin, certification claims, and traceability need to be explicit
For a personalised canvas drawstring bag, fabric origin matters more than many buyers expect. Ask where the yarn was spun, where the cloth was woven, where it was dyed or finished, and whether the same mill can support reorders. If the supplier cannot explain the path of the fabric, it is harder to manage shade consistency, lead time, and any future claim dispute. This is especially important when the bag is part of a private-label or retailer programme that expects repeatable quality.
Certification claims need equal precision. GOTS, OEKO-TEX Standard 100, and GRS mean different things and apply to different parts of the chain. A certificate held by a fabric mill does not automatically mean the finished bag carries the same claim unless the scope covers the bag and the supply chain is documented correctly. Ask for the certificate number, issuing body, scope, and, where relevant, a transaction certificate for the shipment. If the order uses recycled content, ask whether the claim is post-industrial or post-consumer and what tolerance is accepted. The safest rule is simple: no written proof, no claim.
- Ask for mill, dye house, and finishing location, not only the trading office address.
- Request the exact certification number and scope for any sustainability or chemical claim.
- Confirm whether trims, labels, and packing materials are inside or outside the claim scope.
- Set a no-substitution rule for fabric, cord, and labels unless you approve a change in writing.
Sample approval should test the real bag, not only the logo
A pre-production sample is the cheapest place to catch a bad decision. It should be made from actual bulk fabric, actual cord, actual decoration, and the intended packing format. A logo strike-off alone is not enough because the bag can still fail after sewing, pressing, filling, and folding. Measure the finished bag, check seam symmetry, test the closure action, and confirm that the print sits where you expect relative to the seams and the top channel.
Sample control also protects reorder consistency. Keep one marked reference sample with the date, fabric spec, print method, and pack-out details attached. If the supplier later proposes a different fabric lot or a different print house, you have a clear reference point. If the sample and the quote do not match, do not treat the sample as an approval. Treat it as a development step and require a new sample before release.
- Measure the bag after sewing and pressing, not only as a cut panel.
- Load the sample with the actual product or an equivalent test load before approval.
- Check whether the cord pulls evenly and whether the top hem twists under use.
- Approve colour, print placement, and packing together, not as separate decisions.
Quality control has to catch real defects, not just visual noise
Quality control works only if the defect definitions are set before production starts. For this product, the critical failures are usually open seams, broken closure function, wrong branding on the wrong SKU, and a size mismatch that stops the bag from fitting the intended contents. Major defects are things like obvious shade drift, misaligned print placement, weak back-tacking, or a cord that frays in normal handling. Minor defects are usually cosmetic, such as loose threads or slight weave variation that does not affect use.
The test plan should include dimensions, closure performance, print durability, and carton control. A common starting point for consumer goods is an AQL of 0 for critical defects, 2.5 for major defects, and 4.0 for minor defects, but that should be adjusted to the risk of the programme. If the bag is retail-facing or part of a premium gift set, tighten the standard. If the bag is low-value promotional packaging, you may accept more cosmetic variation, but not seam failure or mixed sizes.
- Check finished width and height against the approved tolerance.
- Run a pull test on the cord or channel with the intended load.
- Inspect print adhesion with dry rub, and wet rub where relevant.
- Check for holes, contamination, slubs, oil marks, and weak back-tacking.
- Verify carton counts, inner pack counts, and size separation before shipment.
Packing, freight, and lead time are part of the product spec
Packing choice changes both cost and handling. Bulk packing is cheaper and usually the better choice for warehouse-based distribution, but it shifts sorting and protection work to the receiving side. Individual polybags add labour and material cost, but they can protect the print and make the bags shelf-ready or ecommerce-ready. There is no universal right answer. The correct format depends on who handles the product after import and how much surface protection the brand needs.
Lead time should be treated as a sequence, not a single number. Sample approval, fabric readiness, print setup, sewing, packing, and final inspection all have their own delay points. In practice, the biggest delays are often missing artwork sign-off, a fabric lot that is not available in the required shade, or a sample that needs rework. Ask the supplier to show the critical path and to identify the step most likely to slip. For seasonal programmes, use the latest safe approval date, not the optimistic ship date.
- Bulk packing reduces unit cost, but only if your warehouse can receive and sort efficiently.
- Individual packing improves protection and shelf readiness, but increases carton cube and labour.
- Ask for carton dimensions and gross weight so freight can be calculated accurately.
- Start the lead-time clock from approved sample and confirmed artwork.
Specification comparison for buyers
| Bag option | Typical spec | Best use case | Main tradeoff | What to verify |
|---|---|---|---|---|
| Lightweight promotional canvas | 6 oz to 7 oz cotton canvas, simple one-colour print, bulk packing | Leaflets, event giveaways, low-cost inserts | Lower material cost, but less structure and weaker premium feel | Check actual gsm or oz, finished size after sewing, and whether the print shows through the cloth |
| Standard retail canvas | 8 oz to 10 oz cotton canvas, one or two-colour print, reinforced channel | Retail packaging, gifting, private label inserts | Best balance of price and presentation, but needs tighter size control | Confirm seam allowance, cord diameter, print placement tolerance, and carton pack count |
| Premium heavyweight canvas | 10 oz to 12 oz cotton canvas, stronger cord, reinforced corners | Gift sets, bottles, candles, higher-value product packaging | Higher unit cost and freight weight, with more sewing effort | Verify closure smoothness, bag stiffness, and whether the heavier cloth changes artwork appearance |
| Certified or recycled canvas | Organic, recycled, or traceable cotton canvas with documented claim | Sustainability-led programmes and retailer compliance requirements | Narrower supply base and more paperwork, often with longer lead times | Ask for certificate number, scope, transaction certificate if relevant, and proof the final bag is within scope |
| Material | 6-10 oz cotton canvas, 210D polyester, rPET, or blended cotton with shrinkage and colorfastness expectations set before sampling | Before price comparison | Different cloth weights, backing, or certification claims make quotes hard to compare | |
| Construction | cord diameter, eyelet or reinforced channel, bottom corner reinforcement, seam allowance, bar-tack position, and load target | Before sampling | Weak stress points create returns and failed inspections | |
| Decoration | screen print, transfer, embroidery, woven label, or drawstring tag tested against folding and abrasion | Before artwork approval | The wrong method can crack, bleed, pucker, or fail on the chosen fabric | |
| MOQ | Base MOQ plus change drivers | During quote review | Custom colors, trims, and packing can change minimums |
Buyer checklist before sampling
- Lock finished size, not cut size, and write the tolerance you will accept after sewing and pressing.
- Specify fabric in gsm or oz, plus weave type, finish, and whether the canvas is natural, bleached, dyed, or prewashed.
- State the closure build in detail: cord material, cord diameter, cord length, channel style, knot finish, and any reinforcement at the top edge.
- Define decoration exactly: print method, print size, placement from seams, number of colours, Pantone or brand colour target, and whether the same artwork applies to every size.
- Ask for fabric origin by stage if relevant: weaving mill, dye house, and finishing location, not just the trading address.
- Request proof for any certification claim, including certificate number, issuing body, scope, and transaction certificate if the programme needs one.
- Approve a pre-production sample made from actual bulk fabric, actual cord, actual decoration, and actual packing materials.
- Set the sample-to-bulk variance rule in writing for size, shade, print placement, stitch appearance, and cord length.
- Define your defect classes before bulk starts: critical, major, and minor, plus the inspection standard and AQL target you expect.
- Ask for carton dimensions, gross weight, inner pack count, label text, and whether the quote assumes bulk packing or individual polybags.
Factory quote questions to send
- Which site will actually cut and sew the personalised canvas drawstring bag, and will the same site handle reorders?
- What is the exact fabric specification, including gsm or oz, weave, finish, and whether the quoted cloth is greige, bleached, dyed, or prewashed?
- Where was the fabric woven and finished, and can you identify the mill rather than only the exporter or trading office?
- If you are quoting a certified or recycled claim, which certificate applies to the fabric and which applies to the finished bag?
- What is the cord material, diameter, and finish, and is reinforcement at the channel or bottom corners included in the price?
- How many setup charges apply for screen count, artwork colours, labels, embroidery, or special packing, and are repeat-order charges lower?
- What finished size tolerance do you work to after sewing and pressing, and how is that measured on the line?
- What is the accepted sample-to-bulk variance for shade, print placement, stitch density, and cord length?
- What AQL or inspection standard do you use for final inspection, and how do you classify critical, major, and minor defects?
- Can you quote the same spec on a repeat order without changing fabric source, trim, or packing format?
Quality-control points to confirm
- Finished width and height should match the approved spec within the agreed tolerance after pressing, not just on cut panels.
- The opening should close smoothly with the intended load inside, without snagging, twisting, or visible channel distortion.
- Use a cord or channel pull test on sampled bags with the intended working load or an agreed equivalent load; there should be no seam opening, tearing, or permanent deformation.
- Check side seams, bottom seams, and top hems for skipped stitches, broken thread, loose ends, and weak back-tacking at stress points.
- Inspect the print for placement, size, colour, and edge sharpness, and compare it to the approved strike-off on the same fabric.
- Run dry rub testing, and wet rub testing where relevant, to catch ink loss or smearing on the woven surface before bulk ships.
- Treat shade drift between cartons as a lot-control issue, not a cosmetic preference, especially if the bags will be packed in mixed sets.
- Check for holes, oil marks, slubs, contamination, and visible weave defects on front panels and seam allowance areas.
- If the programme uses AQL, agree the plan before production; a common starting point for consumer goods is 0 critical, 2.5 major, and 4.0 minor, but the right threshold depends on the risk.
- Verify carton counts, inner pack counts, size segregation, and label data against the PO so mixed sizes and missing units are caught before shipment.