Why tote lead times slip for coffee roasters
Organic cotton tote programs look simple on paper and slow in practice when the deadline is fixed. A coffee roaster usually ties the tote to a launch window that does not move: a holiday bundle, a trade show, a new retail display, a subscription campaign, or a wholesale promotion. When procurement treats the tote like a standard commodity, the schedule slips because the real work happens before sewing starts.
The delays usually come from invisible decisions. Fabric may need to be sourced or dyed. Artwork may need a strike-off. Labels and barcodes may come from another supplier. Packing requirements may be different for retail versus wholesale. Each of those items can be short on its own, but together they create the actual critical path. The point of planning is not to add bureaucracy. It is to expose the path early enough that the factory can reserve materials and capacity.
Coffee roasters also have a product-specific issue: tote quality is judged next to coffee quality. If the bag is part of a premium retail or gift program, a sloppy seam, off-center print, or weak handle feels inconsistent with the brand. That makes lead time planning more than a logistics exercise. It is a brand protection exercise.
- Most schedule drift happens before bulk sewing begins.
- Natural fabric is usually faster than dyed fabric when stock cloth is available.
- Accessories can be the true critical path, not the tote body itself.
- The buyer should define the approval chain before samples are made.
- Lead time should be measured from a clear trigger, not from the PO date alone.
Start with the delivery date and work backward
The safest way to plan a tote order is to work backward from the date the goods must be in hand. Start with the warehouse receipt date or launch date, then subtract transport, customs, booking buffer, final inspection, packing, sewing, printing, fabric prep, and sample approval. That gives you the latest production start date the project can tolerate. If a supplier quote does not fit that window, the quote is not usable even if the unit price looks attractive.
This backward planning matters because suppliers often quote production days without defining the start trigger. A 25-day lead time can mean 25 days after deposit, after artwork approval, after lab dip approval, after sample sign-off, or after materials are in house. Those are not interchangeable. Procurement should force the supplier to name the trigger point in writing.
Build a buffer between final inspection and freight handoff. A carton mark correction, a count adjustment, or a booking change can easily consume several days. If the tote is seasonal, that buffer protects the launch. If the tote is a replenishment item, that buffer keeps the warehouse from receiving a carton mix it cannot process cleanly.
- Ask for the planned ex-factory date, not only the quoted production days.
- Do not assume weekends, holidays, or sample courier time are included.
- Keep a separate buffer for cartons, labels, and inserts.
- Treat freight booking as a confirmed step, not a promise.
- If the ship date is fixed, shorten the scope before you try to shorten the sewing time.
Write a spec the factory can price without guessing
A usable RFQ has to describe the tote in production terms, not branding language. "Organic cotton tote" is too vague to price accurately because it does not tell the supplier the bag size, gusset, weight, handle type, print method, or packing format. For a coffee roaster, the intended use matters as much as the look. A tote for a single 250 g bag and a postcard is different from a tote that carries two 1 kg bags, a mug, and a brewing guide.
The spec should cover finished dimensions, gusset depth, handle length, fabric weight, color route, reinforcement, print placement, and the intended load. It should also say whether the tote is for giveaway, retail sale, or resale through a distributor. That one detail changes the acceptable finish level. A brand can accept minor natural variation in a giveaway bag but still require tighter print placement and cleaner packing on a retail SKU.
For many coffee programs, 8 oz to 10 oz organic cotton is a practical middle range. It is sturdy enough for merchandise, prints well, and avoids the cost and handling penalty of very heavy canvas. If the tote needs to feel premium, it is often better to improve details such as print quality, stitching, and packing discipline before moving to a much heavier fabric.
- Typical simple tote: about 35 x 40 cm without gusset for light promotion.
- Common retail coffee merch size: about 38 x 42 x 10 cm for beans and small items.
- Shoulder-carry handles often work well at about 60-70 cm total length.
- Box-x or cross stitch reinforcement is safer for heavier coffee packs than a simple straight stitch.
- State the target load so the supplier can judge fabric and reinforcement together.
Choose fabric with the schedule in mind
Fabric choice often decides whether the order moves smoothly. Stock natural organic cotton is usually the shortest path because it avoids a dye step and pairs well with earthy coffee branding. It also works visually with kraft pouches, origin labels, and brown print inks. The tradeoff is that natural cotton is not perfectly uniform. Tone can vary from cream to oat, and seed specks or slubs may be visible. That is normal if the buyer defines it as acceptable in advance.
Dyed fabric gives the brand more control but extends the timeline. A black, charcoal, olive, or seasonal color usually needs a lab dip, internal approval, bulk dye scheduling, and shade control. If the shade is off, the factory may need to redip or delay cutting. That is why dyed fabric should be treated as a schedule risk, not just a color preference. The buyer should ask whether the factory is quoting from stock dyed cloth, mill-dyed fabric, or a custom dye lot.
The same logic applies to fabric finish. If the tote must feel soft and relaxed, some variation is fine. If the tote is meant to read as a premium retail piece, buyers should ask for a clearer reference sample and a defined tolerance on shade, slub level, and shrinkage. A vague approval like "looks okay" is what creates disputes later.
- 220-270 GSM works for lighter promo bags and softer hand feel.
- 270-340 GSM is a strong all-around range for coffee merchandise and retail add-ons.
- 340-430 GSM looks heavier and more premium, but it raises material and freight cost.
- Natural fabric should have an agreed standard for seed specks and tone variation.
- Dyed fabric should have a lab dip or physical swatch before bulk starts.
- Ask whether shrinkage control is based on pre-shrunk cloth or a sewing allowance.
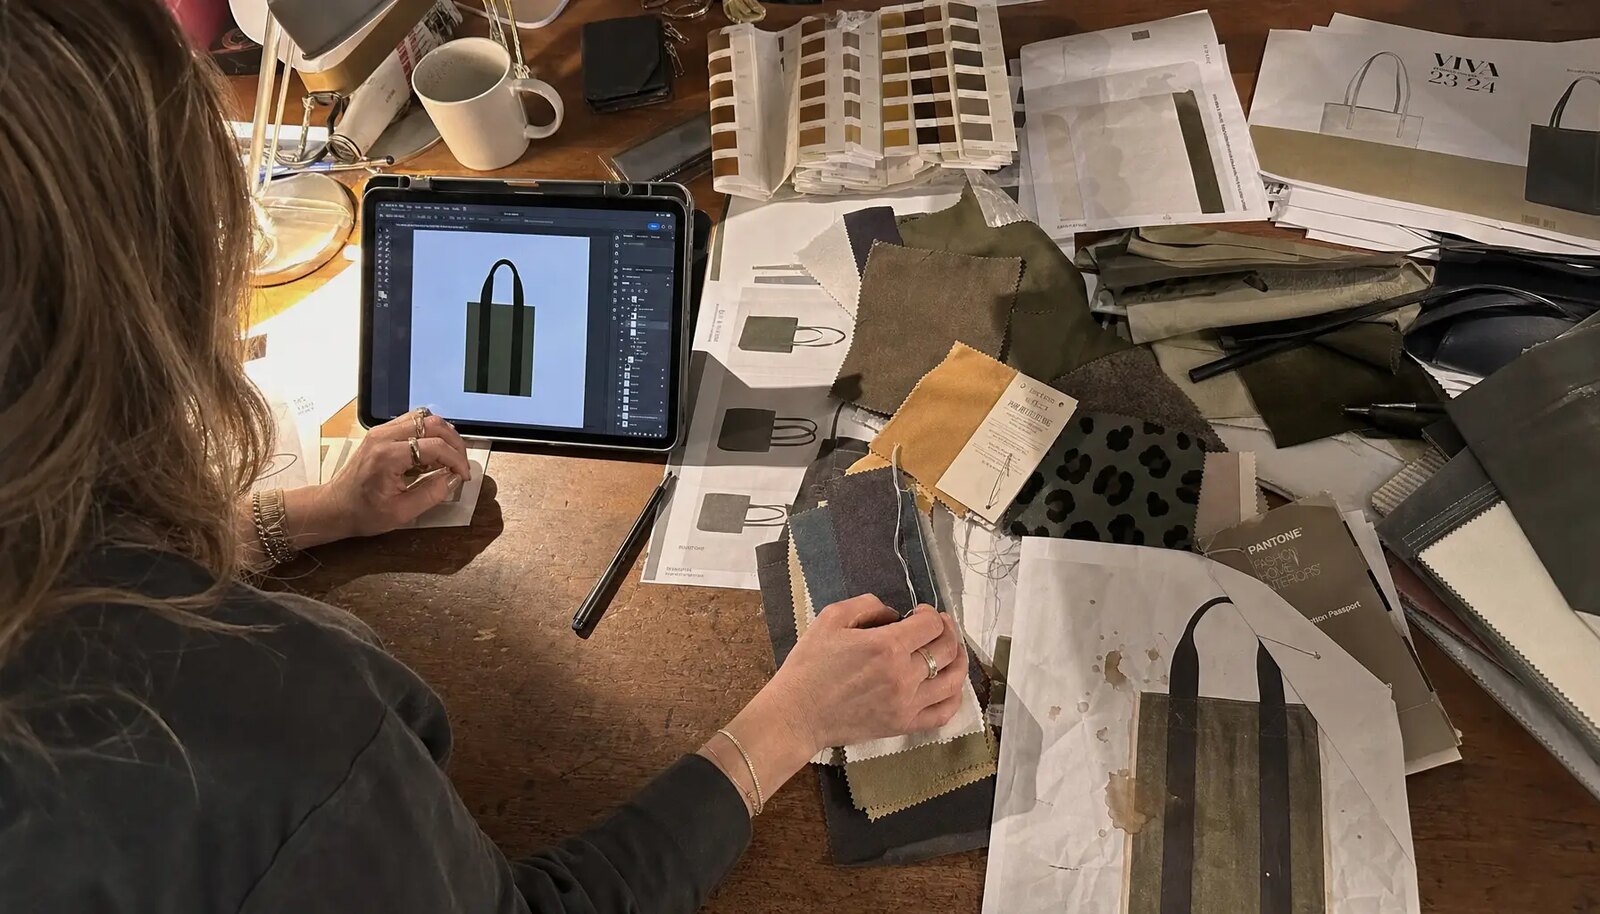
Make print and branding decisions early
Most coffee tote artwork is well suited to one- or two-color screen printing. Logos, origin art, line drawings, and typography usually print cleanly and are easy for a factory to repeat. The risk is assuming that the digital file is already production-ready. Small text can fill in, thin lines can break, and large solid areas can feel stiff or dry unevenly. If the artwork is close to a seam or gusset, the print setup becomes more sensitive.
A buyer should ask the supplier to confirm the print method, number of colors, print area, and any setup charges. If the tote is being sold at retail, placement matters as much as color. The artwork should be measured from seams or edges, not described only as "centered." For dual-sided print, the buyer should say whether alignment between front and back is important or whether each side can be treated independently.
Additional branding items should be handled as their own lead-time items. Woven labels, care labels, hangtags, barcode stickers, and belly bands are useful for retail, but each one can become a separate delay if artwork or approval is late. For procurement, the practical rule is simple: if the accessory changes the carton count, the SKU logic, or the retail presentation, it belongs in the RFQ from day one.
- Water-based screen print is a reliable baseline for 1-2 color roaster logos.
- Large flood prints can slow drying and affect the hand of the bag.
- Dark ink usually reads better on natural cotton than very pale ink.
- Print placement should be defined with measurements from seams or edges.
- Ask whether screen charges, strike-offs, and curing time are included.
- If the tote is retail-facing, approve the real printed sample, not just a mockup.
Use one body, not six variations, whenever possible
MOQ gets messy when the tote program has several roaster artworks, seasonal campaigns, or wholesale customers. A total order of 5,000 units can still behave like several smaller runs if each version has a different fabric color, handle style, label, or packing method. The factory does not plan on the total number alone. It plans on how many times it has to change setup, material, print, or packing.
The best way to keep the project efficient is to standardize the parts the customer will not notice much and vary the parts they will. Keep one body size, one handle construction, one fabric weight, and one packing format where possible. Then vary the print artwork, hangtag, or barcode by SKU. That usually improves line efficiency and simplifies warehouse receiving. It also makes the quote easier to compare because the supplier is not hiding complexity inside a different construction each time.
If the program truly needs multiple versions, ask the supplier to show the cost and timing impact of each variation separately. That helps procurement decide whether the extra branding is worth the delay. In coffee, the strongest merchandising programs usually look intentional because the base tote is consistent, not because every detail is different.
- One common body across several artworks usually lowers complexity.
- Changing print artwork is often simpler than changing fabric colors across SKUs.
- MOQ should be clear by body size, fabric color, artwork, and packing format.
- Accessories can distort cost if each SKU has its own label or tag run.
- A high total order count does not help if each version is below an efficient print run.
- Ask whether cutting and sewing can be batched before the artwork split.
Treat samples as approvals, not exploration
Sampling should remove ambiguity. The fastest projects separate the approvals by decision type: first the blank tote, then the printed sample, then accessories. The blank sample should confirm size, gusset depth, handle drop, stitching, reinforcement, and fabric hand. The printed sample should confirm color, placement, sharpness, and curing. Accessories should be approved with the same discipline because label text, barcode data, and tag size can hold up packing even after the tote itself is ready.
Photo approval can be useful for routine items, but it is weak when fabric tone and print contrast matter. Organic cotton is especially prone to false confidence on screen because warm neutrals and dark inks can look different in person. If the tote is part of a gift set or retail assortment, one physical pre-production sample is usually worth the time. It gives the buyer a real reference beside the coffee packaging it will sit with.
The buyer side needs a clear owner for each approval. Marketing may own artwork, procurement may own the purchase order, operations may own carton count, and someone else may own barcode text. If those roles are not defined before sampling, comments arrive late and conflict with each other. A good factory can work through a clear correction list. It cannot resolve three different versions of the same approval.
- Approve the blank tote before judging the print.
- Keep one signed approval file with images, measurements, and comments.
- Ask for separate timing on sample sewing and courier transit.
- Approve accessory text and barcode data as carefully as the tote body.
- Hold onto one approved physical sample for inspection reference.
- Avoid mixing design changes with production corrections in the same review cycle.
Plan packing and cartonization before bulk sewing ends
Packing is not a late-stage admin task. It changes labor, materials, carton size, and freight cost. For wholesale coffee merchandise, flat bundle packing usually works well because it keeps cube low and counts easy. For retail or 3PL programs, individual polybags, belly bands, or barcode stickers may be required. The key is to decide that before the factory packs the first bulk carton. A packing change after sewing is often more disruptive than the buyer expects.
Carton design matters too. Overfilled cartons can be hard to receive and may crush the bag shape. Underfilled cartons increase cube and freight cost. The right carton plan depends on bag size, fabric weight, whether the tote is gusseted, and whether each piece is individually packed. Procurement should ask for proposed carton dimensions and gross weight before shipping is booked, not after production is complete.
Organic cotton also benefits from sensible moisture protection. Natural fabric can pick up odor or dampness if cartons are stored badly, especially in humid seasons or during sea freight. The goal is not to over-package everything. It is to make sure the goods arrive clean, countable, and ready for warehouse processing without repacking.
- Typical export packing may be 50 or 100 pcs per carton, depending on size and weight.
- Keep carton gross weight practical for handling, often below about 15-18 kg where possible.
- Individual polybagging adds labor, material cost, and carton volume.
- Barcode placement should be approved if retail scanning or 3PL receiving matters.
- Ask for carton dimensions before booking freight.
- If a retailer has packaging rules, collect them before production starts.
Set QC standards that match the channel
Quality control should reflect how the tote will be used. A giveaway tote for a tasting event can allow more natural fabric character than a premium retail item. A subscription insert may care more about accurate counts and easy folding than shelf presentation. A gift set tote carrying coffee and a mug needs stronger handle reinforcement. The acceptance standard should be written before bulk starts so the factory knows what is normal variation and what is a defect.
The useful QC points are measurable. Finished width, height, gusset, and handle drop need tolerances. Print placement should be checked against seams or edges. Fabric weight should be verified by GSM testing. Stitching at the handle and bottom corners should match the approved reinforcement type. Print cure should pass a rub test after sufficient drying time. Carton counts and SKU marks should match the packing list.
Organic cotton also needs a visual standard that is realistic. Minor slubs, seed specks, and tone variation may be acceptable on natural fabric. Oil marks, contamination, broken stitches, major shade mismatch, crooked labels, and obvious print errors should not be. Keep the approved sample and the written inspection sheet together so the buyer, supplier, and inspector are working from the same reference.
- Define dimension tolerances in millimeters or centimeters.
- Tie print position tolerance to seam reference points.
- Verify handle reinforcement and loose threads against the approved sample.
- Count cartons and bundle packs against the packing list and SKU marks.
- Open random cartons before shipment release.
- Document the acceptance standard before pre-production begins.
Specification comparison for buyers
| Spec decision | Recommended option | When it fits | Buyer risk to check |
|---|---|---|---|
| Fabric weight | 8 oz to 10 oz organic cotton, about 270-340 GSM | Good middle ground for retail coffee merchandise, subscription inserts, gift sets, and event bags | Below about 220 GSM may feel too light for coffee packs; above about 400 GSM can raise sewing time, carton weight, and freight cost |
| Fabric color route | Stock natural organic fabric when tone variation is acceptable | Best when the launch date is tight and the brand works with undyed cotton | Natural lots can vary in tone, slub level, and seed speck content; define acceptable character before bulk |
| Dyed fabric route | Certified organic base fabric with lab dip approval | Useful for black, charcoal, green, or seasonal brand colors | Dyeing adds lab dip review, shade control, and possible rework; late color approval moves the ship date |
| Print method | 1-2 color water-based screen print | Most roaster logos, origin art, and typographic designs | Large flood areas can change hand feel, slow drying, and reduce stacking speed |
| Premium branding | Woven side label plus small screen print | Retail shelf programs, gift sets, and distributor resale packs | Woven labels, hangtags, and barcode stickers can each have separate lead times |
| Bag construction | Open-top tote with self-fabric handles and box-x or cross stitch reinforcement | Fastest and most cost-stable choice for merchandise and promotions | Gussets, pockets, zippers, snaps, or contrast piping increase cutting, sewing, and inspection work |
| MOQ strategy | One shared body size across multiple artworks | Useful when one roaster program has many SKUs | Too many fabric colors or construction changes split the run and reduce efficiency |
| Packing format | Flat packed in fixed bundles, 50-100 pcs per export carton where practical | Best for ocean freight, 3PL receiving, and wholesale inventory counts | Individual polybagging adds labor, materials, cube, and packing time |
| Freight planning | Book after final inspection with a 7-10 day buffer | Suitable for seasonal launches, trade events, and replenishment programs | Assuming a ship date before inspection pass, carton mark approval, or booking confirmation creates avoidable misses |
Buyer checklist before sampling
- Define the end use first: event giveaway, retail merchandise, bean gift set, subscription insert, wholesale add-on, or distributor resale pack.
- Lock the finished bag size, gusset depth, handle drop, target load, and closure type before requesting quotes.
- Specify fabric in GSM or oz, not only as "thick cotton," "canvas," or "premium organic cotton."
- State whether natural fabric tone variation, seed specks, small slubs, and minor yarn character are acceptable.
- Provide artwork with color count, print coverage, placement dimensions, and Pantone or brand color references.
- Decide early whether woven labels, hangtags, care labels, barcode stickers, retail belly bands, or carton labels are required.
- Set MOQ logic by body size, fabric color, print artwork, and packing method so supplier quotes are comparable.
- Request separate timing for blank sample, printed sample, lab dip if dyed, accessory sample, and final pre-production sample.
- Define packing method: individual polybag, bundle pack, inner count, export carton count, target carton weight, and carton mark format.
- Add written inspection standards for size tolerance, print variation, seam quality, fabric appearance, carton count, and moisture protection.
Factory quote questions to send
- What is the exact fabric specification by GSM, yarn type, weave, shrinkage expectation, and whether the cloth is stock or woven to order?
- If the fabric is certified organic at fabric stage, what shipment documents can be provided if our customer or retailer requests them?
- What is the lead time from the real production trigger point, and what event starts the clock?
- Does the quoted lead time include fabric sourcing, dyeing if needed, printing, curing, sewing, inspection, packing, and carton marking?
- What MOQ applies by body size, fabric color, print artwork, and packing format rather than only by total order quantity?
- What print method is quoted, how many colors are included, what print area is assumed, and are screen charges included?
- What handle construction is included: self-fabric handles, webbing handles, straight stitch, box-x, cross stitch, or bartack reinforcement?
- What dimensional tolerance will the factory hold on finished width, height, gusset, and handle drop after sewing and pressing?
- How will natural fabric shade variation, slub level, and seed speck content be managed across bulk lots?
- What sample charges apply for blank samples, printed samples, woven labels, packing samples, and courier, and which charges are refundable after bulk order?
Quality-control points to confirm
- Measure finished bag width, height, gusset, and handle drop against the approved spec with written tolerances.
- Verify fabric weight by GSM test on bulk fabric, not only from the supplier declaration or original quote.
- Check print placement from side and bottom seams, plus color consistency against the approved sample or color standard.
- Review print adhesion and cure with a rub test after sufficient drying time, especially on dark dyed fabric or heavier ink coverage.
- Inspect seam security at handle attachment, side seams, bottom corners, and gusset folds for skipped stitches, loose threads, and broken stitches.
- Confirm inside and outside cleanliness: no oil marks, needle damage, severe slubs beyond the approved standard, or visible contamination.
- Check woven label position, text accuracy, barcode readability, edge finishing, and attachment quality if labels are included.
- Count carton quantities and bundle counts so shipment units match the packing list, SKU labels, and outer carton marks.
- Verify moisture protection for sea shipments, humid seasons, and long inland transport, especially with natural organic fabric.
- Approve carton dimensions and gross weight before booking to avoid warehouse handling issues, retailer receiving problems, or freight rework.