1. Why coffee roaster jute tote orders need tighter specifications than a normal promo bag
Jute tote bags make sense for coffee brands. The material already speaks the same visual language as many roasters: natural fiber, earthy texture, reusable packaging, and a warmer shelf presence than a basic nonwoven giveaway bag. A well-built jute tote can support café merchandise, holiday gift packs, subscription welcome kits, origin-themed launches, trade-show sampling, or wholesale bundles with beans, mugs, filters, and brew guides.
The risk is hidden in the wording. “Jute tote bag” is not a spec. It might mean laminated jute with cotton web handles and reinforced seams. It might also mean lighter open-weave burlap with narrow handles and very simple finishing. Both can be described in a quote as “natural jute tote with logo,” yet the durability, print result, carton volume, and landed cost will be different.
Coffee buyers have less margin for guesswork than many promotional buyers. Roasted coffee is dense. Retail pouches are often structured. Gift sets may include hard goods that push into corners and stress the bottom seam. If the bag is underbuilt, the problem may not show in an empty sample photo. It shows when a café team packs 500 gift sets and the totes lean, bulge, shed, or crease across the logo.
A useful RFQ should explain the job the bag has to do. Tell the supplier the intended load, display requirement, retail finish standard, logo method, packing plan, sample approval route, and inspection tolerances. Otherwise, suppliers fill in the blanks themselves, and the buyer ends up comparing assumptions instead of comparable bags.
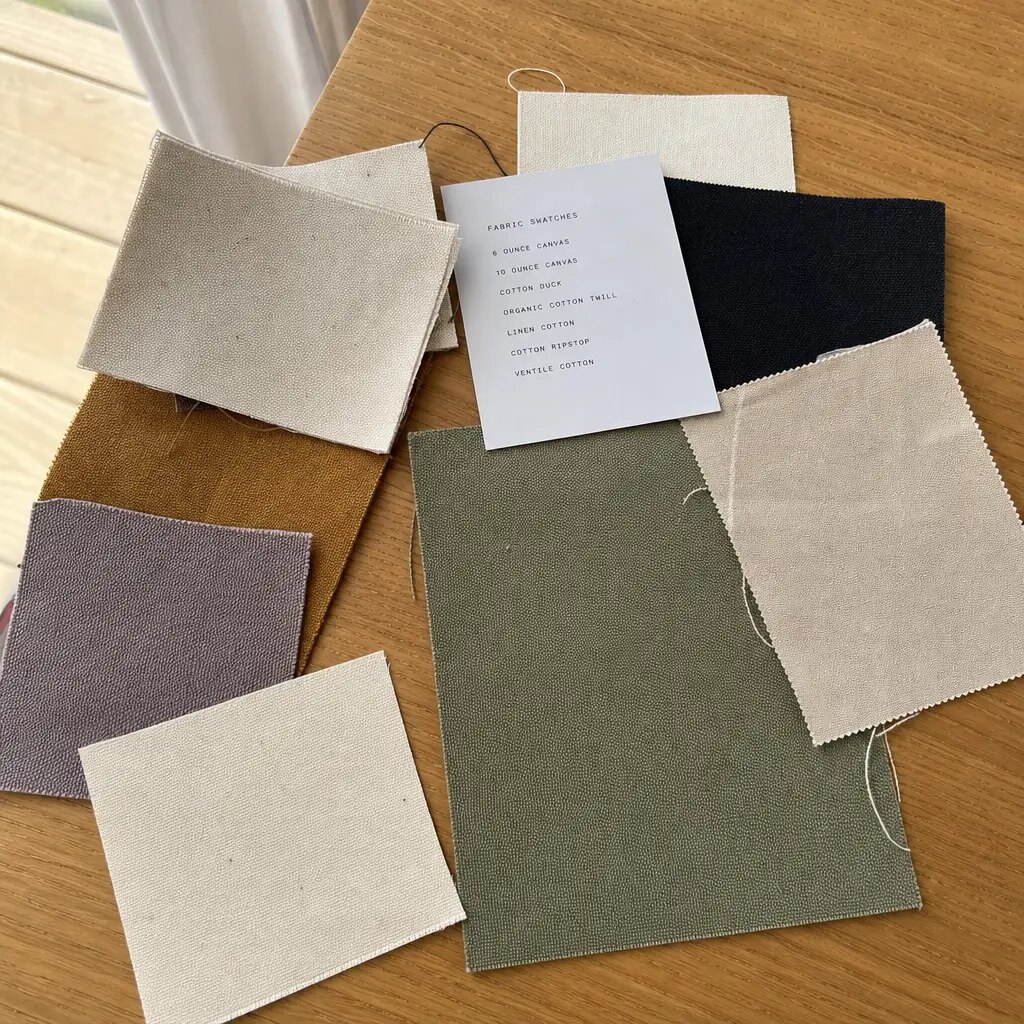
This checklist is designed to turn a mood-board image into measurable requirements. When body fabric, lamination, handles, gusset, print, sampling, and QC are clearly defined, there is less room for accidental downgrades or vague substitutions during bulk production.
- Best-fit coffee uses: gift bundles, café resale, subscription add-ons, promotional launches, event giveaways, distributor programs
- Common failure points: weak handle stitching, muddy logo edges, inconsistent dimensions, strong lamination odor, excessive shedding, crushed packing
- Main buying mistake: comparing unit price before aligning GSM, lamination, handle width, reinforcement, print area, accessories, and cartons
- Procurement rule: approve the tote based on filled use and inspection criteria, not only an empty sample photo
2. Start with the coffee load, not the bag size
Begin with what goes inside the tote. A bag for one 250 g retail pouch and a postcard does not need the same construction as a bag carrying two 1 kg coffee bags, a ceramic mug, a cupping spoon, and a brew guide. Coffee is compact and heavy for its size, so a tote can look generous in dimensions and still be under-specified for the load.
Add a short loading note to the RFQ. It does not need to be complicated. For example: “Bag to carry 2 x 1 kg coffee pouches, one 350 g ceramic mug, and one A5 insert; target total load approximately 2.5-3.0 kg; must stand on a retail shelf.” That one sentence helps the factory choose a better body weight, gusset depth, handle reinforcement, and seam construction.
Use case changes the finish level as well. A café resale tote needs cleaner stitching, fewer loose threads, controlled folding, and a front panel that still looks good after the carton is opened. A trade-show tote carrying brochures and one sample pouch may prioritize cost and logo visibility. A holiday gift set may need a deeper gusset so the packed set looks intentional on a counter. An e-commerce insert may need to fold flat without leaving a hard crease through the print.
The word “reusable” also needs context. Some buyers mean a customer will carry the bag home once. Others expect the tote to be sold as merchandise and used repeatedly. If repeated use matters, upgrade handle comfort and seam reinforcement before adding decorative extras. A hangtag cannot compensate for handles that feel sharp or seams that begin to pull after a few carries.
Ask the supplier to review the packed load before quoting final production. If you can share product dimensions, sample weights, or a packing sketch, do it. It is much easier to adjust gusset, handle drop, or bottom seam construction before the PPS than after bulk cutting has started.
- List the packed contents and target total weight in the RFQ
- State whether the tote must stand, hang, fold into a shipper, or display on a shelf
- Differentiate promotional giveaway quality from retail merchandise quality
- For mugs or hard goods, pay extra attention to bottom seam and gusset corner strength
- Ask the supplier to test the PPS with equivalent weight, not just photograph it empty
3. Specify jute body fabric with GSM, weave, lamination, and realistic tolerances
For many coffee roaster wholesale programs, a practical starting point is natural jute in the 13-14 oz class or about 280-320 GSM finished body feel. This is not a universal standard, because suppliers measure and describe jute in different ways. Still, it is far more useful than asking for “good quality jute.” Below this range, some totes look fine when empty but sag when filled with dense coffee products. Above it, the bag may become bulkier, more expensive, and less efficient to fold and ship.
Clarify how the supplier is measuring GSM. Is it before lamination, after lamination, or a general fabric category? A laminated jute body can feel more structured even when the base cloth is not dramatically heavier. For inspection, record the finished bag weight from the approved PPS and agree on an acceptable range. Many buyers use a GSM tolerance around ±5-10%, depending on fabric and supplier capability, but the PO should state the actual tolerance rather than leave it implied.
Weave openness deserves attention. Open burlap-style jute can show more gaps, shed more fibers, and create rougher print edges. A tighter weave usually gives a cleaner panel and better shape, although it may cost more. If shade, dusting, hand feel, or logo clarity matters to the brand, request a body fabric swatch before moving into a full PPS.
Natural jute will not behave like dyed cotton canvas. Shade variation, slubs, and minor fiber irregularities are part of the material. Procurement teams should accept normal character, but they should not accept severe discoloration, oil marks, mildew-like stains, large holes, weak open-weave areas, or obvious panel mismatch within the same bag. The approved swatch or signed PPS should show the acceptable natural range.
If your brand needs a very uniform appearance across multiple café locations or distributor shipments, say that early. Tighter sorting may increase wastage, cost, or production time. It is better to price that requirement directly than to discover later that the factory considered wider shade variation normal for jute.
- Useful baseline for many coffee totes: about 280-320 GSM finished feel or 13-14 oz class
- Clarify whether GSM is before or after lamination
- Record approved sample weight for later inspection comparison
- Request a swatch if shade, shedding, or weave openness is important
- Accept normal jute slubs, but reject stains, holes, severe striping, and weak weave areas
4. Decide whether laminated or unlaminated jute is right for the program
Lamination is one of the choices that most affects how a jute tote performs. Unlaminated jute gives the rawest burlap look. It also tends to shed more, absorb marks more easily, and hold a less stable shape. Laminated jute, usually with a thin internal PP film, adds structure, reduces dusting, and helps the bag open more cleanly when filled.
For coffee roaster retail and gift programs, internal lamination is often the safer commercial choice. The coffee is normally sealed inside retail pouches, so the tote is not acting as direct food-contact packaging. Even so, the bag will be handled in cafés, warehouses, event spaces, delivery cartons, and customer homes. Cleaner handling and better shape retention are often worth more than the small saving from unlaminated fabric.
State where the lamination should sit. If the brand wants a natural exterior, ask for internal lamination and confirm whether the inside film is matte, semi-gloss, or glossy. Request photos of inside seams, bottom corners, and gusset folds. Glossy or thick film can become visually obvious where the bag folds, especially after compression in export cartons.
Inspection criteria should be specific. Ask how the supplier checks peeling, bubbling, cracking at folds, tackiness, and odor. A laminated bag should not feel sticky, transfer marks to coffee pouches, or produce a strong chemical smell when a carton is opened. At the same time, avoid unrealistic language such as “zero smell.” Jute has a natural earthy odor, and newly printed or laminated bags may need normal airing.
For sensitive retail programs, test odor in a simple repeatable way. Seal the PPS in a polybag or closed carton for 24 hours, then open it and evaluate immediately. If the odor is chemical, solvent-like, mildew-like, or too strong for café handling, resolve it before approving bulk.
- Choose laminated jute for cleaner retail handling, less shedding, and better structure
- Choose unlaminated jute only when a raw burlap look is the priority and more variation is acceptable
- Specify internal lamination if the exterior must remain natural-looking
- Reject peeling, major bubbles, cracking, tackiness, and strong chemical odor
- Check odor after enclosed storage, not only after the sample has aired out
5. Use finished dimensions and gusset design to control filled appearance
Write jute tote dimensions as finished sewn size: width x gusset x height. This sounds basic, but it prevents many misunderstandings. Cut-panel dimensions, flat measurements, and finished measurements are not the same once hemming, stitching, gussets, and lamination are involved. Even a 1 cm difference can matter when coffee pouches, cartons, or mugs are packed tightly.
For coffee bundles, side gussets and bottom gussets usually work better than a flat tote. The side gusset creates usable volume. The bottom gusset helps the bag sit on a counter or retail shelf. A flat bag may look cheaper on a quote sheet, but coffee pouches can push the front and back panels outward, distort the logo, and make the set look less premium when filled.
If standing upright matters, make it a test. Ask the factory to load the PPS with your intended products or equivalent blocks and send front, side, three-quarter, and top-view photos. A tote that looks square when empty may lean forward when packed. For gift programs, that is not a small detail. It affects shelf presentation, photography, and the speed of packing in a café or warehouse.
Think about artwork placement while deciding gusset and size. The center of an empty front panel may not stay visually centered after the bag is filled. Avoid putting important text near bottom folds, side expansion points, or areas likely to bulge. If the tote will be folded for export, confirm the fold line does not run sharply through the main logo.
Set tolerances before production starts. For small and medium jute totes, a common tolerance is about ±1 cm for width and height, with gusset tolerance often around ±0.5-1 cm depending on construction. Print placement often needs a tolerance of about ±5 mm to ±10 mm because jute and sewn panels move. Handle drop tolerance should also be written down; uneven handles are easy for customers to notice.
- Write size as finished width x gusset x height
- Use side plus bottom gussets for coffee gift packs and shelf-ready bundles
- Ask for filled sample photos before PPS approval
- Avoid placing key artwork on hard fold lines or extreme bulge zones
- Define tolerances for size, gusset, print placement, and handle drop in the PO
6. Treat handles as a load-bearing component, not a decorative detail
Handles are one of the biggest hidden differences between jute tote quotes. A reference photo may show cotton webbing, while a lower quote may assume narrow jute tape, twisted rope, or shorter handles. These are not interchangeable. They feel different in the hand, pack differently in cartons, and handle load differently.
For many coffee roaster totes, cotton web handles around 25-30 mm wide offer a practical balance of comfort, cost, and retail appearance. Narrower handles can cut into the hand when the tote carries dense coffee bags. Rope may suit a certain look but can change the packing profile and attachment method. Jute tape may match the body visually, yet it is not the same as cotton webbing for comfort or strength.
Specify both total handle length and handle drop. Total length helps the factory cut the component correctly; drop tells the buyer how the tote will be carried. Short handles may be fine for hand carry. Longer handles may allow shoulder carry, but they can add carton bulk and look messy if folded without control. Handle color also matters. Natural, off-white, black, and dyed handles may have different availability, lead times, and MOQs.
The attachment method is where many failures start. Stronger constructions usually insert the handle into the top hem and secure it with box-X stitching, bar-tacks, or reinforced multi-row stitching. Surface-applied handles can work for light promotional use, but they should not be accepted automatically for dense gift sets. Ask for close-up photos or a technical drawing showing insertion depth, top hem width, stitch pattern, and seam allowance.
Use a practical test on the PPS. Fill the bag with the intended products or equivalent weight, lift it repeatedly, hang it for a defined period, and inspect the handle seams, top hem, bottom seam, and gusset corners. A simple internal test might be 20-30 repeated lifts plus a short static hang at the target load. The point is not to claim a universal load rating; it is to confirm that this construction is appropriate for this coffee program.
- Recommended starting point: cotton webbing, 25-30 mm wide
- Specify material, width, color, total length, drop, insertion depth, and reinforcement
- Request box-X, bar-tack, or equivalent reinforcement details
- Test with the intended coffee load or an agreed equivalent weight
- Reject twisted handles, uneven drops, skipped stitches, weak insertion, and top hem distortion
7. Design print and branding for coarse jute, not for a smooth digital proof
Screen printing is usually the most practical branding method for custom jute tote bags, especially for one- or two-color roaster logos, origin marks, event graphics, and simple retail designs. Jute texture can make bold artwork look tactile and intentional. The same texture can make small text, thin serif details, gradients, and tight multicolor registration look broken or muddy.
A digital proof is only a layout tool. It does not prove ink coverage on jute. Before final artwork release, ask the supplier for minimum line thickness and minimum text height for the chosen fabric. The exact limit depends on weave and ink system, but buyers should treat hairlines, tiny taglines, QR codes, and small certification icons as risky on the jute body.
Move small information somewhere else if readability matters. A kraft hangtag, printed insert, woven side label, or barcode sticker can carry details that would not print cleanly on coarse jute. This is often better than forcing too much information onto the front panel and then accepting a disappointing print result.
Pantone references help communicate color direction, but natural jute changes perceived color. Dark brown, black, forest green, navy, burgundy, and other strong tones usually read better than pale or low-contrast inks. White or cream ink may look softer and less opaque than it would on cotton canvas or paper. If brand color is important, approve a physical print strike-off or PPS, not only a screen proof.
Print placement should be measured from finished bag edges and the top hem. If printing both sides, on gussets, or near the bottom, confirm that the quote includes the added setup and handling. Also check the packing fold. A well-printed tote can still arrive looking poor if the export fold creases the logo or presses handles into the ink area.
- Best artwork: bold logos, simple type, solid marks, one or two colors
- Risky artwork: tiny text, QR codes, gradients, fine strokes, close-register multicolor designs
- Approve a physical strike-off when color or sharpness matters
- Measure print placement from finished edges, not from cut panels
- Use hangtags, labels, or inserts for small details that jute cannot print cleanly
8. MOQ and price breaks: compare like-for-like, not headline unit prices
MOQ for custom jute tote bags is shaped by fabric purchasing, cutting efficiency, print setup, sewing line allocation, accessory sourcing, and packing labor. For many custom printed jute totes, a commercial starting point is often around 1,000-2,000 pieces per size or artwork, although factories vary. Lower quantities may be possible with stock dimensions or stock components, but unit price and specification flexibility usually change.
Ask for a price ladder rather than one unit price. Useful breaks are often 1,000 / 3,000 / 5,000 pieces. Then ask what changes at each level. Is the factory buying jute more efficiently? Are screen charges spread over more pieces? Does a custom handle color become possible only above a certain volume? Do woven labels, hangtags, or barcode stickers have their own MOQs?
Keep the specification constant while comparing price breaks. A lower price is not useful if the fabric becomes lighter, the lamination changes, the handle narrows, or the carton plan becomes more compressed. Ask the supplier to show any construction difference clearly rather than burying it in a revised quote.
SKU complexity can quietly raise cost. A roaster may think it is ordering 5,000 totes, but if that total is split across two sizes, five artworks, and three handle colors, the factory sees many smaller lots. Each change adds setup, sorting, inspection, and packing risk. If the budget is tight, reducing artwork versions or handle colors may save more than weakening the handle or choosing a lighter body fabric.
Treat very low MOQ offers with care. They may rely on leftover jute, mixed fabric lots, stock handle colors, simplified stitching, or standard carton plans. That can be fine for a small event test when expectations are clear. It is more risky for café resale or distributor programs that need consistency across reorders. Ask whether the same jute, lamination, handle, and ink can be repeated later.
- Ask for 1,000 / 3,000 / 5,000 piece pricing per size and artwork
- Separate MOQ by size, print design, handle color, lamination, label, hangtag, and packing
- Confirm that all price breaks keep the same construction and material
- Reduce SKU complexity before cutting essential handle or fabric specs
- For stock-component orders, ask what can and cannot be repeated later
9. Sample approval: make the PPS measurable and binding
The pre-production sample should prove the actual bag, not just the concept. It should use the intended jute, lamination, handle material, stitching, print method, accessories, and folding method. A substitute stock sample may help with early size discussion, but it should not become the approval standard for a custom wholesale coffee program.
Test the PPS as a customer would. Fill it with the intended coffee products or equivalent weight. Carry it. Set it on a shelf. Photograph it. Inspect it after handling. Look for logo distortion, leaning, uncomfortable handles, seam stress, loose threads, odor, and whether the gusset opens as expected. Many of these issues are invisible when the sample is empty.
Document approval in measurable terms. Measure finished width, height, gusset, top hem, handle drop, print size, and print position. Weigh the finished sample. Photograph the front, back, sides, inside lamination, bottom seam, gusset corners, handle stitching, labels, hangtags, and packing fold. If changes are needed, write them plainly: “move logo 15 mm lower,” “increase handle drop to 28 cm,” “remove loose threads at handle seam in bulk,” or “fold away from printed logo.”
Keep one signed PPS with the buyer and ask the factory to keep a matching reference. Reference the sample date, revision, and artwork file name in the PO. During final inspection, the PPS becomes the standard for natural jute variation, print texture, handle construction, and acceptable finishing.
Do not rush PPS approval just to protect the launch calendar. A rejected or vague sample often costs more time later. If the tote will support a seasonal coffee release, holiday bundle, or café rollout, build the schedule around proper sample review, not around an optimistic production promise.
- PPS must use actual production material, print, handle, lamination, and accessories
- Measure and photograph every approval point
- Load-test with real coffee products or agreed equivalent weight
- Check odor after the sample has been enclosed for 24 hours
- Reference the signed PPS revision in the purchase order
10. QC, packing, and lead time controls before bulk shipment
Final inspection should focus on the issues that matter for coffee roaster use: body fabric consistency, lamination quality, handle attachment, gusset shape, print readability, odor, and packing condition. Use your company’s standard AQL plan if you have one, but add product-specific checkpoints. Jute is naturally variable, so the inspection standard must separate acceptable slubs from rejectable stains, holes, weak weave, and severe shade mismatch.
Finished size should be checked against the PO and signed PPS. Finished bag weight should be sampled as well, because it can reveal lighter body fabric, missing lamination, a changed handle, or a major construction shift. Inspectors should open gussets, pull handles gently, review seam ends, check top hems, and look inside for lamination defects. Do not inspect only the front print.
Packing affects both sellable condition and landed cost. Jute totes are bulkier than many cotton or nonwoven bags, and laminated jute can hold crease memory if compressed too tightly. Ask for pieces per carton, carton dimensions, net weight, gross weight, inner bundle method, shipping marks, and estimated CBM before confirming the order. A slightly higher FOB price may still land better if carton efficiency is stronger and damage risk is lower.
Decide early whether individual polybags are necessary. They can reduce dust, support barcode scanning, and improve retail presentation when cartons are split across cafés. They also add cost, labor, material, and waste. If the brand wants to avoid individual plastic, discuss inner bundles, paper bands, or organized master cartons instead. Whatever method you choose should be photographed and approved before shipment.
Lead time should be managed by milestones, not a vague “30 days.” Separate artwork proofing, swatch approval, PPS production, PPS review, material booking, cutting, printing, sewing, finishing, packing, final inspection, and ex-factory readiness. For many custom programs, PPS may take about 7-10 days after artwork approval, while bulk production may take about 25-40 days depending on quantity, print complexity, accessories, and season. The supplier should state what starts the clock: deposit, PO, artwork approval, material booking, or PPS sign-off.
Delays often come from buyer-side revisions as much as factory capacity. Fine artwork may need adjustment after strike-off. A woven label may require separate approval. Barcode files may arrive late. A rejected PPS can reset the schedule. If the launch date is fixed, build a buffer after PPS approval and book inspection early.
- Inspect finished size, weight, fabric, lamination, handles, print, gussets, odor, and packing
- Request carton count, carton size, net weight, gross weight, marks, and CBM before comparing landed cost
- Avoid folding that creases the main printed logo or crushes laminated gussets
- Define individual polybags, inner bundles, barcode labels, and carton marks in the PO
- Track lead time by milestones from proofing to ex-factory readiness
Specification comparison for buyers
| Spec decision | Recommended option | When it fits | Buyer risk to check |
|---|---|---|---|
| Base cloth weight | Specify natural jute body by GSM and construction; many coffee retail totes use about 280-320 GSM finished body feel or 13-14 oz class, depending on supplier measurement method | Coffee gift packs, café resale, subscription welcome kits, and event totes carrying dense packaged coffee | GSM may be quoted before lamination, after lamination, or by fabric category. Request fabric swatch, finished bag weight range, and allowed GSM tolerance, commonly ±5-10% unless otherwise agreed |
| Inside finish | Internal PP lamination, preferably matte or low-gloss, with lamination weight and odor expectation stated | Totes that must stand better, shed fewer fibers, protect coffee pouches from jute dust, and stay cleaner in warehouse handling | Unlaminated burlap-style jute sheds more, absorbs marks, and may print less sharply. Confirm lamination side, thickness or film description, visible seam behavior, peeling criteria, and whether it is included in the quote |
| Handle material | Cotton webbing handles, commonly 25-30 mm wide, with specified drop and reinforced top-hem stitching | Medium-load coffee bags, mugs, brew accessories, gift sets, and merchandise customers may carry by hand or shoulder | Rope, narrow jute tape, and cotton webbing are not equivalent. Request handle width, total length, drop tolerance, insertion depth, stitch count, and pull or load-test method |
| Bag construction | Side gusset plus bottom gusset, finished size stated as width x gusset x height, with reinforced bottom seam if carrying multiple coffee packs | Shelf-ready bundles, coffee-and-mug sets, retail displays, and wholesale kits that should stand when filled | Flat bags quote cheaper but bulge and hide the logo. Confirm finished sewn dimensions, not cut-panel size, and test the PPS with the intended product load |
| Print method | One- or two-color screen print with bold artwork; avoid fine lines, tiny text, gradients, and tight registration | Roaster logos, origin graphics, seasonal promotion marks, and simple café merchandise designs | Digital proofs do not show jute texture. Request minimum line thickness, minimum text height, print strike-off on actual jute, and placement tolerance, often ±5 mm to ±10 mm depending on artwork size |
| Branding add-ons | Use woven side label, kraft hangtag, barcode sticker, or paper insert only when retail or channel handling requires it | Private label programs, café resale, distributor cartons, gift kits, and multi-location inventory control | Each accessory may have its own MOQ, artwork approval, color tolerance, placement check, and lead time. Confirm tag string, label fold, barcode grade expectation, and carton label content |
| MOQ strategy | Quote 1,000 / 3,000 / 5,000 pieces per size and artwork, with component variations separated | Regional roasters, promotional buyers, coffee distributors, and seasonal merchandise programs | A total order of 5,000 split across five designs can behave like five smaller runs. Ask MOQ by size, print, handle color, lamination, label, hangtag, and packing format |
| Sample route | Digital proof, fabric/handle swatch, print strike-off if needed, then PPS using actual production materials and folding method | Any program where color, odor, load capacity, retail finish, or shelf shape matters | A substitute stock sample cannot approve bulk production. Define signed PPS as the standard for fabric feel, print, handle, stitching, lamination, folding, and carton packing |
| Packing plan | Fixed-count export cartons with consistent folding, moderate compression, carton labels, and inner bundles or polybags only where needed | Importer warehousing, café rollouts, retail resale, trade shows, and distributor delivery | Over-compression can crease laminated jute and deform handles. Request pcs/carton, carton dimensions, gross weight, net weight, carton marks, and estimated CBM before comparing landed cost |
Buyer checklist before sampling
- State finished bag dimensions as width x gusset x height in cm or inches, and clarify finished sewn size after hemming, not cut-panel or flat-panel size.
- Describe the real packed load: for example, 2 x 1 kg coffee bags plus one 350 g mug, or 4 x 250 g retail pouches and one brochure. Include the target total weight.
- Specify whether the tote must stand upright, hang on a retail peg, fit inside an e-commerce shipper, or be split across cafés from master cartons.
- Define the jute body specification: natural jute or blend, target GSM or ounce class, whether GSM is before or after lamination, allowed tolerance, shade range, weave openness, and finished sample weight.
- Choose laminated or unlaminated construction. If laminated, state internal lamination, matte or gloss expectation, low-odor requirement, and rejection criteria for peeling, bubbles, cracking, or sticky film.
- Define handle material, width, total length, handle drop, color, insertion depth, reinforcement style, and load-test expectation. Cotton webbing, jute tape, and rope handles should be quoted separately.
- Provide artwork with print size, placement from finished edges, number of colors, Pantone references where useful, and instructions to thicken hairlines or remove tiny text unsuitable for coarse jute.
- State every branding location: one side, both sides, side gusset, bottom panel, woven label, hangtag, care label, barcode sticker, or carton mark, because each affects setup and inspection.
- Request a pre-production sample made with actual production jute, actual lamination, actual handles, actual stitching, actual print method, and intended export folding.
- Set written tolerances for finished size, gusset, handle drop, print placement, print color, odor, loose threads, fiber shedding, lamination defects, stains, panel shade mismatch, and carton count.
Factory quote questions to send
- What is the exact jute body specification in GSM or ounce class, and is the measurement before lamination, after lamination, or based on finished fabric category? What tolerance will you control?
- Is the material 100% jute, jute-cotton blend, jute-laminated fabric, burlap-style open weave, or another construction? Please describe weave density, finish, and expected natural color variation.
- If laminated, what type of internal film is used, is it matte or glossy, and how do you check lamination peeling, bubbles, cracking at folds, tackiness, and odor before packing?
- What handle material, width, total length, drop, color, and insertion depth are included? Are handles stitched into the top hem, sewn onto the outside panel, riveted, or combined?
- Please provide close-up photos or a technical drawing of handle reinforcement, including stitch pattern, box-X or bar-tack details, seam allowance, top hem width, and stitch count per inch or centimeter.
- What maximum recommended load do you suggest for this construction, and what factory test supports it: static hang test, repeated lift test, pull test, or internal inspection only?
- What print method is quoted, how many colors are included, what print area is included, and what minimum line thickness and minimum text height do you recommend for this jute surface?
- Can you provide a print strike-off and a PPS on actual production material before bulk production? Please state sample charge, screen charge, courier charge, and sample lead time.
- What are the MOQ breaks by size, print design, handle color, lamination type, woven label, hangtag, barcode sticker, and packing method?
- What are the unit price breaks at 1,000, 3,000, and 5,000 pieces, and which cost elements change at each break: fabric purchasing, print setup, sewing efficiency, accessories, packing, or carton loading?
Quality-control points to confirm
- Finished size should be checked against the PO and signed PPS. For small and medium jute totes, a common tolerance is about ±1 cm for width and height and ±0.5-1 cm for gusset, unless the buyer approves another range.
- Finished bag weight should be checked from a sample set against the approved PPS range to detect lighter body fabric, missing lamination, different handle material, or major construction changes.
- Body fabric should match the approved swatch or PPS for weave openness, natural shade range, lamination appearance, odor, hand feel, and visible fiber shedding.
- Natural jute slubs are normal within limits, but large holes, severe discoloration, oil marks, mildew-like stains, weak open-weave zones, and obvious panel shade mismatch should be rejected.
- Handle attachment must be even, symmetrical, and reinforced, with no skipped stitches, broken threads, loose insertion, twisted handles, exposed raw handle ends, or visibly uneven handle drop beyond tolerance.
- Top hem and seams should be consistent, with no sharp edges, loose seam ends, raw edges beyond the approved design, seam puckering that distorts the front panel, or open seams at gusset corners.
- Print color, coverage, placement, registration, and readability should match the signed strike-off or PPS, with no major smudging, ghosting, pinholes, ink cracking, peeling, heavy ink odor, or unreadable required text.
- Side and bottom gussets should open evenly and allow the tote to sit or stand as required when filled with the agreed coffee load or equivalent inspection weight.
- Inside lamination should not peel, bubble excessively, crack along fold lines, feel sticky, transfer marks to coffee pouches, or produce an odor level unsuitable for retail handling after cartons are opened.
- Packing inspection should verify pieces per carton, folding direction, inner bundle count, barcode or carton label placement, shipping marks, carton strength, and whether compression has creased the logo or deformed handles.