1) Why print method is a sourcing decision, not a decoration preference
For heavy canvas tote bags, the print method changes almost every commercial term a retail chain cares about: unit price, MOQ, setup time, sample approval, carton yield, product feel, and how consistently the bag will present on shelf. That is why buyers should treat print method as part of the product specification, not as a style choice left for the factory to decide.
In retail programs, the tote has to do more than carry a logo. It may need to sit neatly at checkout, survive repeated folding in-store, ship in bulk to distribution centers, and still look acceptable after customers carry purchases home. A method that looks fine in a catalog can become expensive or fragile once those realities are added.
The risk in a loose RFQ is that each supplier prices a different product. One may assume 12 oz canvas and one-color screen print, another may quote a heat transfer on lighter fabric, and a third may substitute a woven label because they are short on print capacity. Unless the buyer names the method, the quote comparison is not real.
Retail chains also need repeatability. A first buy might be a seasonal test, but if the item performs well, the same tote often gets reordered with only minor artwork or label changes. That makes scalability important. Some decoration methods are excellent for launch speed but become costly or inconsistent when the chain scales from hundreds of units to many thousands.
The best sourcing approach is to choose a primary decoration method, a fallback method, and a reference sample before issuing a final PO. That keeps the supplier from improvising under pressure and gives the procurement team a clear basis for commercial comparison.
- Use print method as a spec item, not a supplier preference.
- Tie the method to store use, DC handling, and reorder potential.
- Quote at least one alternate method so the cost tradeoff is visible.
2) What “heavy canvas” should mean in the RFQ
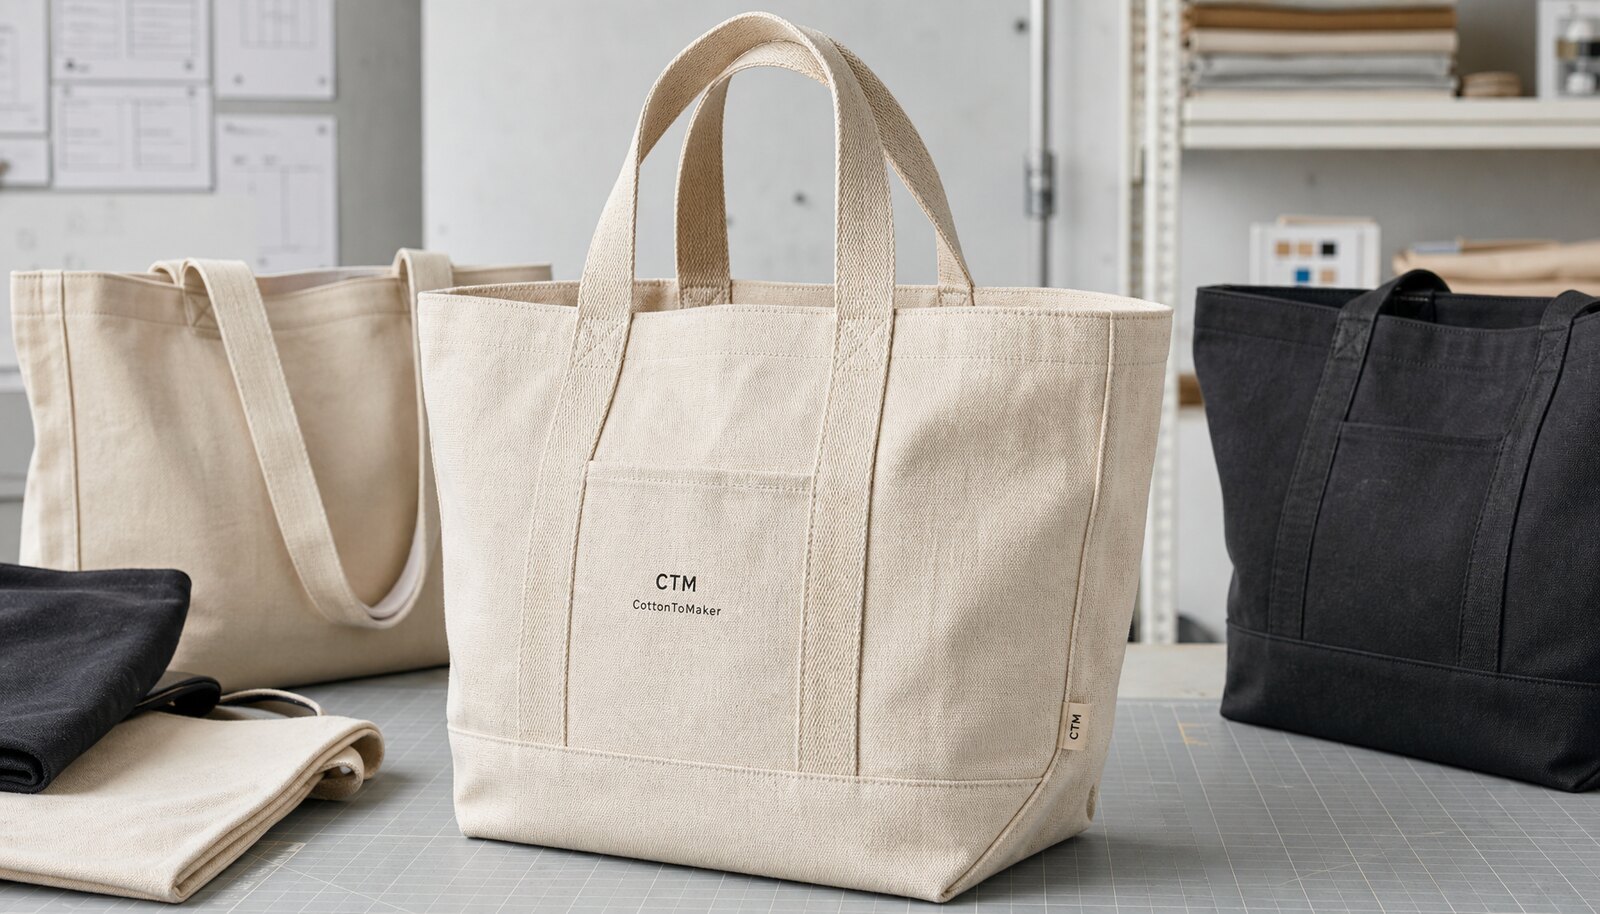
The phrase heavy canvas is too vague for procurement. Buyers should ask for a numeric fabric weight in GSM or oz/yd² and confirm whether that number refers to finished fabric or raw fabric. A tote described only as “heavy” may arrive with a different hand feel, drape, and print behavior than expected.
For many retail programs, 12 oz canvas is the lower end of what can still feel substantial; 14 oz is often the practical middle ground; and 16 oz supports a more premium, structured bag. The right choice depends on how the tote will be used. A promotional checkout item does not need the same body as a premium private-label tote, but if the bag must stand upright on shelf, lighter fabric may collapse visually.
Fabric weight affects print quality. Heavier canvas tends to provide a more stable surface for screen printing and can help the logo sit cleaner, especially when the artwork uses sharp edges or solid fills. Lighter canvas can move more during printing, which may affect registration and perceived quality. At the same time, heavier fabric adds cost in sewing labor, carton weight, and freight.
Buyers should also ask about pre-shrinking, enzyme washing, or any finishing process that changes the hand feel or dimensions. If the factory quotes raw fabric weight but delivers a washed bag, the finished size can shift. That matters for shelf display, retail packaging, and carton planning.
If the tote needs to meet a premium retail standard, specify not just the fabric weight but the acceptable surface appearance: slub level, weave consistency, natural flecking, and whether shade variation is acceptable. Natural canvas often varies more than dyed fabric, and that should be addressed before bulk production starts.
- Always request GSM or oz/yd², plus whether it is finished or raw fabric weight.
- Ask for the expected shrinkage range after any washing or finishing process.
- Specify whether natural slub, flecking, or shade variation is acceptable.
3) Print-method comparison for heavy canvas tote bags
For retail chain buyers, the practical comparison is not which method is “best” in general. It is which method is best for a specific artwork file, order volume, and shelf-life expectation. Screen print, heat transfer, digital transfer, embroidery, and woven labels each solve different sourcing problems.
Screen print is usually the lowest-cost route once the order is large enough to absorb setup. It is strongest for bold logos, one- or two-color art, and repeat replenishment. The limit is detail: if the artwork depends on gradients, tiny text, or thin lines, screen print may simplify the image more than the brand wants. It also requires careful curing. A print that is under-cured may crack or transfer color when the tote is folded tightly or rubbed repeatedly.
Heat transfer and digital transfer are more flexible for artwork complexity. They can reproduce gradients, photo-like graphics, and finer details with less setup than screen print. That makes them useful for short launches, seasonal campaigns, or pilot runs where the buyer needs a fast proof of concept. The tradeoff is unit economics and durability risk. A transfer that looks sharp at arrival can still peel at the edges or show wear if the bag is handled often, especially in high-friction retail environments.
Embroidery and woven labels are not substitutes for every printed design. They work best when the brand mark is small, premium, and simple. Embroidery has strong perceived value and good longevity, but dense stitch areas can stiffen the panel and create puckering if the canvas weight or backing is not suited to the design. Woven labels are excellent for identity, branding, or side tagging, but they do not replace large artwork across the bag body.
A hybrid route is often the most commercial option for retail chains: print the main body logo with screen print or transfer, then use a woven label or embroidered patch for secondary branding. That can improve perceived quality without forcing the entire design into a more expensive method.
- Screen print: best for simple logos, repeat SKUs, and lower per-unit cost at scale.
- Heat transfer / digital transfer: best for complex art, short runs, and faster proofing.
- Embroidery: best for premium marks and limited artwork, but check stiffness and puckering.
- Woven label: best as a brand identifier or accent, not as a full replacement for body print.
- Hybrid decoration often gives the best balance of value and brand presentation.
4) Side-by-side print method matrix for procurement teams
The table below is built for buying decisions, not catalog browsing. It helps normalize the commercial differences that are often hidden in supplier quotes. When you compare offers, use the same fabric weight, same bag size, same packing format, and same artwork file; otherwise the method comparison is not meaningful.
A useful rule is to compare methods on five axes at once: unit economics, setup burden, durability after folding and handling, color fidelity, and SKU scalability. The method that wins on one axis can lose badly on another. For example, a transfer can look excellent on a short-run launch but become expensive and less durable than screen print in a replenishment program.
If a supplier cannot explain their method against these five axes, that quote is not ready for serious procurement review.
- Normalize every quote to the same bag body and artwork file.
- Ask suppliers to state whether price includes setup, curing, digitizing, and packing.
- Compare methods using both first-order launch cost and reorder cost.
5) Recommendation hierarchy: which print method to choose first
For most retail chain buyers, screen print should be the first method to price when the artwork is a simple logo and the program has reorders or meaningful volume. That recommendation is not a slogan; it comes from the way setup costs behave. Once screens and curing are established, the method tends to be more economical than transfer-based options for stable programs. It also gives good visual consistency when the factory is experienced with canvas.
Heat transfer or digital transfer should move to the top of the list when the art is complex, the launch is short, or the chain is testing multiple creatives quickly. In those cases, the lower setup burden can outweigh the higher unit price. The buyer should simply recognize that the economics are different: a method that is inexpensive to start is not always inexpensive to scale.
Embroidery and woven labels should be treated as premium branding tools, not universal substitutes. They are often the right answer when the tote is intended to feel more like a merch item or private-label accessory than a promotional bag. They are less suitable when the artwork is large, flat, or heavily color-dependent.
A good procurement sequence is: quote the target method first, quote the backup method second, and ask the supplier which method they would actually recommend based on your artwork and volume. The supplier answer is useful only if it is supported by a reason tied to production, not by vague preferences.
If the chain expects multiple SKUs, consider standardizing the bag body and varying only the branding element. That approach keeps sewing stable, simplifies inventory, and reduces the number of distinct production routes a supplier must manage.
- Simple artwork plus repeat volume: start with screen print.
- Complex or fast-changing artwork: start with transfer-based methods.
- Premium brand mark: consider embroidery or woven labels.
- Multiple SKUs: standardize the body and vary the branding element.
6) How MOQ, sampling, and version control affect the true quote
MOQ is usually where retail buyers lose the most visibility. A supplier may quote a reasonable unit price, but the order becomes expensive once MOQ, setup, and sample costs are factored in. On heavy canvas tote bags, MOQ can shift by print method, color count, artwork version, or whether the supplier must reserve a production line for a specific finishing step.
Screen print generally has the strongest MOQ pressure because the screens, alignment, and setup labor only make sense when spread across enough units. A simple one-color logo may have a lower MOQ than a multi-color front-and-back design, but the buyer should not assume that difference will be small. If the quote is split across colors or SKUs, the total program cost may rise faster than expected.
Transfer methods are often more flexible for pilot quantities, but the buyer should test the reorder effect. A short-run quote can be attractive, yet a chain program can become uneconomic if every reorder carries a similar prep charge. Embroidery often has digitizing cost, stitch programming, and sample approval steps that behave like setup costs, even if the bag body itself is simple.
Version control matters just as much as MOQ. If the supplier is quoting multiple artwork versions, the buyer should lock one master file, one print size, and one color reference. Each change adds complexity, and complexity usually means more sample rounds, more setup, and more chance of carton-level inconsistency.
For retail chains, the best practice is to ask for pricing at two volumes: a pilot quantity and a replenishment quantity. That reveals whether the method is only viable for a test or whether it can support a national rollout.
- Ask for pilot pricing and replenishment pricing on the same sheet.
- State whether MOQ is by color, artwork version, or size.
- Lock artwork files early to avoid hidden setup and sample cost creep.
7) What a pre-production sample must prove before bulk approval
A sample that only looks good in a photo is not enough. For heavy canvas tote bags, the pre-production sample should prove that the chosen print method works on the final fabric, with the final handle construction, final finishing, and final packing. If any of those elements change later, the sample loses value as an approval tool.
The buyer should examine the sample in the same way the retail chain will handle the bulk goods. Fold it the way the distribution center will fold it. Stack it in a carton. Rub the logo. Check the bag after it has been compressed for a day or two if possible. A print method that looks strong immediately can still show weakness when the bag is put under pressure in real packing conditions.
For screen print, verify opacity, ink edge definition, and cure. For transfer methods, check adhesion at corners, edges, and any tight curves in the fabric. For embroidery, inspect thread tension, backing, and whether the stitch pattern distorts the canvas panel. For woven labels, check placement, seam integration, and whether the label frays or curls after handling.
It is also worth approving a packaging sample, not just a product sample. Retail buyers often underestimate how much a fold style, tissue insert, or polybag affects perceived quality and DC throughput. If the final pack format matters to store presentation, the sample should show that format exactly.
Where possible, keep one sealed top sample and one working reference sample. The sealed sample helps if there is a dispute later; the working sample helps the production and QC teams stay aligned during future reorders.
- Approve the final fabric, not a substitute fabric.
- Approve the final decoration route, not a look-alike route.
- Review the final packing format alongside the product sample.
- Keep a sealed reference sample and a working reference sample for reorders.
8) QC standards and acceptance metrics that matter for retail receiving
Retail receiving does not care that a product was “made carefully.” It cares whether the carton count is right, the barcode scans, the logo sits correctly, and the bag survives use. Buyers should therefore define QC in measurable terms and add those measures to the purchase order or quality agreement before production starts.
A practical inspection plan usually starts with an AQL framework. Many buyers reference AQL 2.5 for major defects and AQL 4.0 for minor defects, but the correct numbers should match the brand’s tolerance for risk and the size of the program. A small promotional order may need tighter visual control than a very large, low-margin replenishment run. The important part is consistency: whatever AQL is chosen should be shared with the factory and inspection team in advance.
For print quality, the buyer should define what counts as a defect. Examples include visible misregistration beyond the approved window, ink smearing, pinholes in solid fills, edge lifting on transfers, cracks after fold testing, or thread show-through on embroidered areas. These are not theoretical concerns; they are the kinds of issues that affect sell-through perception in-store.
For structure and durability, use a load test and a seam check. The bag should be filled to a realistic retail load and inspected for handle pull, seam opening, distortion, and bottom failure. The test load should be agreed by the buyer and supplier and should reflect how the tote is actually used. A decorative tote that only holds a soft sample load is not a meaningful approval.
Carton-level checks matter as much as bag-level checks. Count accuracy, SKU segregation, carton marks, and barcode placement should be verified before shipment release. If the chain uses DC receiving rules or chargeback systems, even small labeling mistakes can become a commercial issue.
- Set AQL expectations before production, not during inspection.
- Define print defects in plain operational language.
- Use a realistic load test for handles, seams, and bottom strength.
- Check carton count, barcode accuracy, and SKU segregation at receiving.
9) Landed-cost comparison: how to normalize quotes by method
Comparing ex-factory price alone is one of the easiest ways to make a bad sourcing call. Heavy canvas tote bags vary in freight weight, packing volume, and decoration labor, so a lower factory price can still become a higher landed cost. The right comparison method is to build a like-for-like cost sheet and then compare the total per sellable unit.
Start by normalizing the bag body. The canvas weight, finished size, handle structure, and finishing should be identical across quotes. Next, normalize the decoration: same artwork size, same color count, same print location, same label placement, and same approval standard. Then normalize packing: units per carton, inner packing materials, barcode labels, and whether the bags are folded or packed with tissue. Finally, add the commercial costs: sample fee, setup or digitizing fee, inland handling, freight, duty, and any special inspection or document charges.
This is especially important when comparing screen print against transfer or embroidery. Screen print may look cheapest per unit once the run is large, but if the buyer only needs a small pilot quantity, the setup cost can make it more expensive than a transfer. Conversely, transfer may look economical at launch but become costly when the same style is re-ordered in larger volumes. Embroidery can carry a premium, but if the brand needs a high-perceived-value item with modest artwork, that premium may still be justified.
A quote should therefore include at least these fields: bag spec, decoration spec, sample cost, setup cost, MOQ, packaging spec, carton dimensions, gross weight, lead time, and freight assumption. Without those fields, the procurement team is comparing fragments of cost rather than true options.
If the supplier cannot quote the same tote in multiple methods side by side, ask them to explain each assumption line by line. Hidden assumptions are often where margin gets lost after the PO is issued.
- Normalize body spec, decoration spec, packing, and logistics before comparing price.
- Add setup, sample, freight, duty, and handling to the per-unit math.
- Use side-by-side method quotes to reveal hidden assumptions early.
10) RFQ structure, supplier answers, and a short decision guide
A good RFQ for retail chains should make it easy for suppliers to quote the same thing. The document does not need to be long, but it should be precise. Include the bag dimensions, canvas weight, finishing, handle construction, decoration method, artwork file, color references, packing format, carton requirements, and the approval process. If the project has multiple decoration options, ask the supplier to quote each one in a separate line or table column.
The supplier answers you want are specific. For example: what is the exact screen count, what cure method is used, what is the expected color tolerance, what is the minimum acceptable print placement window, and what test does the factory use for adhesion or rub resistance? Those answers tell you whether the supplier actually understands the method or is simply reselling it.
Keep the quote discussion focused on the method that fits the commercial purpose. If the program is high volume and repeated, screen print or a hybrid print-plus-label route is usually the first place to look. If the chain is testing a seasonal design or very detailed artwork, transfer-based methods deserve more attention. If the tote is meant to feel premium and understated, embroidery or woven labeling can be the right answer. The decision should follow the artwork, volume, and retail role—not the supplier’s default machine line.
Once the method is chosen, lock the spec in writing and make the sample the contract reference. That is the simplest way to protect future reorders, control quality drift, and keep procurement from re-litigating the same choices every season.
For buyers managing multiple stores or banners, keep one master spec by SKU family and note which elements can change and which cannot. That is the easiest way to scale the program without turning every reorder into a new sourcing project.
- Ask for side-by-side quotes by decoration method on one RFQ.
- Require process-specific answers: cure, adhesion, stitch, or label performance.
- Use the approved sample as the reference for reorders.
- Document which SKU elements are fixed and which can vary.
Specification comparison for buyers
| Decision area | Screen print | Heat transfer / digital transfer | Embroidery / woven label | Best-fit buyer note |
|---|---|---|---|---|
| Typical cost band | Low to medium at volume; setup is spread across larger runs | Medium to high on small runs; can become expensive as volume rises | Medium to high depending on stitch density or label construction | Use screen print when the design is simple and the order will repeat |
| Typical MOQ range | Often 500 to 3,000+ pcs by color/artwork, lower for simple one-color jobs | Often 100 to 1,000 pcs, sometimes lower if supplier already has transfer capability | Often 300 to 1,000+ pcs depending on stitch count or label size | Ask each supplier to state MOQ by artwork version, colorway, and pack format |
| Setup time | Longest among common methods because screens, alignment, and curing must be set | Usually faster than screen print because no screen-making step, but still needs proofing | Embroidery digitizing or label weaving adds prep time before sewing | Short launch windows often favor transfer or label-based branding |
| Durability after folding and shelf handling | Good if cured correctly and if ink deposit is not overly thick | Variable; can lift, crack, or edge-peel if adhesive or film quality is weak | Very good for logo identification, but not for large filled graphics | If bags will be folded, stacked, and reopened often, ask for abrasion and fold tests |
| Color fidelity | Strong for spot colors and Pantone-matched simple art | Strong for gradients, multi-color art, and fine details | Best for simplified marks and text; woven labels have crisp edges but limited palette | Choose based on artwork complexity, not on trend or habit |
| Best artwork type | Bold logos, text, single-color icons, limited spot-color art | Photographic or gradient art, variable seasonal graphics, small text | Premium mark, wordmark, monogram, side tag, or small front logo | Match the decoration to the design file you actually have |
| Risk to check | Ink thickness, cure quality, and cracking after repeated fold cycles | Peeling, image distortion, or edge lifting under abrasion | Stiffness, puckering, or visual overkill on a simple tote | Request the supplier’s test method, not just their opinion |
| Scalability across SKUs | Very good once artwork and screen setup are locked | Good for many short-run SKUs, but unit price can climb quickly | Good for a premium family of SKUs with consistent placement | Retail chains with many store-level variants should map the method to SKU velocity |
| Retail chain recommendation | Best default for stable, high-volume programs with repeat reorders | Best for seasonal drops, design tests, and complex art on moderate volumes | Best for premium positioning, subtle branding, or hybrid decoration | Use a two-step strategy when needed: print the body, label the branding |
Buyer checklist before sampling
- State the bag spec in measurable terms: finished size, canvas weight in GSM or oz/yd², handle length, handle width, and gusset depth if used.
- Name the decoration method you want quoted first, then ask for a second method as a control quote so the factory’s assumptions are visible.
- Provide the artwork in vector format where possible and note whether the print must match a Pantone reference, a brand guide, or a retail color standard.
- Require a pre-production sample made from final fabric, final decoration method, and final packing format before bulk approval.
- Ask the supplier to confirm whether the quoted MOQ is by color, by artwork version, by size, or by combined order volume.
- Define packaging on the RFQ: bulk fold, polybag, tissue wrap, hang tag, barcode label, and master carton marking.
- Request carton dimensions, gross weight, units per carton, pallet pattern, and whether cartons are compression-tested or export-ready.
- Set measurable quality criteria for print placement, stitch density, seam strength, fabric weight tolerance, and visible defect limits.
- Ask for a landed-cost breakdown that includes setup fees, sample fees, packing materials, inland handling, and duty assumptions where relevant.
- Lock one approved reference sample and one approved spec sheet for all future reorders and replenishment buys.
Factory quote questions to send
- What exact canvas weight are you quoting in GSM or oz/yd², and is that the finished fabric after treatment or the raw fabric before finishing?
- Which decoration method is included in the price, and what is the setup fee, color count limit, and print location allowance for that method?
- Please quote the same tote with screen print, heat transfer, digital transfer, and woven label or embroidery so we can compare true landed cost.
- What MOQ applies by method, by artwork version, and by colorway, and does a higher MOQ reduce the unit price materially or only slightly?
- What sample will you provide before mass production, and will it use final fabric, final ink or thread, final label, and final packing?
- What are your accepted tolerances for finished size, print placement, handle length, and seam allowance, and what happens if pieces fall outside them?
- How do you test cure quality, adhesion, or abrasion resistance for the chosen decoration method?
- What packing configuration is included in the quote, and does it include inner pack materials, barcode labels, and carton marks?
- What is the production lead time after sample approval, and how much buffer do you recommend for peak retail season?
- Can you provide carton dimensions, gross weight, and units per carton so we can normalize freight and warehouse handling cost?
Quality-control points to confirm
- Check fabric weight against the approved spec using an agreed method and tolerance, and reject clear underweight substitution without written approval.
- Inspect print placement against a measured artwork template; set a placement window for left-right, top-bottom, and centered alignment.
- Use a simple abrasion and fold cycle check on pre-production samples: fold the printed area repeatedly, rub by hand or cloth, and inspect for cracking, lifting, or color loss.
- For screen print, verify ink coverage and cure with a dry-rub check, then a fold check, and a heat or pressure check if the tote will be packed tightly.
- For heat transfer or digital transfer, confirm edge adhesion, no peeling at corners, and no image distortion after simulated shelf handling.
- For embroidery or woven labels, check stitch density, thread tension, backing stability, and whether the decoration creates unwanted puckering on the canvas panel.
- Pull a carton-level inspection plan into the PO: AQL 2.5 for major defects and 4.0 for minor defects is a common reference point, but buyers should align the final AQL to brand risk and program size.
- Verify seam strength at handles, side seams, and bottom seams with a load test based on intended retail use; the test load should be agreed before production, not after a failure.
- Check carton drop performance on master cartons from a realistic handling height, especially if the bags are packed with a rigid insert or hang tag that could shift.
- Inspect carton count, SKU mix, barcode accuracy, and carton marks at receiving to avoid DC delays and chargebacks.