Why trade show tote bags need a different specification than retail canvas bags
A trade show tote is a logistics item as much as a branded accessory. It is handed out in volume, carried for hours, stacked in cartons, and often reused by attendees for samples, notebooks, or product literature. That means the bag has to do more than look good in a flat sample photo. It needs a fabric weight that feels substantial, stitching that survives repeated loading, and a pack format that arrives intact at the event site.
Retail tote buying often focuses on shelf appeal. Procurement for show programs has a different job: define a bag that can be produced consistently, packed efficiently, and distributed quickly without damaging the print or wasting freight cube. Heavy canvas tote bags for trade shows also have to work as branded inventory, so the spec should make supplier comparisons possible. If two vendors quote similar-looking bags but one uses lighter canvas or weaker handle reinforcement, the total value is not the same even if the logo mockup looks identical.
For that reason, this guide treats the tote as a controlled procurement item. The goal is not to over-specify every detail. It is to define the points where bag quality, cost, and event performance intersect: fabric GSM, handle construction, print method, carton pack, and acceptance criteria. Those are the variables that determine whether the order becomes a useful campaign asset or a last-minute replacement problem.
When buyers skip the operational details, the bag may still “work” in a narrow sense. But it can still arrive wrinkled, overpacked, misprinted, or too weak for the intended kit. The best specification is the one that matches the load, the deadline, and the receiving conditions at the destination.
- Trade show bags are judged in seconds at registration, then stressed for hours in use.
- The spec should protect both brand presentation and event handling efficiency.
- A useful tote order must be comparable across suppliers, not just visually similar.
Start with the load profile: what the bag must actually carry
Before choosing canvas weight, define the heaviest realistic load, not the average one. A tote for brochures and a notebook is a different product from a tote that also carries a catalog set, bottle, boxed sample, or product literature with inserts. If the bag is designed only for the lightest use case, it may pass a photo review and still fail when attendees add extra items at the show.
A practical procurement method is to classify the expected load into three bands. Light event carry is mainly paper collateral and small giveaway items. Medium carry adds notebooks, folders, and a few packaged items. Heavier carry includes boxed samples, drinkware, or multiple catalogs. That distinction matters because load drives fabric choice, handle reinforcement, and whether a gusset is needed. The cheapest answer is not always the correct one if the bag must survive more than one day of use.
Ask the buyer, event team, or marketing team for an actual contents list. What will be placed in the bag at handout? Will the bag be filled on-site by staff or handed out empty? Will the bag be used to walk the show floor all day or taken home as a reusable retail-style item? These questions sound simple, but they determine whether a 10 oz canvas is adequate or whether 12 oz, stronger stitching, or a wider handle is the safer choice.
A useful checkpoint is to require the supplier to state the recommended safe carry range in plain language, such as brochure-only, mixed collateral, or heavier sample kit. That is more helpful than a generic claim that the tote is “strong” or “durable.” Buyers need a spec tied to use, not a slogan.
- Write down the maximum intended contents before asking for price.
- Separate brochure-only bags from sample-kit bags; they are not the same spec.
- Request a supplier statement on safe carry use, not just a marketing description.
Fabric specification: how to choose canvas weight without overbuying
For heavy canvas tote bags for trade shows, a common procurement window is 10 oz to 12 oz canvas, roughly 340 to 420 GSM. That range usually gives enough body to keep the bag upright on a table, enough opacity for clean-looking print, and enough structure to avoid the limp feel associated with lighter promotional bags. If the program includes heavier contents or you want a more premium hand, 12 oz is often the more defensible choice.
The key is not simply to ask for a number. Ask whether the supplier is quoting finished GSM after any washing, dyeing, or softening process. Finished weight can differ from raw fabric weight, and a quote that does not clarify this is difficult to compare. Also ask whether the canvas is plain weave, whether it has been pre-shrunk, and whether there is any surface treatment that might affect print adhesion or hand feel.
There are tradeoffs at the edges of the range. A lighter bag can reduce unit cost and freight weight, but it may wrinkle more sharply and feel less substantial during handout. A heavier bag tends to offer better body and better perceived value, but it increases sewing effort, can push freight cost higher, and may require more careful handling during fold and pack. For event buyers, the right answer is usually the lowest fabric weight that still supports the intended contents and brand impression.
If the bag is intended for repeat use, a heavier canvas can make sense even when the handout itself is only one day. Reuse extends the visibility of the brand, but only if the bag remains functional after folding, carrying, and storage. Buyers should ask the vendor for a sample lot or at least a consistent fabric swatch showing the weave and finish, not only a finished product photo.
- 10 oz canvas suits light event kits; 12 oz is safer for mixed or heavier carry.
- Ask whether GSM is finished weight and whether the fabric is pre-shrunk or softened.
- Do not compare quotes without confirming the same fabric finish and weave type.
Construction details that separate a usable tote from a weak one
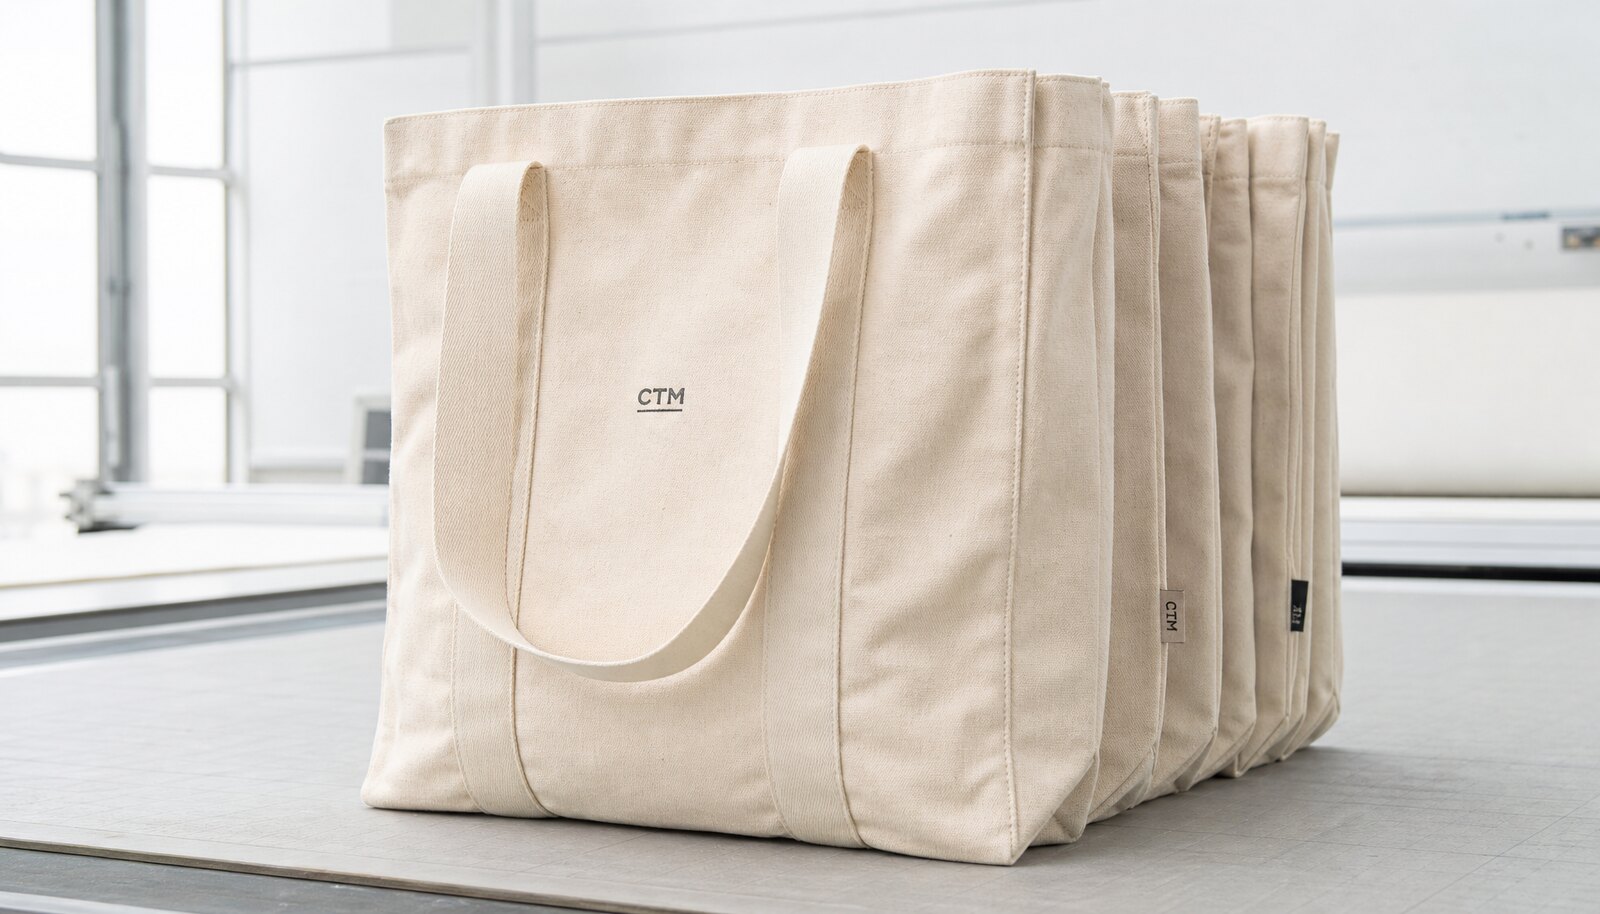
Handle and seam construction usually determine whether a tote holds up under event use. Even when the fabric is adequate, weak handle attachment can fail if the bag is loaded with brochures, a bottle, or a stacked kit. The procurement spec should state the handle material, handle width, attachment style, and reinforcement method. “Cotton webbing handle” is useful only if the width and stitch detail are also defined.
For most trade show programs, self-fabric handles or cotton webbing handles with reinforcement at the stress point are reasonable choices. If the bag will carry more weight or the brand wants a more finished appearance, ask for bar-tack or X-box reinforcement at the handle anchor. Buyers should not assume the supplier’s standard attachment is enough. The place where the handle meets the body is the area most likely to show strain, seam creep, or tearing after repeated use.
Top hem construction also matters. A clean folded hem can improve appearance and help prevent raw-edge fray, but it should be assessed together with stitch count and fabric thickness. If the hem is too bulky, it can distort the opening and make packing harder. If the seam allowance is too narrow, the bag may fray sooner than expected. For high-volume event orders, buyers should request a visible sample of the seam finish and check whether the top edge lies flat after folding.
A simple procurement rule helps here: any component that will carry load should be named, measured, and reinforced explicitly. That means handle width, seam allowance, reinforcement style, and thread color if it affects appearance. The more specific the construction note, the easier it is to compare suppliers and the less likely it is that a “similar” bag arrives with a weaker build.
- Define handle material, width, and finished length in the spec.
- Require reinforcement at load-bearing points rather than assuming a standard stitch is enough.
- Check that the top hem stays flat and does not distort the opening.
Size, gusset, and handle geometry: small dimension changes can affect the whole program
Bag size should be tied to what the event team is handing out. A tote around 38 x 42 cm, or a similar A4/letter-friendly format, is common because it fits most brochures and notebooks without appearing oversized. But a simple size number is not enough. Buyers should state whether that dimension is the finished bag size, the cut size, or the internal usable space. Those are not interchangeable, and quoting confusion often starts there.
A gusset should be added only when the contents justify it. A flat bag is simpler and cheaper, and it often works well for brochures, documents, and light giveaway items. Once the kit includes boxed samples or bulkier merchandise, a bottom gusset or side/bottom gusset improves stability and makes the bag easier to fill. The wrong gusset depth can create a bag that looks bulky when empty, so the spec should reflect the real kit, not a generic premium style.
Handle geometry affects both comfort and appearance. Short handles create a neat, compact look and keep the bag closer to the body, which can be useful in crowded event spaces. Longer handles support shoulder carry, but if they are excessive the bag can swing or hang awkwardly. Procurement should define finished handle length in a way that matches the intended carry style. If the bag is likely to be worn over outerwear, test that scenario at sample stage rather than assuming standard handle length is enough.
A good sample review checks dimensions under pressure, not only while the bag is empty. Fill the sample with the intended contents, then verify opening width, handle balance, and whether the gusset keeps the bag stable. If the tote tips over on a table or folds inward when loaded, the size spec needs adjustment before production.
- State whether the size is finished size or cut size.
- Add a gusset only when the contents need volume and stability.
- Test the bag with the actual contents before approving final dimensions.
Print method selection: matching artwork complexity to the bag’s texture and use
Print choice on heavy canvas should be driven by artwork, quantity, and durability needs. Screen print remains the most common choice for simple logos because it tends to deliver strong opacity and consistent brand color on textured fabric. It is often the most economical route when the artwork has a limited number of colors and the order volume is large enough to justify setup.
Heat transfer and digital print expand the design options. They are useful when the logo contains small type, multiple colors, gradients, or details that would be difficult to reproduce cleanly through screen printing. But buyers should treat those methods carefully on canvas. Fine print on textured fabric can lose sharpness if the transfer or ink system is not suited to the weave. Some methods also create a different hand feel, which may matter if the tote is expected to feel premium rather than promotional.
The procurement point is not which print method is “best” in general. It is which method matches the artwork and the event conditions. A design that looks clean on screen may crack when the bag is folded repeatedly. A print that is visually detailed may still disappoint if it cannot withstand abrasion from cartons, warehouse stacking, or day-long attendee use. Ask the supplier to describe the curing method, the expected rub resistance, and whether there are limits on fine line thickness or minimum text size.
For comparability, the RFQ should specify print position, print size, color count, and the acceptable movement range relative to seams or the bag centerline. If the logo must appear exactly on the panel center, say so. If some tolerance is acceptable, define it in millimeters. That reduces disputes and helps the factory set screens or transfer alignment correctly.
- Use screen print for simple, high-volume branding when durability matters.
- Use transfer or digital methods when the artwork requires more detail, but confirm flex and rub resistance.
- Specify logo size, location, and registration tolerance in millimeters.
MOQ, pricing breaks, and how to compare quotes without getting misled
MOQ is not just a factory rule; it reflects fabric cutting efficiency, print setup, and sewing line planning. Buyers sometimes focus on the lowest unit price at one quantity, only to find that the order size required to get that price exceeds the event need. If the tote is for a single trade show, leftover stock can become its own cost. The real question is not “What is the cheapest bag?” but “What is the lowest-risk quantity at a fair landed cost?”
A better RFQ structure is to ask for pricing at two or three realistic points: a pilot quantity, a standard event quantity, and a larger annual run. That reveals whether the supplier’s cost curve is driven mainly by setup or by real scale savings. It also exposes hidden charges for screens, plates, custom labels, or carton changes. If the quote jumps sharply between quantities, ask which cost elements are fixed and which are variable.
For trade show programs, quotation comparisons should use like-for-like conditions. The same fabric weight, same handle material, same print method, same pack method, and same carton count per master carton should be compared together. If one vendor quotes the bag only and another includes inner packing and export cartons, the apparent price difference is not meaningful. Procurement should ask for a line-item breakdown or at least a fully written spec summary attached to the quote.
Another useful threshold is the cost of nonconformance. A slightly cheaper tote that arrives with poor print cure, weak seam finishing, or packing errors can cost more once rework, replacement freight, and event damage are included. Buyers should compare not only the quote total but also the probability of acceptance at receiving.
- Request price breaks at realistic quantities, not only the headline MOQ.
- Compare quotes on the same fabric, print, handle, and pack specification.
- Treat poor packing or high reject risk as a real cost, not an afterthought.
Packaging specification: the part buyers under-specify most often
Packaging is where many tote orders become operationally messy. Heavy canvas tote bags for trade shows are commonly packed flat in export cartons, but the folding method should still be specified. If the bag is folded arbitrarily, the print can crease in the same place on every unit, and the top edge may not sit neatly when the bag is displayed after unpacking. A simple folding instruction with a reference photo is often enough to prevent this.
Carton size matters because it affects freight cube, warehouse handling, and the chance of over-compression. Buyers should request carton dimensions, piece count per carton, and gross weight. If the carton is too small, the bags may be crushed and the print can show permanent fold marks. If the carton is too large, empty space can cause shifting and carton damage during transit. For destination handling, it is worth setting a gross weight ceiling that suits the receiving warehouse and event team, especially if cartons must be carried by hand or moved up stairs.
Master carton labeling should not be an afterthought. Require SKU, bag color, size, PO number, piece count, and country of origin if needed by the destination process. If the event warehouse needs easier intake, add carton sequence numbers and ship-to details. In some programs, palletization is more important than individual carton appearance because the shipment will be transferred several times before the show. If palletizing is required, specify pallet pattern, overhang limit, stretch-wrap method, and whether corner boards are needed.
Inner polybags are optional in many canvas tote programs. They can protect print, but they also add labor, plastic, and waste. Use them only when storage time, surface scuffing, or destination cleanliness rules justify the extra step. If you do use an inner wrap, define whether it is loose, sealed, or bundled so the supplier knows the actual packing standard.
- State the fold method, cartons per case, and maximum carton weight.
- Require carton labels that include SKU, size, PO number, and piece count.
- Add pallet and overpack instructions when destination handling is complex.
Quality control: build an inspection plan that catches tote failures early
QC should start with the approved sample and translate into measurable checks on the production run. A useful framework is to separate critical, major, and minor defects before production begins. Critical issues would be things that make the bag unusable or unsafe, such as handle failure, severe seam opening, or incorrect size that prevents the intended kit from fitting. Major issues would include off-center print, obvious fabric substitution, or missized cartons. Minor issues would be cosmetic flaws such as small thread tails or slight shade variation within an agreed range.
The most common generic QC language is too soft for procurement. Buyers should ask for a more practical inspection method. For example: check stitching for uniformity, verify the seam allowance on random units, inspect the handle anchors under a pull test, and confirm that print cure passes a folding and rub check. If the ink system supports it, a simple tape pull can show whether the print is adequately bonded. None of these tests require lab equipment, but they provide a much better signal than visual inspection alone.
AQL-style acceptance language can also be used if the supplier is familiar with it. The exact numbers should be agreed in the order, but the buyer should at least define the idea: zero tolerance for critical defects, a low acceptable limit for major defects, and a controlled limit for minor defects. That gives receiving teams a workable decision rule. The same logic applies to pack-out checks. Count pieces per carton, confirm the master carton label, and verify that the carton count matches the packing list before shipment leaves the factory.
If the destination is a show warehouse, consider an overpack or pallet test at the sample stage. Cartons are often stacked, scanned, moved, and reopened multiple times. A carton that looks good at the factory may fail in transit if it is underfilled, overfilled, or weak at the corners. Packaging QC is not just about neatness; it is about avoiding delivery friction when time is already tight.
- Use critical / major / minor defect categories before production starts.
- Inspect stitching, handle anchors, print cure, and carton count—not only appearance.
- Write pack-out acceptance rules so the receiving team can make a clear pass/fail decision.
Lead time, schedule buffers, and the real causes of tote delays
Lead time for canvas tote programs is usually driven less by sewing speed than by decision timing. The order slows down when artwork is late, sample approval takes multiple rounds, or the packing spec changes after production planning has started. Buyers often underestimate how much time is lost when a handle length changes by a few centimeters or when the logo position is adjusted after the first sample. Those changes can be small in design terms but large in production terms.
A workable schedule has three separate blocks: sample development, mass production, and shipping. The sample stage should be completed before final artwork approval if possible, because the blank or printed sample can reveal real issues with proportion or stiffness. Once the sample is approved, freeze the construction spec. If the show date is fixed, add a buffer for freight delay, warehouse intake, and any corrective action if cartons arrive with packing issues.
Procurement should also ask the supplier how they manage rush periods. A factory that promises very fast delivery without discussing artwork status, print complexity, or carton requirements may be quoting a standard routine rather than your exact order. A more credible supplier will ask specific questions about approval timing, ship-to destination, and whether cartons need palletization or direct event delivery. Those questions are a good sign because they show the factory is thinking about the actual delivery process, not only the sewing line.
If the tote is part of a larger trade show kit, coordinate the bag schedule with the rest of the kit. Tote delays can hold up inserts, badges, or boxed samples even when those items are ready. The best way to prevent that bottleneck is to lock the tote spec early and keep the event team from re-opening construction decisions unless there is a genuine functional issue.
- Separate sample time, production time, and freight time in the project plan.
- Freeze the construction spec early; late geometry changes often trigger delay.
- Coordinate tote timing with the rest of the event kit, not in isolation.
Specification comparison for buyers
| Buying route | Best use case | Pros for procurement | Tradeoffs / risk to check | Measurable acceptance criteria |
|---|---|---|---|---|
| Direct factory with tote sewing line | Repeat programs, custom print, carton control, and price negotiation | Clearer control over fabric, stitching, sample approval, and carton packing; easier to align spec and production | Confirm the supplier actually cuts and sews the bag, not only sourcing finished stock; check whether they own print capacity or outsource it | Factory should provide a technical sheet, sample lead time, carton spec, and written tolerance for size and print placement |
| Trading company / sourcing agent | Multi-item campaigns, mixed accessories, or buyers needing coordination across several SKUs | Can manage communication, consolidate items, and coordinate shipment timing | Spec can become diluted between buyer and actual factory; ask for the factory name and production role | Must disclose the producing factory, fabric spec, and packing method in writing; no quote should rely on marketing wording only |
| Local decorator / print shop with blank-bag supply | Short runs, rush events, or very small custom logo programs | Fast turnaround for simple branding and local logistics | Blank bag quality may vary by batch; handle strength and seam quality must still be verified | Need sample of blank bag, print adhesion check, and carton count confirmation before award |
| Import-distributor stock program | Strict deadlines when customization is limited and arrival date matters more than a fully custom build | Simple ordering and less development work; often easier for small teams | Limited control over fabric weight, handle length, and carton pack; may not match event kit needs | Require confirmation of exact stock SKU, fabric weight, logo method, and carton quantity before PO |
| Factory-direct with custom packing instructions | Large events with fixed warehouse intake rules, palletization needs, or destination labeling requirements | Best option when event teams need bags packed a certain way for faster counting and handling | Packing instructions must be frozen early; changes can delay shipment or cause carton rework | Need carton dimensions, gross weight limit, fold orientation, and master carton label format approved before production |
| Material | 8-12 oz cotton canvas, 120-220 gsm cotton, recycled cotton, or blended fabric selected by use case and target price | Before price comparison | Different cloth weights, backing, or certification claims make quotes hard to compare | |
| Construction | bag size, gusset, handle drop, seam allowance, stitch density, reinforcement patch, and loading expectation | Before sampling | Weak stress points create returns and failed inspections | |
| Decoration | screen print, heat transfer, embroidery, woven label, or hangtag matched to fabric texture and brand durability needs | Before artwork approval | The wrong method can crack, bleed, pucker, or fail on the chosen fabric |
Buyer checklist before sampling
- Final finished size, including tolerance in centimeters or millimeters, plus whether the size is measured flat or opened
- Fabric composition, finished GSM, weave type if relevant, and whether the canvas has been washed, dyed, bleached, or softened
- Handle type, handle width, finished handle length, attachment method, and reinforcement details at the stress points
- Stitch requirements, including seam allowance, top hem construction, and whether bar-tacks or X-box reinforcement are required
- Print method, number of colors, print placement, artwork size, and acceptable registration tolerance
- Carton pack quantity, folded orientation, inner wrap yes/no, carton size target, and maximum gross weight
- Quality approval path: blank sample, printed sample, and pre-production sample if the design or packing is new
- Destination handling: warehouse receiving, show-floor distribution, palletized delivery, or direct-to-event shipping
Factory quote questions to send
- What exactly is the finished canvas spec: GSM, yarn count or weave density if available, and whether the fabric weight is after finishing or before finishing?
- What is the finished bag size and tolerance, and are those dimensions measured before or after pressing/folding for packing?
- What handle material are you quoting, what is the handle width, and how is each handle attached to the body?
- What seam reinforcement is included at the handle anchor points: bar-tack, X-box, or another method, and how many stitches per reinforcement area?
- What print method is included in the price, how many colors and print locations are covered, and what registration tolerance can you hold?
- Can you provide carton dimensions, pieces per carton, carton gross weight, and whether cartons are export-grade single wall or double wall?
- What is your sample process, what is charged for blank and printed samples, and which approved sample becomes the production reference?
- If we change only carton pack, handle length, or print coverage, which part of the quote changes and how much?
- Do you make the tote body and handles in-house, and which processes are outsourced if any?
- What inspection standard do you use before shipment, and do you accept buyer-specific AQL or defect criteria?
Quality-control points to confirm
- Fabric should match the approved GSM within a clearly stated supplier tolerance; any substitution should be pre-approved in writing rather than treated as equivalent.
- Body dimensions should be checked against a pre-agreed tolerance, and the check should be done on finished bags, not cut panels.
- Stitching should be inspected for straight seams, no skipped stitches, no loose thread tails, no seam puckering, and no needle damage around load-bearing points.
- Handle anchors should be pulled manually during inspection; the bag should not show tearing, seam opening, or obvious distortion at the stress points.
- For event bags, an AQL-style acceptance rule should be written into the order. Buyers commonly ask for critical defects at zero tolerance, major defects under 2.5, and minor defects under 4.0, but the exact plan should be agreed with the supplier and inspection team before production starts.
- Print adhesion should be tested by folding the bag at the print line, rubbing with a clean cloth, and checking for cracking, smearing, tackiness, or color transfer after curing.
- A simple tape pull or rub test should be used on the approved sample when the ink system allows it; if the print flakes or lifts, the batch should be reviewed before shipment.
- Carton count must match the packing list exactly. Count each carton, verify piece count per carton, and check that the carton label matches the SKU, color, size, and PO number.
- Cartons should be checked for compression, corner crush, puncture, and water damage risk. If bags are packed flat, the fold should not create a permanent crease across the print area.
- For destination handling, require overpack or pallet checks when cartons are transferred multiple times. Cartons should survive reasonable warehouse handling without seams bursting or labels rubbing off.