Why museum giveaway totes need a different buying spec
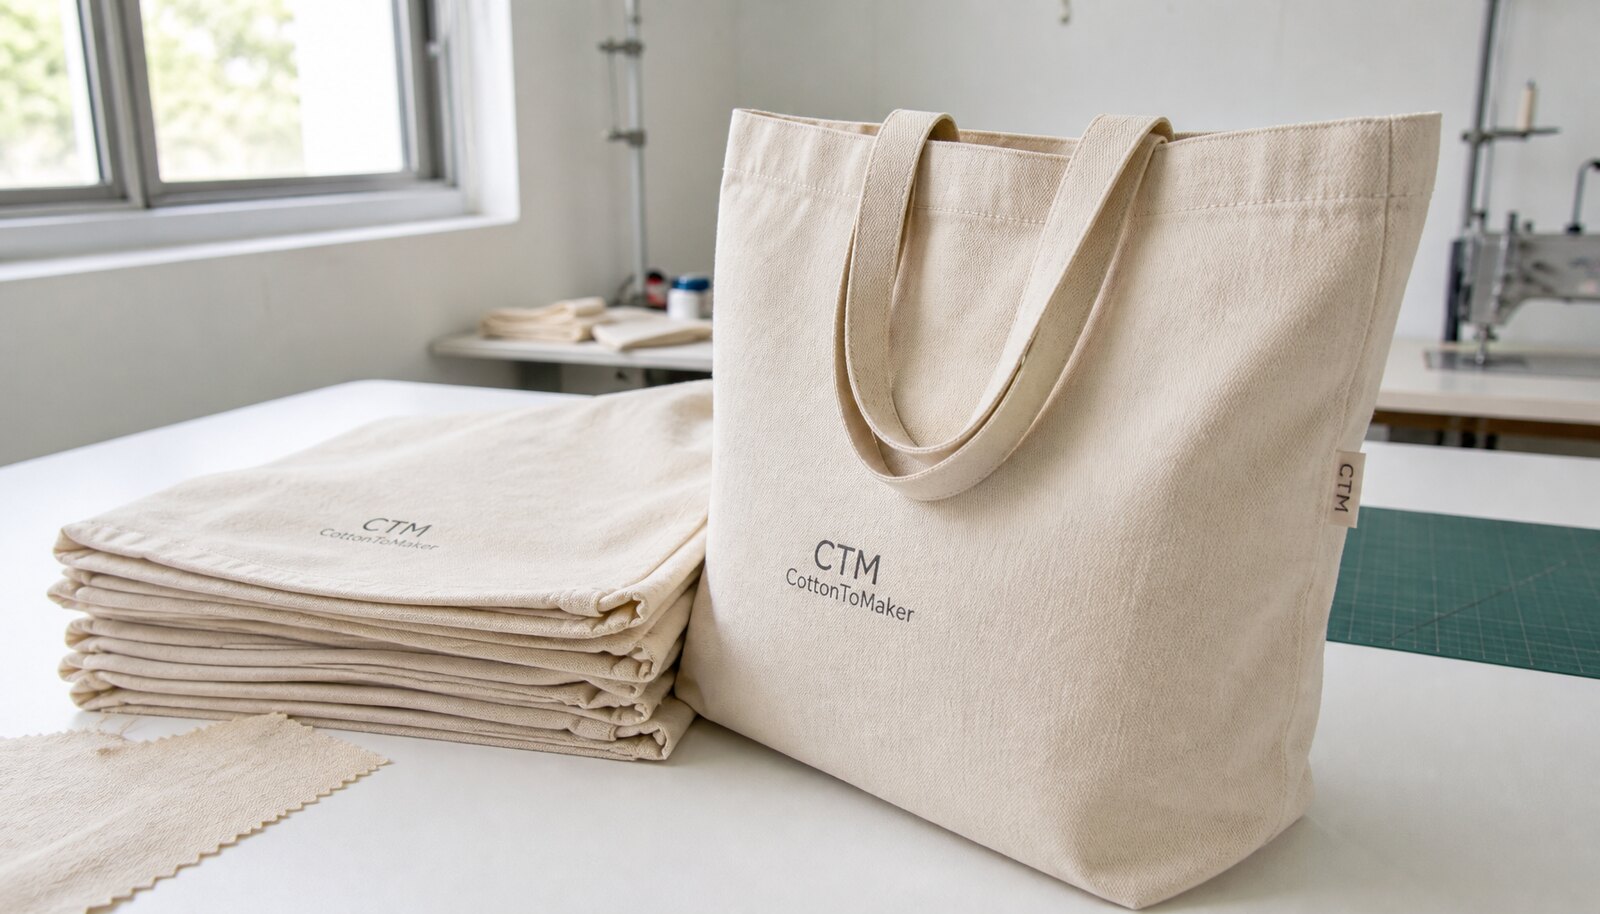
Heavy canvas tote bags for museums are not ordinary promotional handouts. They are expected to carry exhibition catalogs, brochures, member materials, notebooks, and sometimes a retail purchase without sagging or twisting. They also function as a visible brand object in the lobby, the museum shop, and on the street after the event. Procurement has to evaluate the bag as both a utility item and a presentation item.
That dual role changes the buying logic. A tote handed out at a donor preview is not the same as one used for public opening day traffic. A bag meant for catalog distribution needs a stable opening, dependable handle attachment, and enough body to stay upright while being packed. A bag for retail resale needs cleaner finish quality, tighter visual consistency, and more careful carton presentation.
The right source spec starts with use case, not artwork. If the team knows whether the bag will be handed out flat at registration, loaded with catalogs at a check-in table, or sold through the museum shop, the rest of the specification becomes much easier to defend internally. In practice, the most useful questions are: what is being carried, how often will the bag be reused, what level of finish is acceptable, how it will be packed, and who owns each step of the order.
Museums also need to think about how the tote will be perceived. If the bag feels too thin, the giveaway can read as low value. If it feels too heavy or stiff, shipping and storage may become harder than the event budget allows. The best answer is usually in the middle: sturdy enough to survive real use, refined enough to reflect the institution, and simple enough to source repeatedly without production confusion.
A well-written tote brief should therefore be practical rather than promotional. It should tell a supplier what the bag must do, what it must look like, and what it must survive after it leaves the event table.
- Define the bag’s job: giveaway, member gift, catalog carrier, or retail item.
- Set the expected load before approving bag size and handle style.
- Treat seam strength, print durability, and packing quality as part of the guest experience.
- Write the spec so it can be reordered later without re-interpretation.
Choose fabric weight around the payload, not around the catalog photo
For museum programs, the most practical heavy-canvas range is usually 12 oz to 14 oz, or roughly 340 to 475 GSM depending on weave and finishing. That range generally gives enough body for event materials while avoiding the excessive stiffness that can make a tote awkward to fold, ship, or store. If the tote will hold a catalog, booklet set, and a small retail item, 13 oz to 14 oz is often the safer starting point. If it is mostly carrying light inserts, a well-made 12 oz version may be enough.
The useful number is the finished fabric weight, not a vague marketing label. Two suppliers can both describe a tote as heavy canvas while one is using a denser finished cloth and the other is relying on a loose weave or surface finish to create the appearance of weight. Ask for the finished GSM or ounce weight after any washing, dyeing, or shrinking process. If the supplier cannot state that clearly, the quote is not yet comparable.
Weave quality matters as much as weight. A heavy bag made from uneven cloth can still show thin lanes, slubs, or irregular texture that affect print appearance. On natural canvas especially, buyers should ask whether the cloth is piece-dyed, yarn-dyed, washed, or pre-shrunk. Those decisions influence shrinkage, tone variation, and how crisp the logo looks after sewing and packing.
There is also a freight and handling angle. A heavier bag often looks more substantial and carries more, but it increases carton weight and can raise freight costs if cartons are overpacked or if individual wrapping is added. That does not mean heavier is wrong. It means the buyer should decide whether the added structure is worth the landed cost for the event format. For a one-night gala, the premium feel may justify it. For a large public opening, the budget may favor a balanced mid-weight bag with reinforced seams instead.
When comparing suppliers, keep the conversation focused on finished fabric, density, and load performance. Ask for a sample filled with realistic materials, then check whether the bag sags, twists, or becomes awkward to carry. A tote that behaves well when empty can still fail the real-world test once it is loaded with printed materials and an insert.
- 12 oz / 340 to 380 GSM: suitable for moderate inserts and more cost-sensitive events.
- 13 oz / around 400 GSM: a balanced choice for catalogs and premium giveaways.
- 14 oz / 450 to 475 GSM: better for heavier loads and more structured presentation.
- Ask for finished fabric weight, not only a raw cloth or base-yarn description.
Map the buyer routes: factory, trader, distributor, or hybrid
The sourcing route affects more than price. It determines who owns the fabric decision, who handles print setup, who responds if there is a defect, and how easy it is to reorder the same tote later. Museum procurement teams often compare several quotes without noticing that the quotes came from different business models. That makes pricing look comparable when the real risk profile is not.
A direct factory is usually the strongest route when the museum wants tight control over construction. The factory can usually lock the same cloth, handle attachment, seam construction, and packing format from one run to the next. That matters for annual exhibitions, membership programs, and repeat visitor campaigns. It also makes it easier to request a preproduction sample that reflects the final goods rather than an approximation assembled from borrowed stock.
A trading company or sourcing agent can be helpful when the buyer needs a broader program handled through one contact point. That route may reduce internal coordination time if the museum is buying the totes alongside lanyards, notebooks, or other event materials. The tradeoff is transparency. The buyer needs to know which party is actually making the bag, which party is approving the sample, and which party will correct a defect if the first bulk shipment misses spec.
Domestic distributors are often best for speed and simplicity. If the event is close, customs risk or ocean transit may not be acceptable, and a local supplier can provide faster turnaround and easier invoicing. The cost per unit may be higher, but the total procurement burden can be lower when the museum values certainty over scale. The key is to ask whether the item is stock, semi-custom, or fully custom. Those categories have very different constraints on fabric choice, print method, and replenishment.
A hybrid model can also be sensible for larger institutions. The factory produces the bags, while a local partner receives, stores, and releases them by event date or venue. That works when the museum needs staged deliveries or wants a safety stock for late additions. It also helps when multiple departments will use the same tote over several months. In that case, procurement should ask who holds inventory risk, how storage is billed, and who checks cartons before release.
- Direct factory: strongest for repeatability and detailed construction control.
- Trading company: useful when the buyer wants one interface for multiple items.
- Domestic distributor: best when speed and local fulfillment matter more than unit cost.
- Hybrid model: useful for staged delivery and inventory staging across events.
Use a real comparison framework before shortlisting suppliers
A side-by-side sourcing comparison should help the buyer decide which route deserves a sample request, not merely which tote spec looks nicest on paper. For museum event planning, the most useful comparison looks at commercial structure, accountability, and the level of control each supplier can realistically offer. A low price is only meaningful if the same fabric weight, print method, and packing standard are included in the offer.
One practical way to compare suppliers is to score them on five items: clarity of production ownership, sample reliability, quote transparency, ability to hold a repeat order, and responsiveness on production issues. A factory may score highest on production ownership but lower on response time if communication is slow. A trader may respond quickly but require more follow-up to confirm the real production source. A distributor may offer the easiest logistics but less flexibility on construction changes.
The buyer should also ask whether the supplier can support the total program, not just the tote itself. If the museum needs a box label, barcode, retail sleeve, or phased release by venue, the supplier’s capability matters beyond the bag body. When the quote is reviewed only as a unit price, those support needs often appear too late and become add-on costs.
Do not compare suppliers solely by lead time. A short lead time is useful only if the bag still meets the approved spec. Ask how many production steps are already committed, whether the fabric is in stock, and whether print screens or packaging components still need approval. The route that appears slower on paper may actually be more dependable if it has fabric in hand and clearer control over sampling.
For procurement records, the best comparison sheet is one that records route, included assumptions, sample support, production ownership, risk ownership, and whether the supplier can reproduce the same tote on a reorder without retooling. That gives the museum a cleaner basis for later buying decisions.
- Compare suppliers by route, accountability, and quote completeness, not just unit price.
- Record which steps are in-house, outsourced, or re-badged under a trading name.
- Use the same spec version when comparing prices so no supplier is advantaged by missing assumptions.
- If a supplier cannot explain sample ownership, treat that as a sourcing risk.
Match the print method to artwork complexity and canvas texture
Heavy canvas is textured enough that decoration choice matters. For a simple museum logo or one-color event mark, screen printing is usually the strongest starting point because it delivers solid coverage, relatively good durability, and predictable pricing at scale. It also works well when the tote is meant to look clean and restrained rather than highly illustrated. For many institutions, that is enough.
When the artwork includes gradients, fine detail, or a full-bleed illustration, the buyer may need to consider heat transfer or digital printing. Those methods can reproduce more detail, but they should be approved on the actual fabric, not on a flat design file. On rougher canvas, the image can look different in brightness, edge sharpness, and hand feel. A supplier should show a strike-off or production-style sample before bulk approval.
For smaller premium runs, a woven label, stitched patch, or side tag may be better than a large printed panel. These finishes can make the tote feel more like a retail item and less like a standard promo giveaway. They may also be helpful when the institution wants a quieter design language or when the artwork is not suitable for a large print field. The added sewing step is a cost, but it can reduce risk if the museum is sensitive to ink cracking or color mismatch.
The important procurement question is not only what print method looks best, but what print method will remain acceptable after handling. If the bag will be folded, packed, handed out, and used repeatedly, the decoration should survive friction, creasing, and normal wear. That is why buyers should ask for rub resistance, adhesion notes, and any available care guidance, especially if the bag will be sold in the museum shop rather than handed out once at the door.
Artwork placement should also be written clearly. Centered prints, off-center prints, and vertical logo layouts all have different setup requirements. The spec should show the print area size, the distance from seam to artwork edge, and the acceptable location tolerance. That removes guesswork and helps the factory avoid shifting the print when the tote body is cut or sewn.
- Screen print: best for simple logos, fewer colors, and cost efficiency.
- Heat transfer or digital print: better for fine detail, but must be strike-off approved on the actual canvas.
- Woven label or patch: useful for premium presentation and lower visual wear risk.
- Specify print area, print placement, and allowable location tolerance in the PO.
Write the quote around real cost drivers, not just the unit price
A quote for heavy canvas tote bags should be structured so the buyer can see where the money goes. The ideal quotation separates fabric, sewing, print setup, sample cost, packaging, carton format, and freight assumptions. If those items are blended into one line, it becomes hard to tell whether two suppliers are offering the same product. A low unit price may simply mean that the quote excludes inner packing, color matching, or export cartons.
Fabric weight is one of the main price drivers, but not the only one. A natural canvas tote is usually less expensive than a custom dyed tote because it avoids dyeing risk and extra processing. Handle construction, gusset depth, and reinforcement also affect labor time. A tote with a neat box stitch or stronger bar-tacks will usually cost more than a simple sewn handle, but the added durability can be worth it when catalogs or heavier inserts are involved.
Decoration changes the economics too. A one-color screen print is usually the most efficient starting point. Multiple colors raise setup work and can introduce registration risk. Large print areas consume more ink and may require more careful press control. If the museum expects the bag to be photographed or displayed often, a cleaner finish may justify the added cost. Procurement should ask for the price impact of each color change and each size change rather than accepting a single blended number.
Packing can quietly change the landed cost. Flat packed bulk cartons usually ship more efficiently than individually sleeved totes. If the museum wants a premium presentation, ask for the cost of tissue, insert cards, sleeves, or polybags as separate options. The difference can matter as much as the print cost on small and mid-sized orders. The same is true for carton printing and carton marks: those items are not always included unless the buyer asks for them.
The useful comparison is landed value, not just the factory price. That means the buyer should look at production cost, packing, inland movement, freight method, duties if relevant, and receiving work on arrival. A quote that seems more expensive may actually be better if it reduces rework, speeds receiving, or prevents waste from overpacked cartons.
- Ask for separate lines for fabric, sewing, print setup, sample, packing, and freight assumptions.
- Check whether natural, dyed, or washed fabric changes both price and lead time.
- Request unit price changes by print color count and print area size.
- Compare landed cost, not only the factory price.
- Ask whether sample charges are deductible from bulk order value or billed separately.
Set MOQ with the event calendar and storage plan in mind
MOQ should be treated as a planning tool, not as a fixed truth. A museum might need only a few hundred bags for a single opening, but the factory’s minimum may be higher because cutting waste, screen setup, and packing labor need to be spread over enough units to make the order efficient. The right answer depends on whether the bag is a one-time event item or part of a recurring program.
For a one-off exhibition, a moderate MOQ can still make sense if the design is evergreen enough to use for the museum shop or later events. But if the artwork is tied tightly to one show date, buyers should avoid overcommitting. Dead stock ties up storage space and can create internal pressure to discount or discard the remaining bags. The safer approach is to order just enough to cover the event plus a small reserve for replacements, media, or VIP additions.
When reviewing MOQ, ask whether the minimum changes by color, print method, or packaging. Many suppliers advertise a low MOQ for a plain natural tote, but the real production minimum rises if the museum wants a custom fabric color, multi-color print, or retail sleeve. That does not mean the supplier is being difficult; it means setup complexity has changed. Procurement should capture those thresholds in writing so the team understands what changes trigger a higher minimum.
The storage plan matters because a tote is bulkier than many small promo items. Even if the order quantity is affordable, it may consume more space than the museum can comfortably hold. That is especially relevant for institutions that receive goods at a central warehouse and then redistribute by department or event date. If space is limited, it may be better to split the order into a first batch plus a replenishment clause, provided the supplier can hold the same fabric and print standard for the second run.
A practical way to reduce overbuying is to link quantity to attendance and distribution method. A controlled donor event may justify a smaller, higher-quality bag. A public opening with large footfall may need a bigger run, but the bag may also need to be simpler so the total budget stays in range. The right quantity is the one that balances attendance, budget, storage, and likelihood of reuse.
- Typical starting range for custom museum programs: 500 to 1,000 pcs, depending on event size.
- 1,000 to 2,000 pcs can improve pricing when the design is evergreen and storage is available.
- Ask how MOQ changes by color, print count, packaging, and handle construction.
- Avoid ordering a quantity that creates dead stock after a one-time exhibition.
Approve samples as production tools, not as display pieces
A good sample is not just a nice-looking tote. It is the production reference that will be used to judge the bulk order. That is why the approval sample should use the final fabric, final handle construction, final print method, and final packing style. A flat mockup or a hand-finished show sample may hide issues that only appear once the actual run begins.
The most useful sample review is tactile and measurable. The buyer should check dimensions with a ruler, feel the fabric weight, inspect the seam finish, and load the tote with the real event contents. If the bag is meant to carry a catalog and brochure packet, fill it with those items and carry it by the handles. This reveals whether the handle drop is comfortable, whether the opening stays usable, and whether the bag twists under load.
Print approval should happen on the actual cloth, not only on a PDF proof. Canvas texture can soften edges, shift color perception, or change the apparent darkness of the ink. The sample should show whether the logo is centered where expected, whether the impression is clean over the weave, and whether the ink finish is consistent across the print area. If the artwork has small type or thin lines, inspect it closely from normal viewing distance rather than only at arm’s length.
If the sample includes any label, patch, or secondary decoration, inspect that element too. Labels can twist, stitch unevenly, or sit too close to a seam if the body pattern is not designed carefully. This is particularly important for museum programs because the bag often needs to look polished from both sides, not only from the main-logo face.
Once the sample is approved, freeze the version. Record the sample date, fabric weight, print reference, handle length, and packing method. If the buyer later changes the artwork or size, that should trigger a fresh approval. That discipline prevents confusion when the museum wants to reorder the same tote months later.
- Approve a physical preproduction sample, not only a digital proof.
- Fill the sample with realistic event materials before signing off.
- Record the approved sample version, date, and measurement set.
- Any change to fabric, size, artwork, or packing should trigger re-approval.
Specify packing, carton marks, and shipping details before the order starts
Packing has a larger effect on total cost than many museum buyers expect. Heavy canvas tote bags are often best packed flat in bulk cartons, especially when they are being handed out at an event rather than sold individually. Flat packing reduces cube, keeps handling efficient, and usually lowers freight costs. If the tote is going into a shop or VIP gift kit, individual polybags or a retail sleeve may be justified, but they should be treated as a conscious upgrade, not as a default.
Ask the supplier to provide carton dimensions, gross weight, pieces per carton, and the packing configuration. Those numbers help the buyer estimate freight and receiving labor before the goods are shipped. They also help the warehouse plan how the cartons will be shelved or moved on arrival. Overpacked cartons can crush the fabric and create handling issues, while underfilled cartons waste space and make shipping unnecessarily expensive.
Carton marks should be simple and useful. At minimum, they should reference the PO number, color, size, and carton sequence. If the order includes multiple event destinations or phases, the carton labels should make sorting easy. That reduces receiving errors and helps the museum team identify the right cartons without opening everything at once.
Shipping mode should be decided with the event calendar in mind. If the event date is fixed and the lead time is tight, the buyer may need to compare air freight, sea freight, or a hybrid approach. The packing data from the supplier should make that comparison realistic. A tote order that looks inexpensive at the factory can become costly if the cartons are bulky or if the shipment cannot be booked in time because packing details were not finalized early.
For larger programs, ask whether the supplier can ship a small finished lot first and hold the balance, or whether a phased release is possible. That can be useful when the museum wants inventory staged for several event dates instead of receiving everything at once.
- Flat pack is usually the most efficient format for event giveaways.
- Use individual polybags or retail sleeves only when presentation justifies the added cost.
- Require carton dimensions, gross weight, and carton sequence in the quote.
- Match carton marks to the PO and receiving plan.
Build a realistic production timeline and protect it with checkpoints
Lead time on paper is not the same as lead time in practice. A realistic timeline for custom heavy canvas tote bags often includes sample development, sample correction if needed, bulk production, quality inspection, packing, and transit. The commonly quoted 7 to 14 days for sampling and 25 to 45 days for bulk after approval is a planning range, not a promise. Museum procurement should treat it as a baseline and then add buffer time for artwork finalization and transport.
The most common schedule risk is late decision-making. If the logo changes after the sample is already made, the factory may need to remake screens, revise print setups, or adjust sewing sequence. A small design change can therefore affect several steps downstream. The same is true for packing artwork and carton labeling, which are often left to the end even though they are required before shipment can leave the factory.
To keep the plan stable, set internal checkpoint dates. One date for final artwork, one for sample approval, one for carton mark approval, and one for freight booking. If the museum has multiple internal reviewers—marketing, exhibitions, development, and retail—those checkpoints help keep the order from drifting. The supplier should also be told which person has final approval authority so there is no confusion when the sample arrives.
Transit should be planned as part of production, not after it. If the event date is fixed, the buyer should work backward from the arrival deadline, not forward from the purchase order date. That gives a more honest picture of whether air, sea, or domestic shipment is needed. A tote bag that is cheap to make but late to arrive is not a good buy.
The safest procurement habit is to ask for the supplier’s real bottlenecks. Some factories are slowed by fabric procurement, others by printing, others by sewing line availability, and others by carton production. Knowing the bottleneck makes it easier to protect the schedule with early approvals or material lock-in.
- Use separate dates for final artwork, sample approval, packing approval, and shipment booking.
- Treat the supplier’s quoted lead time as a baseline, not a guarantee.
- Ask which production step is most likely to slow the order.
- Work backward from the event date and include transit time from the start.
Specification comparison for buyers
| Sourcing route | Best fit for | Commercial strengths | Procurement risks to check |
|---|---|---|---|
| Direct factory | Repeat museum programs, custom construction, controlled packaging, and reorders | Best control over cloth, stitch construction, print setup, and carton format. Easier to keep the same body size and reinforcement details across annual events. | Confirm which steps are truly in-house. Ask who owns sample approval, who signs off on color, and who remakes stock if the lot fails inspection. |
| Trading company / sourcing agent | Multi-item programs, mixed product baskets, or buyers who need one point of contact across several SKUs | Can simplify communication when the tote is one part of a larger event kit. Helpful when the museum needs multilingual coordination or bundled purchasing. | The quoted producer may not be the real maker. Clarify who controls fabric choice, print approval, and defect correction before PO release. |
| Domestic distributor / promotional supplier | Short lead times, smaller runs, and buyers needing local invoicing or quick reorders | Reduces customs complexity and can shorten the path from PO to delivery. Often helpful for urgent openings or small replenishment runs. | Ask whether the tote is stock, semi-custom, or fully custom. Domestic quotes can hide constraints on fabric origin, decoration method, and replenishment limits. |
| Hybrid import program with local fulfillment | Large events, staged launches, and repeat annual campaigns where inventory needs to be released in phases | Combines factory economics with local delivery timing. Useful when cartons must arrive early and be released by event date or venue. | Check who carries inventory risk, who pays storage, and whether the first shipment covers approved sample, safety stock, and local receiving costs. |
| Material fit / spec baseline | 8–14 oz cotton canvas, recycled cotton, or cotton-blend canvas selected for payload and budget | Helps buyers compare apples to apples by tying material to the bag’s real carrying job rather than a marketing description. | Different finishing methods, shrink behavior, or certification claims can make quotes non-comparable if the spec is too loose. |
| Construction fit / load performance | Bag size, gusset depth, handle drop, seam allowance, and reinforcement requirements | A clear construction brief reduces failures at handle pull, seam slippage, and mouth distortion when bags are loaded with catalogs. | Weak stress points are often invisible in quotes; ask for stitch details and reinforcement drawings before sampling. |
| Decoration fit / brand use | Screen print, heat transfer, embroidery, woven label, or hangtag matched to fabric texture and use case | Choosing the right decoration method improves durability, visual clarity, and perceived quality without overspending on unnecessary finish. | The wrong method can crack, bleed, pucker, or sit poorly on textured canvas if it is not tested on the actual cloth. |
| MOQ fit / order planning | Base MOQ plus change drivers | Helps procurement understand where the minimum comes from and how to balance quantity against storage and event demand. | Custom colors, trim changes, or retail packaging can raise minimums; the supplier should state those triggers clearly in writing. |
Buyer checklist before sampling
- Define the tote’s real job first: visitor giveaway, member welcome gift, VIP packet carrier, retail souvenir, or catalog bag.
- Lock the finished size and expected payload before asking for artwork changes or price comparisons.
- Choose fabric weight based on what the tote must carry and how often it will be reused, not on appearance alone.
- Request a physical preproduction sample using the final fabric, handle construction, print method, and packing format.
- Set handle length, reinforcement style, seam allowance, and opening structure in measurable terms.
- Define packing format, carton size, carton count, and carton marks before bulk production starts.
- Ask every supplier to separate unit price, setup charges, sample cost, packaging cost, and freight assumptions.
- Build time for artwork approval, sample corrections, inspection, and transit into the event calendar.
- Inspect one approved sample against a written spec sheet so future reorders can be matched to the same version.
- If the tote will be reused or sold, add wash/abrasion expectations and print durability requirements to the brief.
Factory quote questions to send
- What is the finished fabric weight after finishing, in GSM or ounces, and is that number based on raw cloth or finished goods?
- Is the canvas woven, dyed, washed, or pre-shrunk before sewing? If yes, how does that affect final dimensions and shrinkage risk?
- What MOQ applies by fabric color, print color count, handle construction, and packaging style?
- Which steps are in-house and which are outsourced: fabric supply, cutting, printing, sewing, labeling, and packing?
- Can you break out sample cost, screen setup, film or plate cost, bulk unit price, and any color-change charges separately?
- What print tolerance can you hold on textured canvas for centered logos, registration, and color consistency across the run?
- What are your standard finished-size tolerances for width, height, gusset depth, and handle drop?
- What stitch construction do you use on the handles and stress points, and how many reinforcement stitches or bar-tacks are standard?
- How are the totes packed for shipment, how many pieces per carton, and what are the carton dimensions and gross weight?
- What is the realistic sample lead time, bulk lead time after approval, and the most likely cause of delay in your production schedule?
Quality-control points to confirm
- Finished fabric weight should fall within the approved range, with the supplier stating whether that range is based on raw cloth or finished goods.
- Body dimensions should stay within an agreed tolerance, such as ±0.5 cm for smaller dimensions and ±1.0 cm for larger tote measurements, unless the spec requires tighter control.
- Stitching should be straight, with no skipped stitches, seam slippage, loose thread bundles, seam opening, or visible needle damage at stress points.
- Handle reinforcement should be symmetrical and secured with box-stitch or equivalent reinforcement at both attachment points; check for handle pull when the bag is loaded.
- A practical defect limit should be written into the PO: for example, no more than 2 major defects per 100 pcs in a checked lot, with major defects defined in advance.
- Print should be centered within the approved location tolerance, such as ±0.5 cm for small logos and ±1.0 cm for larger graphics, unless the layout is intentionally offset.
- Color should be checked against an approved reference under daylight-equivalent light, with strike-off approval recorded before bulk production.
- Acceptance should include rub, adhesion, and visual checks where relevant to the print method, especially for heat transfer or digital decoration on textured canvas.
- Cartons should arrive intact, dry, and correctly labeled to match the purchase order, packing list, and carton sequence.
- Use an AQL-style inspection approach when possible: separate critical, major, and minor defects, define the sample size, and agree in writing on pass/fail thresholds before shipment.