Why museum retail needs a different tote specification
Museum retail is not the same as a generic souvenir program. Buyers usually need a tote that feels substantial on the shelf, carries books or catalogues without sagging, and still prints cleanly with a museum name, exhibition title, or gallery mark. Heavy canvas works well because it gives the bag enough structure to look premium without moving into leather or laminated bag territory.
The buying mistake is to define the tote only by size and price. For a launch, the commercial question is whether the bag can support a retail margin while still surviving repeated use. That means the canvas weight, stitch construction, print method, and packing format all affect complaints, reorder speed, shelf presentation, and the selling price a store can defend.
Museum buyers also need to think about shopper behavior. A tote bought at the end of a visit is often an impulse purchase, so the bag must explain its value quickly: strong handfeel, clear graphic identity, and a price that matches the visitor’s expectation for a quality souvenir. If the tote looks too thin, the customer reads it as promotional. If it looks too expensive for the perceived value, sell-through slows even when the design is good.
- Typical museum retail sweet spot: 12 oz to 16 oz cotton canvas
- Common use case: books, postcards, exhibition catalogues, boxed gifts, and gifts-to-go
- Premium signal: tight weave, clean corners, reinforced handles, and crisp print edges
- Commercial rule: the tote spec should match the planned shelf price tier, not the other way around
Start with the retail price tier and work backward to cost
Before asking factories for quotes, define the selling tier. A museum launch tote can be positioned as an entry souvenir, a core everyday bag, or a premium limited-edition item. Each tier supports a different fabric weight, print method, and margin structure. When the product tier is clear, you can reject quotes that are technically fine but commercially wrong.
As a practical buying rule, entry-level launch bags usually need the simplest construction and the lowest setup burden, while premium lines can absorb thicker canvas, a tighter weave, or more refined finishing. The danger is not buying the nicest bag; it is buying a bag that forces a retail price higher than the shop floor can support.
For landed-cost planning, work from target gross margin instead of unit price alone. A tote that costs a little more at the factory may still be the better choice if it supports a higher shelf price, lower return risk, and stronger reorder consistency. Conversely, a cheaper bag can hurt margin if it leads to complaints, rework, or markdowns after a weak first season.
- Set the target retail price before finalizing fabric weight or print complexity.
- Estimate landed cost using unit price, setup fees, freight, duties, and local receiving costs.
- Compare margin by SKU, not by supplier quote alone.
- Reject specs that force the retail price into a tier your museum shop cannot credibly sell.
Choose canvas weight around the merchandise, not around the catalog
For most museum launches, 14 oz canvas is the safest starting point. It gives a dense handfeel, holds screen print cleanly, and usually lands in a cost band that still supports museum shop pricing. If the bag will routinely carry heavier books or boxed items, move to 16 oz only if the product price can absorb the extra fabric and sewing cost.
If the design is meant to be a lighter everyday shopper, 12 oz can work, but the buyer should inspect drape and collapse carefully. Very loose canvas weaves may look acceptable in a sample yet feel thin in bulk production if the supplier changes yarn lot, finishing, or shrink control. A pre-shrunk finish is especially useful when the bag shape must remain consistent across reorders.
Do not accept a quote that only says 'canvas' without clarifying construction. Ask for oz weight or GSM, yarn count or weave density if available, whether the fabric is bleached or natural, and whether the supplier can maintain the same lot or shade range for the reorder window. These details matter because the same nominal fabric can behave very differently on the sewing line and on the shelf.
- 12 oz: lighter retail tote, lower cost, but less structure and less premium handfeel
- 14 oz: balanced retail option for most museum shops and launch programs
- 16 oz: stronger structure and premium feel, but higher fabric and sewing cost
- Ask for fabric lot consistency and finish details on the quote, not only the finished bag price
Construction details that affect durability and perceived value
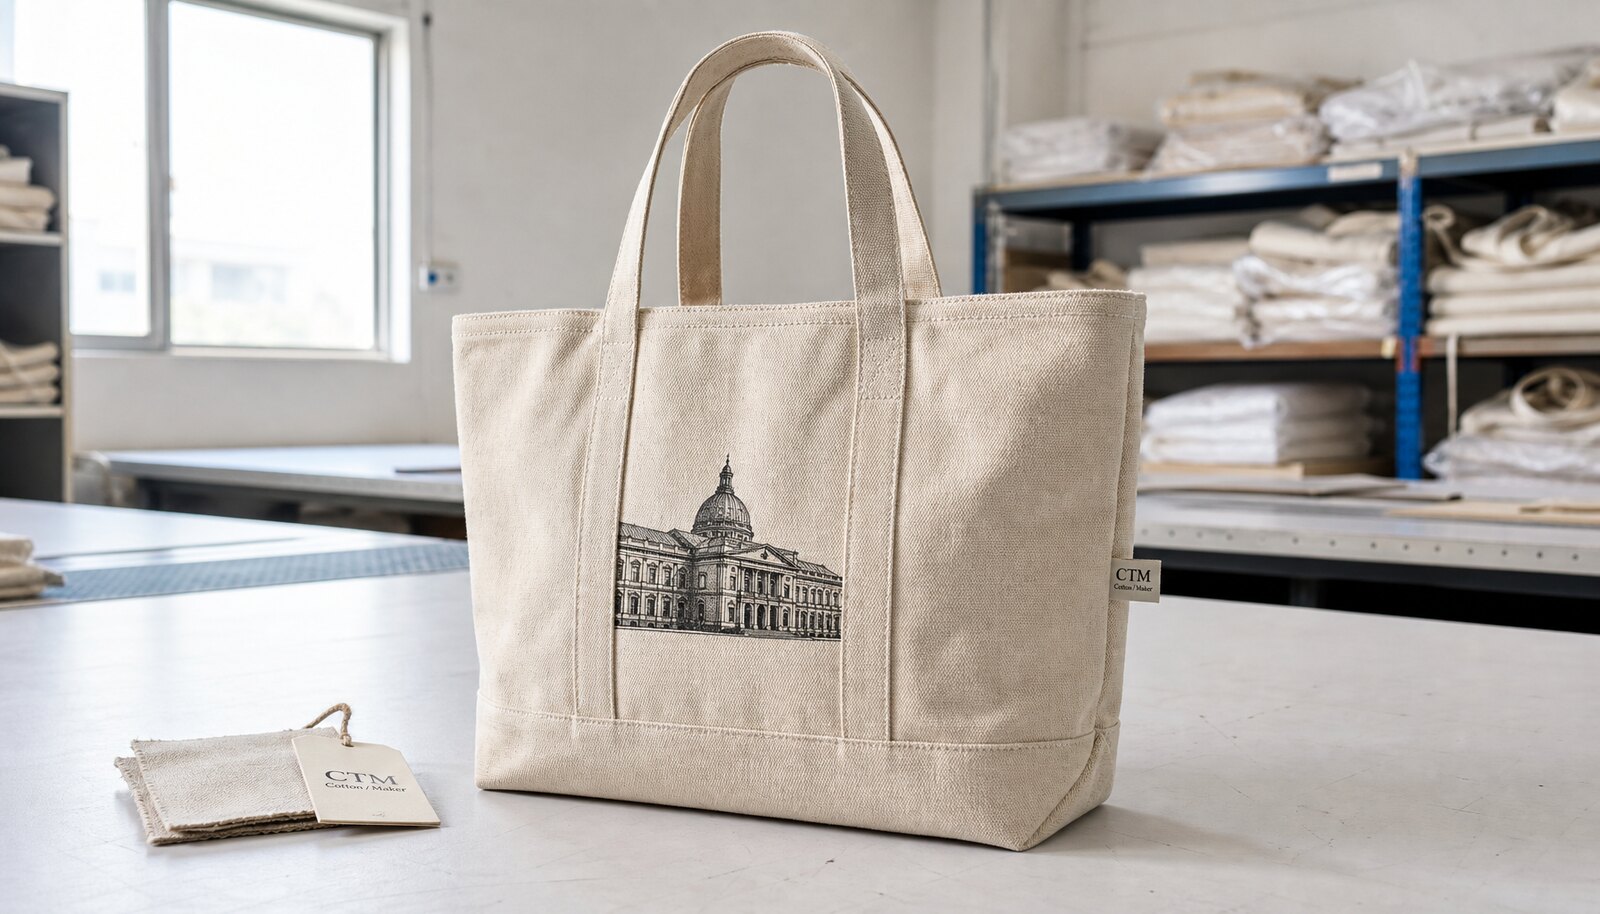
Heavy canvas totes are judged by more than fabric weight. Handle width, seam reinforcement, gusset shape, and corner finishing all influence how the bag feels in a customer’s hand. A bag with good fabric but weak construction can still fail the retail test because it twists, stretches, or looks unfinished after one day of use.
Handle construction deserves special attention. Cross-stitched handles, a handle width of about 2.5-3 cm, and reinforced attachment points are common for museum retail bags that need to carry books or catalogues. Ask the factory whether the reinforcement is box-X, bar-tack, or another method, and make sure the method is visible in the sample so you know what you are buying.
Interior finishing also matters. Raw edges, uneven seam allowance, or loose thread bundles may be acceptable in a cheap promotional tote, but not in a product meant to live on a museum shelf. If the bag is supposed to feel premium, the buyer should insist on clean stitching lines, neat turning at the corners, and consistent gusset shape on both sides.
- Use cross-stitched or otherwise reinforced handle attachment for book-carrying retail use.
- Check stitch density and seam allowance consistency on the sample.
- Review the bag from the inside as well as the outside before approving bulk.
- Ask the supplier which reinforcement method is standard and whether it changes by factory line.
Print method should match the artwork and the expected reorders
For museum logos, exhibition titles, and simple graphics, screen print is usually the strongest default. It is durable, cost-effective at scale, and generally the cleanest option on thick canvas. It also gives the buyer a better chance of consistent reorders because the result is less dependent on temperature-sensitive application settings than some transfer methods.
Heat transfer is a useful fallback for short runs or artwork that is too detailed for screen printing, but it should be used deliberately. Buyers should check whether the transfer has a glossy or plastic feel, whether edges lift after folding, and whether fine lines survive packing and shipping. For premium museum retail, a transfer that looks acceptable on a sample may still underperform in a real store environment.
Embroidery and woven labels can work for limited-edition programs or capsule merchandise, but they change cost and approval flow. Embroidery can distort on dense canvas if the design is too small or too text-heavy. Woven labels are often best as a secondary brand marker or side seam element rather than the main graphic on a launch bag.
- Screen print: best for durability, repeat orders, and most museum logos
- Heat transfer: useful for short runs or artwork with detail, but inspect cracking and edge lift
- Embroidery: premium feel, but only if the artwork is simple and the stitch density is controlled
- Woven labels: best as an additional identity element rather than the main print method
How to compare supplier routes without comparing apples to oranges
Museum buyers often receive quotes from factories, trading companies, and domestic decorators in the same week. The problem is that these suppliers do not always control the same parts of production. A direct factory may cut, stitch, print, and pack in one workflow. A trading company may manage the order but subcontract some or all of the work. A local decorator may offer speed but at a higher landed cost.
The best comparison framework is measurable. Ask each supplier to state who owns each production step, where fabric is sourced, whether printing and packing are in-house or outsourced, what sample approval looks like, and how reorders are handled. This avoids the common trap where one quote looks cheaper only because it excludes packing, quality checks, or export documentation.
For launch buying, the decision is rarely just about lowest price. If the tote will become a repeat retail line, prioritize production control, lead-time predictability, and reorder consistency. If it is a one-off exhibition drop, a faster route with lower setup friction may be the better answer, even if the unit cost is higher.
- Direct factory: best for spec control, reorder consistency, and lower escalation friction
- Trading company: useful when communication support is needed, but verify who actually controls production
- Local decorator or reseller: useful for very small or urgent runs, but usually weaker on landed cost
- Ask every supplier to identify subcontracted steps and their own inspection point before shipment
What to ask for in a quote so pricing is actually comparable
A useful quote should separate the bag specification from the commercial terms. At minimum, it should show fabric weight, fabric type, size, handle length, print count, packing method, sample charge, setup fees, and the incoterm basis. If these are missing, two quotes that look similar may produce very different landed costs or very different product quality.
The quote should also reveal what is included and what is excluded. Is cutting included? Is the fabric pre-shrunk? Are print screens extra? Are labels sewn on or packed loose? Is the price based on EXW, FOB, CIF, or another basis? For buyers planning museum store launches, these details matter because a cheap ex-factory quote can still become expensive after freight, duty, receiving, and rework.
Use a simple internal rule: if a supplier cannot explain its price in the same language as your spec sheet, the quote is not yet comparable. Ask for a revised quote rather than trying to reverse-engineer assumptions later.
- Require the quote to define size, fabric weight, handle type, print method, and packing method.
- Ask for separate line items for setup, sample, label, and special packaging costs.
- Confirm incoterms and whether freight, duty, and local delivery are included or excluded.
- Request a quote version number tied to the same spec sheet you used for sampling.
MOQ, sample charges, and contract terms: the hidden procurement levers
MOQ should never be treated as a single number without context. For heavy canvas tote bags, minimums are usually driven by fabric stock, print screens, cutting efficiency, and carton packing. A supplier may offer 500 pieces if the canvas is standard and the print is one color; the same project may require 2,000 pieces if the fabric must be dyed or the artwork needs multiple screens.
Buyers should ask for MOQ per artwork, per color, and per size. That distinction is especially important for museum launches that carry multiple exhibition titles or regional store versions. A low MOQ can be useful, but it is only valuable if the supplier does not recoup the cost through higher setup fees, less favorable reorder terms, or aggressive payment terms.
Sample charges also deserve attention. Ask whether the pre-production sample is chargeable, whether the fee is refundable against bulk, and how many revision rounds are included. For launch programs, it is common to pay for sampling; what matters is whether the supplier treats the sample as a real production reference or as a rough marketing sample that does not match bulk construction.
Contract terms should cover payment schedule, defect handling, delivery timing, and remedies for missed dates. A simple purchase order should not be the only control document. If the supplier is late or the batch has measurable defects, the buyer should know whether the remedy is rework, replacement, credit, or shipment holdback.
- Ask for MOQ by design, color, and size instead of only one headline number.
- Confirm whether stock fabric lowers MOQ and whether custom dyeing raises it.
- Clarify if sample charges are credited back against bulk and how many revisions are included.
- Use written terms for late delivery, reject batches, and defect rework before production starts.
Launch economics: how tote specifications affect retail price and sell-through
A museum tote is often one of the easiest products to launch, but it can still fail commercially if the product spec is misaligned with the shelf price. Fabric weight, print complexity, packaging quality, and construction all push the landed cost up or down. Because museum retail teams often need a healthy margin to cover overhead, even small spec changes can move the product into a different price tier.
As a rule, heavier fabric and more complex graphics justify a higher shelf price only if the customer can see and feel the difference immediately. A 16 oz tote may support a premium tier if it feels substantial, carries books well, and has crisp print and reinforcement. If the graphics are simple and the bag is sold next to lower-cost alternatives, the extra material cost may not translate into better sell-through.
Packaging matters too. A flat-packed tote with clean folding and clear SKU labeling is cheaper to receive and easier to replenish. Retail-ready presentation can justify a higher price if the bag is merchandised on shelf or hung near the register, but retail-ready packaging only pays off when the shop floor actually uses it. If not, you are paying for presentation that never reaches the shopper.
Buyers should also plan for markdown risk. If the first shipment is too large for a new motif or exhibition-related design, even a good tote can end up discounted when the exhibit closes. That is why launch volume should be tied to the expected footfall window, not just a favorable factory price. In museum retail, a smaller first run with a controlled reorder may protect margin better than a large first order chasing a lower unit price.
- Model landed cost against the intended shelf price before approving the spec.
- Choose the lightest construction that still meets the product’s perceived-value target.
- Use packaging only when it supports receiving efficiency or real shelf presentation.
- Size the first order to the exhibition window or expected visitor demand, not just the MOQ.
Sample approval and QC: define pass/fail before bulk starts
The sample should be treated as the control standard, not a casual preview. For a heavy canvas tote, the buyer should verify fabric weight, finished size, print placement, handle construction, seam appearance, and packing method on the sample. If the sample is approved but the bulk uses thinner fabric or different reinforcement, the buyer has no practical defense after shipment.
A good approval process includes a physical sample and a written spec sheet. The buyer should mark the acceptable tolerance for dimensions, placement, color tone, and stitching appearance. Without those thresholds, the factory may treat its normal variation as acceptable even if it looks off on shelf. The goal is not perfection; it is repeatable acceptance criteria.
Use an inspection plan that separates critical, major, and minor defects. Critical defects are those that make the product unsellable or unsafe, such as missing handles, wrong artwork, wrong SKU, or severe seam failure. Major defects affect retail acceptability, such as visible stains, crooked print, or badly misaligned labels. Minor defects may include loose threads or slight fold marks if they stay within the written standard. Ask the supplier which AQL plan they use and insist that critical defects remain zero tolerance unless otherwise agreed.
If an inspection fails, the escalation path should already be defined. Do not wait until the issue appears to decide whether the lot will be sorted, reworked, replaced, or partially shipped. A practical contract should say who pays for rework, who bears freight for replacements, and what happens if the delivery window is missed.
- Inspect finished size after pressing or folding, not just cut panels.
- Use a signed sample and written tolerance band for dimensions and print placement.
- Define critical, major, and minor defects before production starts.
- Require a documented correction path for failed QC, including replacement or rework responsibility.
Specification comparison for buyers
| Decision area | Recommended option | Why it works for a museum launch | Buyer risk to check |
|---|---|---|---|
| Fabric weight | 14 oz cotton canvas as the default launch spec; 12 oz for lighter gift shops; 16 oz for premium or book-heavy retail | 14 oz usually gives the best balance of structure, print clarity, perceived value, and cost control for a first run | Too light and the bag collapses or looks inexpensive; too heavy and landed cost can push the bag out of its intended price tier |
| Weave and finish | Tight plain weave with pre-shrunk or sanforized finish | Improves print sharpness, reduces first-wash shrink risk, and creates a cleaner shelf appearance | Loose weave can show yarn irregularity, bleed at print edges, or fray at high-stress points |
| Print method | 1-2 color screen print for core launch SKUs; heat transfer only for short runs or artwork with fine detail | Screen print is durable, cost-effective at scale, and usually best for museum logos or exhibition titles | Heat transfer may crack, feel less premium, or show edge lift after repeated use |
| Supplier route | Direct factory with in-house cutting, printing, stitching, and packing | Simplifies accountability, improves repeatability on reorders, and makes QC escalation easier | If printing or packing is subcontracted, color, placement, and packing quality can drift between batches |
| MOQ structure | Quote MOQ per artwork, per color, and per size; expect 500-3,000 pcs per design depending on material and setup | Helps buyers right-size launch SKUs and avoid dead stock from unnecessary variants | A low MOQ may hide higher setup fees or stricter reorder rules |
| Handle construction | Cross-stitched handles, 2.5-3 cm handle width, reinforced stress points, and bar-tack or box-X reinforcement where relevant | Better for catalogues, books, and heavier counter purchases that museums often sell | Weak stitch density can cause handle pullout complaints and returns after light repeated use |
| Packing route | Flat-packed with size label, barcode, SKU sticker, and master carton marks | Supports efficient receiving, accurate counts, and easier backroom storage | Loose folding, mixed cartons, or missing labels create receiving disputes and delayed put-away |
| Artwork control | Vector artwork, Pantone target, print placement drawing, and a signed physical sample | Reduces logo-size drift, centering errors, and color disagreement across stores or reorders | Email-only artwork often leads to vague approvals and inconsistent production interpretation |
| Commercial tier | Entry launch, core line, or premium souvenir tier defined before quoting | Prevents suppliers from pricing an undefined product and helps buyers align product spec to target retail price | If the commercial tier is unclear, suppliers may optimize for cost instead of the shelf price you need |
Buyer checklist before sampling
- Confirm final bag size, gusset depth, handle drop, and practical loading weight before requesting quotes.
- Specify fabric type, fabric weight in oz or GSM, finish, and acceptable shrinkage after production or after a light wash if relevant.
- Provide vector artwork, Pantone targets, logo placement drawing, and minimum line thickness for print.
- Ask for a physical pre-production sample and a signed reference sample before bulk approval.
- Define packing format, carton count, barcode or hangtag needs, and whether the bags are retail-ready or warehouse-packed.
- Request quote terms for sample charges, tool/setup fees, freight basis, payment terms, and defect escalation.
- Record inspection checkpoints for stitching, print registration, odor, stains, count accuracy, and carton condition.
- Freeze the spec version and keep all approvals tied to one document to prevent scope drift.
Factory quote questions to send
- What exact canvas weight, weave density, and finish are you quoting, and what tolerance range do you allow on bulk production?
- Is the quote based on in-house cutting, printing, stitching, and packing, or are any steps subcontracted?
- What is the MOQ per artwork, per color, and per size, and how does it change if we use stock fabric instead of custom-dyed fabric?
- Please list every setup charge separately, including print screens, plates, labels, hangtags, embroidery digitizing, or special packaging.
- What is the charge for samples, and do you credit any sample cost against bulk if the order is confirmed?
- What exactly will you send in the pre-production sample, and which approval points are required before bulk starts?
- How are the bags packed in cartons, what is the carton count, and can you confirm carton dimensions, gross weight, and master carton markings?
- Which incoterms are available in the quote, and what freight or export documents are included or excluded?
- What lead time applies after sample sign-off, what is the production calendar for artwork and packing approval, and what events could extend it?
- Which defects are covered by your standard QC, what inspection standard do you use, and how do you handle late delivery or reject batches?
Quality-control points to confirm
- Finished size: measure length, height, gusset, and handle drop on finished bags after pressing or folding, not only cut size. Set acceptable deviation in writing, such as a narrow tolerance band for core dimensions and a separate tolerance for natural fabric variance.
- Fabric weight: confirm actual GSM or ounce weight from bulk fabric, not just the spec sheet. If the supplier quotes a range, ask for the average and the allowable variance by lot.
- Print registration: logo, text, and artwork must stay centered within the agreed placement drawing. Reject if the image is visibly skewed, blurred, smeared, or shows color bleed beyond the approved boundary.
- Stitching: check handle attachment, side seams, bottom seams, and stress points for even stitch length, no skipped stitches, no loose thread bundles, and no broken reinforcement. Use a close visual check and a pull test on random pieces.
- Load test: use a practical retail load such as books, catalogues, or boxed gifts and check handle pull, seam stress, and deformation. Look for seam popping, handle elongation, or panel distortion under repeated lifting.
- Packing accuracy: carton count, barcode, SKU label, and polybag spec should match the approved packing list. Cartons should arrive sealed, dry, and free of crush damage.
- Odor and cleanliness: bags should ship free of oil marks, loose threads, fabric dust, metal fragments, and strong chemical smell. Natural canvas should look clean enough for immediate retail handling.
- Defect severity rule: define critical, major, and minor defects before inspection. For example, a broken handle, missing print, or wrong SKU is critical; crooked print, visible stain, or wrong placement is major; loose thread or slight fold mark may be minor if within written limits.
- Inspection method: use a documented AQL plan with clear accept/reject rules. Tie the inspection to the approved sample and reject any lot that fails on agreed critical items even if the overall count seems close.
- Escalation checkpoint: if defects exceed the agreed threshold, stop shipment release, ask for a corrective action plan, and require rework photos or replacement commitments before balance payment or shipment release.