1. What procurement needs to lock before the next reorder
Heavy canvas tote bags for corporate events are easy to treat as a simple promotional item, but reorder programs quickly turn into a specification problem. The first order may feel smooth because everyone is focused on artwork and event date. The second order is where the buyer finds out whether the fabric weight was truly recorded, whether the print file was archived correctly, and whether the factory can reproduce the same handle construction without new setup charges.
For procurement teams, the real goal is not just to buy another batch. It is to turn the tote into a repeatable SKU that can survive multiple event cycles. That means locking the body spec, print method, packing format, and approval path in a way that another buyer on your team could reuse next quarter. If the spec is vague, the supplier can be right about the sample and still wrong on the reorder. If the spec is precise, your quote comparison becomes faster and your delivery risk drops.
The best planning memo starts with the question: what must remain identical, and what can change without affecting event quality? Usually the non-negotiables are dimensions, fabric weight, print placement, handle reinforcement, and carton pack. The flexible items are minor artwork changes, hangtag copy, or secondary packing details. Write that split down early so you do not renegotiate the bag from scratch every time the event calendar changes.
- Treat the tote as a repeatable SKU, not a one-off giveaway.
- Separate non-negotiable specs from optional add-ons before quoting.
- Keep the golden sample, signed tech pack, and final artwork file in one place.
2. Choosing the right canvas weight, weave, and finish
For most corporate event programs, the question is not whether the bag is “heavy” in a general sense. The buyer needs to know how the canvas behaves under load, in transit, and after printing. The right fabric spec depends on what the bag carries, how premium it should feel at handout, and whether it must hold shape on a registration table or in a gifting kit.
A practical sourcing conversation starts with weight in oz and GSM, but it should not end there. Ask what the weight means in the factory quote: pre-finishing or post-finishing, greige or dyed, washed or unwashed. Those distinctions matter because a nominally similar fabric can feel noticeably different after finishing. For repeat orders, consistency is often more valuable than chasing the heaviest possible cloth.
A useful way to think about canvas selection is by performance, not fashion. If the event tote will hold brochures and a notebook, a mid-heavy canvas is usually enough. If the tote must support bottle, catalog, apparel, and a hard insert, you need better structure, reinforced seams, and a gusset that keeps the bag from collapsing. If the bag is part of a premium client gift, the finish should be clean enough that the fabric surface and seam behavior look intentional, not utilitarian.
Ask the supplier to submit a swatch or lab dip for color approval, and keep a physical reference. Natural canvas can vary in tone between lots, and dyed canvas can shift under different lighting. That does not mean the bag is defective; it means procurement must decide the acceptable range before production starts. If the event needs visual uniformity across many cartons, make that requirement explicit in the quote and sample stage.
- Use oz and GSM together; do not rely on one unit alone.
- Clarify whether the quoted weight is before or after finishing.
- Approve a physical swatch for color and hand-feel, not only a digital image.
- Match fabric structure to load type: brochures only, mixed kit contents, or premium gift sets.
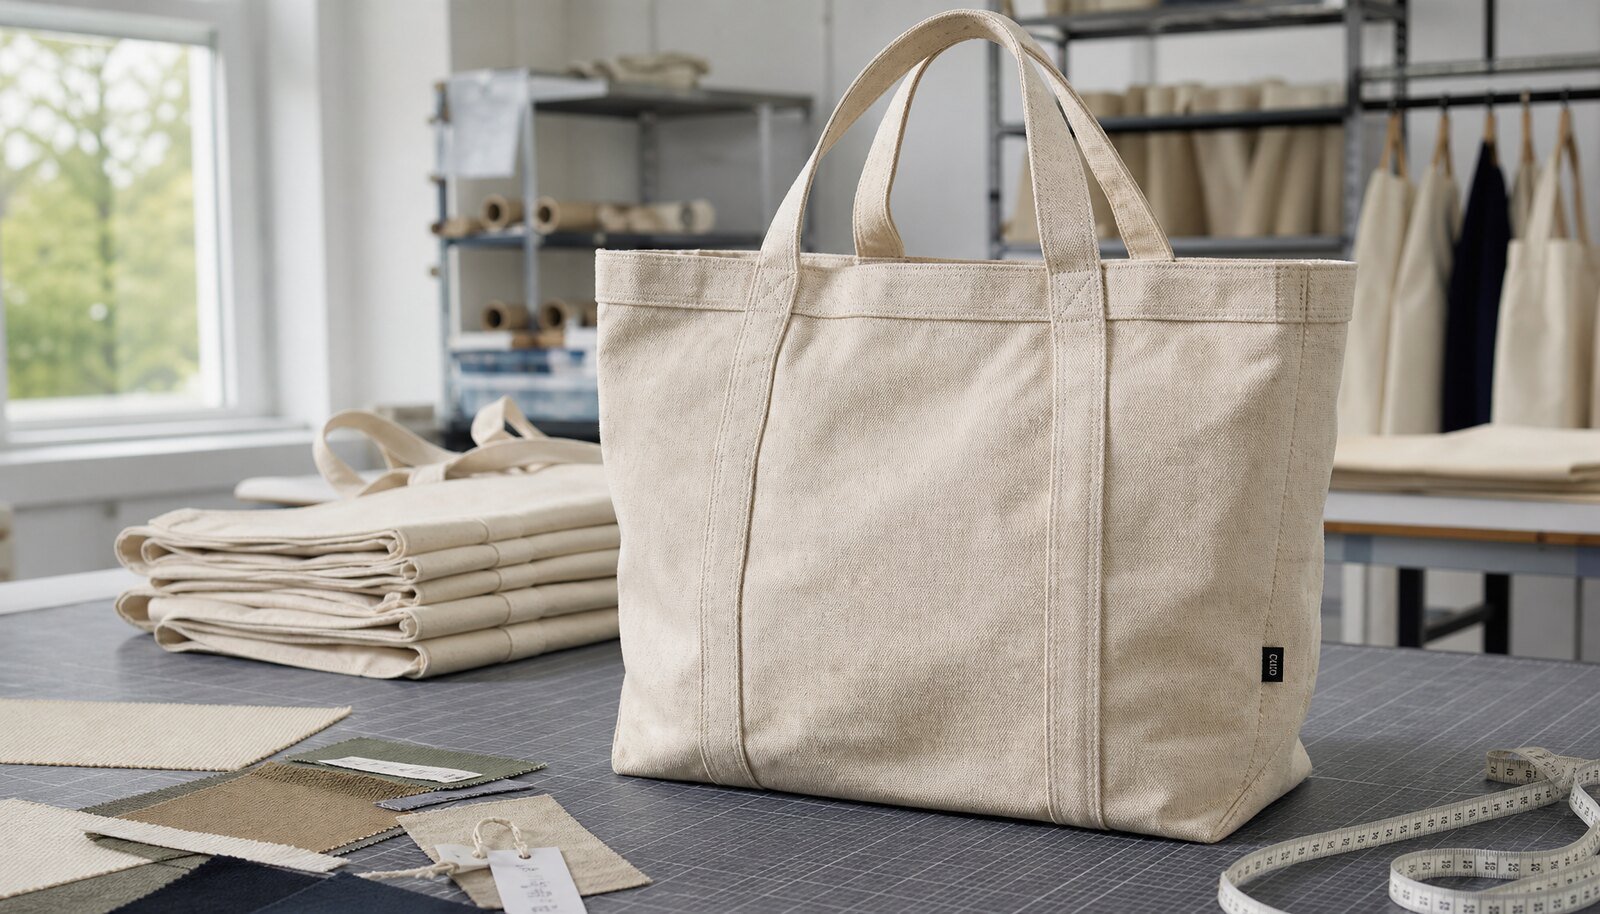
3. Construction details that determine whether the bag feels premium or flimsy
With canvas totes, construction often influences perceived quality more than fabric weight. A well-sewn 12 oz bag can feel more credible than a poorly built heavier bag. Buyers should inspect the handle join, top edge, side seams, gusset depth, and bottom seam before approving the bulk order. These are the places where repeated use creates early failure.
The handle specification deserves particular attention. Confirm handle length with the actual carrying use in mind: hand carry, shoulder carry, or both. A shoulder-length tote that is awkward to pick up from a table creates a poor event experience, even if the bag is technically correct. Ask the factory to specify handle width and reinforcement method, then verify whether the handle join uses bar-tacks, X-box stitching, or another controlled reinforcement pattern. If the tote will carry heavy inserts, that reinforcement should be standard, not optional.
Bottom structure matters too. A gusseted base gives the bag capacity and better shelf presence, but it should not be overbuilt to the point that it creates bulky corners or slows sewing. A bottom board can be useful for premium kit presentation, but it also adds cost, assembly time, and carton volume. If the event team wants a bag to stand upright at a registration desk, consider whether a modest gusset and consistent folding method would solve the problem more efficiently than a board insert.
A procurement memo should state which construction details are approved and which are not. For example: single body seam with reinforced side stitch; bound or turned top edge; no raw edge exposed at the opening; and no sharp insert board unless specifically requested. This level of detail prevents the factory from substituting a cheaper structure that still looks similar in a thumbnail photo.
- Define handle length by use case, not by aesthetics.
- Specify reinforcement type at handle joins and stress points.
- Use gusset depth and seam control to improve stand-up shape before adding inserts.
- Make “no raw edge” and “no visible puckering” explicit acceptance criteria.
4. Print method, artwork control, and what to check before bulk
For most corporate event tote programs, screen print is still the most controllable method for simple branding. It usually gives the best balance of cost, edge clarity, and repeatability when the logo is one or two colors and the artwork does not need photographic detail. But the buyer should not approve a method just because it is common. The right method depends on logo complexity, the number of event versions, and how sensitive the design is to small shifts in placement.
When comparing quotes, ask the supplier to separate printing setup from per-unit printing cost. That matters because a low unit price can hide a large screen or plate charge that only appears on reorder. Ask how many colors are included, whether halftones or fine text are being simplified, and whether the quote includes any cure or wash test. If the print is close to a seam, confirm the minimum placement distance so stitching does not distort the logo after production.
If the artwork changes by region or event, insist on a clean version control process. One common source of reorder mistakes is sending a supplier a file called final_v7_new2 and assuming everyone knows which version is active. Instead, name the file by event, date, and approval version. Record who approved the art, when it was approved, and what exactly changed from the prior order. That makes future cost comparison much easier.
Before bulk approval, review the print sample under normal room light and under strong light. Check registration against the bag edges and seams, opacity on the canvas texture, and whether the ink sits flat after folding. Run a dry rub on the approved sample. If the design cracks, smears, or transfers during that basic check, do not let the order move forward without a corrective sample.
- Use screen print for simple repeat branding when volume supports the setup.
- Separate print setup charges from unit price before comparing suppliers.
- Require file naming and approval version control for each reorder.
- Run a dry rub and light fold test before bulk release.
5. Sourcing route comparison: direct factory, trading company, stock supplier, or hybrid
The sourcing route matters because it shapes not just price, but how quickly the order can be corrected when something goes off spec. For a buyer planning repeat corporate events, the best route is the one that keeps the spec stable while making future reorders faster, not the one that only looks cheapest on the first quote.
A direct factory quote usually gives the clearest view into where the money goes: fabric, cutting, sewing, printing, packing, and shipping. It also tends to be better for buyers who need to revisit the same tote on a set calendar, because the factory is closer to the actual process and can often hold the approved construction more consistently. The tradeoff is that procurement must manage the spec tightly. If the buyer is loose on artwork placement or packing, the factory may use the freedom to make substitutions that are technically acceptable but not helpful for a repeat program.
A trading company can help when the event kit has multiple items or when you need one point of contact across several factories. That convenience has a cost: you may lose visibility into the actual production line, and sample revisions may pass through an extra layer before they reach the plant. For buyers who use trading companies, the key is to ask who the actual factory is, who signs off the pre-production sample, and whether the supplier can document the same factory on each reorder.
A regional stock supplier is the fastest fallback. It is useful when an event date is close and inventory matters more than customization. The risk is that stock-based buying often gives up exact control over color, print placement, or reinforcement. A hybrid model — standard body plus custom print — can work well when you want speed and brand control, but only if the base body is truly stable and documented.
- Direct factory: best for repeatability and transparent cost breakdowns.
- Trading company: useful for bundle buys, but verify the actual factory and approval chain.
- Stock supplier: fastest, but weakest on exact spec control.
- Hybrid: good for speed, if the blank body is already proven and documented.
6. How to compare quotes like a procurement buyer, not just a shopper
A strong comparison table should help the buyer answer three practical questions: what is the landed cost, what is the delivery risk, and what happens if we reorder this item again? If the table only compares fabric weight or handle style, it is not really helping procurement decide. The comparison needs to show supplier route, pricing pattern, lead time behavior, QC burden, and reorder risk in one view.
When the quotes arrive, put them on the same basis before comparing. That means the same Incoterm, same print version, same packing method, same carton count, and same approval stage. If one supplier quotes FOB and another quotes EXW, the unit prices are not directly comparable. If one includes individual polybags and the other does not, the apparent savings may disappear in warehouse handling or repacking. The same logic applies to setup charges: the lowest unit cost may be offset by screen charges, sample fees, or carton upgrades.
It also helps to ask each supplier for a short explanation of where they expect the price to move on reorder. A factory that knows the tote program well can often tell you whether the next order is likely to hold steady, drop slightly, or increase because of fabric lot, print changes, or carton costs. That answer is more useful than a generic “best price” claim.
Procurement teams should also compare response quality. Did the supplier answer the spec questions precisely, or did they give generic reassurance? Did they return an annotated quotation, or just a lump sum? A quote that arrives with clear assumptions and clean exclusions is usually a better partner for a repeat event program than a cheaper quote that hides the risk.
- Quote on the same delivery basis and packing basis before comparison.
- Track setup fees, sample fees, carton upgrades, and extra label costs separately.
- Ask each supplier what part of the quote is likely to change on reorder.
- Use response quality as a sourcing signal, not just final price.
7. Sampling and approval flow that reduces reorder mistakes
The sample stage should verify both appearance and function. A tote can look right on a table and still fail when loaded into a conference kit. The approval flow should therefore include a pre-production sample or golden sample made from the exact fabric, print method, thread, reinforcement, and packing approach intended for bulk production. A lookalike sample is not enough when the tote is part of a repeat event program.
A practical approval sequence is simple: review the tech pack, review the first sample, confirm any corrections, then sign a golden sample that becomes the reference for production. That sample should be dated and stored with the approved artwork file, spec sheet, and buyer sign-off record. If the supplier later says “same as last time,” procurement can check the approved version instead of relying on memory.
The function test should be realistic. Load the sample with the kind of contents the bag will actually carry: brochure stack, notebook, water bottle, gift item, or apparel. Check whether the handles feel comfortable, whether the bag leans or twists, and whether the bottom shape keeps the tote usable on a table. Many tote failures show up only when the bag is loaded and moved, not when it is empty.
If the artwork is close to seams or the canvas grain is uneven, inspect how the print behaves after folding and filling. Some logos look clean until the fabric bends across the same area repeatedly. A strong approval flow catches that before bulk starts. Buyers should also require the supplier to tell them what counts as a revise-and-resubmit item versus a minor adjustment that can be handled in production. That keeps expectations clear and prevents hidden delays.
- Use a golden sample made from the exact final spec, not a generic mock-up.
- Test the bag under real load, not just while empty.
- Archive the approved sample, date, and artwork version for future reorders.
- Define which changes require a new sample and which are minor.
8. QC thresholds: what to inspect, how many units, and what is a fail
Quality control should be written in terms the factory can actually execute. A good tote memo does not just say “check stitching” or “inspect print.” It states what gets checked, how many units, and what is unacceptable. For a repeat corporate event program, the goal is to stop a bad lot before it reaches packing and to make future reorders easier to approve because the acceptance rules were already documented.
A practical approach is an AQL-style visual inspection plan, even if your organization does not formally use one. Inspect fabric, dimensions, stitch quality, print quality, and packing across random samples from different cartons or bundles. If possible, check at least 20 units for basic dimensions and appearance per lot, then add targeted checks for handles and print on a smaller subset. The exact sampling plan can vary by supplier and order size, but the principle should stay the same: do not approve a shipment based on one top sample only.
Pass/fail should be written plainly. For example, loose threads that are easy to trim may be minor, but open seams, skipped stitches at stress points, print smearing, or obvious size drift should be major defects. Handle reinforcement should not show early separation under a controlled pull check. The printed logo should not smear or transfer when rubbed lightly by hand after curing. If the bag uses a bottom board, inspect that it sits flat, does not warp the tote, and does not present a sharp edge at handling points.
The inspection record should also track carton-level consistency. Some shipments look good in the first carton and then drift later because cutting or packing changed mid-run. Randomly open cartons from different pallet positions, and check that variants are separated correctly. This matters for event allocation, where a mixed box can create downstream fulfillment issues even if the bags themselves are acceptable.
- Write a simple sampling plan and defect list before production starts.
- Use distinct major and minor defect categories.
- Inspect multiple cartons, not only the first carton or display sample.
- Treat open seams, print failure, and stress-point failure as clear rejects.
9. Packing, freight, and inventory handling for event teams
Packing decisions can change the total landed cost almost as much as fabric or print. A flat-packed tote in a polybag and master carton is usually the most economical option for bulk events and warehouse receiving. But procurement should confirm how the bags will be handled after arrival. If an event fulfillment team will re-kit the bags into boxes, the factory does not need to overinvest in presentation packing. If the bags go directly to a client-facing event, fold quality and crease control matter more.
The buyer should ask for the carton size before final approval because carton dimensions can drive freight more than the bag itself. Large but lightweight bags can still become expensive to ship if the cartons are oversized. This is especially relevant for air freight or any cubic-rate pricing model. If the supplier suggests a retail-style insert or thick board, ask whether the appearance benefit justifies the higher carton volume and labor time.
Labeling also needs to be decided early. Event programs often need carton marks by region, version, or allocation team. If the shipment contains multiple tote variants, ask for variant separation by carton and a packing list that makes receiving easy. A mixed carton may save space, but it often creates headaches for the warehouse and increases the chance of a wrong handout at the event.
If the program is seasonal or repeatable, store the packing instructions with the spec sheet. Buyers often remember the bag style but forget the folding direction or the carton count that worked well last time. That becomes a hidden source of cost and delay on the next reorder.
- Flat pack is usually the best default for cost and receiving efficiency.
- Ask for carton size before final approval so freight impact is visible.
- Use clear carton marks and packing lists when ordering multiple variants.
- Store the approved fold and pack method with the reorder file.
10. Reorder governance: when to trigger, how to escalate, and what to keep on file
Reorder governance is what prevents a tote program from turning into an emergency purchase every season. The buyer should define a trigger point, an approval path, and an escalation path long before inventory gets low. In practice, the reorder trigger should be tied to event demand and supplier lead time, not to a vague sense that stock “looks low.” If the next event is fixed on the calendar, the reorder needs enough buffer for production, transit, and a possible correction cycle.
A useful rule is to plan the reorder while the current stock is still healthy enough to absorb delay. That gives procurement room to compare quotes, update any artwork, and reserve capacity without panic pricing. It also gives the supplier time to source the same fabric lot or alert you if a change is unavoidable. The moment a buyer waits until the last carton is nearly empty, every decision becomes more expensive.
Escalation should be clear. If the print proof is off by placement, who approves the change? If the factory says the fabric lot is no longer available, who decides whether a substitute is acceptable? If the shipment date moves, what is the backup plan: partial air freight, alternate stock body, or a smaller event allocation? These are practical decisions, not hypotheticals, and they should be written into the memo so the team is not improvising under pressure.
Keep the file complete: approved sample photos, tech pack, quotation with assumptions, artwork version, inspection notes, carton spec, and freight basis. When those records are intact, the next reorder becomes an operational repeat instead of a new sourcing project. For corporate events, that is usually the real savings: fewer surprises, faster approvals, and a bag that looks the same when the client sees it again.
- Trigger reorder by event forecast and lead time, not by a nearly empty storeroom.
- Document who can approve spec changes, substitutions, and shipment exceptions.
- Keep the spec file complete so the next order does not restart from zero.
- Build a fallback plan for delayed print, missing fabric, or late shipment.
Specification comparison for buyers
| Sourcing route | Typical pricing pattern | Lead time profile | QC and reorder risk | Best fit for |
|---|---|---|---|---|
| Direct factory | Usually best on repeat SKUs once the spec is stable; setup and tooling are visible line items | More predictable once approvals are locked; can still slip if fabric or screen setup changes | Lower markup risk, but buyer must own spec clarity and approval discipline | Brands, distributors, and event teams with repeat annual or quarterly reorders |
| Trading company | Often higher unit price, sometimes easier bundling across multiple items | Can be convenient early in the project, but revisions may move slower through the middle layer | Risk of hidden margin, unclear factory ownership, and slower sample corrections | Programs that combine totes with notebooks, drinkware, or other event kit items |
| Regional stock supplier | Fastest for urgent replenishment and local ship dates | Short if the exact style is already in inventory; weak if customization is needed | Color, print, and construction variation can be harder to control over time | Rush events, one-time fallback buys, and temporary inventory gaps |
| Hybrid model: stock body + custom print | Useful when the tote body is standard and only the branding changes | Shorter than full custom because the body is pre-made | Lower structural risk, but print placement and color matching still need proofing | High-frequency events where speed matters more than full material customization |
| Full custom production | Best when handle length, gusset depth, and packing must match a kit program exactly | Longest, because fabric, cutting, sewing, print, and packing all need approval | Highest control if managed well; highest disruption if approvals are weak | Premium launch kits, retail-like giveaways, and branded programs with strict presentation needs |
| Material | 8-12 oz cotton canvas, 120-220 gsm cotton, recycled cotton, or blended fabric selected by use case and target price | Before price comparison | Different cloth weights, backing, or certification claims make quotes hard to compare | |
| Construction | bag size, gusset, handle drop, seam allowance, stitch density, reinforcement patch, and loading expectation | Before sampling | Weak stress points create returns and failed inspections | |
| Decoration | screen print, heat transfer, embroidery, woven label, or hangtag matched to fabric texture and brand durability needs | Before artwork approval | The wrong method can crack, bleed, pucker, or fail on the chosen fabric |
Buyer checklist before sampling
- Confirm the approved body dimensions, acceptable tolerance range, and whether dimensions are measured before or after packing and pressing.
- Lock fabric weight in both oz and GSM, and state whether the weight is pre-finishing or post-finishing.
- Record the canvas color standard, whether a lab dip or physical swatch was approved, and who signed off on it.
- Specify print method, number of colors, ink type, print area, and the minimum distance from seams, edges, and stitching lines.
- Set handle construction requirements: handle width, stitch count, reinforcement type, and whether bar-tacks, X-box stitches, or both are required.
- Define packing method, fold direction, polybag requirement, master carton quantity, carton mark content, and any retail barcode or hangtag needs.
- Name the exact approval chain for the pre-production sample, first inspection, and bulk release, including who can stop shipment.
- Record the reorder trigger point by forecast quantity and event date, not just by percentage of stock remaining.
- Keep one sealed golden sample and one signed tech pack version in the procurement file for future reorders.
- Ask the supplier to quote the same Incoterm, same carton configuration, and same artwork version across all comparison quotes.
Factory quote questions to send
- What is the exact canvas spec, including oz, GSM, weave type, and whether the quoted weight is before or after finishing?
- Can you quote fabric, sewing, printing, packing, and freight separately so we can compare landed cost accurately?
- What MOQ applies by fabric color, print version, handle color, and packing variant, not just by total quantity?
- Which print method is included in the base quote, how many colors are covered, and what are the setup charges for a new screen or new artwork version?
- What reinforcement is standard at the handle joins and bottom seams, and what is the unit-price impact if we require extra bartacks or double stitching?
- What is your pre-production sample process, how long does it take, and what exactly is checked before bulk approval?
- Which factory will actually produce the bags, and who owns the final approval of fabric, sewing, and print?
- What packing method is standard, what is the master carton size and quantity, and can you quote an alternate pack for event kitting or retail presentation?
- What inspection standard do you use for bulk release, and can you share the defect categories and acceptance criteria before we place the order?
- If we reorder the same item later, what inputs do you need from us to hold the spec stable and avoid new setup charges?
Quality-control points to confirm
- Fabric weight check: verify at least 3 rolls or cutting lots; accept only if the measured fabric falls within the agreed tolerance stated in the tech pack. If the spec is 12 oz, do not approve a lot that is materially lighter in hand feel or visibly thinner across the roll.
- Dimensional check: inspect at least 20 units per production lot for body width, height, gusset depth, and handle length. Reject if repeated measurements fall outside the tolerance band or if one side is clearly skewed.
- Stitching check: inspect handle joins, side seams, top edge finish, and bottom reinforcement on each sampled unit. Reject skipped stitches, broken threads, loose knots, uneven tension, or any open seam.
- Functional pull check: apply a controlled pull to the handle area on sampled bags loaded with event-type contents. Look for stitch failure, seam distortion, or visible tearing; any structural failure is a reject.
- Print quality check: inspect registration, opacity, and edge sharpness under normal light. Run a dry rub and light abrasion rub on the printed area; reject smearing, cracking, or transfer that appears before reasonable use.
- Surface check: reject excessive oil spots, dirt, dye stains, pulled yarns, fabric holes, or obvious shade variation between panels that would be visible at event handout distance.
- Packing check: verify fold consistency, polybag count, carton labels, and variant separation. Randomly open cartons from different pallets or stacks so mixed SKUs do not slip into the shipment.
- AQL-style acceptance approach: use a defined sampling plan for visual defects and functional defects, and state in advance which defect categories are major versus minor. Do not rely on a vague 'looks okay' approval for bulk release.