1. Why heavy canvas matters in charity and retail programs
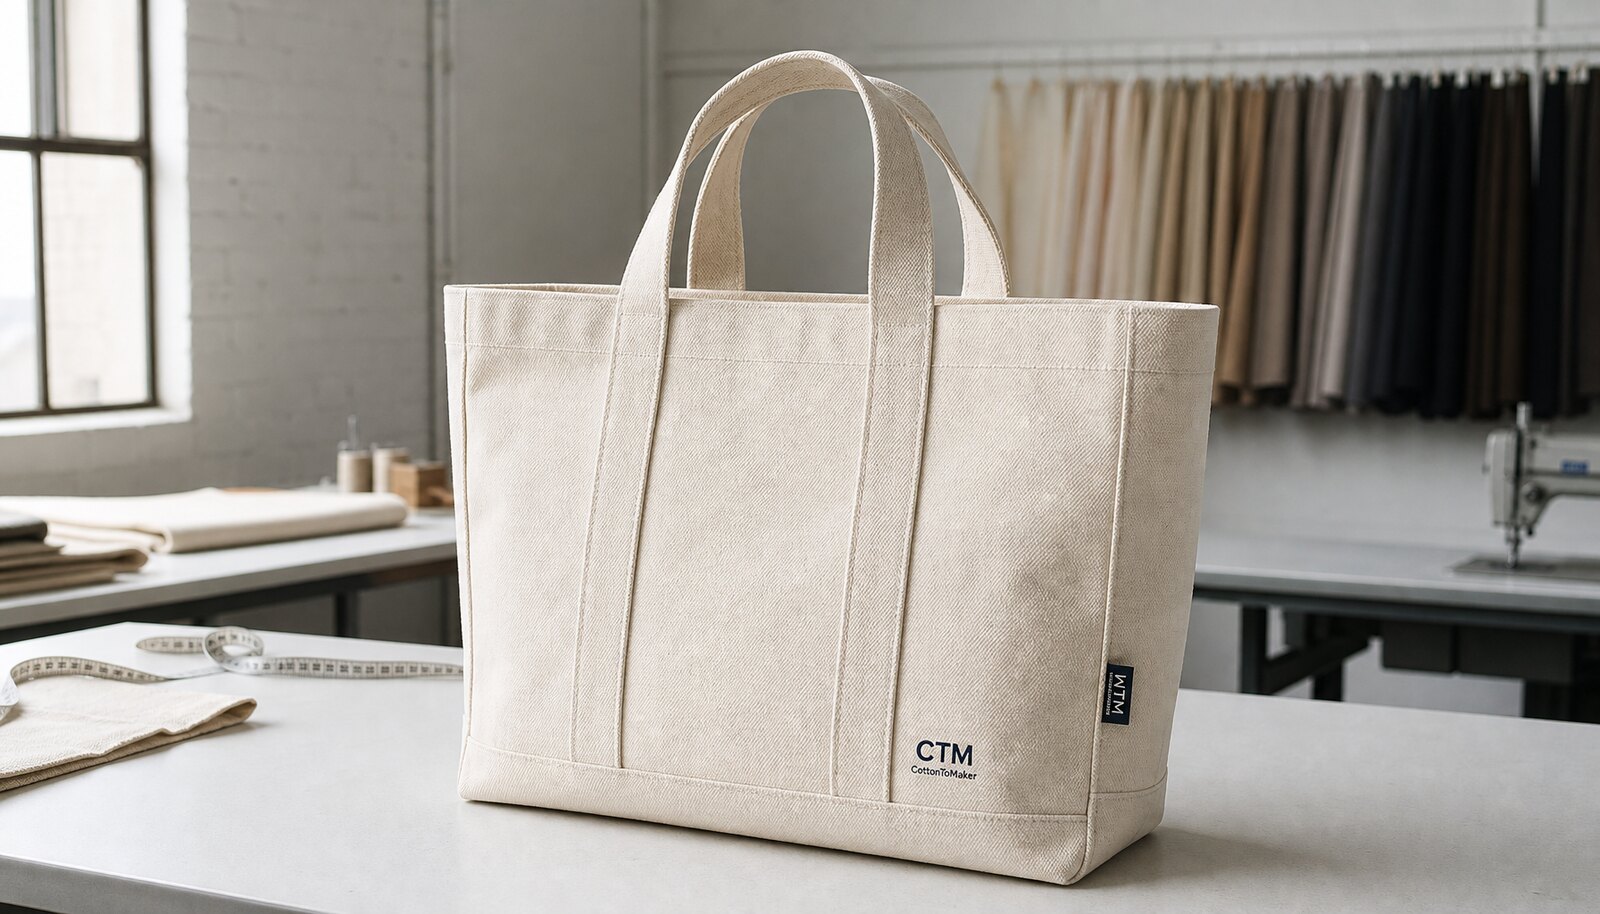
Heavy canvas tote bags are usually chosen when the bag has to do more than carry a logo. For a charity campaign, the tote often becomes a visible fundraising item that people use in public, so the bag needs to look intentional, hold its shape, and survive repeated carry. For a retail launch, the tote is part of the product line, which means the fabric body, handle build, print clarity, and packing all affect shelf appeal, return risk, and brand perception. Lightweight promotional totes can work for giveaways, but they often look too casual for a paid item or a premium campaign item.
The buyer should start with the use case, not the product photo. Is the tote being sold as merch, bundled with another product, distributed at events, or shipped through retail fulfillment? A bag that sits on a store shelf needs more structure and a cleaner finish than a bag handed out at a fundraiser. A bag that will be carried across a venue for one day may tolerate more variation than a bag a consumer expects to reuse for months.
This is why the phrase heavy canvas tote bags for charity campaigns retail launch buying guide matters commercially: the same tote category can solve very different sourcing problems. A charity buyer may care most about landed cost, print visibility, and low-risk scheduling. A retail buyer may care more about hand feel, seam quality, barcode-ready packing, and consistency across replenishment orders. If you do not separate those priorities early, the quote comparison becomes noisy and the final approval becomes subjective.
A useful rule is to define the bag as a sellable item before you compare supplier prices. That means you need a target fabric weight, construction detail, print standard, pack format, and acceptable tolerance range before you ask for quotes. Without that structure, one supplier may quote a light, loose weave and another may quote a tighter 14 oz canvas that simply looks more expensive. The unit price difference is then misleading because the products are not equivalent.
For procurement teams, heavy canvas is not just about durability. It is about how the bag photographs, how it folds, how it sits on a retail shelf, and how it reflects the campaign or brand story. The more visible the bag will be to end users, the more important it becomes to specify the weave, handle reinforcement, and print method up front.
- Use heavy canvas when the tote must carry weight, hold shape, or present as a premium item.
- Treat charity campaign bags as public-facing merchandise, not low-spec promotional giveaways.
- Separate event merch requirements from retail launch requirements before issuing the RFQ.
- Fix the target use, load expectation, and packaging scenario before you discuss price.
2. Choose fabric weight by function, not by habit
For most charity campaigns and retail launches, the practical canvas range is 12 oz to 16 oz, which is roughly 420 to 540 GSM. That range gives buyers enough structure for a premium hand feel without forcing the bag into an unnecessarily expensive build. In many cases, 12 oz is the lower edge of what still feels substantial, 14 oz is the balanced middle, and 16 oz is the heavier option for bags that need to stand upright or feel distinctly premium on shelf.
Still, the nominal ounce rating does not tell the whole story. Two fabrics with the same stated weight can feel different because of yarn thickness, weave density, finish, shrinkage, or whether the cloth is plain canvas or duck canvas. A denser cloth often behaves better under print because the surface is more even, but it can also increase sewing time and reduce flexibility when the bag is folded. That tradeoff should be part of the buyer's decision, not an afterthought.
If the bag is for a charity campaign, the most common mistake is choosing a fabric that looks impressive in a sample photo but adds cost without improving public visibility. If the bag is for retail, the more common mistake is choosing a fabric that is technically strong but visually underwhelming. The buyer needs to decide whether the bag should feel sturdy, structured, soft, or crisp. Those are different sourcing targets and they change the quote.
A simple way to brief suppliers is to state the intended use first, then the minimum cloth weight, then the acceptable feel. For example: 'retail shelf tote, 14 oz minimum, structured body, natural canvas, good print hold, moderate stiffness acceptable.' That type of brief is easier for factories to quote accurately than a vague request for a 'heavy cotton tote.' It also gives you a better basis for comparing sample hand feel.
If you are not sure whether 12 oz or 14 oz is enough, ask the supplier to quote both with the same construction and packing. The cost gap is usually easier to understand when the construction is fixed. You can then evaluate whether the extra material and sewing time are worth the premium perception or load performance you gain.
- 12 oz / 420 GSM: suitable for value-conscious campaigns and lighter retail launches.
- 14 oz / 470-500 GSM: a practical middle ground for most premium charity or store programs.
- 16 oz / 540 GSM: best when the bag must look structured, carry more weight, or feel distinctly premium.
- Ask for fabric cut swatches, not only photos, when the order has visible quality risk.
3. Translate the design into a procurement-ready specification
A tote can look simple, but the buying spec should be precise. For each order, define finished width, height, and gusset depth, then state whether the bag is measured laid flat or fully opened. Add handle length and handle width, because a handle that is technically durable can still feel uncomfortable if it is too narrow, too short, or sewn too close together. If the bag has a top hem, internal pocket, zipper, snap, or side gusset detail, each of those elements should appear in the quote drawing or tech pack.
Procurement teams should also decide whether the bag needs to stand upright on a shelf. That one question affects everything from fabric weight to bottom construction. A tote that needs shelf presence usually benefits from a tighter weave, a firmer finish, and more consistent bottom stitching. A flat, foldable tote can tolerate a softer drape and simpler pack format. If you do not state the shelf requirement, the supplier may optimize for sewing speed rather than display behavior.
Dimensions need realistic tolerances. A practical starting point for many tote programs is ±0.5 cm to ±1.0 cm for finished width and height, with similar control on gusset depth if the tote is meant to stand or fold consistently. Handle length and print placement usually need separate tolerances because those are highly visible to the buyer and to the end customer. The exact ranges should depend on price point and use channel, but the key is to document them before production, not after a dispute arises.
Specify stitch type and reinforcement as part of the product, not as a generic factory detail. For a heavy tote, you usually want a reinforced handle attachment such as bar-tack or box-X reinforcement and a consistent top seam finish. If the supplier says the bag is 'strong enough,' ask for the stitch count, reinforcement method, and an example photo with the seam highlighted. For procurement, vague strength claims are not enough.
A tech pack for a tote does not need to be complicated. It does need to be complete. The best versions include a front and back view, a flat dimension sketch, a print placement diagram, the exact pack format, and the approved material reference. When these details are in one place, the quote becomes easier to compare and the QC team has something concrete to inspect against.
- State finished dimensions, not only cut dimensions.
- Specify whether the tote must stand upright, fold flat, or do both.
- Include handle width, handle length, and reinforcement method in the spec.
- Set practical tolerances for size, print placement, and gusset depth before quoting.
4. Match the print method to the artwork and order volume
Most heavy canvas totes are decorated with screen print because it gives strong color, good opacity, and a clean retail finish on thick cloth. For simple logos, block text, and one- or two-color campaign graphics, screen printing usually gives the best balance of cost and durability. Thick canvas can absorb more ink than smoother textiles, so the supplier should print a sample on the actual fabric to confirm coverage, edge sharpness, and drying behavior.
That said, the artwork should drive the method, not the supplier's default process. If the design has fine details, tonal gradients, or many small elements, screen printing may lose clarity or require too many screens to remain economical. In those cases, heat transfer or digital print may be worth testing, particularly for short runs or test launches. The tradeoff is that those methods can cost more per unit, may show different wear patterns, and may not age as gracefully on a fold-heavy product.
For charity campaign bags, the usual priority is a clear message at a sensible cost. That means bold graphics and high contrast often outperform complex art. For retail launch bags, the logo placement and print finish may be part of the brand story, so a more detailed decoration route can make sense if the supplier can prove rub resistance and consistency. The important thing is to approve the method on a decorated physical sample rather than on artwork alone.
Buyers should also ask how the print method affects lead time. A factory may quote a low unit price for screen print but extend production because screens, curing, or queue time create bottlenecks. Digital or transfer methods can shorten setup for short runs, yet the unit price may be higher and the supplier quality control may depend on operator skill. This is why print method should be compared alongside MOQ and schedule, not just in isolation.
If you need a secondary brand element such as a woven side label, do not let it substitute for a weak main decoration. The tote still needs a primary visual identity that reads at a distance. Secondary branding can add value, but only if it does not create another hidden cost driver through extra sewing, extra labels, or more pack steps.
- Screen print is usually the default choice for bold, simple artwork on heavy canvas.
- Use digital or transfer only when the art detail or short-run economics justify it.
- Approve print on real fabric, not on a flat mockup or vector proof.
- Ask whether print setup, curing, and multi-color registration change the promised lead time.
5. Compare supplier routes by control, cost structure, and accountability
The supplier route changes the buying outcome almost as much as the tote specification itself. Direct factories are usually the strongest choice when you need clear process control, repeatability, and accountability across sewing, printing, and packing. Trading companies and sourcing offices can be helpful when your program is multi-item, multi-country, or too small to justify direct factory management. Local decorators using imported blanks can work well for urgent launches or domestic fulfillment, but they rarely offer the same control over fabric choice and base construction.
The key procurement question is where the risk sits. If one supplier owns the process from fabric to carton, the buyer has a cleaner line of responsibility when a defect appears. If the print is outsourced or the labels are added by a different shop, lead time can stretch and color consistency can drift. If a trading company is involved, the buyer should not assume the visible contact also owns production decisions. Ask who actually cuts, sews, prints, inspects, and packs the tote.
A direct factory quote is often easier to benchmark because the factory can break down material, sewing, decoration, and packing. But direct buying can also expose you to more operational questions: who approves artwork, who holds the color standard, and who replaces rejected cartons? A trading company may reduce communication friction, but the buyer can pay for that convenience through margin layering or weaker visibility into the real production source. There is no universally best route; the best route is the one that matches your team's capability and risk tolerance.
Local decorators can be a smart route for short campaigns when freight time, import admin, or warehouse proximity matters more than factory-scale economics. They often win on speed and low-order convenience. They usually lose when the buyer needs custom fabric, custom packing, or strong unit economics at volume. If you are comparing them against overseas factory sourcing, calculate not just unit price but decoration cost, inbound freight, duty, relabeling, and the cost of handling a bulky but low-value item in your own warehouse.
A useful procurement filter is to ask every supplier the same process questions: who makes the fabric, who performs each production step, who signs off on the sample, and what happens if the bulk lot differs from the approved sample. The answer tells you more than the headline price.
- Direct factory: best for process control, repeat orders, and clear defect ownership.
- Trading company: useful for mixed programs, but verify who actually runs production.
- Local decorator: useful for urgent or domestic programs, but check blank quality and hidden packing costs.
- Ask for the production map before you compare unit pricing.
6. Build a landed-cost comparison instead of a unit-price comparison
The biggest pricing mistake in tote sourcing is comparing the ex-factory unit price alone. Heavy canvas bags are bulky, and bulk volume affects freight more than many buyers expect. That means the cheapest tote quote can still become the most expensive landed option once packing volume, inner packaging, carton dimensions, and freight method are included. For procurement, landed cost should include the bag, decoration setup, inner packing, carton packing, freight, duty or tax where relevant, and any receiving or relabeling labor at destination.
There are several hidden cost drivers to watch. Fabric weight increases material cost, but it may also increase sewing time and carton volume. Multi-color print increases setup cost and may create minimum charges per color. Woven labels, hangtags, barcodes, and retail polybags each add labor. Custom dyed canvas can raise lead time and lock you into a larger MOQ. Even the fold method matters because a tighter folded size can reduce freight and warehouse cost. These are not minor details; they often decide whether a program is financially viable.
The comparison should separate one-time charges from recurring unit charges. Screen setup, artwork preparation, sample charges, and tooling may be acceptable if the order will repeat, but they can distort the first order quote. A buyer planning a charity campaign may be happy to absorb setup cost for a one-time run if the total campaign cost still fits. A retail buyer planning replenishment will often prefer a slightly higher unit price with lower setup and more predictable reorders. Different business models call for different cost structures.
You also need to compare cost in relation to order size. A 1,000-piece test launch may make a domestic decorator or a trading company look competitive because the logistics are simpler and the setup is smaller. A 20,000-piece retail program may swing decisively toward a direct factory with higher process control and lower base unit economics. The correct answer changes with volume. That is why your RFQ should request pricing breaks at multiple quantity tiers rather than a single number.
If a quote seems too low, ask what is excluded. Common exclusions include inner packing, outer cartons, print setup, label attachment, color matching, sample freight, inspection, and port handling. It is better to discover those exclusions during the quote stage than after you have already approved artwork and scheduled the launch.
- Compare total landed cost, not only ex-factory price.
- Separate one-time setup charges from recurring unit charges.
- Request pricing at multiple volume tiers so you can see where the route changes.
- Check whether freight volume, packing labor, or label work is driving the real cost.
7. Use sample stages to de-risk fabric, decoration, and packing together
A good sample process is not just about aesthetic approval. It should prove that the chosen fabric, print method, handle reinforcement, and packing method all work together. For a heavy canvas tote, the most useful sample is usually a pre-production sample made from the same or equivalent materials that will be used in bulk. A pretty sample made from a superior cloth can hide problems that only show up later, such as a softer-than-expected hand feel, a different print strike, or a bag that folds badly in carton packing.
In a procurement workflow, the sample stages should be simple and explicit. A proto sample may help validate shape and dimensions before decoration. A decorated sample then confirms the print, logo placement, and handle construction. A pre-production sample, ideally from bulk materials or approved equivalents, is the one you should use for final sign-off. If the supplier wants to skip directly to bulk after a sketch approval, that is a risk, not a time saver.
For retail launch programs, the sample should be checked in the same way the finished product will be received. Measure the final dimensions, inspect the handle reinforcement, test the print visually and by light rub if appropriate, and fold the bag into the intended pack format. Keep photos of the approved sample next to a ruler, the print reference, and the folded pack size. That record becomes useful if you need to compare a bulk shipment or settle a defect dispute.
If the order includes multiple colors or regional versions, sample each version that carries a different fabric, print, or label. Do not assume one approved sample covers every SKU unless the build is identical. A new colorway can change the look of the print, the feel of the fabric, and the packing behavior. One sample per SKU may sound slow, but it is cheaper than correcting an entire shipment later.
The point of sampling is not to prove perfection. It is to identify the failure points before they become bulk losses. The best buyers use the sample process to force clarity on the details that would otherwise be left to interpretation.
- Use proto, decorated, and pre-production samples as separate approval stages.
- Approve the sample in the same fold, pack, and label format planned for bulk.
- Sample each distinct SKU if fabric, print, or labels change.
- Keep a dated approval record with photos, measurements, and the exact sample reference.
8. Set QC thresholds that are objective enough to enforce
For procurement buyers, the bag should be judged against measurable tolerances, not just whether it 'looks good.' Canvas is a woven product, so some variation is normal, but variation should stay inside a defined band. Agree the acceptable fabric weight tolerance, finished size tolerance, print placement tolerance, and stitch appearance criteria before bulk. If the supplier knows the pass/fail line, inspection is faster and the chance of dispute is lower.
A practical tolerance framework often starts with dimension control around ±0.5 cm to ±1.0 cm on the finished bag, depending on the bag size and market expectation. Print placement usually needs tighter control where the logo is prominent or aligned to seams. Stitch quality should be defined by visible criteria: no skipped stitches, no loose thread clusters, no obvious seam puckering, and no asymmetric handle attachment. If the handle build is load-bearing, require a reinforcement pattern such as box-X or bar-tack and inspect for consistency on both handles.
The load test should be realistic. If the tote will carry merchandise or consumer purchases, test with a packed weight that reflects real use, not just an empty-bag visual check. The purpose is not to break every bag; it is to confirm that the handles, top seam, and side seams behave as expected under normal use. For a retail launch, a weak bag can create both replacement cost and brand damage. For a charity campaign, it can create reputational risk if the bag fails in public.
A strong QC plan also includes color and cleanliness checks. Compare the approved sample to the bulk lot under daylight and warehouse lighting because canvas can shift visually under different lamps. Inspect for stains, oil marks, ink smears, loose threads, odor, and carton damage. For many buyers, these are not cosmetic side issues; they are the difference between a shelf-ready tote and a rejected one. If the bags are sold through retail, the packing standard matters as much as the sewing standard.
If you use a third-party inspector or a buyer-side receiving team, make sure the inspection method is stated in advance. AQL-based sampling or an agreed lot check keeps the process objective. What matters is consistency: the same standard must be used for the sample, bulk, and any repeat order. That is how you keep the product line stable over time.
- Set a size tolerance sheet before production starts.
- Define visible stitch defects, not just general strength language.
- Use a realistic load test tied to how the tote will actually be used.
- Inspect under different lighting conditions for color and stain control.
- Use the same inspection method for the sample, the first shipment, and reorders.
9. Plan packing, cartonization, and warehouse handling as part of the product
Packing is often treated as a final administrative step, but for heavy canvas totes it is part of the product economics. The bag is bulky relative to its value, so fold size, carton count, and master carton dimensions directly affect freight and warehouse handling. A flat-packed tote usually ships more efficiently and arrives in better shape than a loosely packed tote. If the tote is going to retail stores or an e-commerce fulfillment center, the packing spec should be written with the receiving team in mind.
Decide early whether the tote needs a polybag. For some programs, a polybag protects the product and makes retail handling easier. For others, it adds labor and waste without enough benefit. The same is true for hangtags, barcode labels, and carton markings. A charity campaign distributed directly to participants may need only simple bulk packing. A retail launch, by contrast, often needs unit-level identification so the warehouse can receive and distribute stock without manual relabeling.
The folded size matters because it determines carton efficiency. If the fold is too loose, the cartons become oversized and freight cost rises. If the fold is too tight, the bag can look creased or lose its clean retail shape. A good quote should specify the folded dimensions, bag count per carton, gross weight target, carton dimensions, and whether cartons are palletized. If any of these fields are missing, the supplier may optimize around its own packing habit rather than your receiving process.
Carton labeling should match the order structure. If you have multiple colorways, SKUs, or campaign versions, the master carton marks should clearly identify each one. Mixed cartons can create problems for distribution centers and make quality claims harder to trace. For a retail launch, a tidy pack list and barcode structure can save a surprising amount of receiving time. That is hidden value, and it belongs in the buying decision.
For charity programs with tight event deadlines, simple packing can be an advantage. But even then, the bag should arrive clean, counted, and consistent. Packing is not glamorous, but it is where many tote orders lose efficiency or arrive less prepared than planned.
- Agree folded size before the factory finalizes carton dimensions.
- Use SKU-specific carton marks when you order multiple colors or versions.
- Only add polybags, tags, or inserts when they support the channel economics.
- Confirm carton count, gross weight, and pallet plan before shipment booking.
10. Use a quote framework that makes final supplier comparison easier
If you want a realistic supplier comparison, ask every candidate to quote the same structure. The quote should separate fabric, sewing, decoration, packing, and logistics so you can see which part of the program drives cost. It should also distinguish between sample cost and bulk cost, because some suppliers price samples low and recover margin in the production run. Others do the opposite. Without a structured quote, the cheapest line item can hide the highest overall cost.
A useful quote template for heavy canvas tote bags should include fabric weight and composition, finished size, handle specification, decoration method, packing format, MOQ, sample lead time, bulk lead time, and any setup or tooling charges. If the order will be repeated, ask for reorder pricing after the setup is amortized. If the order is one-time, ask for the total landed cost at the required destination. The buying decision is different in each case.
When comparing direct factory, trading company, and local decorator bids, put the answers into the same worksheet and score them on more than price. Score them on spec clarity, sample fidelity, response speed, QC transparency, and the ability to repeat the same result on the next order. For a retail launch, repeatability is often more valuable than a small first-order discount. For a charity campaign, schedule certainty may matter more than perfect finish detail. The right buyer outcome depends on the business objective.
You should also ask the supplier to explain the assumptions behind the lead time. Is the fabric already in stock? Is the print queue open? Are labels sourced locally or imported? Is there a planned inspection hold? Those details tell you whether the quoted date is realistic. A single promised ship date without a milestone breakdown is not enough for launch planning. The buyer needs visibility into the path, not just the endpoint.
The final decision should balance visible quality, landed cost, MOQ flexibility, and delivery confidence. If one supplier is slightly more expensive but much clearer on QC and lead time, that can be the lower-risk commercial choice. If another supplier is cheaper but vague on packaging or production control, the apparent savings may disappear later. That is the real procurement tradeoff.
- Ask for the same quote structure from every supplier so comparisons are meaningful.
- Separate sample cost, setup cost, unit cost, and freight cost.
- Score suppliers on repeatability and QC clarity, not price alone.
- Request lead-time milestones, not just a single promised ship date.
Specification comparison for buyers
| Procurement decision | Best-fit option | Typical cost impact | When it wins | Buyer risk to check |
|---|---|---|---|---|
| Fabric weight | 12 oz to 16 oz canvas, usually 420 to 540 GSM | Lower GSM can reduce fabric cost, but a dense weave may still price higher than a loose heavier cloth | Retail launch, premium charity merch, or any tote that must hold shape and take decoration cleanly | Confirm the real hand feel and weave density, not only the stated oz or GSM |
| Supplier route | Direct factory with in-house cutting, sewing, printing, and packing | Usually lower hidden coordination cost; may have better unit pricing at scale | Repeat orders, tight spec control, and programs where QC accountability matters | Verify which steps are truly in-house and which are outsourced |
| Supplier route | Trading company or sourcing office | May add margin, but can simplify multi-item programs and multilingual coordination | Mixed programs, consolidated shipments, or buyers with less direct factory management time | Ask for factory identity, process ownership, and who signs off on defects |
| Supplier route | Local decorator using imported blanks | Can reduce domestic transit time and simplify small-volume reorders | Short test launches, urgent charity events, or local fulfillment needs | Check blank quality, decoration durability, and landed cost versus factory direct |
| Sampling stage | Pre-production sample from same or equivalent bulk materials | Adds sample cost and time, but reduces bulk rework risk | First order, custom artwork, or any retail launch with launch-date pressure | Do not approve a nicer sample fabric than the bulk plan |
| Print method | Screen print for simple logos; heat transfer or digital print only when artwork demands it | Screen print usually has the strongest unit economics at volume; digital may raise unit cost but lower setup for short runs | Solid spot-color artwork, repeat campaigns, or limited SKU tests | Confirm rub resistance, edge sharpness, and behavior on thick canvas weave |
| MOQ structure | Quote by fabric color, print color, and packing variation | Split colorways increase setup and may raise per-unit cost | Regional charity editions, retail test programs, or multi-color campaign lines | Do not assume total order volume equals MOQ per SKU |
| Packing format | Flat pack with inner polybag only if needed and SKU-coded master cartons | Simple packing keeps labor down; retail-ready labeling can add cost but reduce receiving time | E-commerce, retail distribution, and warehouse-managed programs | Check folded size, carton count, barcode placement, and carton marks |
| QC control | Written tolerance sheet plus pre-shipment inspection | Minimal direct cost compared with rework, claims, and delayed launch costs | Any import order, especially where the bag is public-facing or retail sold | Agree tolerances for size, stitch, print, color, and load before production |
Buyer checklist before sampling
- Final artwork file with exact print dimensions, placement, and one approved Pantone target or visual color reference
- Target fabric weight in oz and GSM, plus whether you want natural, bleached, dyed, or recycled canvas
- Handle length, handle width, stitch pattern, and minimum load expectation in kg or lb
- Bag dimensions, gusset depth, and whether the tote must stand upright on shelf
- Pack method: folded size, polybag yes/no, carton pack count, and any retail barcode label needs
- Target MOQ per colorway and acceptable setup cost for print, embroidery, woven label, or special packaging
- Required sample stage: proto sample, size confirmation sample, pre-production sample, or decorated sample from bulk materials
- Inspection method: in-line check, final random inspection, or third-party pre-shipment inspection
- Target lead time and any launch date that cannot move
- Desired landed cost basis: EXW, FOB, DDP, or delivered-to-warehouse comparison
Factory quote questions to send
- What is the exact fabric specification you are quoting: oz, GSM, yarn count if available, weave type, and whether the cloth is stock or woven/dyed to order?
- Is the print setup included in the unit price, or separated as screen charge, plate charge, artwork fee, or sampling charge?
- What is the MOQ per color, per print design, per label type, and per order line if we split sizes or packaging?
- Which steps are done in-house: fabric cutting, sewing, printing, washing, ironing, packing, and carton labeling?
- Can you provide a size tolerance sheet, stitch specification, and allowable color variation for the canvas and the print?
- What is the sample lead time and what fabric will the sample use relative to bulk production?
- What packing configuration is quoted: inner polybag, carton quantity, carton size, gross weight, and pallet option?
- What is the estimated production lead time after sample approval, and what could extend it such as fabric dyeing, label sourcing, or external printing?
- What inspection standard do you use before shipment, and can you share photo evidence from finished goods or carton checks?
- What are the hidden costs if we change artwork, request extra labels, split into multiple colorways, or ask for urgent production?
Quality-control points to confirm
- Fabric weight tolerance: agree a practical range, such as within 5% of the approved GSM or oz specification, and verify on an actual cutting swatch rather than by feel only.
- Finished size tolerance: define acceptable variation for width, height, and gusset depth; for many tote programs, ±0.5 cm to ±1.0 cm is a practical starting point depending on size and construction.
- Handle stitching: inspect bar-tack or box-X reinforcement for symmetry, tight tension, and no skipped stitches; if the tote is load-bearing, require a documented pull or carry check.
- Seam allowance: confirm consistent seam width so the finished size does not drift between samples and bulk, especially around the gusset and top hem.
- Print registration: check logo placement and edge sharpness on the actual fabric texture, not only on artwork proofs or flat mockups.
- Color consistency: compare the sample to the bulk lot under daylight and warehouse lighting before mass approval; if Pantone matching is required, state the acceptable delta in the spec sheet.
- Load test: verify handles and side seams with a realistic packed weight, not just an empty-bag visual inspection; many buyers specify a carrying load test at the bag's intended use level plus a margin.
- Print durability: ask for rub or fold resistance guidance for the chosen ink or transfer system, especially when the tote will be folded, stacked, or used repeatedly.
- Packing accuracy: count bags per carton and verify SKU labels, barcode labels, and carton marks against the PO; confirm whether master carton counts are exact or approximate.
- Inspection sampling: use an agreed random inspection method, such as AQL-based sampling or a buyer-approved lot check, so pass/fail decisions are not subjective.