Why the top hem fold is a sourcing risk, not a sewing detail
For a drawstring backpack, the top hem is not just a finishing edge. It controls how the bag opens, how the cord moves, how the mouth sits in the hand, and how much usable print area remains above the logo. When the hem is folded inconsistently, buyers see twisted openings, uneven mouth heights, or artwork that lands too close to the seam and disappears after sewing. That is why a drawstring backpack top hem fold risk register is useful: it gives procurement teams a way to compare suppliers against the same failure modes instead of relying on a sample that looks fine at first glance.
The risk shows up most often after the first bulk run, not during a quick sample approval. A sample made by a skilled technician can hide weak process control in cutting, folding, or pressing. If the factory has no written rule for fold depth, stitch path, and cord exit reinforcement, the first lot can still pass visual review while failing after packing, loading, or light washing. Buyers who treat the hem as a controlled spec usually get cleaner quotes and fewer disputes when defects appear.
- The fold affects function, not only appearance.
- Small hem errors can shift logo placement by several millimeters.
- Inconsistent folding often creates more customer complaints than the print itself.
Write the hem into the spec in finished dimensions
A strong RFQ starts with finished dimensions, not casual descriptions like neat fold or standard top finish. State the finished hem depth in millimeters, the total bag size after sewing, and the tolerance you will accept left to right. If you only specify flat cut size, two factories can quote different constructions and both claim compliance. For example, one may use a wider double turn hem on a 240 GSM canvas bag, while another uses a narrow single fold with a visible stitch line. They are not the same product, even if the exterior size is similar.
Also state where the fold begins relative to the bag opening and where the stitch line lands. For a simple promotional bag, a 20-25 mm finished hem can work well on medium cotton canvas. For a more structured retail bag, a buyer may need a slightly deeper fold to hide raw edges and protect the cord channel. The key is to avoid vague terms. Write the hem in the spec sheet the same way you write panel size, strap length, or print area: as a measured feature that can be checked on receipt.
- Use finished hem depth in mm, not words like standard or normal.
- State tolerance separately for size, fold symmetry, and artwork placement.
- Ask the supplier to mark the fold line on the PP sample before approval.
Match fabric GSM and weave to the fold you want
Fabric weight changes how the top hem behaves. Lightweight cotton at around 140-180 GSM is easier to sew and cheaper to ship, but it can collapse at the mouth and make the fold look soft or uneven after packing. Medium cotton or cotton canvas in the 200-280 GSM range usually gives a better balance for retail and premium promotional orders because it holds the hem shape without becoming bulky. Heavier canvas above that can look strong, but it also needs more careful folding and higher stitch control so the top edge does not become thick or distorted.
The weave matters as much as GSM. A loose weave can spread at the fold, which makes the top edge drift and can expose raw fibers near the cord exit. A tighter weave gives a cleaner line but may need stronger needles, better thread selection, and more sewing skill to avoid puckering. If your bag will be washed, pre-shrunk or washed fabric is worth asking for, because the top hem is one of the first areas to show shrinkage differences. Buyers should not assume a heavier fabric automatically solves hem risk. Sometimes the right answer is a midweight fabric with better yarn consistency and a controlled fold.
- 140-180 GSM: lighter giveaway use, but higher risk of mouth collapse.
- 200-280 GSM: often the safest band for shape retention and clean fold appearance.
- Above 280 GSM: better body, but check bulk at the top edge and cord movement.
Choose branding methods that survive the top edge
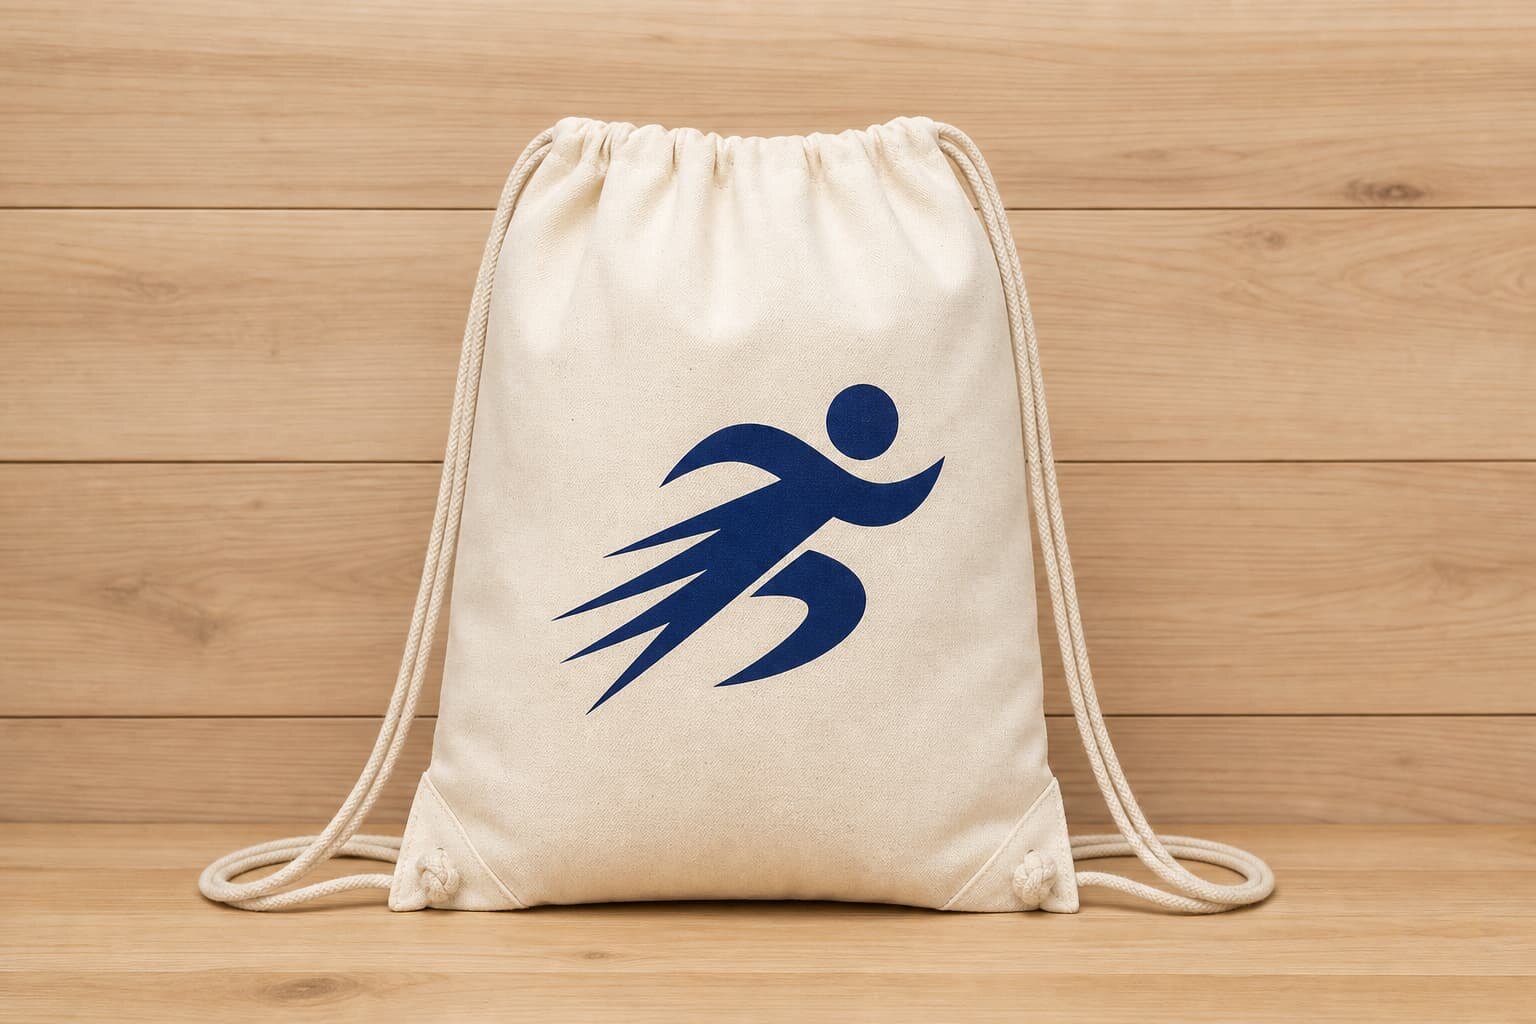
Branding fails fast when artwork sits too close to the fold. Screen printing, heat transfer, embroidery, woven labels, and sewn patches all interact differently with the top hem. A screen print placed just below the hem can become partially hidden after the fold is pressed and stitched. Heat transfer may look crisp on the flat sample but crack when the mouth is turned repeatedly. Embroidery adds texture, but on lighter fabric it can pull the panel upward and create a ripple near the top edge. The safest rule is to reserve a protected print zone and make the factory show the finished fold before you approve artwork placement.
For many buyers, the best approach is to keep the main logo on the front panel and move small identity marks to a side label or lower woven tag. That gives the hem room to breathe and lowers the chance that branding gets swallowed by the seam. If the design must sit high on the bag, require a physical strike-off or decorated PP sample using the exact fabric and folding process. Do not approve logo position from a digital artwork file alone. Ask the factory to show the relation between the artwork edge and the final fold line in millimeters.
- Screen print: good value, but confirm the print does not cross the fold zone.
- Heat transfer: check cracking after repeated opening and closing.
- Embroidery: verify puckering risk on lighter GSM fabric.
- Woven or sewn labels: safer near the side seam than near the hem.
Set sample acceptance criteria before you approve production
A sample is only useful if it is judged against written acceptance criteria. For the top hem, that means measuring the depth of the fold, checking whether the left and right sides match, and confirming that the cord exits do not cut into the seam allowance. Ask the factory to send a pre-production sample made with the same fabric, cord, print method, and packing method as bulk production. A prototype made from substitute materials is useful for fit review, but it should not be the final approval basis for hem quality.
Your acceptance rules should include both appearance and function. The bag should open smoothly, the cords should move without snagging, and the mouth should return to a straight line after being drawn open and closed several times. If the logo is positioned near the top, set a measurement from the fold line to the nearest printed edge and keep that distance consistent across the sample and the bulk run. A practical buyer does not ask whether the sample looks good; they ask whether the same result can be repeated 5,000 times.
- Check hem depth at three points: left, center, and right.
- Cycle the cord open and closed several times to catch snagging.
- Confirm the PP sample uses final fabric, final print, and final packing.
- Keep a sealed sample or photo record for dispute handling.
Compare hem constructions before you award the order
Not every drawstring backpack needs the same top hem construction. A light promotional bag can use a simpler fold if the load is low and the decoration is minimal. A retail bag that carries shoes, sports gear, or a laptop accessory may need a deeper fold, stronger topstitching, and reinforced cord exits. The right comparison is not cheap versus expensive; it is function versus risk. Buyers should ask suppliers to quote the same size, the same fabric weight, and the same decoration method, then compare how each factory builds the hem.
Use the table below to compare options that matter in real production. The point is to see which construction gives the best balance between mouth shape, print safety, and sewing durability. When suppliers quote different hem depths or stitch paths without explaining the reason, the apparent price difference can be misleading. A lower quote that uses a weaker fold can cost more after rework, claims, or delayed launches.
- Compare identical size, fabric, cord, and packing before judging price.
- Treat the hem as a construction choice with direct cost and quality impact.
- Ask the supplier to explain why one construction is better for your use case.
Build quote data that lets suppliers price the same bag
A clean quote starts with the inputs that actually change cost. At minimum, the supplier needs fabric GSM and finish, panel size, hem depth, print method, number of print colors, cord type, label type, packing format, and carton loading target. If those items are missing, one factory may quote a stripped-down version while another builds in reinforcement and packing detail. The result looks like a price gap, but it is really a specification gap. Buyers should ask for quote lines that separate blank bag cost, decoration cost, special sewing cost, and packing cost.
MOQ logic should also be visible in the quote. Screen printing often carries a setup cost per color and a practical MOQ tied to the print screen or stencil run. Woven labels may have a minimum order tied to label weaving or cutting. Embroidery can have a digitizing or hooping setup factor. If you add a special fold finish, ask whether the factory treats it as standard sewing or as a custom operation that changes the MOQ. The buyer's goal is not the lowest headline number; it is the lowest fully comparable number.
- Require separate lines for blank bag, print, label, packing, and special sewing.
- Ask how MOQ changes when you add a logo, label, or color variation.
- Request the quote basis in writing so later revisions are traceable.
Pack and carton the bag without flattening the mouth
Packing can damage the hem even when sewing is correct. If the bag is folded too tightly, the mouth can develop a permanent crease or the cord channel can bend inward. That is a real commercial problem for retail buyers because the bag may look cheap on shelf, even though the sewing passed inspection. Ask the supplier how many folds are used, whether the bag is polybagged individually, and how many units are packed per carton. The answer matters because over-compressed packing can change the top line and hide the fold issues you paid to control.
Lead time should also be discussed as a sequence, not one date. A small correction to the hem may not add much time, but a change in print position, cord reinforcement, or packing method can affect cutting, sewing, decoration, and carton loading. For a typical order, the supplier should be able to tell you where time is spent: sample approval, material booking, print setup, sewing, packing, and final inspection. That lets procurement teams see whether a quote is realistic without asking for a promise that the factory cannot control.
- Do not over-fold the mouth during packing just to save carton space.
- Ask for a packing photo or a packed sample before bulk dispatch.
- Break lead time into sample, material, production, and packing steps.
Track the risk register from sample to final inspection
The value of a risk register is that it turns hidden sewing problems into tracked items. For a drawstring backpack top hem fold, the register should list the risk, the cause, the inspection method, the owner, and the decision if the defect appears. Examples include hem twist, cord exit tear-out, logo intrusion into the fold, uneven top line, and packing crush. When the same risk names appear in the RFQ, the sample review, and the inspection report, suppliers understand that the buyer is measuring repeatability rather than just chasing visual perfection.
This is especially useful when multiple factories quote the same job. One supplier may say the hem is fine because the sample looks neat, while another may flag that the print is too high and will fall into the fold after bulk sewing. The risk register gives procurement a way to document those differences and ask the right follow-up questions. It also helps after production if you need to decide whether an issue is reworkable, waivable, or rejectable.
- Record the defect, likely cause, and inspection point for each hem risk.
- Use the same risk wording in the RFQ and in the final QC report.
- Keep photos that show the fold line, print edge, and cord exit together.
Decide what is reworkable and what is not
Not every hem issue deserves the same response. A misplaced woven label or a slightly shifted fold line may be reworkable if the bag still functions and the fabric is not damaged. But if the fold cuts into the cord channel, the opening twists, or the logo is trapped in the seam, the defect is structural and should be treated much more seriously. Buyers should set this decision logic before production starts so there is no debate at the warehouse dock when cartons are already in transit.
The cleanest rule is simple: if the issue can be corrected without weakening the bag or creating visible cosmetic damage, it may be reworked; if the fix changes function, it should be rejected or renegotiated. Put that rule in the RFQ or quality agreement, along with photo examples if needed. For a product that is judged by retail customers in seconds, the top hem is not a minor detail. It is the line that tells them whether the bag feels intentional or rushed.
- Reworkable: loose label placement, minor packing crush, small trim cleanup.
- High risk: distorted mouth line, cord exit tear, print trapped in the fold.
- Reject or renegotiate when the bag loses function or repeatability.
Specification comparison for buyers
| Spec decision | Recommended option | When it fits | Buyer risk to check |
|---|---|---|---|
| Top hem depth | 20-25 mm finished hem on light to medium canvas | Promotional and retail bags where the mouth needs a clean line without extra bulk | Too shallow can bite the cord; too deep can distort the top edge and raise sewing cost |
| Stitch construction | Double topstitch or reinforced fold seam | Bags that will be loaded often or washed occasionally | Single stitching can open at the fold or drift unevenly across panels |
| Cord exit reinforcement | Bar tack or patch reinforcement at both exits | Any bag above basic giveaway quality | Unreinforced exits tear first, especially on heavier fill weights |
| Branding near the hem | Keep print 20-30 mm below the fold line | Screen print or heat transfer on the upper front panel | Artwork too close to the fold distorts, cracks, or gets hidden in the seam |
| Fold method | Specify pre-press and final fold sequence | Orders that need consistent mouth height across batches | Different folding order changes the finished bag height and can skew print placement |
Buyer checklist before sampling
- Confirm finished body size, hem depth, and tolerance in millimeters, not just open-size dimensions.
- State fabric GSM, weave, and any wash finish so suppliers quote the same material basis.
- Define print method, print area, and minimum distance from the top hem line.
- Ask for cord diameter, cord length, tip finish, and whether the cord is pre-cut or cut in-house.
- Require a pre-production sample or sealed gold sample that shows the final fold and branding position.
- Set acceptance criteria for symmetry, seam security, and logo placement before bulk approval.
- Ask how the bag will be folded, polybagged, and carton-packed so the mouth does not deform.
- Request separate pricing for blank bag, decoration, packing, and any special reinforcement.
Factory quote questions to send
- What finished hem depth do you quote, and what tolerance can you hold across left and right panels?
- What fabric GSM, weave density, and finish are included in the price?
- Which stitch construction is used at the top hem, and is reinforcement added at the cord exit?
- How far is the standard print zone from the fold line, and what is the maximum safe artwork height?
- What is the quoted MOQ for blank bags, printed bags, and bags with added labels or embroidery?
- How is the bag folded and packed for carton loading, and does that change the quoted lead time?
- What sample type is available before bulk production: prototype, PP sample, or sealed approval sample?
- Which quote items are separate line items: fabric upgrade, print setup, label application, packing, and carton testing?
Quality-control points to confirm
- Measure hem depth at left, center, and right on the finished bag.
- Check that the fold line stays parallel to the top edge and does not twist into the cord channel.
- Verify logo or label distance from the hem so no part disappears into the fold.
- Pull the cords several times and confirm the exits do not tear, fray, or elongate.
- Inspect stitch density and backtack strength at the fold and at the side seams.
- Open and refold packed bags to confirm the mouth line recovers without permanent creasing.