Why zipper business bags are a different launch item
For a brand launch, a zipper business bag is rarely just a carry case. It is a working sales tool: it holds documents, sample cards, tablets, chargers, product sheets, or small display items, and it has to make a good first impression when your team walks into a meeting or trade event. That is why procurement should treat it like a functional presentation product, not a generic tote with a zipper added at the end.
The most common mistake is buying from a visual reference alone. A bag can look clean in a mockup and still fail in production because the zipper curve reduces the usable opening, the fabric collapses after printing, or the handles feel too soft for daily use. For a launch program, the right spec balances appearance, load-bearing, unit cost, and the packing method your freight plan can handle.
A launch bag also has a different lifecycle than a consumer accessory. You may only need the first run for a campaign window, but the item still has to be repeatable if the launch expands into distributor kits or field sales use. That means the product spec should be written as if it may be reordered. If the first order is too vague, the second order becomes a new sourcing project.
Procurement teams should also recognize that zipper business bags sit between two competing goals. Marketing wants them to look premium; operations wants them to ship efficiently and stay within budget. The most useful specs make those trade-offs explicit. If the bag is meant to be carried in front of clients, a little more structure and branding depth may be worth the extra cost. If it is mainly for internal launch documents, a simpler shell with a clean logo may be the smarter buy.
From a sourcing standpoint, this product is only manageable when the buyer defines the end use first. Do the bags need to carry printed folders? Must they fit a 13-inch tablet? Will they be handed out individually or packed in master cartons for distributor shipment? These use-case details affect the opening width, handle length, zipper gauge, fabric stiffness, and carton size. In other words, the bag is not just an item to price; it is a small system that has to fit the launch workflow.
- Good use cases: launch kits, sales meeting bags, distributor onboarding packs, event giveaways with documents, and internal brand rollout materials.
- Typical failure points: weak zipper tape, print cracking on low-density fabric, undersized openings, and handle stitching that fails after repeated carry.
- Buyer priority: choose a spec that can be repeated across SKUs without constant rework.
- Procurement rule of thumb: define contents first, then size, then material, then decoration.
- If the bag will be carried in front of clients, inspect hand feel and zipper finish as carefully as print quality.
Start with the use case, not the artwork
Before asking suppliers for prices, lock the practical use case. This is the fastest way to stop the quote from drifting. A launch bag for document handouts does not need the same build as a sample-carrying bag that will move through airports, trade fairs, and field visits. If the contents are thin paper folders only, the bag can be slimmer and cheaper. If the contents include rigid sample boards or devices, the bag must have more depth, better seam allowance, and a zipper opening that does not pinch the top edge.
A useful brief should answer five questions: what goes inside, how often the bag is used, who carries it, what impression it should create, and how the bags are packed for delivery. Those answers determine whether the bag should be flat or gusseted, lined or unlined, soft or structured, and whether a front pocket is actually useful or just decorative. In procurement terms, this is the difference between a nice-looking price and a usable product brief.
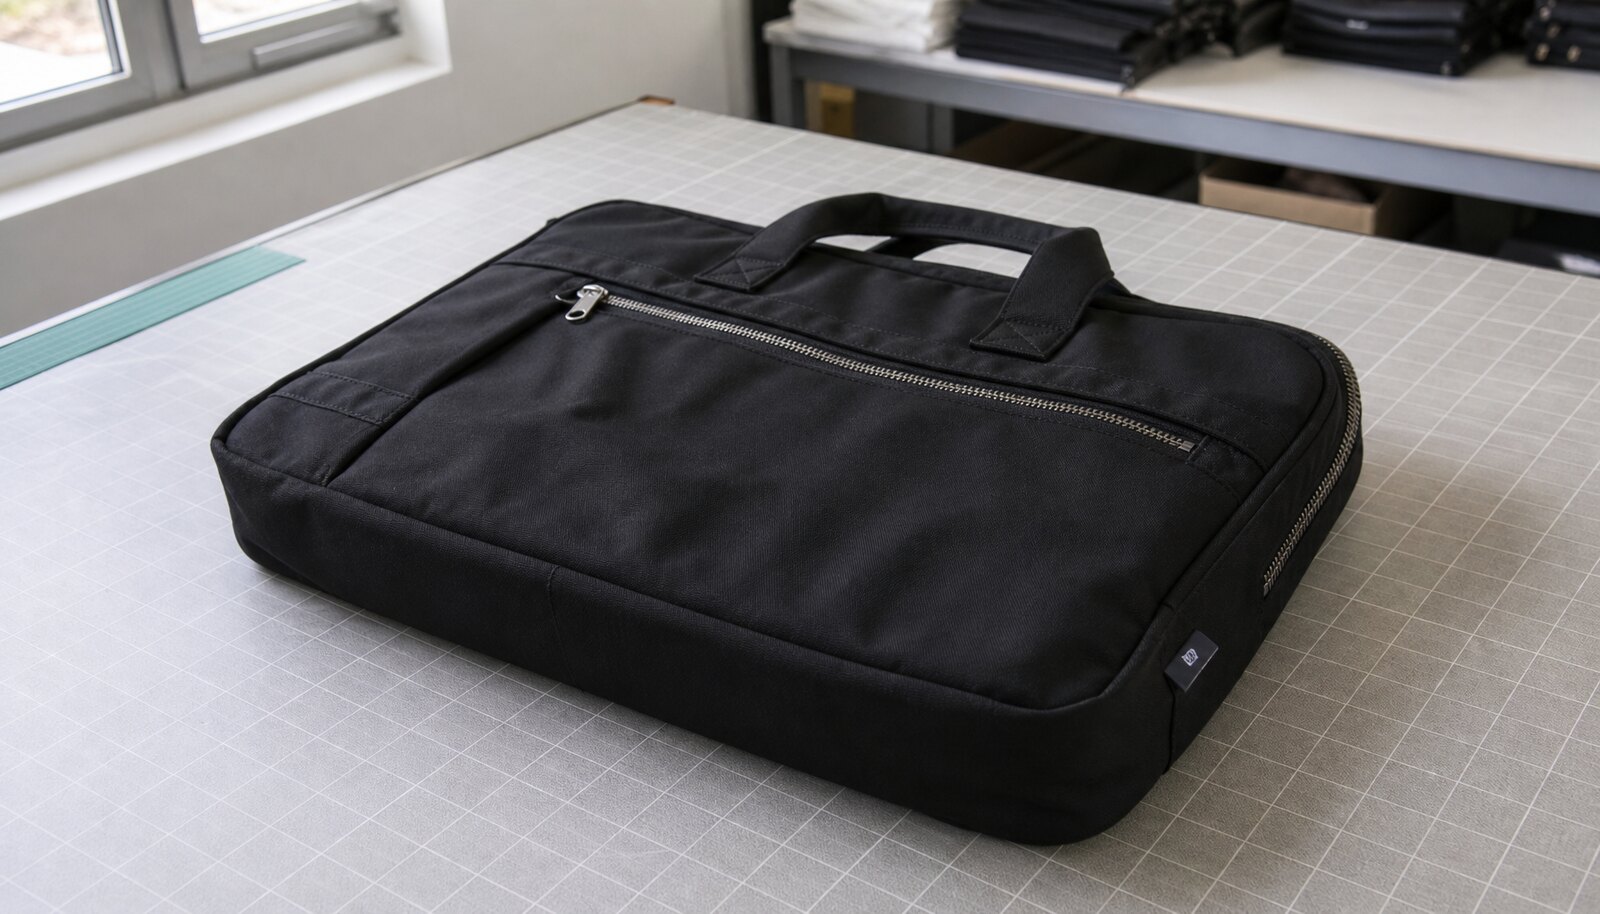
For brand launches, it is often smarter to keep the structure simple. A full top zipper, one main compartment, one front pocket if needed, and reinforced webbing handles will satisfy many launch scenarios without overcomplicating the cost stack. Extra compartments, padded sleeves, metal hardware, or complex panel shaping may look attractive in renderings, but each one adds sewing time and quality risk. Unless those details support a clear use case, they usually belong in a later version of the bag.
The best time to simplify is before the supplier samples anything. If the buyer has not agreed on the exact contents, the factory may choose dimensions that are easy to sew rather than dimensions that work for the end user. That is how a bag ends up too short for a folder, too shallow for a tablet, or too narrow for a brochure set. Write the use case into the RFQ. That one step improves quote accuracy more than most buyers expect.
A practical launch spec is usually easier to approve when the contents are listed in the order they will be packed. For example, a sales kit may need one A4 brochure, one slim notebook, one charging cable pouch, and one tablet sleeve. If the factory can see the complete load-out, it can recommend a better internal size and opening width instead of guessing from the artwork. That reduces the risk of a remake after the first sample.
- Write down the exact items the bag must carry, including folder size, tablet size, and any sample box dimensions.
- Decide whether the bag is hand-carry only or needs shoulder comfort for longer movement.
- Keep the first launch spec to one main compartment unless a second compartment solves a real workflow problem.
- Ask the supplier to confirm the usable internal dimensions, not just the outer dimensions.
- If the bag is for distributor kits, check whether bulk packing or retail-ready packing is more important.
Choose the bag structure before you compare supplier prices
A clear structure makes quote comparison possible. For zipper business bags, the main decisions are shell fabric, lining, size, zipper style, handle construction, and any internal pocket or divider. Once those are fixed, you can compare suppliers on the same sheet instead of comparing different assumptions. That is where many sourcing projects go wrong: one supplier quotes a lightly padded polyester bag, another quotes unlined canvas, and both look competitive until samples arrive.
The most practical launch spec is usually a structured document bag that fits A4 folders or a tablet sleeve, with a full top zipper, reinforced webbing handles, and one front pocket if the buyer needs quick access to cards or a phone. If the bag is meant to present a premium brand, canvas at 12–16 oz often gives a better hand feel. If the budget is tight or the launch volume is uncertain, 300D to 600D polyester is usually easier to price and faster to source.
Think of structure as a cost-control tool. A lightly structured polyester body is easier to sew, easier to pack, and usually more forgiving on print. Canvas creates a stronger visual impression but can expose stitching irregularities more clearly, especially on lighter colors. Lining improves perceived quality but adds labor, more cut pieces, and a greater chance of alignment issues if the factory is not organized. For launch programs, the right structure is often the simplest one that still looks deliberate and works under real use.
A buyer also needs to think about zipper behavior. A full opening that seems generous on paper can become cramped if the zipper curve reduces the usable width at the corners. If the bag will hold thick inserts or a tablet, ask the supplier to state the opening width, not only the bag width. That detail matters because a bag can be technically large enough and still feel awkward in use. The opening should support the contents without forcing the user to bend materials or fight the zipper path.
If you expect the bags to be reused after the launch event, check whether the structure will hold its shape after repeated loading. A very soft body may be acceptable for document handouts, but it can look tired quickly once the bag has been filled and emptied several times. That is where structure becomes a brand signal as much as a functional choice.
- Use 300D–600D polyester when cost, color flexibility, and lighter shipment weight matter more than premium texture.
- Use 12–16 oz canvas when the bag needs a more substantial look and better print surface for simple brand marks.
- Add lining only when the contents or customer experience justify the extra sewing cost and lead time.
- Keep internal pockets simple; every added piece raises labor and seam risk.
- Confirm opening width and zipper run length, not just overall bag dimensions.
Fabric, GSM, and print method drive more cost than buyers expect
Fabric choice is the biggest price lever after quantity. In business bags, the factory is not just charging for material; it is also charging for cutting behavior, stitch speed, print compatibility, and reject risk. A 300D polyester body can be quick to cut and sew, while heavier canvas may need stronger needles, slower sewing, and more careful alignment. That means the quote should state both the fabric and the expected finish, not just the material family.
For buyers who are comparing options, it helps to think in procurement terms rather than marketing terms. “Polyester” can mean a wide range of weights and hand feels. “Canvas” can mean different weaves, coatings, or surface textures. If the supplier does not define the actual fabric weight, you may get a bag that technically matches the description but feels noticeably different from the sample. Ask for GSM or oz where appropriate, and ask whether the fabric has a coating, backing, or water-repellent finish.
For print, silkscreen works well when the logo is one or two solid colors and the artwork has clean lines. It is usually the lowest-cost option for a brand launch, but it needs enough flat surface and firm fabric support. Heat transfer is useful for more detailed logos or smaller runs, but it adds process steps and can affect rub resistance if the bag is used heavily. Embroidery has a premium look, yet it can pucker on thin shells and should be tested on the actual fabric before bulk approval.
The print decision should also consider logo size and line weight. Small text, thin outlines, and tight spacing are the areas most likely to fail. A logo that looks crisp on screen may blur once it is printed on textured canvas or stitched on light polyester. If the artwork includes fine type, ask the supplier which size is the minimum readable size on the chosen fabric and process. A good supplier can tell you where the artwork should be simplified before production, rather than discovering that problem after the sample arrives.
For launch projects, buyers should be cautious about over-specifying decoration. An extra print hit, metallic ink, or dense embroidery can raise the cost faster than expected and may not improve the bag enough to justify the spend. When in doubt, choose a stable shell and one clear branding method. That produces a cleaner bag and a cleaner quote. As a working benchmark, ask the supplier to quote the base bag and then price each decoration upgrade separately so you can see where the cost jumps.
- 300D polyester: common for low-to-mid cost launches; ask for actual fabric weight and backing if any.
- 600D polyester: better structure and print stability; often a safer option for bags that need to stand upright.
- 12 oz canvas: workable middle ground for premium-looking launch kits.
- 16 oz canvas: sturdier and more premium, but freight and sewing cost rise quickly.
- Print rule: if the logo includes small type, request a strike-off or printed sample, not just artwork proof.
- Ask whether the chosen method affects rub resistance, color fastness, or future reorders.
How to read MOQ logic without getting trapped by low quotes
MOQ is often presented as a single number, but for zipper business bags it usually comes from three separate constraints: fabric minimums, color setup, and logo process. A factory may quote a low bag MOQ but require a higher MOQ for a custom zipper color, special lining, or woven label. That is normal. What matters is whether the supplier explains how the MOQ changes by component.
For brand launches, a realistic MOQ strategy is to start with one body color, one zipper color, and one logo placement. If you need multiple launch markets, separate those changes into later repeat orders. That keeps the first run manageable and reduces the chance of getting stuck with a half-usable quantity because every version has a different setup cost. It also helps the supplier price the order on a clean basis, which usually gives you fewer surprises in sample correction and packing.
Low MOQ is not free. When a quote looks unusually low on a small order, the trade-off is often hidden somewhere else: fewer color choices, more standard components, higher print charges, a less flexible packing method, or a faster need for full payment before production. Buyers should ask whether the price changes if the order moves from one color to two colors, or if the logo is moved from front panel to pocket panel. Those changes are usually more meaningful than a small quantity reduction.
The safest way to handle MOQ in launch sourcing is to separate must-have spec items from nice-to-have items. For example, the bag may absolutely require a zipper and handle reinforcement, but the woven label, zipper pull customization, and inner pocket may not be necessary for the first production lot. Price the core bag first, then price the upgrades separately. That approach makes the decision clearer when budget, time, and brand expectations are all under pressure.
One practical example helps. If a supplier quotes 500 units at one price for a 600D polyester document bag with one-color silkscreen, and then says a custom zipper puller adds another tooling charge plus a higher MOQ, that does not mean the supplier is being difficult. It means the custom part is a separate production item. The buyer’s job is to decide whether that detail is worth delaying launch or whether a stock puller is the right first-run choice.
- Lower MOQ usually means higher unit price, fewer material choices, or more reliance on in-stock components.
- A custom zipper puller or woven label may carry its own minimum order, even when the bag body MOQ is reasonable.
- If the launch is uncertain, price one standard spec first, then ask for an incremental cost on upgrades such as lining or embroidery.
- Ask the supplier to separate MOQs by body, zipper, print, label, and packing if any item is customized.
- Use one approved colorway for the first order unless market testing truly requires more.
Route comparison: direct factory, trading company, or sourcing agent
For this product, the sourcing route changes more than many buyers expect. A direct factory is usually the best fit when you have a clear spec, want a custom logo, and need control over stitching, zipper quality, and packing. A trading company can be useful if you need to consolidate several product categories or are buying smaller volumes from multiple factories. A sourcing agent helps when you lack time or need local language support, but it adds another layer between the quote and the actual production floor.
The buyer should compare not only unit price but also how much visibility each route gives into component choices and QC. A slightly lower unit price from an indirect supplier can become a worse landed cost if the sample cycles take longer, the zipper is substituted, or the packing spec changes late. For launch goods, clarity is usually worth more than a shallow price cut.
A direct factory is strongest when you need to inspect the real manufacturing constraints. The team can tell you whether the zipper tape is standard stock, whether the fabric is cut in-house, and whether the requested handle reinforcements are consistent with the machine setup. That matters because business bags are not only about appearance; they are stitched products with real mechanical failure points. With a direct factory, you are more likely to get honest feedback about what the sample can and cannot do.
A trading company can be useful if your launch basket includes notebooks, stationery, and other branded items that need to ship together. The trade-off is that the actual bag factory may be less visible, and the trading layer may make it harder to verify whether the zipper brand, fabric roll, or thread specification is being held constant. If you choose this route, ask for direct factory photos, a packing list with component details, and clear sign-off responsibility for defects.
A sourcing agent is best viewed as a control layer, not a substitute for a good spec. If the brief is weak, the agent cannot fix the ambiguity. If the brief is strong, an agent can help bridge language, time zone, and factory coordination issues. For buyers new to zipper business bags, the key point is not the route itself but whether someone can translate procurement requirements into factory language without losing detail.
One useful discipline is to ask every route for the same evidence: product photos from the actual line, a sample with the real zipper specification, the exact packing method, and a clear statement of who signs off on defects. If a supplier cannot answer those questions cleanly, the route is not ready for a launch order.
- Best route for repeatable business bags: direct factory with a written spec and sample sign-off.
- Best route for mixed-category launch packs: trading company or sourcing partner that can consolidate shipment.
- Best route for first-time buyers with limited factory language support: sourcing agent plus a transparent factory contact path.
- Ask who actually owns QC sign-off before you place the order.
- If the supplier cannot explain component sourcing clearly, treat that as a procurement risk, not a communication nuisance.
A side-by-side sourcing comparison that shows real tradeoffs
The table below compares the three main sourcing routes on operational factors that matter to launch buyers. It is not just a routing matrix; it is a practical view of how each option behaves when you need sample control, cost clarity, and on-time shipment. Use it to judge which route gives the best combination of speed, visibility, and support for your order size.
Direct factory sourcing usually gives the cleanest production visibility, but only if your spec is strong enough to be understood without a middle layer. Trading companies can be flexible when multiple items need to ship together, yet they can hide the actual production source and make it harder to confirm component substitutions. Sourcing agents can save time and language effort, but they do not remove the need for a well-written spec or a real inspection plan.
The measurable tradeoff is control versus convenience. If the launch is high visibility, the buyer may want the route with the best control even if the quote is not the lowest. If the launch is a pilot market or internal kit, convenience may matter more. The right answer depends on the risk of the order, not just the quantity on the page.
- Compare routes by sample speed, component visibility, defect ownership, and packing control.
- Use the same spec and same artwork file for all route comparisons.
- A low quoted price is only useful if it comes with stable component sourcing and clear QC responsibility.
What a usable factory quote should include
A quote for custom zipper business bags should be a working document, not a vague price line. It should tell you the material, dimensions, logo method, zipper specification, handle type, packing format, MOQ, sample charge, bulk lead time, and any setup fees. If the quote only gives you a single unit price, the risk is that you will discover exclusions later during approval or packing.
Good quote structure also helps you compare landed cost. For example, a quote with a slightly higher unit price but included woven label, carton marking, and polybagging may be cheaper in the end than a bare quote that charges extras for every finishing step. For brand launches, packaging cost and QC cost often sit in the middle of the real budget, not at the edge.
The quote should also identify what is standard and what is optional. If the supplier is quoting a zipper bag with a front pocket, the buyer should know whether the pocket is already included in the price or treated as an add-on. If the zipper pull is customized, ask whether that customization affects MOQ or sample timing. If the bag includes a lining, ask whether the lining color is stock or custom dyed. The more the quote breaks down these points, the less likely the order is to drift after sample approval.
To compare suppliers fairly, ask for the same format from everyone: product name, size, fabric, weight, color, logo method, zipper type, handle detail, accessories, packing, MOQ, sample lead time, bulk lead time, trade term, and payment term. This makes the quotes readable and reduces the chance of comparing one fully loaded price against one that leaves out a major step. If the buyer wants decision-grade procurement, the quote itself has to be decision-grade.
A practical habit is to attach your brief to the quote request and ask the supplier to confirm any deviation in writing. That way, you can see whether the vendor is proposing a better technical option or simply quoting a different item. Many procurement headaches disappear when the quote is forced to state every deviation before the sample is made.
- Separate sample cost from bulk unit cost.
- State whether print plates, embroidery digitizing, or label tooling are included.
- List carton size and CBM estimate if freight planning matters.
- Confirm whether the quoted price is EXW, FOB, or another term.
- Ask suppliers to note any deviation from your brief line by line.
Landed cost: where the budget really moves
For launch buyers, landed cost is more useful than unit price because the unit price rarely includes all the real work. You need to account for sample charges, tooling, inland freight, export packing, carton volume, inspection cost, and the freight mode you will actually use. A bag that looks cheaper on paper can become more expensive once you add these steps, especially if the bags are bulky or require individual polybags.
The biggest landed-cost levers are usually fabric weight, decoration method, and packing density. Heavier canvas increases carton weight and can reduce the number of pieces per carton. A dense embroidery logo may add labor but also slows the line. Individual polybags and insert cards improve presentation but expand carton volume and can push the shipment into a higher freight bracket. Buyers should therefore ask for both unit price and estimated carton count before choosing a supplier.
Inspection and packing standards also matter. If the project requires 100% visual check, extra carton labeling, or pre-shipment photo evidence, those requirements may add labor but can save money by catching defects before shipment. A disciplined buyer will treat QC as part of the landed-cost model, not a separate afterthought. In launch work, the cheapest mistake is the one caught before the truck leaves.
A useful way to compare bids is to convert them into cost per usable piece delivered. If Supplier A has a lower ex-factory price but higher freight volume and more packing labor, the real delivered cost may exceed Supplier B by the time cartons are on site. That is why the quote needs carton dimensions, gross weight, and packing count. Without those numbers, you cannot calculate true landed cost.
For a practical example, imagine a 600D polyester bag with one-color silkscreen and bulk carton packing at 50 pieces per carton. If the buyer upgrades to canvas, adds a woven label, and switches to individual polybags, the total shipment may need more cartons and more handling time. The right question is not whether the upgrade is nice; it is whether the launch benefit justifies the freight and packing increase. That is the landed-cost decision in plain terms.
- Ask for carton dimensions, gross weight, and pieces per carton before comparing quotes.
- Convert each bid into delivered cost, not just ex-factory price.
- Treat packing and inspection as budget lines, not hidden admin tasks.
- Heavier fabrics often reduce carton efficiency and increase freight exposure.
- If the launch is price-sensitive, keep decoration and retail packaging simple on the first run.
Sample approval: the details that prevent expensive rework
The pre-production sample should be treated as the release gate. For zipper business bags, the sample is where most production issues become visible: zipper alignment, logo size, handle position, seam finish, and whether the bag holds shape with actual contents inside. A flat sample photo is not enough if the final bag has a structured body or internal pocket. Buyers should insist on a physical sample before bulk when the logo or structure is new.
When reviewing the sample, load it with the real use-case items. Put in the folder, tablet, brochure set, or sample pack it is meant to carry. That reveals whether the zipper opening is wide enough and whether the bag keeps its form once filled. Also inspect the inside finish. If the inside thread tails or lining stitches look loose, the same weakness often shows up in the bulk run.
The sample review should be measured, not just visual. Check the bag width, height, and depth against the approved spec. Measure the logo position from the seam line. Open and close the zipper several times, including after the bag is loaded. Pull lightly on the handles to verify attachment points. If the bag has a front pocket, insert a card or phone-sized object and confirm the pocket opening is practical. These checks are simple, but they catch most avoidable errors before production starts.
For higher-risk orders, ask for a top-of-production photo showing the first finished pieces on the line. This is especially useful when the bag uses a new print method, a new zipper color, or a novel handle layout. The goal is to catch systematic errors while the batch is still early enough to correct. That is cheaper than discovering a repeated mistake at final inspection.
The buyer should also document what counts as an acceptable difference from the sample. Not every tiny variation is a defect, but the tolerance should be explicit. If the bag dimensions, print placement, or zipper color can vary slightly, note the range in the approval record. If they cannot vary, say so. That removes ambiguity and gives the factory a clear release standard.
A good sample sign-off note includes three things: what was approved, what variance is acceptable, and what defect is rejectable. If those three points are written down, the factory has less room to interpret the order loosely later. That clarity is especially important for launch bags because the first run often becomes the benchmark for reorders.
- Approve logo placement with actual measurements from seam to logo edge.
- Open and close the zipper several times to test smoothness and end stops.
- Check handle drop length on the shoulder or hand carry path you expect.
- Review the bag with the contents inside, not empty only.
- Request a stitched, printed, or embroidered pre-production sample that matches the final production process.
- Write down the acceptance tolerance for dimensions, print placement, and color before sign-off.
Specification comparison for buyers
| Spec decision | Recommended option | When it fits | Buyer risk to check |
|---|---|---|---|
| Primary fabric | 300D–600D polyester for lighter cost; 12–16 oz canvas for a more premium hand feel | Launch kits, sales presentations, distributor onboarding, trade show carry bags | Too-light fabric can collapse after printing; too-heavy fabric raises freight and sewing cost |
| Lining | 150D polyester lining or no lining for simple document bags | Price-sensitive programs and internal business use | Unlined bags can show thread tails and reduce perceived quality if the shell fabric is thin |
| Print method | Silkscreen for 1–2 spot colors; heat transfer or embroidery for smaller logos with detail | Simple brand marks, agency kits, and launch programs with controlled artwork | Fine text may fill in on silkscreen; embroidery can distort on thin fabric |
| Closure style | Full zipper with self-fabric piping or reinforced zipper tape | When documents, chargers, sample cards, or catalog inserts must stay secure | Cheap zipper coil and weak stitching are the most common early failure points |
| Handle construction | Webbing handles with box-X reinforcement | Hand-carry use at shows, retail visits, and field sales meetings | Short bar-tacks or weak stitch density can tear under repeated load |
| MOQ route | Standard factory MOQ for one style/color + one logo placement; lower MOQ only if using shared materials or in-stock fabric | First launches, pilot markets, and brand tests | Low MOQ often means higher unit cost, fewer color options, or limited customization |
| Sample strategy | Pre-production sample before bulk; photo sample only for repeat orders | New logo, new material, or new bag shape | Skipping a physical sample often leads to zipper alignment, logo size, or pocket-position mistakes |
| Packing method | Bulk pack in cartons with size labels and carton marks; individual polybag only if retail-ready presentation is required | Distributor orders and B2B shipment efficiency | Retail polybagging adds labor and carton volume; weak carton spec can crush bags in transit |
| Supplier route | Direct factory for customization; trading company only when consolidating multiple product lines or mixed factories | Brand launches with clear technical specs and repeat volume potential | Trading layers can hide real MOQ, delay sample approval, and reduce QC visibility |
Buyer checklist before sampling
- Confirm target bag size, zipper opening width, and whether the bag must fit A4 folders, tablets, or sample kits.
- Lock the fabric spec in writing with GSM/oz, weave type, and color reference, not just a generic material name.
- Approve logo placement, print size, Pantone reference, and whether artwork must stay within a stitched panel.
- Set acceptable zipper level, puller style, and reinforcement points before sampling.
- Define packaging format: bulk pack, polybag, insert card, hangtag, or retail master carton configuration.
- Request a pre-production sample and a top-of-production photo before bulk approval.
- Write down carton size limits and gross weight targets for your freight plan.
- Confirm lead time by stage: sample, approval, bulk, packing, and booking date.
- Ask for 1–2 spare percentage allowance in case of minor damage or print rejects.
- Collect at least two quotes with the same spec sheet so pricing is comparable.
Factory quote questions to send
- What exact fabric weight and construction are you quoting, and can you name the GSM or oz value?
- Does your quoted price include printing, zipper puller customization, woven label, and packing, or are any of these extra?
- What is the MOQ by color and by logo variant, and does a different zipper color change the MOQ?
- Can you send a pre-production sample, and what is the sample lead time and sample charge policy?
- Which zipper brand or zipper specification will you use, and what is the stitch reinforcement around the zipper ends?
- What carton size, carton quantity, and packing method are included in the quote?
- What is the production lead time after sample approval, and what production step usually causes delays?
- Can you provide inspection photos or a bulk pre-shipment QC report before shipment?
- If I reduce quantity by 20–30%, how does the unit price and tooling charge change?
- What changes in cost if we switch from silkscreen to embroidery or from polyester to canvas?
Quality-control points to confirm
- Fabric weight matches the approved spec within a stated tolerance of ±5% and the hand feel is consistent across the lot.
- Zipper runs smoothly from end to end with no snagging, skipped teeth, crooked tape attachment, or exposed sharp edges.
- Logo placement stays within the approved tolerance of ±3 mm on small logos or ±5 mm on larger placements and does not cross seams, darts, zipper tape, or pocket openings unless approved.
- Handle reinforcement uses box-X or equivalent bar-tack strength, with at least two secure reinforcement passes at each stress point.
- Seams are straight, thread tails are trimmed, and inside construction does not show broken stitches, loose lining, or raw edge fray.
- Bag dimensions stay within the agreed tolerance of ±5 mm for small bags or ±8 mm for larger document bags, especially usable width and depth after filling.
- Color consistency is acceptable across the bulk lot, with no obvious panel-to-panel shade shift or zipper-to-body mismatch beyond the approved standard.
- Carton pack count matches the packing list, cartons are dry and undamaged, and compression damage is not visible on the first carton layer.
- Any print registration, embroidery density, or woven label placement is checked against the signed sample before release.
- Defects to reject include broken zipper stops, crooked front pockets, skipped stitches at handle points, loose pullers, ink transfer, and oily stains on light colors.