What trade show buyers are actually buying
A trade show tote is not a casual retail bag. It is a working container that gets loaded quickly, carried for long stretches, set down on carpet, concrete, and folding tables, then sometimes reused after the event if it still looks worth keeping. For procurement teams, that shifts the buying decision away from a mockup review and toward a product that can survive handling, keep its shape, and still represent the brand after repeated use.
The common failure mode is approving from appearance alone. Jute can look substantial in a photo and still be weak at the stitch line, soft at the base, or vulnerable to crush damage in packing. If the spec does not define load, size, handle build, and packing up front, the supplier will optimize for cost and speed. That is how a bag that looks good in a sample room becomes the weak point on the show floor.
A practical custom jute tote bags durability testing checklist for trade show exhibitors starts with use case, not with decoration. What goes inside the bag, how far it gets carried, how often it is reused, and whether the buyer wants a simple handout or a premium gift all change the construction. A tote for brochures and one for bottle-heavy sample kits should not be sourced as if they were the same product.
- Judge the tote by working load and field handling, not by an empty-bag photo.
- Treat the handle anchors and top seams as the first pass-fail points.
- Do not approve from artwork alone if print clarity matters on textured jute.
Turn event needs into a quoteable spec
A quote is only useful when every supplier is pricing the same bag. For trade show programs, the RFQ should state finished width, height, gusset depth, handle drop, fabric weight, print method, packing format, and delivery window. If any of those inputs are vague, you will get a number that is easy to compare only on paper. Procurement loses leverage when one factory is quoting a lighter fabric, a shorter handle, or a simpler pack-out without saying it plainly.
Finished dimensions matter more than cut size because natural fibers can tighten slightly during sewing and finishing. Ask the factory to confirm the usable interior size, not just the panel size before assembly. If the bag has to fit A4 folders, catalogs, or a pre-packed sample box, the interior width and gusset depth determine whether it works on site. A bag that is technically on spec but too tight to load cleanly is a bad event bag.
The RFQ should also include acceptable tolerances. Put the tolerance in writing for width, height, handle length, print position, and stitch alignment. Without that, a bag can be close to the artwork while still failing receiving because the logo sits too near a seam or the handles look visibly crooked when the tote is filled. This is the part of the spec that reduces rework later.
- Define finished dimensions, not only fabric cut size.
- State gusset depth and handle drop clearly.
- Ask the supplier to quote with a tolerance range for size, print placement, and stitching.
- Include the intended contents so the tote is designed around the actual load.
Choose the body construction that matches the job
For many trade show programs, 12 oz jute is the light option, 14 oz is the practical default, and 16 oz is the safer choice when the bag needs to be reused or carry heavier contents. Buyers should ask the supplier to state both the ounce weight and the equivalent GSM, because style names alone do not tell you enough about density, structure, or finished handfeel. If the vendor will not state the measurement basis, the quote is too loose to trust.
Natural, unlined jute is usually the lowest-cost construction. It works for simple giveaway programs where the tote only needs to hold flyers and a few lightweight inserts. The tradeoff is that it will not hold shape as well, and the interior will look more utilitarian. Lined or laminated builds give the bag more structure and a cleaner inside surface, which can matter if the tote is meant to survive beyond the show. The downside is higher cost, more stiffness, and potentially longer lead time.
Buyers should think in terms of bag lifecycle, not just event day. If the tote will be carried back to an office, reused for shopping, or kept as a branded utility bag, the extra structure is often worth the money. If the tote is only meant to move brochures from the booth to the parking lot, a lighter construction can be enough. What matters is not the label on the spec sheet. What matters is whether the build matches the use case.
- Use 12 oz only when contents are very light and reuse is not a priority.
- Use 14 oz as the default starting point for most trade show tote programs.
- Use 16 oz or a lined build when load-bearing and perceived quality matter more.
- Ask for the finished size after sewing so the quote reflects reality.
Compare durability tests before you compare suppliers
The best durability checklist is not a long list of buzzwords. It is a short set of tests that map to the ways a tote will actually fail. Start by comparing what each factory can test in-house and what they can document. A supplier that can describe its load test, handle pull test, and final inspection method in plain language is easier to manage than one that only promises the bag is strong. The buyer does not need laboratory theater. The buyer needs enough evidence to reduce risk before the order lands.
A useful buyer-side protocol usually combines four layers. First, a load-and-hold test to see whether the bag keeps its shape under the intended contents. Second, a handle pull or anchor stress check to expose weak stitching early. Third, a simple abrasion or rub check on the printed area. Fourth, carton and moisture checks for logistics risk. That sequence reflects the real path from sample room to booth floor.
The comparison table in this article is meant to help procurement teams decide which test is relevant to the order. A tote for lightweight brochures does not need the same test severity as a bag carrying bottles, catalogs, and merch. If the supplier cannot explain why one test matters more than another, the quote is probably built around the factory's convenience instead of the event's actual use.
- Ask which tests are routine and which are performed only on request.
- Match the test plan to the actual contents, not to a generic tote category.
- Request written test results for the sample stage, not just a verbal approval.
Set concrete pass and fail rules before production starts
Durability testing is only useful when the pass and fail rules are written in advance. A practical starting point for a new tote style is to test the sample at 1.25x the expected working load for 60 seconds. If the bag is expected to carry 4 kg, the hold test starts around 5 kg. For a spare sample, a more aggressive pull or overload check can be used to expose the margin. These are starting points, not universal standards, but they are concrete enough to anchor the conversation with the factory.
The pass criteria should be functional, not subjective. A sample passes the load test if the seams stay closed, the handles do not slip, the fabric does not tear, and the bag can still stand or rest in a usable shape. It fails if there is seam opening, obvious handle elongation, fabric splitting, or permanent distortion that would be visible on the show floor. For print, the pass rule should be equally direct: no severe smear, flaking, or placement error beyond the approved tolerance band.
If the tote is intended to survive reuse, the buyer should raise the bar. Reuse-oriented programs usually need a heavier fabric, stronger anchor stitching, and tighter acceptance of handle symmetry and top seam finish. That does not mean demanding perfection on every stitch. It means deciding what level of cosmetic variation is acceptable and what level becomes a real failure for the brand or for the user.
- Use 1.25x working load as a starting point for sample load-hold testing.
- Define failure as seam opening, handle slippage, tearing, or irreversible distortion.
- Set a separate print pass/fail rule for smear, flaking, and placement error.
- Treat reuse-oriented bags as a higher-spec program, not the same as a flyer tote.
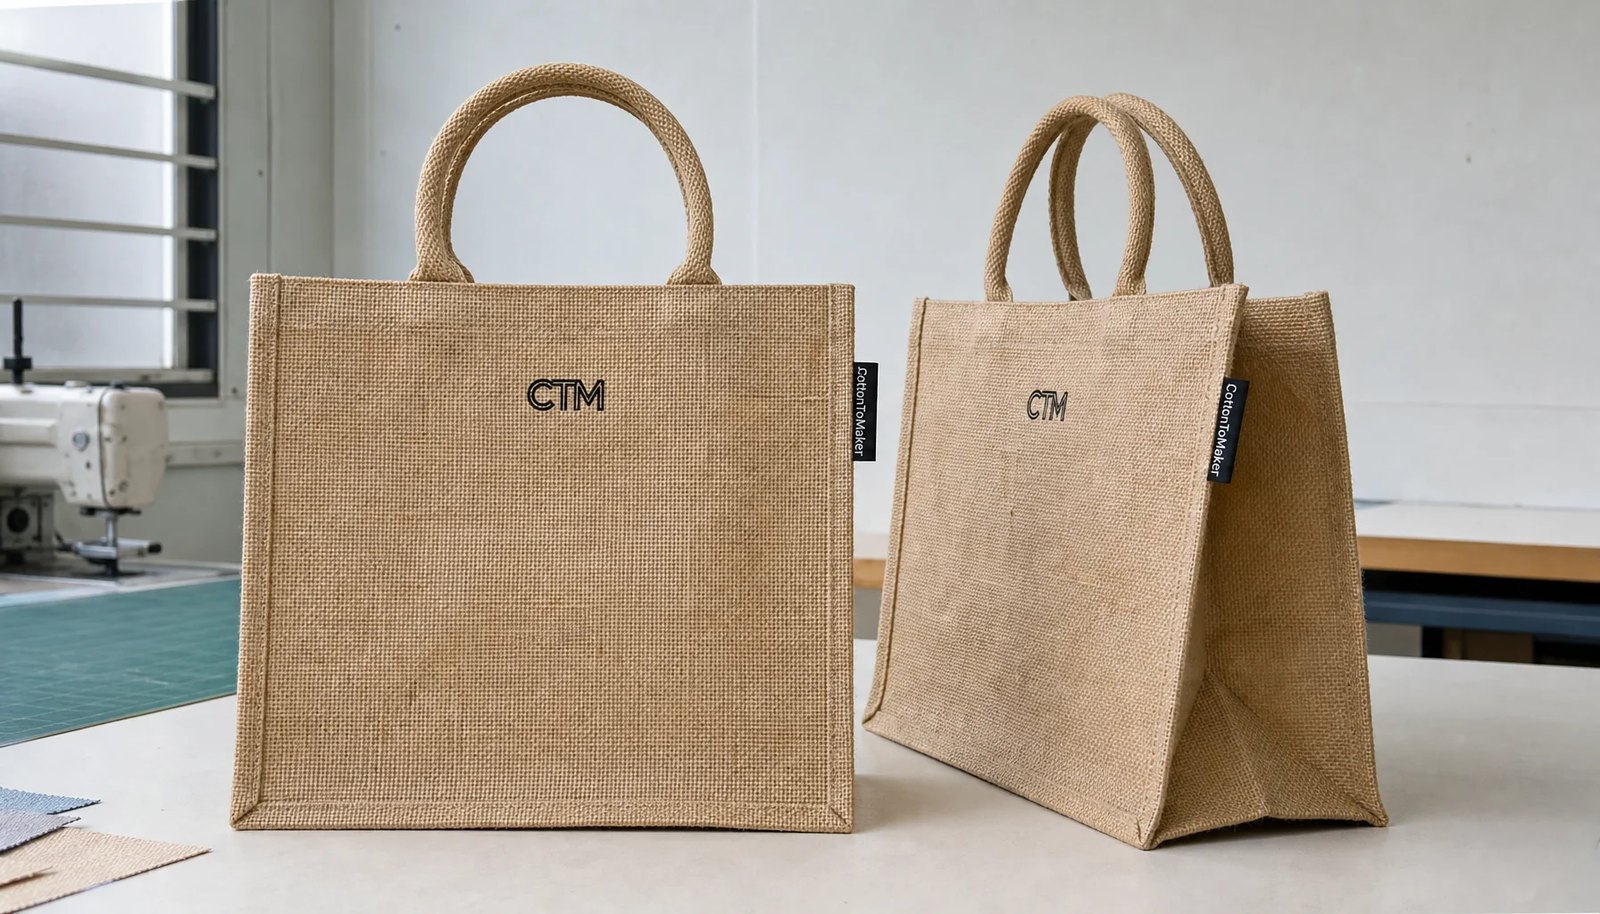
Design handles and seams for repeated carrying
Handle construction is usually the first place a jute tote fails. If the anchor stitching is weak, the bag may look fine in a sample room and still tear when a buyer loads it with catalogs, bottles, or sample packs. For working totes, the safer choices are folded self-fabric handles or cotton webbing handles with box-X, bar-tack, or equivalent reinforcement at the attachment points. The supplier should show exactly how the handle joins the body and what stitch pattern is being used.
Handle drop length matters as much as material. If the drop is too short, the tote is awkward to carry and the load feels heavier than it really is. If it is too long, the bag swings more, brushes the ground, or collides with nearby items in a crowded booth. The right handle drop depends on whether the bag is meant for hand carry, shoulder carry, or mixed booth use. A generic factory length is not enough for a procurement decision.
The seam map needs the same scrutiny. Ask for stitch density, thread type, seam fold method, and the reinforcement layout at corners and gusset junctions. On coarse jute, weak stitch lines can open even when the fabric itself still looks intact. The bag should be inspected at the top hem, side seams, bottom corners, and any area where the gusset meets the body. Those are the points that reveal whether the tote was built for a one-time handout or for repeated use.
- Confirm the handle anchor method in writing.
- Ask for the stitch pattern at the handle and side seam.
- Set the handle drop to the actual carry use case.
- Inspect corner seams and gusset joins separately from the main body.
Print for the material, not just for the art file
For most buyer programs, screen printing is the most practical branding method on jute. It is efficient, repeatable, and works well for bold logos, short taglines, and simple event messaging. The problem is not the process. The problem is artwork that is too detailed for the substrate. Fine text, thin outlines, and dense gradients can break up on the weave and look weaker than they do in a file preview. On coarse jute, the logo needs to be designed for the material, not just for the marketing team.
If the tote needs a more premium or more durable branding surface, a woven label, embroidered patch, or sewn-on appliqué can be a better choice. These options reduce direct abrasion on the printed area and often look more considered on a higher-value tote. They also add sewing operations, setup complexity, and cost. The buyer should decide whether the priority is distance readability on the show floor or durability and reuse after the event. Those are not the same objective.
Whatever method you choose, ask the factory to confirm the print size on the actual panel, the safe margin from seams, the ink curing method, and the accepted color match standard. A logo placed too close to a seam can shift once the bag is filled. A print that looks centered on a flat artboard may look off-center in use. That is why print approval must happen on a real bag, not only on a PDF.
- Keep the logo bold and simplify small type wherever possible.
- Confirm the print size on the actual bag panel, not only in artwork software.
- Request a rub test on the sample before approving bulk production.
- If the design sits near a seam or gusset, confirm it still looks centered when filled.
Validate the supplier beyond the unit price
A cheap quote is only cheap if the supplier can produce the same bag repeatedly. For jute totes, validation should go beyond the price line and include facility capability, material traceability, and consistency of past work. Ask whether the factory buys raw jute locally or through a documented fabric source, whether they can identify the fabric lot used for your order, and how they separate approved production from sample work. Those questions matter because they tell you whether the factory can trace a defect back to the right batch if something goes wrong.
Supplier validation also means checking whether the vendor can explain the build without reading from the quote. If they can restate the fabric weight, handle type, print method, seam reinforcement, packing format, and delivery term in the same language you used, they likely understood the brief. If they cannot, the risk is not just a misunderstanding. The risk is a production order that drifts from the approved sample once volume starts.
For higher-value or higher-volume orders, ask for documentation before the PO is released. A serious supplier can usually provide a spec sheet, sample photos, inspection format, and a production schedule. If the order is important enough to trigger customer-facing risk, it is important enough to require documentation. That is not bureaucracy. It is how you avoid solving a quality problem after the bags are already in transit.
- Ask for fabric, sewing, and print lot traceability.
- Require the supplier to restate the brief in their own words before you award the order.
- Request sample photos, spec sheets, and inspection format before production starts.
- Treat production batch control as a quality requirement, not an administrative extra.
Control QC with documents, not just a final carton count
A bag order becomes manageable when the factory and buyer agree on the QC documents up front. Ask for a first article report on the approved sample, inline inspection photos from the middle of the run, and a final inspection report that shows actual measurements, defect counts, and carton counts. If the supplier uses AQL, have them state the sampling level and defect classification before production starts. The important point is consistency. The receiving team should be able to compare the delivered cartons against the same rules the factory used during production.
For a first run or a new supplier, a reasonable starting approach is to inspect the first 10 units off the line, then take another set from the middle and end of the run. If the order is larger or the timeline is tight, use an AQL-based final inspection plan with the same pass/fail definitions. Cosmetic issues such as minor trim variation should not be treated the same as functional failures such as handle tear risk or seam opening. That distinction prevents overreacting to harmless variation while still protecting the brand from real defects.
The buyer should also require photo evidence for any rejected or reworked units. That record gives both sides a reference if the next order repeats the same issue. The goal is not to build a paper trail for its own sake. The goal is to make the next order faster because the previous one produced usable evidence.
- Ask for first article, inline, and final inspection records.
- Use the same acceptance criteria at sample, production, and receiving stages.
- Separate cosmetic defects from functional defects in the QC plan.
- Require photo evidence for any rework or rejection.
Manage packing, moisture, and warehouse handling
Jute is sensitive to moisture and rough handling. If cartons are packed too tightly, the tote can take on a crease that is hard to remove. If the shipment passes through a humid lane or sits in storage too long, the bags can pick up odor or feel damp on arrival. That is why packing needs to be part of the product spec, not a logistics afterthought. For trade show buyers, poor packing can turn an acceptable bag into a receiving problem.
Flat packing is usually the best approach for event totes because it improves cube efficiency and keeps the body flatter during transit. The supplier should state how many pieces go into each carton, whether the bags are folded or nested, and whether a moisture barrier, inner polybag, or desiccant is used when needed. If the shipment will move by sea or sit in a distribution center for several weeks, those details matter. Do not assume the factory will choose the right method unless it is requested.
Carton labeling is also part of quality control. Outer cartons should show style, color, quantity, and carton number so receiving teams can count without opening every box. If the order is going to a fulfillment warehouse or event prep center, pallet height, carton strength, and stacking rules should be confirmed before production starts. Freight savings are not real if the receiving team has to rework crushed cartons or sort unlabeled boxes.
- Use flat packing unless the bag design requires shaped presentation.
- Ask for moisture protection when shipping into humid routes or long storage cycles.
- Confirm carton marks and carton count before production.
- Check whether the supplier will do a carton drop or compression check before dispatch.
Specification comparison for buyers
| Test method | What it tells the buyer | Practical starting threshold | When to use it |
|---|---|---|---|
| Load-and-hold | Whether the tote keeps its shape and the seams stay closed under the intended event load | Hold 1.25x expected working load for 60 seconds without seam opening, handle slippage, or visible distortion | Use for every new style before bulk approval |
| Handle pull | Whether the handle anchor and top seam can survive repeated carry stress | No anchor tear, stitch pop, or fabric split when the bag is pulled to 1.5x expected working load on a spare sample | Use when the bag will carry bottles, catalogs, or hard-edged inserts |
| Drop test | Whether contents stay contained after a normal hand-carry drop | Three drops from about 75 to 100 cm with no bottom split and no functional failure | Use when the tote will be handed out pre-packed at the booth |
| Abrasion or rub test | Whether the print stays legible on coarse jute after light friction | No obvious smear, flake, or severe cracking after a short dry rub on the approved sample | Use when logo durability matters beyond the show day |
| Carton and moisture check | Whether the product arrives dry, clean, and presentable | No damp odor, visible moisture, crushed corners, or mold risk on carton opening | Use for sea freight, long storage, or humid routes |
| Sample comparison against golden sample | Whether production matches the approved reference | Finished size, color, placement, and build should stay within the approved tolerance band | Use on inline checks, final inspection, and reorder verification |
Buyer checklist before sampling
- Define the actual contents first: brochure set, bottle, sample kit, catalog pack, or mixed giveaway bundle.
- Set a working load in kilograms or pounds, then ask the supplier to state the test load used on the sample.
- Write the finished width, height, gusset depth, and handle drop in the RFQ, not just the cut size.
- Request the fabric weight in ounces and GSM, plus the measurement method used to report it.
- Choose one primary branding method and keep the artwork simple enough for a coarse jute surface.
- Ask for a blank sample, a printed sample, and a pre-production sample if the construction is new.
- Confirm handle construction, stitch pattern, thread type, and reinforcement style before the PO is issued.
- Define acceptable tolerances for size, print placement, stitch alignment, and carton count before mass production.
- Ask for material traceability details, including jute lot, fabric lot, and any coating, lining, or ink batch identifiers.
- Compare quotes only after standardizing pack count, carton size, freight term, and setup charges.
Factory quote questions to send
- What is the exact jute construction, fabric weight in oz, and equivalent GSM you are quoting?
- What are the finished width, height, gusset depth, and handle drop of the quoted bag?
- What tolerance do you hold for dimensions, and is that tolerance measured before or after finishing?
- Which handle style, stitch pattern, thread type, and reinforcement method are included in the unit price?
- How many stitches per inch do you use at the handle anchor and main seams?
- Which print method will you use, how many colors are included, and what is the setup charge per color or location?
- What is the minimum line weight and minimum text size you recommend for this jute surface?
- Can you provide a blank sample, a printed sample, and a pre-production sample before bulk production?
- What is the MOQ for this exact build, and how does pricing change at 1,000, 3,000, and 5,000 pieces?
- What packing format, carton size, carton count, and moisture protection are included in the quote?
Quality-control points to confirm
- Measure finished width, height, gusset depth, and handle drop against the approved spec before packing starts.
- Check sample bags from different cartons for fabric weight consistency, weave uniformity, and visible contamination.
- Inspect handle anchors, side seams, gusset joints, and top hems for skipped stitches, loose threads, or pull-away risk.
- Confirm stitch density and reinforcement pattern match the approved construction at all high-stress points.
- Perform a load-and-hold test at 1.25x working load on at least 5 sample bags from the pilot run.
- Run a handle pull check on a spare sample or dedicated test sample before line approval.
- Rub the print by hand and with light abrasion to check for smearing, cracking, transfer, or weak curing.
- Verify logo placement, color consistency, and registration against the approved artwork proof and golden sample.
- Request batch-level traceability for fabric, printing, and sewing so any defect can be isolated quickly.
- Open random cartons to confirm flat packing, moisture protection, no odor, and no crush damage.