Why retail buyers should treat a drawstring backpack like a finished product, not a giveaway
A retail drawstring backpack is not the same buying problem as a trade-show bag or a free event handout. When the product is sold through a retail channel, the buyer is paying for shelf appeal, repeat handling, and a consistent opening experience, not just a logo surface. That changes every part of the specification: fabric selection, stitch quality, print method, packing, and even how the bag is displayed on arrival.
The fastest way to overpay is to ask for 'a custom drawstring bag' and wait for suppliers to fill in the blanks. Some vendors will quote a thin promo-style bag, others will quote a sturdier retail version, and both can claim to be right. If the customer sees the bag hanging next to similar products in a store, the difference between a low-cost giveaway and a proper retail item becomes obvious immediately.
Good procurement starts with the expected retail behavior. Will the bag carry a water bottle and a lunch container, or is it mostly for lightweight accessories? Will it be sold in a seasonal display, bundled with other goods, or used as a premium membership gift? These questions matter because they determine whether you should optimize for low weight, stronger structure, premium handfeel, or presentation consistency.
- Write the selling use case before you ask for a quote.
- Treat branding, packing, and carton details as part of the product.
- Separate promotional suitability from retail suitability in your spec review.
Start with a clear retail spec: size, fabric, and construction
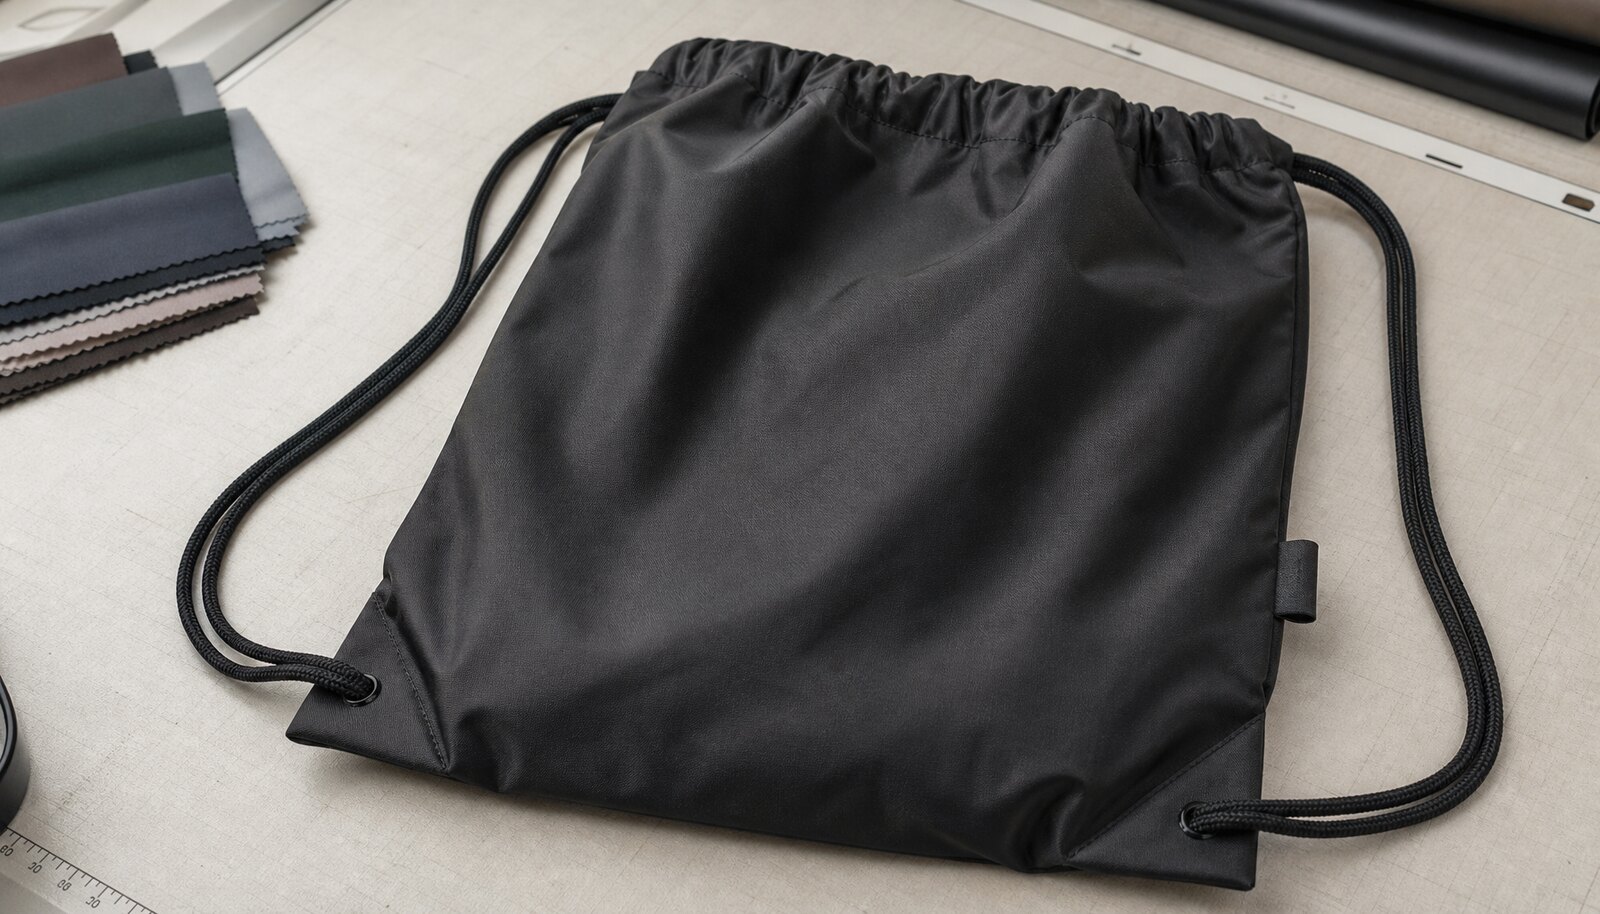
Most retail buyers are better served by a concise spec sheet than by a long narrative brief. The sheet should include finished dimensions, material, color, decoration method, and packing format. If the bag has a gusset, front pocket, zipper pocket, label, or reflective detail, those should be listed as named components rather than described loosely. A supplier cannot quote accurately if the product is only defined by mood or style references.
For many custom drawstring backpacks for retail, the practical finished size often falls in the range of roughly 34–45 cm wide and 40–50 cm high, with a gusset depth around 5–12 cm when the design needs more structure. Those are not fixed standards; they are working ranges that help buyers and suppliers talk about a realistic product family. A smaller size may suit accessories or children’s retail, while a wider and deeper bag may be better for lifestyle or campus programs. The important part is to define the size against actual shelf and carry needs, not just a sketch.
On material, 210D polyester remains a common entry point because it is light, printable, and usually cost-effective. If the bag needs a firmer shape, better perceived value, or a more retail-ready handfeel, many buyers step up to 300D polyester. For premium lifestyle positioning, cotton canvas or heavier canvas-like constructions can work well, but they also raise unit cost, packing weight, and the chance of surface variation. The right answer depends on the selling price, not on what looks 'better' in isolation.
- Specify finished width, height, and gusset depth instead of describing the bag as 'large' or 'medium'.
- Ask whether the quoted fabric weight is before or after coating or finishing.
- If the product carries heavier items, require reinforcement details rather than relying on fabric weight alone.
Use material choices to control cost, shelf look, and failure risk
Retail buyers often focus on GSM because it is easy to compare, but GSM alone does not tell the whole story. Two bags with similar fabric weight can behave very differently if one uses a tighter weave, better coating, stronger stitching, or cleaner edge finishing. The procurement question is not 'How heavy is the fabric?' but 'Does the full construction match the retail use case and sell price?'
For lightweight retail or promotion-adjacent programs, a 70–120 GSM equivalent synthetic construction can be enough when the bag is meant for light carry and quick turnover. For a more structured retail product, a 300D polyester or similar body can help the bag stand up better on display and feel more substantial in hand. For a premium natural look, canvas in the 12 oz to 16 oz range is a common working territory, though the exact decision should be based on the final finish, print method, and cost ceiling. If a supplier only gives you a single word like 'polyester' or 'canvas' without the construction details, the quote is incomplete.
The material decision also affects defect risk. Thin material can pucker around stitching, show print show-through, or distort if the cord tunnel is not reinforced well. Thicker material can hide some issues but may also create higher sewing difficulty at the top opening or around accessory pockets. Buyers should ask the supplier to note any construction that requires extra seam allowance, reinforcement tape, or changed stitch density.
- Use fabric choice to match the retail price point, not to chase the heaviest possible material.
- Ask for exact fiber type, weave, finish, and coating notes on the quote.
- Require reinforcement details if the bag will routinely carry books, shoes, or daily-use contents.
A practical comparison of common retail constructions
The best comparison table for a sourcing decision is not just about where you buy; it should also show how the bag itself changes. Retail buyers need to see how one construction differs from another in printability, perceived value, and risk. The table below is meant to help compare construction families before you ask suppliers for quotes.
When you review a sample, compare it against the construction category you intended to buy. A 210D promo bag and a 300D retail bag should not be judged by the same cosmetic standard alone, because they serve different roles. Likewise, a canvas bag should not be treated as a direct substitute for a thin polyester bag if the target is lightweight shelf-ready packaging.
- Use a construction table before you compare vendors.
- Keep the same spec family across all supplier quotes.
- Judge sample quality against the intended retail role, not only against price.
Decoration choices should match artwork complexity and retail finish
Decoration is where many retail briefs become unstable. A logo that looks simple on screen may be expensive or messy in production if it uses small text, multiple gradients, or a large print area that crosses a seam. Screen printing is usually the most economical option for one to four solid colors and repeatable artwork. Heat transfer can be more flexible for smaller runs or detailed graphics, while embroidery, woven patches, and PVC-style patches can create a more premium look if the bag price can support them.
To quote decoration accurately, the supplier needs the artwork size in centimeters, the number of colors, the print position, and the exact reference for color matching. If your brand has strict standards, state whether color matching must be close under daylight-equivalent light, matched to a Pantone reference, or only visually acceptable. Buyers should also ask what changes if the artwork moves from one side to two sides, or if the print has to avoid seams, grommets, or pockets.
If the product includes more than one decoration element, such as a logo plus a woven side label or a retail hangtag, ask whether the factory applies those items in-house or outsources them. That detail matters for lead time and consistency. A well-quoted bag should identify not just the decoration method, but also the handling points where the factory can introduce variation.
- Provide artwork as vector files and include print placement drawings.
- State the number of colors, not just the logo name.
- Ask whether any artwork detail crosses a seam, tunnel, pocket, or label zone.
MOQ should be read as a pricing structure, not a single threshold
MOQ is usually presented as a simple cutoff, but retail buying works better when MOQ is understood as a layered pricing structure. A supplier may have one threshold for the body fabric, another for print setup, and another for packing or accessory components. If those layers are hidden, a low MOQ quote can turn into a more expensive order once colors, decoration positions, or packaging are finalized.
A useful RFQ asks for price breaks at practical retail levels, such as 300, 500, 1,000, and 3,000 pieces, if those numbers fit the forecast. The goal is not to force the factory into your exact plan; it is to expose how the cost curve behaves. If your launch is uncertain, you may want to know whether it is smarter to place one larger color run or several smaller runs with the same decoration. In many cases, the cheapest option by unit price is not the best option if it creates dead stock or too much variant complexity.
For retailers launching multiple colorways, it helps to ask whether print plates, screens, or setup fees are reusable across versions. Some suppliers will treat each colorway as a new setup even when the artwork is unchanged, while others can consolidate work if the production planning is done cleanly. These are not minor details; they are often the difference between a manageable test order and a quote that is only efficient at scale.
- Ask for quantity breaks that reflect your actual buying plan.
- Separate body MOQ from print setup and packaging MOQ.
- Check whether multi-colorway orders reuse the same setup or pay it again.
How to verify a supplier before you trust the quote
Quote quality depends on who is actually making the bag. A factory quote and a trader quote can both be useful, but they are not the same commercial relationship. If the seller is a trader or consolidator, they may still be able to manage the order well, yet you should know whether they control the sewing line, the printing, and the packing, or whether they are coordinating those steps through another facility. That distinction affects transparency, escalation speed, and sample accountability.
A strong supplier-verification process starts with basic identity checks: business registration, product scope, and the factory address if they claim to be the manufacturer. Then ask for a live factory video or recent production photos that show the actual bag line, not only marketing images or stock photos. If possible, request a sample trace explanation: which factory made the sample, who approved it, and how the bulk run will be matched to that approved reference. That is what sample-chain accountability looks like in practice.
For retail programs, you should also ask whether the supplier has the capability to handle the specific customization you need. Can they print in-house or do they outsource? Do they cut and sew the bag body themselves? Can they apply labels, pack by barcode, and follow retailer carton marking rules? A supplier that can quote a low number but cannot control those steps is a higher risk than a slightly more expensive supplier with clear process ownership.
- Confirm whether the supplier is the factory, a trader, or a hybrid operation.
- Ask for proof of the actual production line relevant to your bag.
- Request sample-chain accountability: who made the sample and who will match bulk production to it.
Sample approval should test structure, not just appearance
A sample that looks good on a table can still fail in bulk if it has weak top stitching, poor cord symmetry, or different packing from the final order. For that reason, retail buyers should define sample stages. A blank sample is useful if the shape is new. A decorated sample shows how the logo, label, or patch will behave on the chosen fabric. A pre-production sample is the one that should mirror bulk materials, packaging, and construction as closely as possible before the factory starts full production.
Sample review should be measured and documented. Record the approved dimensions, note the print position, confirm the cord length, and photograph the inside and outside of the bag. If there is a zipper pocket or accessory feature, open and close it several times and inspect the stitching around the attachment points. For more complex orders, it is worth asking the factory to mark the approved sample with a version code so the bulk line can verify the exact reference. That reduces the risk of 'close enough' substitutions.
The sample process should also include a packing check. If the final product will be polybagged, barcode-stickered, or shipped with a hangtag, the sample should show those items in place. Many distribution problems start because the bag itself is approved, but the retail-ready packout is changed late and no one updated the spec sheet. In retail procurement, the sample is only complete when the bag and the packout are both right.
- Approve blank, decorated, and pre-production samples in sequence when the order warrants it.
- Measure sample dimensions and photograph key construction points.
- Treat the packing format as part of sample approval, not a separate topic.
QC for retail drawstring backpacks: build in measurable acceptance criteria
A serious QC plan needs more than a visual check. Buyers should define what counts as acceptable before production begins. That includes measurement tolerances, stitch quality, print quality, and packing condition. Without thresholds, every defect discussion becomes subjective. With thresholds, the factory knows what to hold and the inspector knows what to reject.
A practical retail QC file should cover the top opening, side seams, bottom corners, cord tunnels, print placement, label alignment, and packaging. Stitch density is especially important in stress areas. Where the factory can provide it, ask for a stitch count target such as stitches per inch or stitches per 3 cm on critical seams. Then inspect the same points in pre-production samples and production units. If the bag has a pocket, zipper, or patch, inspect those attachment areas because they often reveal workmanship variation before the main body does.
AQL-style sampling is useful on larger orders because it turns inspection into a repeatable process. The buyer should state the inspection level, define major and minor defects, and specify whether the factory must sort or replace rejected units. For example, a loose thread may be a minor defect if it is easily trimmed, while a broken seam, severe print misregistration, or a crooked label placement can be major defects. The point is not to micromanage the factory; it is to make the rejection rules clear enough that production does not drift.
- Set tolerance bands for size, print position, and label placement.
- Define major and minor defects before mass production starts.
- Use AQL-style sampling or an equivalent inspection method on larger retail orders.
Test methods that reveal problems before goods reach the shelf
The most useful test methods are simple enough to repeat and strong enough to expose failure points. For seam and cord performance, use a controlled pull test on sample units and check whether the top tunnel, cord exit, or corner reinforcement shows distortion or thread breakage. The exact force level should be tied to your product category or retailer standard rather than guessed, but the principle is straightforward: if the bag opens and closes repeatedly in real use, the test should reflect repeated handling rather than a one-time glance.
For print, use an abrasion check after curing or drying. Rub the surface with a dry cloth first, then a slightly damp cloth if the material allows it, and watch for flaking, transfer, or edge lift. On premium retail products, a buyer may also ask for a wash or rub test if the bag is expected to face repeated friction in consumer use. If the print looks fine only when untouched, it is not ready for retail.
For color control, do not rely on warehouse lighting alone. Compare against the approved reference under daylight-equivalent lighting, and if your brand is strict, define a color delta threshold with the supplier. For many retail programs, the exact numerical target matters less than the fact that both sides have agreed to a measurable rule before production. That is what turns a subjective color complaint into a manageable QC standard.
Transport checks matter too. A packed carton should survive routine handling, warehouse movement, and at least a basic drop or compression check if the route is long or rough. If the bag is sold retail-ready, inspect the carton after movement for scuffing, corner damage, crushed units, or barcode issues. A product can pass sewing QC and still fail if the carton or inner pack was not suitable for the freight chain.
- Use a controlled pull test on seams and cord tunnels.
- Run an abrasion check on the print after curing.
- Compare color under daylight-equivalent lighting and record the standard used.
- Check cartons for drop, compression, or transport damage before accepting bulk stock.
Specification comparison for buyers
| Decision area | What to specify in the RFQ | When it fits retail buying | Buyer risk to check |
|---|---|---|---|
| Base fabric | 210D polyester, 300D polyester, cotton canvas, or blended canvas; note whether coating/finish is on one or both sides | Choose based on shelf presentation, carry weight, and target price point | Thickness alone does not predict durability; verify weave density, coating, and seam reinforcement |
| Finished size | Typical retail starting points are about 34–45 cm wide by 40–50 cm high, with optional gusset depth of 5–12 cm if structure matters | Good for general merchandise, campus retail, event merchandise, and lightweight travel use | If the bag is too narrow, opening and print area suffer; if too large, cube cost and shelf fit increase |
| Fabric weight | For synthetics, specify base construction and equivalent GSM; for canvas, use oz/yard or oz/m² and confirm whether weight includes finishing | Use lower weights for promo and entry retail; heavier builds for lifestyle retail | Ask whether the quoted weight is before or after coating, washing, or dyeing |
| Stitch construction | Side seams, bottom seams, top tunnel seam, and bar-tacks at stress points; specify stitch count or minimum workmanship standard where possible | Important when bags carry bottles, shoes, or daily-use items | Weak tunnels and corner reinforcement are common failure points under repeated cord pull |
| Cord and closure | Cord material, diameter, length, finishing method, and whether the closure uses grommets, stitched tunnels, or stitched loops | Useful when buyers want frequent opening/closing and clean shelf presentation | Cord length inconsistency creates user complaints and uneven closure |
| Decoration method | Screen print, heat transfer, embroidery, woven patch, PVC patch, or label application; include artwork size and placement | Match artwork complexity to the fabric and intended retail price | Small text, gradients, and fine lines often fail on coarse or textured surfaces |
| Accessory options | Zipper pocket, front slip pocket, woven side label, hangtag loop, reflective trim, reinforced corners, or laptop sleeve insert | Adds merchandising value when the bag is sold rather than given away | Every extra component adds sourcing, lead time, and QC complexity |
| Packaging format | Bulk, polybag, insert card, barcode sticker, hangtag, retail tray, master carton marks, and carton count | Retail-ready programs need packaging controlled from the RFQ stage | Packing affects landed cost, cube, and shelf condition more than many buyers expect |
| Supplier route | Direct factory, factory with trading support, or local importer/consolidator | Choose based on order size, customization level, and internal sourcing capacity | Confirm who actually makes the bag and who owns sample accountability |
Buyer checklist before sampling
- Define the retail use case before pricing: promo giveaway, shelf retail, campus resale, seasonal bundle, subscription insert, or membership gift.
- Write one spec sheet for every quote request so suppliers are pricing the same bag, not their own assumptions.
- Lock the finished size, base fabric, color, decoration area, and pack format before asking for a unit price.
- State whether the bag needs a zipper pocket, label, reflective trim, or other accessory so the vendor does not quote a stripped-down version.
- Provide artwork in vector format and include Pantone references, print placement, and any forbidden changes to the logo.
- Specify cord length, cord diameter, and finish type, especially if the bag will be opened and closed many times a day.
- Ask for blank sample, decorated sample, and pre-production sample milestones where the order size justifies it.
- Request carton dimensions, unit pack, barcode location, and retailer routing requirements at the quoting stage.
- Verify whether the quoted supplier is a factory or trader and who is responsible for sample-chain consistency.
- Compare landed cost, not just unit price, by including setup charges, packing, freight cube, duty, and inspection.
Factory quote questions to send
- What is the exact bag construction being quoted, including base fabric, coating or finish, finished size, and cord specification?
- Are you the actual factory making the bag, or are you a trader/consolidator? If you are not the factory, which factory will produce it?
- Can you share a spec sheet for the quoted sample with photos of the blank bag, stitching points, and packing format?
- What tolerance do you hold for finished dimensions, cord length, print placement, and label position?
- What is the minimum order quantity by color, print design, and packing format, and what changes the price at each quantity break?
- Which decoration method is included in the quoted price, how many colors are covered, and what setup charges apply?
- Can you confirm whether the print area includes front only, front and back, or multiple positions?
- What sample stages are available, what is charged for each stage, and is the fee refundable or offset against bulk order value?
- What inspection method do you use before shipment, and can you provide your defect criteria for stitching, measurement, print quality, and packing?
- What packaging is included in the unit price, and what costs extra: polybag, insert card, barcode sticker, hangtag, or retail carton configuration?
Quality-control points to confirm
- Measure finished width, height, and any gusset depth against the approved spec sheet. Use a pre-agreed tolerance band, such as ±5 mm for smaller retail bags and tighter control for premium retail programs when the factory can hold it consistently.
- Check top opening symmetry and cord pull. The bag should open and close evenly without twisting, bunching, or one side sitting longer than the other.
- Inspect seam density at the top tunnel, side seams, bottom corners, and any pocket attachment. Ask the supplier to state stitch density in stitches per inch or stitches per 3 cm where they control the sewing standard.
- Look for bar-tacks or reinforcement at stress points such as cord exits, pocket corners, and label attachments. Missing reinforcement is a common reason for returns after light use.
- Run a seam strength pull test on samples from the top seam and cord tunnel. Buyers often use a simple controlled pull test in-house, then a lab or third-party test for larger retail programs.
- Test print adhesion after curing or drying. Rub with a dry cloth, then a slightly damp cloth if the surface allows, and reject artwork that flakes, smears, or lifts at the edges.
- Check color against the approved standard under daylight-equivalent lighting. For repeat orders, define an acceptable color difference target with the factory, such as a small Delta E tolerance, rather than using words like 'close enough'.
- Examine loose threads, trimming quality, and label alignment. A retail bag that hangs on a display wall will show small defects very quickly.
- Confirm unit packing, barcode readability, carton marks, and master carton count against the retailer routing guide or import paperwork.
- Perform carton drop or transport simulation on a packed sample carton if the bags will move through long freight chains or multiple warehouse handoffs.