Why Proofing Matters for Trade Show Pouches
Custom cotton drawstring pouches look simple, but trade show orders punish small mistakes. The event date does not move, the pouches may be handled by visitors under bright booth lighting, and the logo is often photographed next to the product sample. A slightly crooked print, weak drawstring, or wrong shade of ink becomes visible very quickly when hundreds of pieces are laid out on a booth counter.
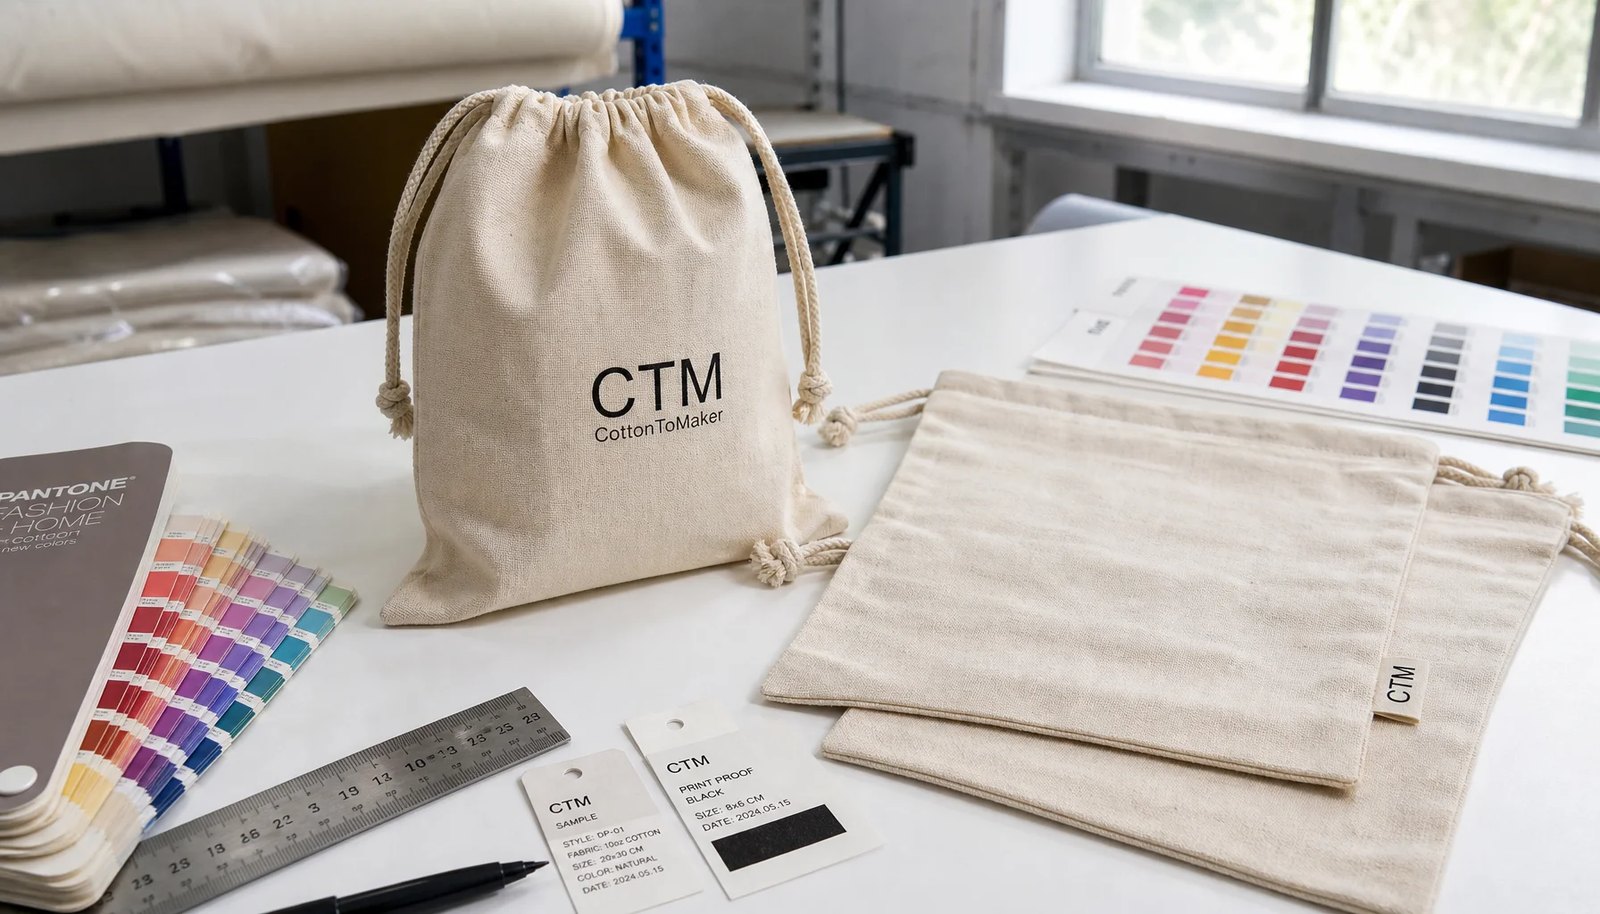
The main buying problem is not whether a factory can make a cotton pouch. Many can. The real issue is whether the buyer gives enough controlled information for the factory to quote and proof the same product the exhibitor expects to receive. A proper print proofing checklist turns a loose giveaway idea into measurable production instructions: fabric weight, finished size, logo size, print position, ink color, sample approval, packing format, and delivery deadline.
- Use the proofing stage to lock the physical product, not only the logo layout.
- Treat the approved sample as the production control standard for bulk inspection.
- Put event delivery dates into the RFQ, because lead time risk changes the factory recommendation.
Start with the Pouch Use, Not the Logo
A cotton drawstring pouch used for a USB cable at a trade show does not need the same fabric, size, or cord strength as a pouch holding cosmetics, drinkware accessories, jewelry, or a retail sample kit. Before quoting, define what will go inside the pouch, the approximate product weight, whether the visitor will reuse it, and whether the pouch must look premium on a display table.
For most exhibitor giveaways, natural cotton in 5 oz to 6 oz works well because it is soft, printable, and cost efficient. For retail-facing kits or heavier products, 7 oz to 8 oz cotton gives a firmer hand and better perceived value, but it increases material cost and shipping volume. Very small pouches may close better in lighter fabric; heavy cotton can bunch at the drawstring channel and leave a bulky top.
- Small accessory pouch: often 4 oz to 5 oz cotton, simple cord, one-color print.
- Standard event gift pouch: usually 5 oz to 6 oz cotton, front logo, bulk packing.
- Premium kit pouch: 7 oz to 8 oz cotton, stronger stitching, possible two-sided branding or custom label.
- Retail insert pouch: tighter size control, cleaner packing, and more attention to fabric shade consistency.
Set Fabric Specifications That a Factory Can Price
The RFQ should state fabric weight in gsm or oz, not only say cotton or canvas. Cotton pouch fabric is commonly discussed as 4 oz, 5 oz, 6 oz, 8 oz, or in gsm such as 120, 140, 170, 230, and above. If your company uses both systems, write both to avoid conversion assumptions. Also state whether you want natural unbleached cotton, bleached white, dyed cotton, organic cotton, recycled cotton blend, or cotton canvas.
Fabric color affects print proofing more than many buyers expect. A black logo on natural cotton is straightforward. A white logo on dyed navy cotton, a yellow logo on natural cotton, or a thin gray logo on off-white cotton requires more proofing discipline. Cotton absorbs ink unevenly compared with coated synthetic materials, so the proof should be judged on the real fabric, not on a PDF proof alone.
- Natural cotton is usually faster and easier to source than custom dyed fabric.
- Bleached white can make colors look brighter but may show dirt more easily during packing and booth handling.
- Dyed fabric should use a lab dip or approved fabric swatch before bulk cutting.
- Organic or recycled claims should be supported by documents when the buyer needs compliance evidence.
Choose the Print Method Around Artwork Risk
Screen printing is the normal choice for solid logos, event slogans, simple sponsor marks, and one to three spot colors. It gives a good cost balance for bulk orders and works well on cotton texture when the artwork has enough line weight. The buyer should provide Pantone references and real print dimensions, because a logo that works at 120 mm wide may fail when reduced to 55 mm wide on a small pouch.
Heat transfer can handle gradients, photographic artwork, or many colors, but the buyer should consider hand feel and edge appearance. A large transfer on a soft cotton pouch may feel like a patch on the fabric surface. Embroidery can look premium, but it is usually better on heavier cotton and simpler artwork; tiny text and QR codes are poor embroidery candidates. For trade show pouches, the safest proofing decision is to match print method to logo complexity before negotiating the last cent.
- Screen print: best for solid colors, clean logos, and larger quantities.
- Heat transfer: useful for gradients, full color, and small runs with many colors.
- Embroidery: suitable for heavier cotton and simple marks, not tiny details.
- Woven label: useful when the pouch itself stays plain but brand consistency matters across product ranges.
Control Logo Size, Position, and Clearance
A common proofing mistake is approving an attractive artwork file without fixing its position on the actual pouch. Drawstring pouches have a channel at the top, side seams, bottom seam, and sometimes a folded gusset area. Printing too close to any of these areas can cause distortion, weak ink coverage, or visible misalignment after sewing and pressing.
For most front prints, keep the logo below the drawstring channel and away from side seams by at least 15 to 25 mm, depending on pouch size. If the pouch will hold a bulky item, confirm the logo remains readable when filled. A logo that looks centered on a flat empty pouch may curve or disappear when the pouch is pulled closed around a product. The proof should include measurements from the top edge or channel seam, not just the word centered.
- State print size in millimeters, for example 90 mm wide, not only small or large.
- Measure placement from a fixed point such as top edge, bottom seam, or side seam.
- For two-sided print, confirm front and back orientation after the drawcord is pulled.
- For QR codes, test scan performance at actual print size on the approved fabric.
Use Samples to Prevent Production Surprises
A digital proof is useful for layout, spelling, color references, and logo position, but it cannot prove fabric feel, ink absorption, cord function, stitching quality, or packing appearance. For first-time artwork, new pouch sizes, dyed cotton, premium event kits, or any order tied to a non-movable trade show date, a physical pre-production sample is the practical insurance.
The sample approval should be written. Do not approve with vague comments such as looks good if you still expect changes. If the logo is acceptable but the cord is too thin, say exactly that and request a revised cord sample or written confirmation of the production change. Keep one approved sample sealed or signed so both buyer and factory have the same reference when bulk goods are inspected.
- Approve fabric hand feel, color, pouch size, print size, and print position together.
- Pull the drawstring several times to check closure behavior and cord slippage.
- Inspect the inside for loose threads and fabric dust if the pouch will hold electronics, jewelry, or cosmetics.
- Photograph the approved sample with a ruler and color reference for internal signoff.
Understand MOQ and Cost Drivers
MOQ is not only a factory preference. It is tied to fabric purchasing, cutting setup, printing setup, ink mixing, sewing line efficiency, packing labor, and export handling. A natural cotton pouch in a standard size with one-color print can usually be quoted at a lower MOQ than a custom dyed pouch with two drawcord colors, inside label, two-sided print, and individual paper bands.
When comparing supplier quotes, make sure each quote uses the same assumptions. One supplier may quote 5 oz cotton while another quotes 6 oz. One may include a physical sample charge, while another excludes sample freight. One may pack bulk in export cartons while another assumes individual polybags. These differences can make a low unit price misleading once landed cost and event handling are included.
- Main cost drivers: fabric weight, pouch size, print color count, print area, packing style, and order quantity.
- Setup costs are easier to absorb at higher quantities, especially for screen printing.
- Multiple artwork versions may create separate setup charges even if the pouch size is the same.
- Custom dyeing, custom cord color, and special labels often raise MOQ or extend lead time.
Define Packing Before the Quote Is Final
Packing is often treated as an afterthought, but for trade show exhibitors it affects counting, cleanliness, booth setup time, warehouse receiving, and freight volume. Bulk packing is economical and suitable when staff will distribute pouches from bins or place them inside kits. Individual polybags protect each pouch and make counting easier, but add labor, plastic use, carton volume, and sometimes compliance questions.
If the pouches are part of a retail kit or distributor program, packing requirements should be stated before the factory quote is final. Inner bundle quantity, barcode label, carton mark, mixed design separation, and pallet instructions can all change labor time. A good quote should show pieces per carton, carton dimensions, gross weight, net weight, and estimated CBM so the buyer can compare landed cost instead of only unit cost.
- Bulk pack by 50, 100, or 200 pieces when the event team only needs fast distribution.
- Use individual packing when cleanliness, barcode control, or retail presentation matters.
- Separate cartons by artwork version to avoid sorting errors at the booth or 3PL.
- Confirm carton strength if goods will move through warehouse, hotel receiving, or show decorator handling.
Build the Schedule Backward from the Show Date
Trade show pouch orders fail most often when artwork approval happens late and every later step is compressed. A realistic schedule includes artwork review, digital proof, sample making, sample freight, buyer approval, bulk material preparation, printing, sewing or final assembly, curing, QC, packing, export booking, customs clearance, and inland delivery. Air freight can rescue some deadlines, but it does not fix a poor print proof.
The buyer should give the factory the required delivery date and destination at the RFQ stage. If goods must arrive at a booth, hotel, or advance warehouse, share receiving instructions early. Factories can usually plan better when they know whether the deadline is a preferred date or a fixed show move-in date. For urgent programs, reduce variables: use stock fabric, standard size, one-color print, and simple bulk packing.
- Allow sample time before bulk production, especially for new artwork or dyed fabric.
- Leave buffer for sample freight and internal approval by brand, legal, or distributor teams.
- Do not schedule final inspection on the same day goods must leave the factory.
- For event shipments, confirm carton labels and delivery marks before packing is completed.
Compare Quotes with the Same Data
A useful quote comparison needs more than FOB unit price. For cotton drawstring pouches, the buyer should compare fabric weight, finished size, print method, print size, number of print colors, sample policy, packing method, pieces per carton, CBM, lead time, and any setup charges. A quote that looks cheaper may use lighter fabric, smaller print, or less protective packing.
When importing, landed cost can change the sourcing decision. Heavier cotton, individual packing, and larger pouch dimensions increase carton volume. If the order is going by air because of a trade show deadline, volume weight can matter as much as product weight. Procurement teams should request carton data before awarding the order, not after production, because freight cost is part of the commercial decision.
- Compare FOB or EXW terms consistently across suppliers.
- Add sample charge, screen charge, packing charge, inspection cost, freight, duty, and inland delivery.
- Review whether each quote includes the same artwork version count and same number of print sides.
- Reject unclear quotes that do not specify fabric weight, pouch size, print method, and packing basis.
Specification comparison for buyers
| Spec decision | Recommended option | When it fits | Buyer risk to check |
|---|---|---|---|
| Fabric weight | 5 oz / 140 gsm cotton for light giveaways; 6 to 8 oz / 170 to 230 gsm for premium kits | Trade show handouts, accessory packaging, retail bundle bags, and reusable sample pouches | Very light cotton can show contents and wrinkle around the print; heavy cotton raises freight cost and can reduce drawstring closure flexibility |
| Fabric color | Natural unbleached cotton for lowest dye risk; reactive-dyed cotton for brand color pouches | Natural bags suit eco-style events and short lead times; dyed bags fit retail campaigns with strict color branding | Dyed fabric requires lab dip approval and may affect ink shade, especially white, beige, navy, black, and deep red |
| Print method | Screen print for solid logos; heat transfer for gradients or small multicolor artwork; embroidery only for thicker cotton | Most exhibitor logos, QR codes, sponsor marks, and simple brand lockups | Fine lines may fill in on cotton texture; transfer edges can feel plasticky if artwork is too large or pouch is very soft |
| Logo placement | Centered on front panel, below drawstring channel, with minimum 15 to 25 mm clearance from side seams | Event giveaways where the pouch is displayed flat on tables or packed inside attendee kits | Printing too close to the channel or side seams can distort during sewing, pulling, or final pressing |
| Artwork file | Vector AI, PDF, or EPS with Pantone references and size in millimeters | Buyers comparing multiple factory quotes or controlling a distributor-approved brand standard | JPEG-only artwork causes uncertain edge quality; RGB colors create avoidable Pantone disputes |
| Proof type | Digital proof plus physical pre-production sample for new artwork or new pouch size | Trade show campaigns with immovable delivery dates and public brand exposure | Digital proofs cannot prove ink penetration, drawcord tension, fabric shrinkage, or actual logo sharpness |
| MOQ logic | Use factory standard pouch sizes and stock natural fabric to keep MOQ lower; expect higher MOQ for dyed fabric or custom cord colors | Orders from 500 to several thousand pieces for exhibitor kits, retail samples, or distributor programs | Low MOQ custom dyeing often carries surcharges, color variance, or split-lot risk |
| Packing format | Bulk packed by pouch size and design unless retail presentation requires individual polybag or paper band | Fast booth setup, warehouse kitting, and lower landed cost | Individual packing improves counting and cleanliness but adds labor, material cost, carton volume, and compliance review |
| Lead time plan | Approve physical sample before bulk production and reserve buffer for packing and export documents | Event orders where booth shipment, hotel delivery, or 3PL intake dates are fixed | Late artwork approval compresses curing, QC, repacking, and inspection time, increasing the chance of avoidable defects |
Buyer checklist before sampling
- Define pouch purpose before quoting: giveaway, retail packaging, VIP kit, jewelry pouch, cosmetics pouch, cable bag, or product insert.
- State finished pouch size in width x height, not only approximate product size, and include tolerance expectations.
- Specify cotton weight in gsm or oz, fabric color, drawcord material, cord color, and whether the pouch needs to stand, fold, or pack flat.
- Send vector artwork with Pantone colors, print size, placement distance from top seam, and whether the logo must remain visible when the pouch is filled.
- Confirm print method based on artwork complexity, fabric color, durability requirement, and hand feel.
- Require a digital layout proof showing pouch size, print size, print position, drawstring channel, seam allowance, and logo clearance.
- Approve a physical pre-production sample for first orders, new logos, dyed fabric, tight event deadlines, or retail-facing packaging.
- Set sample acceptance criteria for color, print edge sharpness, registration, logo position, stitch quality, cord pull, and fabric cleanliness.
- Confirm MOQ by size, fabric, color, artwork version, and packing method, because each variable can change production setup.
- Request carton dimensions, gross weight, pieces per carton, packing method, and barcode or labeling requirements before comparing landed cost.
Factory quote questions to send
- What cotton fabric weight and construction are you quoting, and is it stock greige, stock natural, or custom dyed fabric?
- What is the finished pouch size tolerance after sewing and pressing?
- Which print method do you recommend for this artwork on this fabric, and what minimum line width should the artwork follow?
- Can you provide a digital proof with print size, placement measurements, and Pantone references before sample making?
- Is the quoted unit price based on one artwork, one size, one fabric color, and one packing method?
- What are the MOQ changes if we use dyed fabric, custom drawcord color, two-sided print, or individual packing?
- How many days are needed for sample making after artwork approval, and how many days for bulk production after sample approval?
- What tests or inspection points do you perform for print adhesion, rubbing, drawstring function, seam strength, and carton packing?
- What are the carton dimensions, gross weight, pieces per carton, and estimated CBM for the quoted order quantity?
- Will the bulk production match the approved sample from the same fabric and ink route, or is any substitution possible?
Quality-control points to confirm
- Finished size tolerance should normally be agreed before production, for example plus or minus 5 mm for small pouches and plus or minus 10 mm for larger promotional pouches.
- Logo placement should be measured from fixed seams or the top edge, not by visual centering only.
- Print color should be compared under stable daylight or a light box against the approved Pantone or approved sample, allowing reasonable fabric absorption variance.
- Fine lines, small text, QR codes, and trademark symbols should be inspected at actual pouch size before approving bulk printing.
- Ink adhesion should be checked after curing by light rub testing and folding around the printed area.
- The drawstring channel should pull smoothly without loose threads, blocked seams, or cord ends slipping into the channel.
- Side seams and bottom seams should be reviewed for skipped stitches, uneven seam allowance, broken threads, and puckering around printed panels.
- Fabric should be clean enough for event distribution, with no oil marks, heavy slubs over the logo, mildew smell, or loose cutting dust inside the pouch.
- Packing should match the approved count per inner bundle and carton, with design separation if multiple logos or pouch sizes are ordered.
- Carton labels should show PO number, item name, color, artwork version, quantity, carton number, and destination marks when required.