Start with the real lead time risk: late decisions before bulk production
A cotton drawstring pouch can look like a small add-on to a coffee program. In production, it is still a custom sewn textile item. The factory has to confirm material, set up artwork, test or sample the print, cut fabric, sew channels and seams, trim threads, inspect, pack, label cartons, and prepare export data. The sewing itself may not be complex, but the order can easily lose one or two weeks before the first bulk piece is made if the specification is vague.
The most common delays are not dramatic. They are ordinary procurement gaps. A logo arrives as a low-resolution PNG instead of vector art. The buyer asks for 10oz canvas after the supplier quoted lighter cotton. The brand team chooses a black pouch but no one allowed time for lab dip review or light-ink testing. Warehouse later asks for barcode labels or SKU-specific cartons after bulk packing has already been priced. None of these problems is unusual, and most can be prevented with a tighter RFQ.
Lead time planning should begin with a frozen pouch specification, not with a target unit price. Confirm the finished size, fabric weight, fabric color, print method, logo size, placement, cord construction, seam finish, labels, packing method, and required arrival date. If those details are missing, two suppliers may both quote custom cotton drawstring pouches while assuming different GSM, print coverage, packing labor, and inspection standards. The cheapest quote may simply be the least defined quote.
- Treat the pouch as a custom textile product, not as a generic stock bag with a logo added at the end.
- Break the schedule into specification approval, sampling, buyer approval, material booking, bulk production, packing, inspection, and transit.
- Name internal owners for artwork, packaging, warehouse receiving, compliance, logistics, and final purchase approval.
- Add buffer when the pouch is tied to a seasonal roast, holiday gift set, subscription drop, trade show, wholesale launch, or retailer delivery window.
- Ask suppliers for a shipment readiness date separately from estimated arrival date; transit begins only after packed goods are released.
Turn the coffee use case into measurable pouch requirements
Coffee roasters use cotton pouches in very different ways. A small pouch for a grinder brush, cupping spoon, dosing spoon, or bag clip does not need the same construction as a pouch holding coffee samples, a mug, filters, and a printed insert. A giveaway pouch may be designed mainly around budget and speed. A retail gift pouch is more visible, so body, sewing neatness, fabric opacity, and repeatable logo placement matter more.
Before you ask for pricing, write down what goes inside the pouch and roughly how much it weighs. Include sealed coffee bags, sample sachets, brew tools, glass jars, ceramic mugs, drippers, filter packs, cards, stickers, or mixed kits. If the pouch must fit inside a gift box, the folded thickness and drawcord bulk matter. If the pouch will be photographed for an online product page, shape retention and print position matter more than they would for an internal dust bag.
Many coffee roaster programs start with 8oz to 10oz cotton canvas, commonly around 270-340 GSM depending on mill construction. This range usually feels more substantial and reusable than thin muslin while remaining practical for sewing and screen printing. Lightweight cotton, roughly 140-180 GSM, can work for low-cost promotional inserts, but it will not have the same opacity, structure, or print impact. Heavier cloth may improve hand feel, yet it can increase unit cost, freight weight, and the need for tighter sewing control.
- Accessory pouch: common starting sizes include 10x15 cm or 12x18 cm, but confirm tool length and mouth opening.
- Sampler pouch: 15x20 cm to 18x24 cm may fit sample sachets, cards, and small accessories, depending on thickness.
- Gift pouch: 20x30 cm or larger may be needed for multiple coffee items; test the filled shape before bulk approval.
- Mug or brewer kit: verify corner stress, seam strength, and whether the item creates pressure points at the bottom seam.
- RFQ wording example: finished size 20x30 cm, natural 10oz cotton canvas, one-side one-color screen print, cotton drawcord, overlocked inside seam, bulk packed by artwork code.
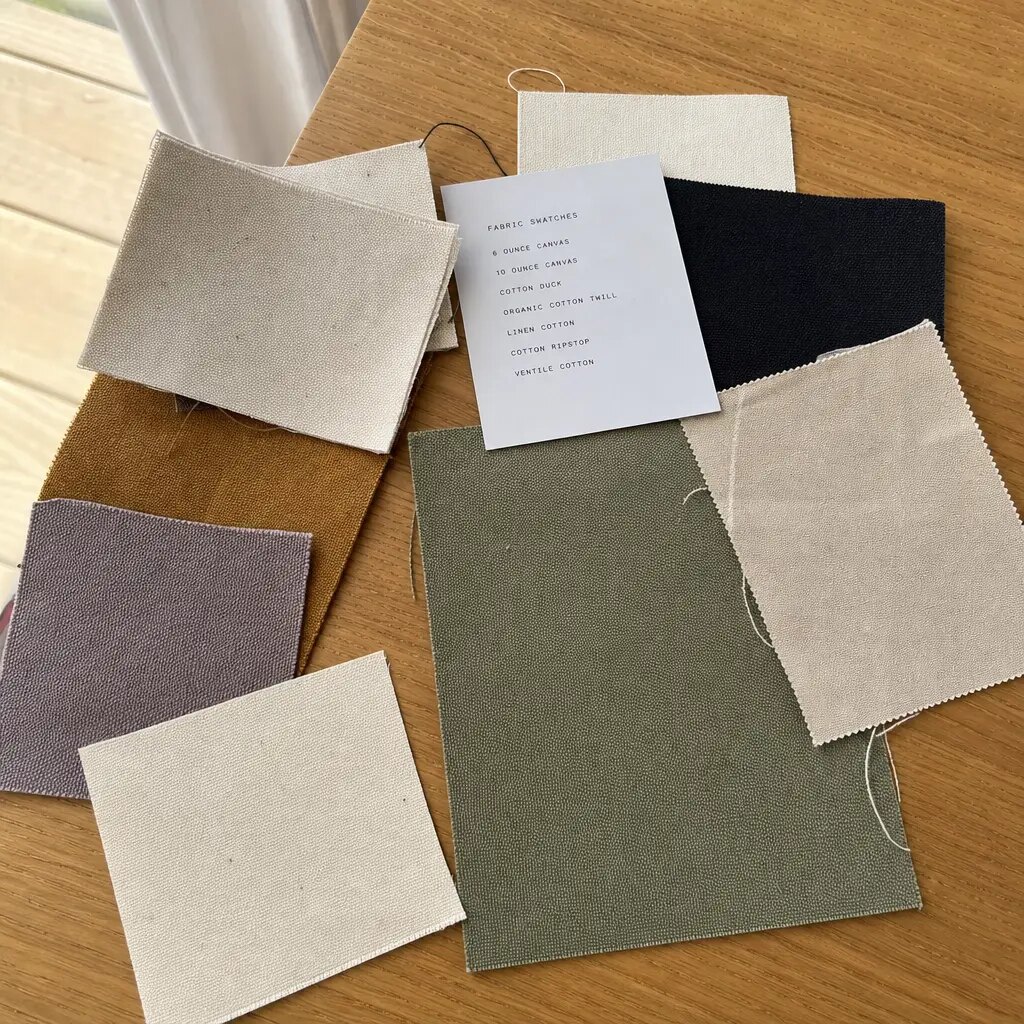
Be precise with fabric terms: cotton, muslin, canvas, calico, GSM, and ounces
Fabric names are not always used consistently. One supplier may describe a light plain-weave cotton bag as canvas. Another may reserve canvas for heavier cloth. Muslin, calico, plain cotton, cotton canvas, and cotton bag are useful descriptions, but they are not complete quality standards. For procurement, the safer route is to specify the intended fabric type, target GSM, and acceptable tolerance, then ask the supplier to confirm the actual material and provide a swatch or current-lot photo.
Ounce weight is helpful, but it is not enough on its own. In bag sourcing, 8oz and 10oz are common commercial references, yet GSM can vary depending on the mill construction and the way the supplier uses trade terms. Ask for GSM so you can compare quotes more cleanly. Also confirm whether the fabric is untreated, washed, bleached, dyed, or pre-shrunk. Those details can affect shade, hand feel, shrinkage, timing, and reorder consistency.
Natural cotton is popular for coffee packaging because it fits earthy branding and prints well with dark inks. It may show seed flecks, slubs, and shade variation. Those features can be acceptable, even attractive, if the brand agrees to them before bulk production. Bleached cotton gives a cleaner light base but can show handling marks more easily. Dyed black or custom-dyed cotton can look more premium, but it adds shade matching, lab dip timing, lint visibility, and print opacity checks. There is no single best fabric. The right choice is the one that matches the brand look, contents, timing, and budget.
- Ask for fabric construction, target GSM, tolerance, and whether the quoted material is in stock or must be sourced.
- For natural cotton, approve the normal range of flecks, slubs, and shade before bulk cutting.
- For dyed cotton, ask whether lab dip approval is mandatory and how many working days it adds.
- For black cotton, check lint control and whether light print colors need special ink coverage or an underbase.
- For reorders, keep an approved fabric reference and request confirmation if the mill, lot, or construction changes.
Lock print method, artwork limits, and placement tolerance before sampling
For many coffee roaster logos, one-color screen printing is the practical choice for custom cotton drawstring pouches. It suits medium and bulk runs, works well on natural cotton canvas, and can be repeatable when the screen, fixture, ink, and curing process are controlled. Still, cotton has texture. Fine details can soften. Large solid ink areas can look uneven on open weave. Tiny text may fill in or break apart.
Send artwork before treating pricing as final. Vector files such as AI, EPS, SVG, or print-ready PDF are the safest starting point. State the final print width and height in centimeters. Do not rely on the phrase ‘centered logo.’ If the artwork includes fine serif text, roast notes, distressed marks, gradients, thin outlines, or small icons, ask the factory to flag details that may need simplification. For multi-color artwork, confirm screen count, registration tolerance, setup fees, and whether the added complexity affects the production slot.
Placement deserves special attention because buyers and factories often define ‘centered’ differently. A drawstring pouch has a top channel, seam allowance, and fabric gathering. Once the pouch is filled and closed, the visual center can shift. The approved proof should show print size, distance from the top finished edge, and horizontal position measured from the center line or side seam. For many common pouch sizes, +/-3 mm to +/-5 mm placement tolerance is realistic. Expecting perfect alignment on every sewn textile item is not.
- Provide vector artwork and specify print color by Pantone, standard black, dark brown, or another clear reference.
- Confirm one-side or two-side print, number of print colors, and maximum print area included in the quote.
- Avoid very small text and thin lines unless the supplier confirms they can hold on the selected cotton texture.
- Show the non-print area near the drawstring channel so the logo does not disappear into folds.
- Request a print close-up photo or physical sample before approving bulk production.
- State print placement tolerance and inspection method in the PO, not only in email comments.
Control MOQ and SKU splits before the quote becomes misleading
MOQ can be confusing because buyers often think in total order quantity while factories think in setups. A coffee roaster may plan 3,000 pouches across three sizes, two artworks, and two fabric colors. The supplier may have quoted based on one size, one fabric, and one screen. When the final SKU matrix appears, the MOQ, setup cost, unit price, and timeline can all change.
The usual split drivers are size, fabric color, artwork, print color, drawcord type, label type, and packing method. Each split may require separate cutting, screen setup, sewing control, trimming, packing, and carton labeling. A low MOQ can be accurate for a simple order and misleading for a complex one. Share the full SKU matrix early, even if some quantities are still tentative, so the supplier can show which combinations are efficient and which ones create minimums or changeovers.
For a first order, standardization usually protects both cost and timing. Use one base fabric, one drawcord, one print color, and one seam construction across several pouch sizes when possible. If volume is limited, choose one hero size that fits the widest use case and add variants later after demand is clearer. Forcing very small quantities across many seasonal logos may look flexible on paper, but it can create higher setup costs and less consistent production.
- Ask whether MOQ is per order, per size, per fabric color, per artwork, per print color, per cord, or per label.
- Provide a SKU matrix showing size, fabric color, artwork, print color, label, packing method, and quantity per SKU.
- Ask whether screen or setup fees apply separately to each artwork and each print color.
- Avoid mixing natural and dyed fabric in a small first order unless the brand benefit justifies the extra handling.
- Request separate price lines for optional upgrades such as double drawcord, woven label, individual polybag, and barcode label.
- Confirm whether excess or shortage tolerance applies to the final shipped quantity, especially for custom-dyed or printed items.
Build a sample approval route that matches the production risk
Sampling should catch repeatable mistakes before thousands of pouches are made. A digital proof is useful for layout, but it cannot show fabric hand feel, opacity, cord movement, seam bulk, print curing, or the way the pouch behaves when filled. For a new pouch program, a physical printed pre-production sample is usually the most useful approval reference because it becomes the standard for bulk production and final inspection.
That does not mean every project needs every sample step. For a true reorder with the same fabric, size, artwork, cord, and packing, digital reconfirmation plus production photos may be enough. For a new size that must fit a specific coffee bag, mug, or accessory kit, a blank fit sample can prevent a costly sizing failure. For dyed fabric, new artwork, retail gift sets, or premium presentation, a printed sample should be approved before bulk cutting or at least before bulk printing.
Record sample approval with measurements, not just a short ‘approved’ message. Note finished size, fabric type and GSM, print size, placement, drawcord length, seam finish, label position, and packing assumption. Keep one signed physical reference sample when possible. If the sample is approved with changes, write the changes plainly: ‘move logo 1 cm lower,’ ‘increase cord length by 3 cm each side,’ or ‘use overlocked inside seam as shown in revised photo.’ Vague comments create avoidable disputes during inspection.
- Step 1: digital proof showing finished pouch size, channel area, print size, and placement measurements.
- Step 2: fabric swatch or current-lot photo when shade, weight, or texture matters.
- Step 3: blank fit sample if the pouch must hold a specific coffee bag, accessory, mug, or gift kit.
- Step 4: printed pre-production sample for logo quality, print placement, cord feel, seam finish, and overall presentation.
- Step 5: written approval with tolerances, defect priorities, and packing instructions attached to the purchase order.
- Step 6: production reference photos shared with purchasing, brand, warehouse, logistics, and QC teams.
Map lead time by stage instead of accepting one promise date
A useful custom cotton drawstring pouches lead time planning guide for coffee roasters should separate the work into stages. A supplier’s single ‘production time’ number may exclude buyer approval, sample transit, lab dips, packing changes, final inspection, and transport. For date-sensitive coffee launches, those excluded steps are often where the schedule slips.
For a standard natural cotton canvas pouch with one-color screen print, artwork review may take about 1-3 working days when files are complete. Sample making may take about 5-10 working days if materials are available and the print setup is simple. Physical sample transit and internal approval can add several more days. Bulk production and packing commonly require several weeks after final approval, depending on quantity, capacity, SKU splits, and inspection requirements. Dyed fabric, custom cord, woven labels, multi-color printing, or retail-ready packing can extend the plan.
Internal timing matters as much as factory timing. Brand, procurement, operations, and logistics often approve in sequence, and each handoff adds waiting time. Circulate the spec sheet before requesting quotes. Then work backward from the required warehouse date: final artwork date, sample approval date, production start date, freight booking date, receiving date, and kitting date. If the pouch supports a holiday gift set or subscription drop, build the buffer early. Waiting until the end usually leaves only expensive freight or reduced QC as options.
- Simple planning model: 3-5 working days for spec finalization, 5-10 working days for sampling, buyer approval time, 3-5 weeks for bulk production and packing, then transit.
- Add time for lab dips, dyed fabric, custom trims, multi-color print, revised samples, retailer compliance labels, and peak-season capacity.
- Ask whether material can be booked before sample approval or only after written approval and deposit.
- Confirm when the factory production slot is reserved and what happens if buyer feedback is late.
- Do not count transit until goods are packed, inspected, and shipment-ready with carton dimensions and gross weight confirmed.
- Use shipment readiness, port or airport handover, estimated departure, and estimated arrival as separate milestones.
Compare supplier quotes by normalizing every assumption
Unit price differences often come from different assumptions rather than true savings. One quote may be based on lightweight cotton, a small one-side print, a basic cord, and loose bulk packing. Another may include 10oz canvas, a larger logo, double drawcord, woven side label, sorted inner bundles, and barcode carton labels. Both may be described as custom cotton drawstring pouches, but they are not the same product.
Normalize each quote before negotiating. Ask every supplier to confirm fabric type, GSM, finished size tolerance, print method, print area, print color count, cord material, seam finish, label details, packing format, carton quantity, sample cost, setup charges, lead time by stage, and shipment terms. If a supplier cannot state GSM, print area, packing format, or carton data, the quote is not controlled enough for a reliable purchasing decision.
For coffee roasters using pouches in gift sets or subscription kits, landed cost matters more than ex-factory price. A cheaper pouch that arrives mixed by size, with weak curing, off-position logos, or inconsistent dimensions can create warehouse sorting labor, delayed kitting, replacement cost, and poor retail presentation. Documentation also helps reorders. When the first run is well specified, the next PO is faster to place and easier to compare.
- Compare 8oz to 8oz and 10oz to 10oz; do not compare generic cotton to confirmed cotton canvas.
- Compare the same print size, side count, ink color count, and artwork complexity.
- Compare the same cord construction, seam finish, label type, and reinforcement requirements.
- Compare packing separately: bulk bundles, polybags, hangtags, barcode labels, carton marks, and mixed carton labor.
- Ask for estimated carton dimensions and gross weight before choosing a supplier so freight can be modeled.
- Flag quotes that omit MOQ split rules, GSM, print method, print area, setup charges, packing format, or inspection standard.
Decide packing and carton control before production week
Packing is not a last-minute shipping detail. It affects cost, schedule, warehouse labor, and receiving accuracy. Coffee roasters often import pouches for later kitting with roasted coffee, mugs, filters, cards, or accessories. If the warehouse will open cartons and assemble kits, bulk packing by size and artwork code is usually efficient. If goods go directly to retail distribution or a third-party logistics provider, barcode labels, carton marks, assortment accuracy, and compliance instructions become more important.
A good packing instruction states whether pouches are folded or flat, how many units go into each inner bundle, how bundles are labeled, how many units go into each export carton, and what appears on carton marks. For mixed cartons, provide exact ratios and require a packing list that shows size-level and artwork-level counts. Avoid loose mixed cartons unless your receiving team specifically wants them. One wrong assortment can delay a kitting line even when the pouch quality is acceptable.
Packing choices also affect freight and sustainability goals. Individual polybags protect against dust and handling marks, but they add material, labor, and carton volume. An inner poly liner may be enough for bulk goods going to a controlled warehouse. Hangtags, insert cards, and retail barcode stickers should be included in the quote and timeline because they require placement checks. If plastic reduction is part of your coffee brand’s packaging position, decide the protection level with logistics instead of leaving the factory to choose a default.
- For warehouse kitting, pack by size and artwork code with clear inner bundle labels.
- For retail distribution, specify barcode type, label position, carton marks, assortment map, and any retailer compliance rules.
- For mixed cartons, provide exact SKU ratio and require count verification before shipment.
- For dust or moisture protection, decide between no polybag, inner carton liner, bundle bag, or individual polybag.
- Request pre-shipment photos of open cartons, inner bundles, carton marks, and packed carton condition.
- Confirm whether export cartons must suit courier handling, palletizing, container loading, or long sea freight transit.
Set QC thresholds for function, branding, and receiving accuracy
Cotton drawstring pouches need practical textile QC. Natural cotton may show seed flecks, small slubs, and slight shade variation; those may be acceptable if agreed in advance. The serious problems are different: wrong size, wrong fabric, weak seams, missing or jammed drawcords, poor print curing, visibly crooked logos, major stains, and incorrect carton assortment. A written inspection standard keeps the discussion objective when production is finished.
Inspection should refer to the approved sample and the written PO spec. Measure finished size flat after sewing, not stretched. Measure print placement from the top finished edge and side seam or center line. Compare print color with the approved sample or reference under consistent lighting. Check that the top channel lets the cord move smoothly, and that side seams and bottom corners are secure for the intended contents. Loose threads, stains, and heavy wrinkles should be controlled because they affect retail presentation.
Define defect severity before shipment release. Critical defects make the pouch unusable or wrong for the order. Major defects harm brand presentation, function, or warehouse usability. Minor defects are small issues within an agreed acceptance level, such as occasional thread ends or normal natural-cotton texture. If you use AQL inspection, align defect definitions with the inspection agency and factory before production starts, not after a failed inspection.
- Critical defects: wrong artwork, wrong fabric color, missing drawcord, broken seam, unusable opening, severe stain, or finished size outside agreed tolerance.
- Major defects: visibly off-center print, poor ink adhesion, repeated loose stitching, cord jam, severe shade mixing, incorrect label, or wrong carton assortment.
- Minor defects: occasional loose thread, small natural slub, slight wrinkle, or minor shade variation within the approved standard.
- Measure print placement with a ruler or template rather than judging only by eye.
- Check carton count by SKU, size, fabric color, artwork, and carton number.
- Require sorting, rework, replacement, or written concession before shipment if defects exceed the agreed threshold.
Specification comparison for buyers
| Spec decision | Recommended option | When it fits | Buyer risk to check |
|---|---|---|---|
| Fabric weight | 8oz to 10oz cotton canvas, commonly about 270-340 GSM depending on mill construction | Reusable coffee gift pouches, brewing accessory kits, sampler bundles, merchandise, and retail sets that need more body than lightweight muslin | Do not compare ounce labels alone. Ask for GSM, weave, shrinkage expectation, and bulk GSM tolerance, often around +/-5% to +/-10% depending on sourcing. |
| Fabric type | Plain-weave cotton canvas or tightly woven cotton confirmed by swatch before production | Branded packaging where print edge quality, seam neatness, and reorder consistency matter | Loose muslin or open-weave cotton can reduce print sharpness, show contents through the fabric, and widen finished-size variation after sewing. |
| Finished size | Specify width x height measured flat after sewing, with the top channel included unless the spec says otherwise | Coffee sample kits, dripper accessories, cupping tools, mug sets, subscription inserts, and retail gift packing | If the size is measured before sewing or excludes channel allowance, the usable internal space may be too small even if the finished height sounds correct. |
| Color base | Natural cotton for the simplest approval path; dyed black or custom dyed when the brand presentation justifies it | Natural cotton works well with black, brown, forest green, navy, charcoal, and other coffee-brand ink colors | Dyed lots may need lab dips, shade approval, and bulk shade control. Black fabric also makes lint more visible and requires light-ink coverage checks. |
| Print method | 1-color screen print for most roaster logos; consider heat transfer, embroidery, or multi-color print only when the artwork needs it | Medium and bulk runs needing durable, repeatable branding on textured cotton | Tiny text, gradients, distressed marks, and large solid ink blocks may not reproduce cleanly unless artwork is adjusted and a sample is approved. |
| Print placement | Define print size plus distance from the top finished edge and center line or side seam, with +/-3 mm to +/-5 mm tolerance for common sizes | Front-facing gift sets, e-commerce photos, retail shelves, and subscription kits where logo alignment is obvious | Visual centering can drift because seams, channel depth, and the filled pouch shape change the apparent center. |
| Drawstring construction | Single drawcord for a simple cost-efficient closure; double drawcord or two-sided pull for larger pouches or a more premium feel | Single cord suits accessory pouches and sampler bags. Double pull improves opening and closing feel on larger gift pouches. | Cord material, diameter, length, knot finish, and color matching can affect MOQ, sewing time, and inspection criteria. |
| Seam finish | Overlocked inside seam or clean turned seam; reinforce bottom corners when the load is higher | Coffee accessory kits, mugs, filters, tools, or multi-item bundles where stress collects at the bottom corners | A basic seam may be fine for light inserts but can fail presentation or strength expectations for heavier retail kits. |
| MOQ approach | Consolidate around one fabric, one base color, one cord, one print color, and limited artwork versions | Roasters with several seasonal SKUs but limited first-order volume | MOQ may apply per size, fabric color, artwork, print color, label, or construction. A quoted total MOQ may not cover the final SKU matrix. |
Buyer checklist before sampling
- Define the finished pouch width and height in centimeters, measured flat after sewing and before packing. State whether the dimensions include the top drawstring channel, and set a tolerance such as +/-0.5 cm for small pouches or +/-1.0 cm for larger canvas pouches.
- State the product use case: roasted coffee gift pouch, sample sachet bundle, brewing accessory bag, grinder brush kit, cupping spoon pouch, mug gift sleeve, subscription bonus, event giveaway, or retail merchandise packaging.
- List the expected contents and approximate load weight. Include the number of coffee bags or accessories, whether corners are sharp, and whether the pouch must stand neatly for photography or shelf display.
- Specify fabric type and target weight, for example natural 8oz cotton canvas or 10oz cotton canvas. Request the approximate GSM range and allowed GSM tolerance.
- Confirm the base fabric color: natural, bleached, dyed black, stock dyed color, or custom dyed. State whether natural flecks, slubs, and shade variation are acceptable, and whether lab dip approval is required for dyed fabric.
- Provide vector artwork, final logo size, ink color reference, print side count, preferred print method, and placement measurements from the top finished edge and center line or side seam.
- Clarify whether the back side must remain blank for later labels, roast information stickers, warehouse routing labels, or retail price stickers.
- Specify drawstring material, color, approximate diameter, length, knot or end finish, and construction type: single drawcord, double drawcord, or double-sided pull.
- State seam construction preference: overlocked inside seam, simple turned seam, French seam, reinforced bottom corners, or another finish required for the intended contents.
- Confirm labels and trims: woven side label, care/content label, brand tag, barcode label, hangtag, removable warehouse sticker, or no label.
Factory quote questions to send
- Can you split the quoted timeline into artwork review, fabric sourcing or preparation, lab dip if needed, sample making, sample transit estimate, buyer approval time, bulk cutting, printing, curing, sewing, trimming, packing, final inspection, and shipment readiness?
- Is MOQ counted per total order, per pouch size, per fabric color, per artwork, per print color, per drawcord type, per label, or per construction type?
- What exact fabric are you quoting: cotton canvas, plain cotton, muslin, calico, combed cotton, recycled cotton blend, organic cotton, or another construction?
- What is the target GSM and allowed bulk GSM tolerance? How do you verify fabric weight before cutting, and can you provide a bulk fabric inspection photo or report?
- For natural cotton, what seed fleck, slub, and shade variation is considered normal? Can you send current lot photos or swatches before making the sample?
- For dyed fabric, is lab dip approval included? How many working days does it add, what color standard do you use, and what is the acceptable bulk shade tolerance?
- Will the fabric be pre-shrunk, washed, or untreated? If the pouch is not intended for washing, can you still state expected shrinkage risk or care limitations?
- Which print method are you quoting, what maximum print area is included, and what artwork details may need adjustment for textured cotton?
- What print placement tolerance do you apply in bulk production, and will placement be measured from the top finished edge, center line, or side seam?
- What print color variation, ink curing method, and rub or scratch check do you use before packing?
Quality-control points to confirm
- Finished size should be measured flat after sewing, not stretched, and checked against the agreed tolerance. Practical tolerances are often around +/-0.5 cm for small pouches and +/-1.0 cm for larger canvas pouches, but the PO should state the exact limit.
- Usable internal space should be confirmed when the pouch must fit a specific coffee bag, mug, dripper, filter pack, or accessory kit. Finished height alone may not reflect the space lost to the drawstring channel.
- Bulk fabric GSM should be checked from the production lot before cutting, especially for retail gift sets, reusable merchandise, or pouches that must photograph consistently.
- Fabric construction should match the approved sample. Weave density, thickness, hand feel, and opacity should not be substituted without written approval.
- Bulk fabric shade should be compared against the approved swatch or sample under consistent lighting. Natural cotton flecks and slubs should be judged against an agreed normal range, not decided after packing.
- Print placement should be measured from the top finished edge and either the side seam, center line, or both, depending on the approved spec. Do not rely only on a filled-pouch visual check.
- Print color should be compared to the approved sample or Pantone reference where applicable, with realistic limits for natural cotton versus dyed cotton.
- Print adhesion and curing should be checked with a simple rub, scratch, or tape-style check agreed with the factory, especially for dark fabric, light ink, heavy coverage, or large front logos.
- Logo edges should be reviewed for bleeding, broken fine lines, pinholes, smudges, and inconsistent ink coverage caused by open weave or poor screen setup.
- Drawstring length should allow smooth opening and closing without one side pulling noticeably shorter than the other. Knot position and end finish should match the approved sample.