Start With the Event, Not the Bag Photo
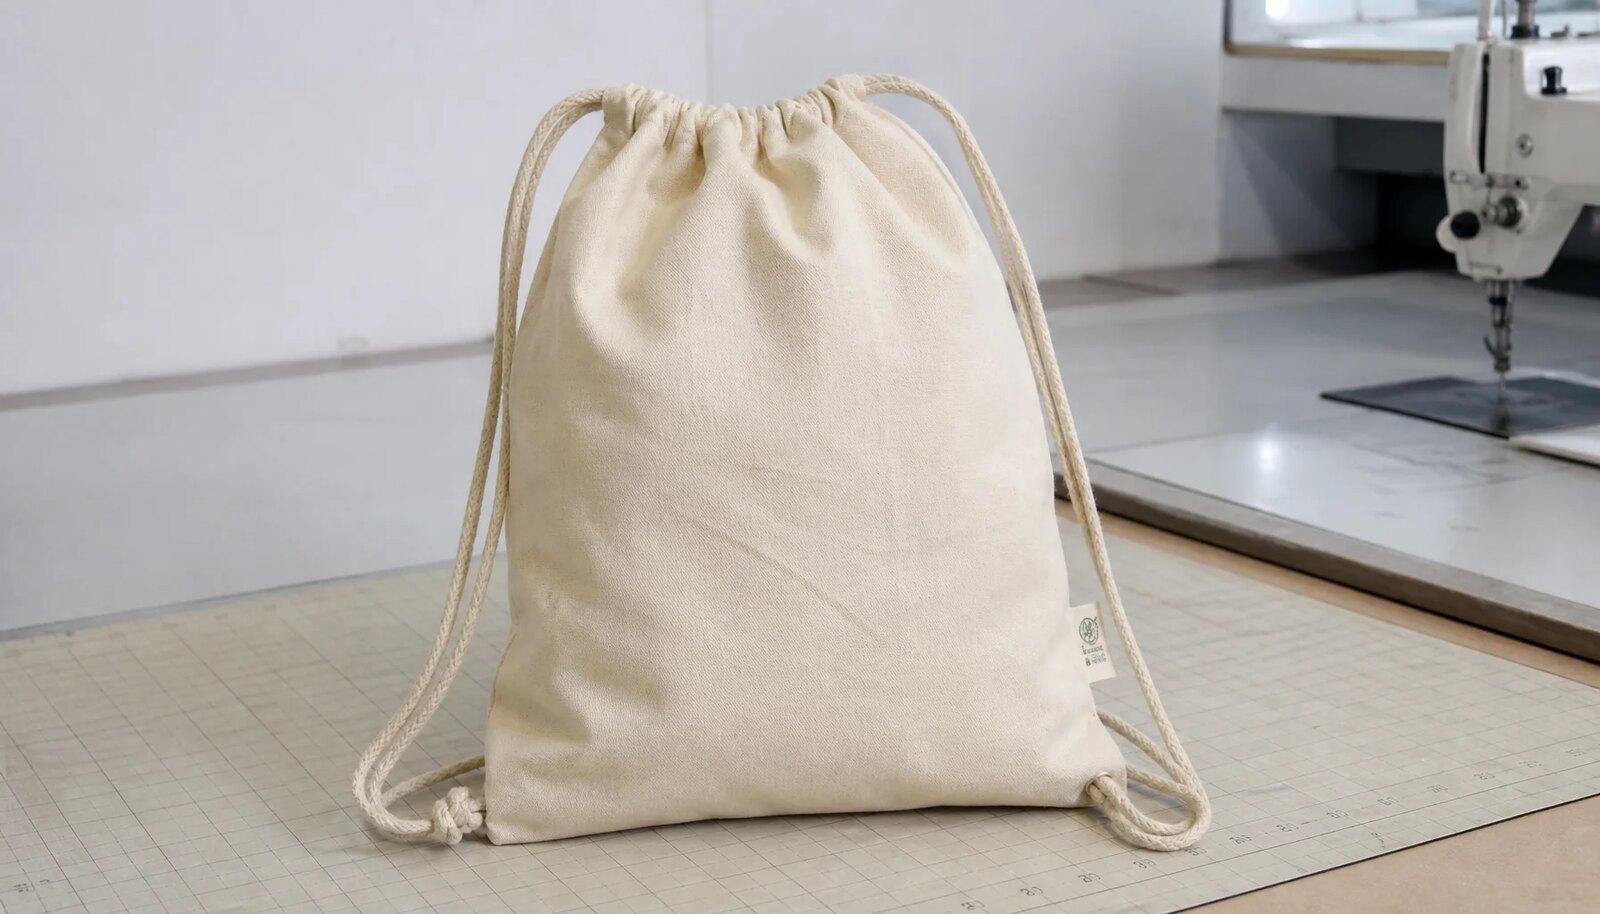
Custom cotton drawstring backpacks look simple, which is exactly why weak specifications cause problems. A buyer may approve a clean product image, then receive bags that are too small for the welcome kit, too thin for the brand position, or packed in a way that slows down registration staff. For an event planner, the bag is not only a promotional item. It is attendee packaging, sponsor visibility, and a logistics tool that has to work at a specific venue on a fixed date.
Begin the procurement brief with the use case. Will the backpack hold only a badge, agenda, and flyer? Or will it carry a notebook, T-shirt, water bottle, charger, catalog, and regional gifts? A flat giveaway handed out at a booth can use lighter construction than a pre-packed conference kit shipped to several hotels or campuses. If the bag fails, the failure is public. Attendees notice torn seams, musty odor, missing sponsor marks, or cartons that arrive at the wrong loading dock.
Set the quality tier before suppliers quote. A basic handout should still be clean, functional, and correctly branded. A sponsor-facing summit, university orientation, employee onboarding event, or retail-style merchandise program may need better cotton opacity, tighter logo placement, cleaner stitching, stronger carton protection, and a more finished hand feel. Suppliers can price accurately only when they know whether the goal is lowest workable cost, balanced event quality, or a reusable premium bag.
- List the expected contents, dimensions, and approximate fill weight before selecting GSM or size.
- State whether bags ship empty, pre-packed, bundled for registration, or split by venue.
- Identify whether bags will be photographed, displayed at booths, sold as merchandise, or used only as free attendee packaging.
- Tell suppliers about venue limits such as carton weight, receiving hours, plastic restrictions, dock appointments, or required carton labels.
- Define the event date and the final receiving date separately because setup and kit assembly usually happen before attendee arrival.
Turn Usage Into a Finished Size and Fabric Spec
Fabric weight is one of the clearest cost and quality levers in cotton drawstring backpacks. For very light inserts, 120-140 GSM cotton can be acceptable when the buyer understands the tradeoff: more wrinkling, more show-through, and a lighter perceived value. For many conferences, trade shows, campus programs, and employee events, 160-180 GSM is a practical baseline. It usually gives better opacity and print performance without the bulk, stiffness, and freight volume of heavier canvas. For heavier kits or a more retail-like feel, 200-240 GSM cotton canvas is usually a stronger starting point.
Do not accept GSM as a vague marketing number. Ask whether the quoted weight refers to greige fabric, finished fabric, washed fabric, or ready-to-cut bulk fabric. Cotton finishing can change weight and hand feel, and suppliers may describe the same product in different ways. If composition matters, write it into the RFQ: 100% cotton, recycled cotton blend, organic cotton, or cotton-poly blend. Any sustainability, recycled, or organic claim used on event materials or labels should be supported by documentation, not simply repeated from a quotation.
Finished size also needs discipline. Measure the bag flat after sewing, not from cut fabric or a catalog title. Common event sizes such as 33 x 40 cm or 34 x 42 cm often fit A4 documents and small kits, but bulky contents reduce usable space because the seams and cord tunnel consume width and height. Give the supplier the largest insert size and the expected packed thickness. A written tolerance, such as +/- 10 mm for finished width and height, is far clearer than saying the size should be approximate.
- Specify finished flat width and height, usable opening, and acceptable tolerance.
- Ask for fabric GSM range, composition, weave type, finish, and whether fabric is natural, bleached, dyed, washed, or recycled-content.
- Require lab dip approval for dyed cotton when brand color or the event palette matters.
- Approve natural cotton shade variation by swatch because unbleached cotton can show seed flecks and lot-to-lot tone differences.
- Confirm whether shrinkage, washing, or pressing is part of production if the event requires a softer or more finished hand feel.
Specify the Construction Where Drawstring Bags Really Fail
Most drawstring backpacks do not fail in the middle of the front panel. They fail at the places that carry stress: the cord tunnel, side seams, bottom corners, and cord exit points. These areas take the load when an attendee pulls the bag closed, swings it over a shoulder, or carries a heavy kit through a venue. A useful procurement spec therefore describes the sewing and cord function, not just the fabric and logo.
For basic event bags, overlocked inner seams with neat lockstitching may be enough. For heavier contents, ask for reinforced bottom corners, stronger stitch density, or bartack-style reinforcement where the design allows it. The supplier should confirm whether side seams are single stitched, double stitched, overlocked, or folded and stitched. Close-up photos are helpful during quoting, but the physical approved sample should be the controlling reference for bulk production.
Cords deserve more attention than they usually receive. The cord is both closure and carrying handle. Cotton cord has a natural look and works well with undyed cotton, but thin cotton cord can fray. Polyester or poly-cotton cord may slide more smoothly and resist abrasion, although it can look less natural. Common cord diameters for event drawstring bags are often in the 4-6 mm range, but the right choice depends on the bag size, tunnel width, and fill weight. Define cord diameter, color, finished length, knot method, and whether cord ends are heat sealed, knotted, tipped, or left plain.
- Inspect top tunnel stitching because it carries repeated opening and closing stress.
- Define cord length so the bag can open wide enough for fast packing and close securely after filling.
- Check whether knots are consistent and cannot pull through the tunnel or corner channel during normal use.
- Reject skipped stitch runs, open seams, broken threads, unraveling overlock, and needle damage near stress points.
- Use the actual event kit or a measured substitute weight when testing seam and cord performance.
Choose Decoration With Inspection Built In
Decoration is the first quality detail most attendees see. The logo is also often the reason the bag was ordered in the first place. Screen printing is usually the most predictable choice for one- to three-color fixed artwork on medium and large event quantities. It works well for bold sponsor marks, event names, and simple illustrations. On dark fabric, buyers may need an underbase or adjusted ink system to achieve opacity, which affects both cost and sample timing.
Heat transfer has its place. It can be useful for gradients, full-color artwork, short runs, or variable designs, but it should be tested on the actual cotton fabric. Transfers can create a different hand feel, visible edge, gloss difference, or pressure mark. They can also lift or crack after tight folding if the process is poorly controlled. Embroidery may work for a small premium mark, but it can pucker lightweight cotton and is rarely the best option for large event logos on thin panels.
Set print specifications before pricing begins. Provide vector artwork when possible. Define logo size, print location, Pantone or brand color target, and the reference point for measurement. Placement should be measured from a fixed point such as the finished top seam, cord tunnel, side seam, or panel center. For many event bags, a practical placement tolerance might be +/- 5 mm to +/- 10 mm depending on bag size, fabric movement, and production method. Whatever tolerance you choose, put it in the PO.
- Ask whether the quote includes screen setup, PMS matching, underbase, and per-color charges.
- Approve a physical print strike-off or pre-production sample on the final fabric color.
- Check print opacity, registration, edge sharpness, curing, rub resistance, odor, and cracking after folding.
- Define print tilt tolerance because a centered logo can still look poor if it is visibly angled.
- Inspect printed bags after a packing trial because fold pressure can reveal weak cure or transfer edge lift.
Write an RFQ That Makes Supplier Quotes Comparable
A strong RFQ protects the buyer from attractive but misleading unit prices. Without a complete specification, one supplier may quote a 180 GSM bag with reinforced stitching and screen print, while another quotes 130 GSM cotton, a smaller finished size, thinner cord, and loose bulk packing. Both quotations may say custom cotton drawstring backpack. The delivered products will not be equal.
Send every supplier the same RFQ pack. Include finished size, GSM, composition, fabric color, cord specification, decoration method, logo artwork, print size, quantity breaks, packing method, destination, incoterm, inspection requirement, and required delivery date. Ask for quote validity and production capacity for the event window. If attendance numbers may move, request pricing at 500, 1,000, 3,000, 5,000, and any likely reorder quantity using the identical specification.
Separate the unit price from everything else. Screen charges, sample fees, PMS matching, label costs, carton upgrades, inspection support, freight, duty, taxes, and last-mile delivery can change the true landed cost. Incoterms also matter. EXW, FOB, CIF, DDP, and delivered-to-venue pricing are not interchangeable. A clean procurement comparison should show what is included, what is excluded, and who owns the risk until the goods reach the warehouse, venue, or kit-packing location.
- Require suppliers to state all exclusions, not just inclusions.
- Ask whether the factory cuts, sews, prints, and packs in-house or uses subcontractors.
- Request carton dimensions, pieces per carton, gross weight, and estimated shipment volume with the quote.
- Ask for lead time from artwork approval, sample approval, and deposit as separate milestones.
- Confirm whether reorders will use retained screens, artwork files, fabric references, and the same approved sample standard.
Treat Samples as Control Documents, Not Souvenirs
A sample is not a courtesy item to glance at and file away. It is the physical control document for the bulk order. Photos cannot confirm cotton hand feel, cord friction, seam strength, odor, print cure, or how the logo behaves after folding. For custom cotton drawstring backpacks, the pre-production sample should use the same fabric weight, cord, stitching, decoration, label, fold method, and packing style planned for mass production.
When the sample arrives, slow down and measure it. Record finished width, finished height, cord tunnel width, cord length, logo size, logo placement, and print tilt. Put the intended contents inside if they are available. If the final kit is not ready, use realistic substitutes with similar size and weight. Open and close the bag several times. Check the tunnel, corners, and cords after handling. Review the sample under daylight and normal indoor light because cotton shade and print opacity can change with lighting.
The approved sample should be signed, dated, photographed, and linked to the PO number and artwork version. If deviations are accepted, write them down. Small natural seed flecks may be acceptable on unbleached cotton, but oil marks, mold, large slubs across the logo, and shade panels from mixed fabric lots should not be accepted. Keep one golden sample with the buyer and require one matching sample at the factory or inspection station.
- Use a material swatch to approve fabric before cutting when color or hand feel matters.
- Use a print strike-off to approve ink color, opacity, and decoration behavior before full production.
- Use a pre-production sample to approve the complete bag construction and appearance.
- Use a top-of-production sample when the first approved sample was handmade or when production risk is high.
- Use a packed sample or packing photo to approve fold lines, bundle count, carton format, and label content.
Define Defects Before the Inspector Opens a Carton
Inspection is only useful when the buyer, supplier, and inspector share the same definitions. A major defect should be anything that prevents normal use, damages brand presentation, creates attendee complaints, or disrupts distribution. For cotton drawstring backpacks, major defects include open seams, broken cords, holes, wrong artwork, wrong color, severe stains, heavy odor, mold, missing decoration, under-cured ink, badly tilted print, unusable closure, and incorrect carton counts.
Minor defects still matter, but they do not usually prevent use. Examples may include a short loose thread, a small wrinkle, slight stitch unevenness, minor natural cotton flecks, or very small print roughness away from the main logo area. The acceptable limit depends on the event. A small fleck may be normal for natural cotton at a casual community program. The same visible mark beside a sponsor logo may be unacceptable for an executive welcome kit.
AQL can be useful, but it is not a substitute for judgment. Many promotional product inspections use ANSI/ASQ Z1.4 or ISO 2859-1 sampling plans with General Inspection Level II and AQL 2.5 for major defects and 4.0 for minor defects, when the parties agree. Critical defects such as mold, unsafe contamination, or serious compliance issues should generally be handled with zero tolerance. Confirm the AQL plan, sampling level, defect list, and acceptance numbers before the goods are packed.
- Create a defect sheet with photos or descriptions of acceptable and unacceptable fabric marks, print flaws, and sewing issues.
- Set size, logo placement, print tilt, cord length, and carton count tolerances numerically.
- Define rework rules before failure occurs: repair, replacement, discount, rejection, or sorting at supplier cost.
- Make wrong artwork, wrong destination labels, and wrong quantity major defects because they disrupt event operations.
- Ensure the inspector has the PO, approved sample, artwork proof, measurement sheet, and carton allocation list before arrival.
Inspect Sewing, Cords, and Load Performance Under Realistic Use
Workmanship inspection should start at the stress points, not with the easiest visual check. Look closely at the side seams, bottom corners, top hems, cord tunnel, and cord exits. Check for skipped stitches, broken stitches, open seams, narrow seam allowance, loose overlock threads, uneven trimming, needle holes, and fabric tearing around the cord path. These are practical defects. They can turn into attendee complaints after the first full kit is dropped into the bag.
Cord function should be tested, not simply viewed. Pull both cords to close the bag, open it again, and repeat several cycles. The cord should slide smoothly enough for normal use but not feel so loose that the closure falls open immediately. Check for fraying, inconsistent length, knots that pull through, twisted cords, and excessive friction inside the tunnel. If the cord is dyed, check whether color rubs onto the cotton body.
Load testing should reflect the event. Put the planned kit inside the bag or use a measured substitute weight that matches the contents. Carry the bag by the cords, lift it from the table, shake it lightly, open and close it again, then inspect stress points after the test. For heavier kits, test units from different cartons rather than only the top carton. Variation can occur by sewing operator, fabric roll, or production batch, and the inspection plan should be designed to catch that variation.
- Check multiple cartons across the shipment, not only the most accessible carton.
- Inspect before and after functional handling because weak stitching may look fine before the first pull.
- Record any repeated failure by location, such as bottom left corner, top tunnel, or cord knot.
- Reject units where cords cannot open the bag fully enough for packing or attendee use.
- Escalate recurring seam failures as a major workmanship issue, even if each individual defect appears small.
Control Print Quality Early in Bulk Production
Print quality should be checked early because fixing finished printed bags is difficult and often slower than catching the issue at the start. Ask for a first-off production sample or print strike-off before the full run continues. Compare it with the approved artwork, Pantone target, and golden sample. Confirm logo size, placement, tilt, opacity, edge sharpness, and registration before the factory prints thousands of units.
For screen print, under-cured ink is a common risk. It may feel tacky, smell strongly, transfer onto other bags, block when stacked, or crack after folding. A basic dry rub and light scratch check can identify obvious issues, but the most important control is supplier process discipline: correct ink, mesh, curing temperature, dwell time, and cooling before packing. For multi-color logos, registration should be checked repeatedly during the run because screens can drift.
For heat transfer, the inspection focus changes. Check edge adhesion, pressure marks, surface gloss, cracking when folded, and whether the transfer hand feel is acceptable on cotton. A beautiful flat sample can still fail after being folded tightly through the logo and compressed in cartons. For either decoration method, inspect printed bags after a packing trial because event bags often remain folded until registration setup.
- Define the exact reference point for logo placement, such as distance from the top seam or centered on the finished panel.
- Use a ruler or template during inspection instead of judging placement by eye.
- Check color under consistent lighting and against a physical standard when brand color matters.
- Run rub, fold, and light scratch checks on cured print before shipment approval.
- Reject severe print shift, missing print, wrong artwork, tacky ink, strong solvent odor, smudging, and transfer edge lift as major defects.
Make Packing Work for Venue Operations
Packing is not an afterthought for event planners. It determines how bags arrive, how quickly staff can distribute them, and whether the logo survives transit. A well-made bag can still become a problem if it is folded through the print, packed into weak cartons, exposed to moisture, mislabeled, or split into the wrong destination quantities.
Choose the packing format during RFQ, not after production. Individual polybags protect against dust and handling, but they add plastic waste, labor, and unpacking time. Bundle packs with paper bands or inner bags can be efficient for registration tables if counts are consistent. Direct carton packing may be lowest cost, but it requires strong fold control and clean cartons. If the event has sustainability rules, plastic restrictions, or venue waste guidelines, specify them before the supplier prices the order.
Carton details should be inspection items. Define pieces per bundle, bundles per carton, total pieces per carton, carton dimensions, gross weight, net weight, and carton mark format. For venue delivery, labels should include event name, PO number, item description, quantity, carton number, total cartons, destination, receiving contact, and any dock instructions. For multi-venue programs, the carton allocation list should match the purchase order and shipping documents exactly.
- Approve fold direction and confirm fold lines do not cut through or crease the logo severely.
- Set a practical carton weight limit so event staff can move cartons without special handling.
- Require photos of open cartons, closed cartons, labels, carton stack, and packed bundle arrangement before release.
- Check for damp cartons, crushed corners, weak tape, overfilled cartons, and missing sequence labels.
- Use clearly marked spare cartons or overage if the event has no time for replacement shipments.
Specification comparison for buyers
| Procurement decision | Recommended B2B specification | Typical tolerance or control point | Risk to verify before PO |
|---|---|---|---|
| Finished bag size | Common event sizes include 33 x 40 cm, 34 x 42 cm, or a custom finished size based on the actual kit contents | Finished width and height tolerance often +/- 10 mm unless the buyer specifies tighter control | Catalog size may refer to cut fabric, not usable finished size after seams and the cord tunnel |
| Fabric weight | 160-180 GSM cotton for most conferences and welcome kits; 200-240 GSM cotton canvas for premium or heavier kits | Ask for finished fabric GSM range, test method, and whether weight is before wash, after finish, or from bulk ready-to-cut fabric | A low quote may substitute 120-140 GSM fabric with higher show-through and weaker perceived value |
| Fabric composition | 100% cotton, recycled cotton blend, organic cotton, or cotton-poly blend stated clearly in the RFQ and label requirements | Composition should match any claim used on event materials, product labels, or packaging | Unverified sustainability, organic, or recycled claims can create compliance and brand risk |
| Cotton color | Natural, bleached, dyed, or Pantone-matched dyed fabric with approved lab dip when needed | Natural cotton shade variation should be approved by swatch or defined as an acceptable range | Natural flecks are normal; oil marks, dye contamination, and uneven shade panels are defects |
| Seam construction | Overlocked inner seams plus lockstitch, double-needle, or reinforcement at stress points where required | Check stitch density, seam allowance, skipped stitches, open seams, and cord tunnel integrity | Weak bottom corners and cord exits often fail after the bag is filled, not while it is lying flat |
| Cord specification | Cotton, polyester, or poly-cotton cord, commonly 4-6 mm diameter depending on bag size and load | Define cord diameter, color, finished length, knot type, end finish, and pull function | Thin cord can fray, cut into the tunnel, or feel uncomfortable when bags are carried all day |
| Screen printing | Best for one- to three-color fixed logos and repeatable event branding | Define Pantone target, print size, placement tolerance, registration tolerance, cure check, rub test, and fold test | Under-cured ink can block, smell, transfer, crack, or remain tacky inside packed cartons |
| Heat transfer | Useful for complex art, gradients, short runs, or variable designs | Check edge adhesion, hand feel, gloss, pressure marks, folding resistance, and wash or rub expectations | Transfer edges can lift after tight folding or heat exposure during storage and transport |
| Sampling | Pre-production sample made with final fabric, cord, stitching, decoration, label, fold, and packing style | Golden sample signed, dated, photographed, and referenced in the PO | A handmade sample may not represent bulk line sewing or production print conditions |
Buyer checklist before sampling
- Define the real event use: attendee profile, distribution method, expected contents, estimated fill weight, carry duration, venue receiving date, and whether bags will be pre-packed before delivery.
- Specify finished flat size in centimeters or inches, usable opening, fabric GSM range, fabric composition, fabric color, weave type, cord type, cord diameter, cord color, and finished cord length.
- State the decoration method, logo size, logo position, Pantone or brand color target, artwork file format, print tolerance, and whether print approval is based on a physical strike-off or pre-production sample.
- Ask suppliers to quote the same quantity breaks, incoterm, destination, packing method, carton marks, inspection requirement, sample stages, and payment terms so prices can be compared fairly.
- Require unit price and separate line items for setup, screens, PMS matching, labels, hangtags, packing, sample fees, inspection support, export cartons, banking fees, and freight when applicable.
- Approve a physical pre-production sample made from the same production fabric, cord, stitching, decoration method, label, fold, and packing style planned for the bulk order.
- Attach the signed golden sample reference, artwork version, fabric standard, size tolerance, print placement tolerance, defect definitions, and AQL plan to the purchase order.
- Classify major defects before production: wrong artwork, wrong color, open seams, broken cords, holes, severe stains, mold, strong odor, under-cured print, unusable closure, and incorrect counts.
- Classify minor defects with limits: loose threads, small wrinkles, minor natural cotton flecks, slight stitch unevenness, small print roughness, or acceptable shade variation away from the logo area.
- Measure finished width, finished height, cord tunnel width, cord length, logo size, logo position, and print tilt during sample approval and inspection.
Factory quote questions to send
- What finished width and height are quoted, what is the measurement method, and what tolerance will you guarantee for bulk production?
- What is the fabric composition, weave, finished GSM range, and fabric source, and can you confirm whether GSM is measured before finishing or from ready-to-cut bulk fabric?
- Is the fabric natural, bleached, dyed, washed, or recycled-content cotton, and what proof can you provide for any composition or sustainability claim used in the quote?
- What shade approval process do you use for dyed cotton: lab dip, bulk fabric swatch, or production lot approval, and how long does each step take?
- Which seams are overlocked, lockstitched, double stitched, bartacked, or otherwise reinforced, and what stitch density or workmanship standard do you use?
- What cord material, diameter, color, finished length, knot method, end finish, and replacement policy are included in the unit price?
- Is the decoration screen print, heat transfer, embroidery, woven label, or another method, and is it completed in-house or by a subcontractor?
- For screen print, how many colors are included, are screen charges separate, is PMS matching included, and how do you check cure, opacity, registration, and placement?
- For heat transfer, what transfer type is used, what temperature and pressure controls apply, and how do you test edge adhesion after folding and packing?
- What unit price can you provide at 500, 1,000, 3,000, 5,000, and 10,000 pieces using the exact same fabric, size, cord, print, label, packing, and incoterm?
Quality-control points to confirm
- Measure finished width, finished height, usable opening, cord tunnel width, logo size, logo position, and print tilt against written tolerances, not against a catalog photo.
- Check fabric GSM, composition claim, color, weave, opacity, hand feel, odor, shade variation, slubs, stains, holes, oil marks, dampness, and contamination against the approved sample.
- Inspect side seams, bottom corners, top hems, cord tunnel seams, cord exit points, overlock edges, stitch density, skipped stitches, broken threads, and loose thread trimming.
- Pull both cords to open and close the backpack at least several cycles during inspection, checking smoothness, tunnel strain, knot security, fraying, and cord length consistency.
- Load sample units with the intended event kit or a measured substitute weight, carry by the cords, shake lightly, open and close again, then inspect stress points for failure.
- Check screen print or transfer color, opacity, edge definition, registration, placement, cure, tackiness, ink odor, smudging, cracking, rub resistance, and performance after folding.
- For multi-color logos, inspect registration drift and color-to-color alignment repeatedly across cartons, not only on the first sample shown by the factory.
- Reject units with wrong artwork, wrong bag color, missing print, severe tilt, open seams, broken cords, holes, mold, strong odor, heavy stains, wet cartons, or unusable closure.
- Verify labels, hangtags, inserts, event codes, SKU references, PO numbers, destination labels, carton marks, quantity per carton, carton sequence, and total shipment count.
- Inspect fold method, bundle count, inner protection, carton strength, carton tape, carton weight, humidity risk, pallet condition, and whether fold lines damage the logo.