Begin with the actual use, not the phrase “canvas zipper portfolio”
A custom canvas zipper portfolio for craft fairs can be many products under one name: a flat document sleeve, a branded stationery organizer, an art print carrier, a workshop kit pouch, a sales sample holder, a menu folder, or a retail-ready craft set. They may look similar in a supplier photo, but the material choices are not the same. A simple paper portfolio can stay slim, unlined, and economical. A kit holding tools, thread cards, swatches, stickers, clips, or product samples needs more thought around zipper strength, gusset depth, pocket layout, corner stress, and packing protection.
For procurement teams, the first mistake is sending an RFQ that says only “custom canvas zipper portfolio.” That leaves too much room for interpretation. One factory may quote 10 oz canvas with a basic #3 zipper and raw interior seams. Another may quote 14 oz canvas with a #5 nylon coil zipper, bound seams, printed logo, and individual barcode packing. Both quotes may sound like the same product, yet the cost, durability, and retail impression are completely different.
Define the contents before defining the bag. Measure the largest insert, expected stack thickness, and loaded weight. If the portfolio is for paper, confirm whether it must fit US letter, A4, A5, square art prints, pattern sheets, catalogs, menus, or custom inserts. If it is for a craft kit, include the thickest component and any point loads caused by small tools or hardware. Those details drive the fabric, zipper, lining, reinforcement, and carton method.
- State the use case in the RFQ: giveaway folder, retail organizer, sales sample case, craft kit, art print sleeve, or document portfolio.
- Send real content dimensions and loaded weight, not only the preferred outside size.
- Separate non-negotiable performance requirements from visual preferences.
- Ask every supplier to quote the same construction so price comparisons are fair.
- Use a sealed physical sample as the commercial standard for bulk production.
Choose canvas by weight, weave, finish, and repeatability
For most custom canvas zipper portfolios used at craft fairs, 12 oz to 14 oz cotton canvas is the practical body-fabric range. In metric terms, that is commonly about 407 to 475 GSM. Twelve-ounce canvas works well for light document sleeves, order-form holders, art print folders, and flexible promotional portfolios. Fourteen-ounce canvas feels firmer in the hand, presents better on a market table, and resists scuffing more confidently when units are opened, stacked, and moved around all day.
Do not buy by weight alone. A tightly woven 12 oz canvas may feel more stable than a loosely woven heavier fabric. Loose weave can distort during sewing, absorb ink unevenly, and make printed logo edges look less clean. Ask for both oz and GSM, then approve a swatch before the sample is made. If the supplier uses a local fabric description, request the GSM equivalent and confirm whether the stated weight is before or after finishing.
Finish has a direct effect on size, color, and decoration. Raw natural canvas gives a handmade look, but it can shrink, crease, and vary by cotton lot. Pre-shrunk or sanforized canvas improves dimensional stability, which matters when the portfolio must fit exact inserts or keep logo placement consistent. Washed canvas feels softer and more relaxed, though it may look less crisp. Dyed canvas supports brand colors and retail assortments, but it adds lab dips, shade approval, dye-lot MOQ, and possible colorfastness checks. If a water-repellent finish is requested, test the logo method carefully because coatings can weaken ink or transfer adhesion.
- Use 12 oz canvas for light flat portfolios, flexible handouts, and paper-based programs.
- Use 14 oz canvas for stronger handfeel, retail presentation, and repeated market handling.
- Avoid vague terms such as “heavy canvas” unless a swatch and GSM are approved.
- For exact-fit inserts, ask for shrinkage expectations and finished-size tolerance.
- Confirm whether natural canvas shade variation is acceptable for your brand.
Specify outside size, usable size, opening length, and gusset depth
Sewn canvas goods need two size conversations: what the portfolio measures from the outside, and what the user can actually fit inside. A portfolio can pass an exterior measurement check and still fail in use if the seam allowance, zipper tape, lining, binding, or gusset reduces the usable opening. For A4 or letter paper, do not approve an A4 or letter outside size. The portfolio needs clearance so users can insert and remove contents quickly without bending corners.
As a starting point, many flat canvas zipper portfolios can be controlled around ±5 mm on finished length and width. Logo placement is often held around ±3 mm to ±5 mm from fixed seam references, depending on size and decoration method. Tighter tolerances are possible only if the factory confirms them during sampling and the design supports them. Thick canvas, wraparound zippers, lining, and gussets all make tight dimensional control harder.
Gusset depth should be matched to real contents, not guessed from a product photo. A shallow gusset is fine for paper stacks, catalogs, thin craft patterns, or stationery inserts. A deeper gusset may be needed for tools, thread cards, sample tiles, or retail kits, but it makes the portfolio bulkier and less carton-efficient. Too little gusset depth strains the zipper and corners. Too much can make the item look boxy and take up unnecessary shipping volume.
- Put both outside size and usable internal size in the RFQ and purchase order.
- Measure zipper opening length, not only panel width.
- Allow extra clearance for fast insertion and removal of paper or art prints.
- Set tolerances before sampling so the factory knows the inspection standard.
- Test the sample with real contents and the expected loaded thickness.
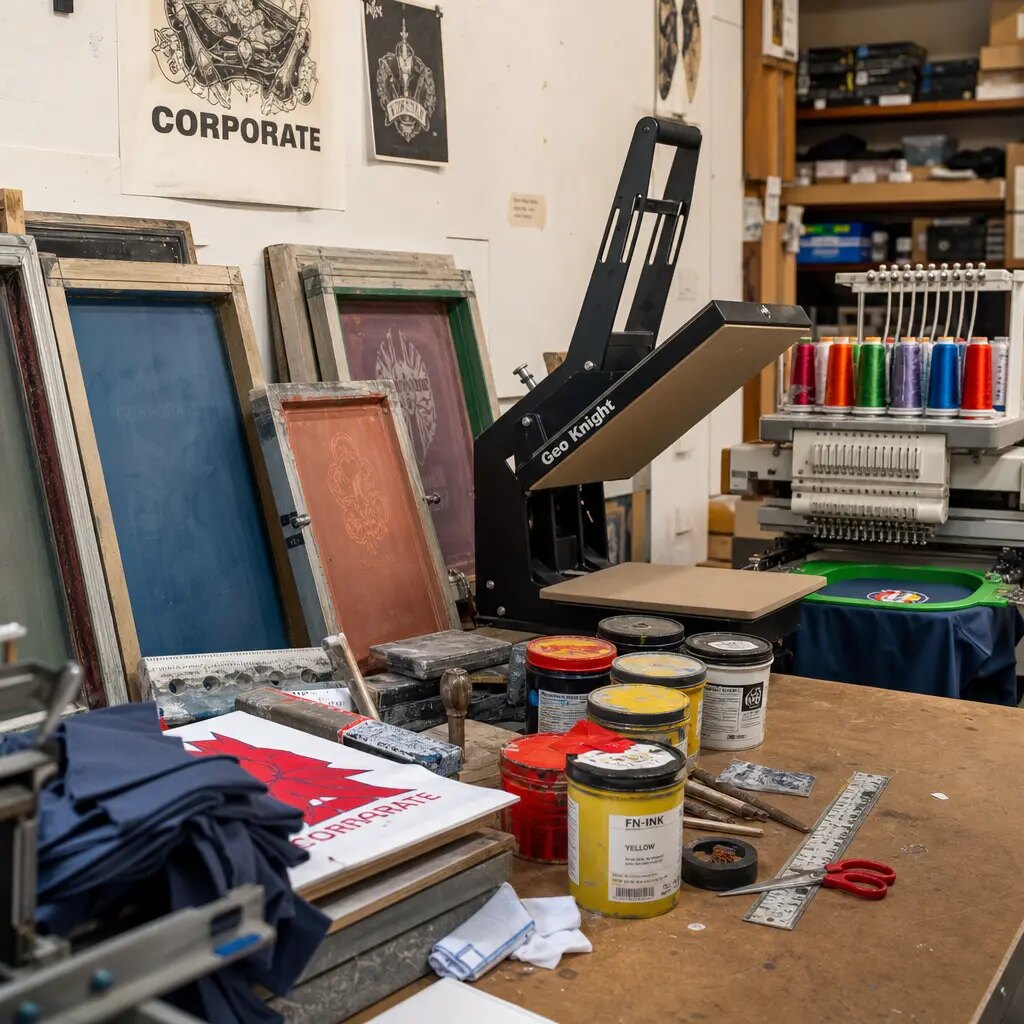
Treat the zipper as a performance component, not a trim detail
The zipper is one of the first things a customer notices. If it drags, jams, or feels weak, the entire portfolio feels cheap even when the canvas is good. For most craft fair and business-bag applications, nylon coil zipper is the safest baseline. It is flexible, relatively light, and suitable for straight, L-shaped, and three-side openings. A #5 nylon coil zipper is common for flat portfolios. For deeper gusseted kits or heavier contents, #7 or #8 may be more appropriate. A #3 zipper is usually too light for repeated handling unless the item is very small and clearly promotional.
Opening style changes access, cost, and defect risk. A straight top zipper is economical and works for documents, catalogs, menus, and paper inserts. An L-shaped zipper improves access when users need to view or select contents without removing everything. A three-side zipper opens like a presentation folder and can display organized kits well, but it demands cleaner patterning, more careful corner sewing, and reliable top and bottom stops.
Specify the complete zipper, not just “nylon zipper.” Include zipper size, coil or teeth material, tape color, slider color, puller material, puller length, top-stop construction, bottom-stop construction, and whether one or two sliders are required. For wraparound openings, ask the factory to recommend a corner radius. Tight corners create slider drag, coil distortion, zipper waves, and lining interference. The sample should be opened and closed repeatedly across the full path, especially at corners and seam intersections.
- Use #5 nylon coil as a common baseline for flat canvas portfolios.
- Consider #7 or #8 zipper for deeper gusseted kits or heavier contents.
- Check the zipper at corners, top stops, and seam intersections, not only on straight sections.
- Avoid rough puller edges that may scratch printed panels during packing.
- Ask whether the zipper supplier and zipper color can be repeated in replenishment orders.
Decide how finished the inside really needs to be
Interior construction should match the sales channel and the contents. An unlined canvas portfolio can be durable, simple, and cost-efficient for paper storage, but raw seams need control or they will look unfinished and may fray. Bound interior seams are often a strong middle option. They keep the inside neat without the added material, sewing time, and bulk of full lining.
Fully lined construction gives a more premium impression and can protect inserts from raw seams, but it introduces new risks. Lining can sag into the zipper path, pucker near pockets, or reduce usable space. Common lining options include 210D and 300D polyester for light-to-medium portfolios. Avoid unspecified “thin lining,” especially around zipper openings, pocket mouths, and divider panels. If the item includes card slots, elastic loops, pen sleeves, or inner pockets, the lining must be strong enough for repeated use.
Reinforcement becomes important once the portfolio carries more than paper. Handles, tool pockets, zipper terminals, and corner stress points need extra stitching or patches. If a webbing handle is required, define the width, handle drop, attachment method, reinforcement patch size, and expected loaded use. A decorative grab handle should not be treated as a load-bearing handle for a sample kit.
- Choose unlined construction for simple, low-bulk document portfolios.
- Choose bound seams when interior appearance matters but full lining is not necessary.
- Choose 210D or 300D lining for premium kits, protected inserts, or organized interiors.
- Use bartacks or reinforced stitching at pocket openings, zipper ends, and handle anchors.
- Confirm that lining cannot catch in the zipper during repeated opening and closing.
Match the logo method to textured canvas and order quantity
Canvas is not a flat plastic panel. Its texture, weave, color, and finish all affect branding. Screen printing is usually a good choice for bold one-color or two-color artwork, especially when the order quantity makes screen setup worthwhile. It can be durable and clean, but fine type, gradients, small registration details, and very thin lines may not reproduce sharply on rough cotton canvas. When brand color and edge definition matter, request a print strike-off or printed panel sample.
Heat transfer can be useful for short runs, seasonal artwork, and multi-color designs. It is not automatically better or worse than screen print; the right choice depends on the artwork, fabric finish, color, and handling expectations. Transfers should be checked for edge lift, opacity on darker canvas, handfeel, and abrasion caused by stacking or carton movement. Washed, coated, or water-repellent canvas needs extra adhesion checks before bulk approval.
Woven labels, cotton labels, leather-look patches, and rubber patches create a retail finish while reducing ink-related problems. They also add sewing and placement risk. A stiff patch can pucker a soft panel. A label too close to a zipper can tilt during sewing. For clean B2B quote comparison, separate the base portfolio cost from decoration cost, setup fees, label cost, patch cost, and artwork cleanup fees.
- Use screen print for simple bold logos and larger repeat programs.
- Use heat transfer for short-run multi-color artwork, but test edge durability.
- Use woven or sewn labels for subtle premium branding and lower print-cracking risk.
- Measure logo placement from fixed seams or zipper edges, not only from a digital mockup.
- Approve a physical decorated sample before bulk production.
Normalize quotes so the low price is not hiding a weaker build
MOQ is usually driven by materials, decoration setup, color management, and production efficiency. A low MOQ is easier when the buyer chooses stock natural canvas, stock zipper tape, simple construction, and a standard print method. MOQ rises when the order requires custom-dyed canvas, special zipper colors, custom pullers, multiple artwork versions, woven labels, lining colors, several sizes, or complex pocket layouts.
Ask for MOQ by component, not only by finished product. A supplier may accept 300 pieces total but require 300 pieces per canvas color. Another may allow mixed artwork only if the same screen setup is used. A custom dye lot can exceed the finished-goods quantity. A custom puller may require tooling and a separate component MOQ. Without this detail, an attractive first quote may change after artwork and color decisions are finalized.
Compare quotes line by line. The same finished size, canvas oz/GSM, fabric finish, zipper size, lining, pocket layout, handle construction, print method, packing, inspection level, and trade term should be included. A lower EXW unit price may not beat a higher FOB price after inland charges, carton volume, packing, and setup fees are counted. Also ask whether the exact materials can be repeated in the next order. A first run made from leftover stock fabric may not support replenishment consistency.
- Request MOQ by fabric color, zipper color, lining color, artwork version, label style, and size.
- Separate unit price, setup cost, sample cost, packing cost, and tooling cost.
- Compare EXW, FOB, CIF, or DDP quotes using landed-cost logic, not only factory unit price.
- Ask whether stock shades and zipper tapes are continuous or lot-dependent.
- Confirm any approved substitutions in writing before production.
Use sampling to catch real-world failures before mass cutting
A sample should be treated as a production proof, not a photo prop. Fill it with the real contents, close the zipper, stack it, open it repeatedly, and check whether it still lies flat. Many issues appear only during use: zipper drag at corners, lining caught in the slider, pockets too tight for inserts, gusset too shallow, crooked labels, or a logo that looks off-center once the portfolio is filled.
A staged approval process reduces surprises. First approve material swatches for canvas, zipper tape, lining, label, and print color. Then review a prototype for structure, dimensions, and capacity. If changes are needed, request a revised sample instead of approving by email alone. Before mass cutting, approve a pre-production or sealed sample that represents the final materials, dimensions, stitch density, zipper, decoration, and packing.
Record sample approval with measurements and photos. Include outside size, usable internal size, zipper opening, gusset depth, pocket dimensions, handle drop, logo location, label placement, canvas swatch reference, zipper spec, lining spec, and packing method. Be specific about conditional approvals. If the sample has zipper ripple, crooked topstitching, or print bleed and you do not reject it, the factory may treat that condition as acceptable in bulk.
- Test samples with real contents and expected loaded thickness.
- Open and close the zipper repeatedly across the full path.
- Measure usable internal size, not only exterior panel size.
- Record accepted tolerances and conditional comments in writing.
- Do not allow bulk cutting until final material, artwork, and packing approvals are complete.
Build packing around craft fair readiness and receiving accuracy
Packing is not just a shipping detail. It protects canvas texture, printed decoration, zipper pullers, labels, and the retail impression. A plain flat portfolio may only need an individual polybag or paper sleeve, depending on buyer policy. A printed portfolio may need tissue or interleaving so zipper pullers, patches, and carton pressure do not mark the printed face. Natural cotton canvas can absorb moisture and odor, so export cartons should be kept dry and away from warehouse contamination.
Craft fair, retail, and maker-market programs often need SKU-level accuracy. Define barcode label location, hang tag, color label, insert card, inner pack quantity, carton pack count, and whether colors or artwork versions may be mixed in one carton. If mixed SKUs are bulk packed without clear carton marks, the receiving team may need to open and sort cartons manually. That adds labor and increases the chance of creasing or soiling finished goods.
Carton efficiency affects landed cost, especially for gusseted portfolios. Ask for carton dimensions, units per carton, gross weight, net weight, and estimated volumetric weight during the quote stage. If the order is air shipped to meet a market deadline, dimensional weight can matter more than actual weight. If it ships by sea, carton strength, moisture control, and stacking compression are more important. For first orders, request photos of the first packed carton before shipment.
- Define individual packing, inner pack, carton pack, SKU mix, barcode location, and carton marks.
- Protect printed faces from zipper pullers, patches, labels, and carton abrasion.
- Confirm carton dimensions and gross weight before final landed-cost comparison.
- Ask for first-carton packing photos for first orders or retail-ready programs.
- Avoid over-compression that creates permanent creases or zipper marks.
Control lead time with approval gates, not wishful dates
Lead time for custom canvas zipper portfolios includes more than sewing. The schedule may include swatch sourcing, lab dip approval, prototype sampling, revised sampling, material procurement, cutting, printing or transfer application, sewing, inspection, packing, and shipment. Delays often happen at buyer approval points: logo revisions, color approval, barcode confirmation, lining choice, carton marks, or late changes to pocket layout.
Craft fair deadlines are usually fixed by market dates, holiday retail windows, product launches, or sales events. A quoted bulk lead time is not reliable until the buyer has frozen the canvas, zipper, lining, artwork, pocket layout, labels, packing, and carton marks. If the design changes from unlined to lined after sampling, or from straight zipper to three-side opening, the factory may need to revise the pattern and resample.
Build internal review time into the calendar. Sample production may take only several working days, but express shipping, stakeholder review, and revision requests can consume more time than expected. For first-time suppliers or complex portfolios, ask for inline photos or an inspection when the first production units are assembled. It is much easier to correct zipper waviness, label tilt, pocket sizing, or print placement during production than after final packing.
- Break the schedule into swatch approval, sample approval, material purchase, production, inspection, packing, and shipping.
- Freeze all construction and artwork details before mass cutting.
- Add contingency for lab dips, sample shipping, print strike-offs, and barcode confirmation.
- Use inline checks for first orders, custom-dyed materials, or wraparound zipper designs.
- Do not treat a delivery date as firm while buyer-side approvals remain open.
Specification comparison for buyers
| Spec decision | Recommended option | When it fits | Buyer risk to check |
|---|---|---|---|
| Canvas body weight | 12 oz to 14 oz cotton canvas, commonly about 407 to 475 GSM; confirm with a physical swatch and supplier data sheet | Most craft fair portfolios that need a substantial handfeel, flat table presentation, and reasonable carton efficiency | Below 10 oz can feel promotional and wrinkle easily; above 16 oz may create bulky seams, zipper waves, needle breakage, and higher freight volume |
| Canvas finish | Pre-shrunk, sanforized, or washed canvas; request the stated shrinkage expectation, ideally within about 3% after standard wash or steam exposure if wash stability matters | Programs where size stability, print placement, and repeat orders matter | Raw greige or untreated canvas can shrink, skew, absorb ink unevenly, and vary in shade from lot to lot |
| Canvas color | Stock natural, stock dyed, or custom dyed with lab dip approval under an agreed light source such as D65 daylight | Natural supports handmade positioning; dyed colors support brand collections, retail assortments, and seasonal launches | Natural cotton shade variation is normal; custom dyeing can increase MOQ, lead time, and shade variation risk between lots |
| Finished size tolerance | For most flat portfolios, target ±5 mm on length/width and ±3 mm on logo placement; tighter tolerances require confirmation during sampling | Important for A4, letter, art print, catalog, pattern sheet, or insert-kit programs | Exterior size can pass while usable internal size fails because seam allowance, zipper tape, and lining reduce opening space |
| Lining choice | Unlined with bound seams, or 210D/300D polyester lining for premium kits; avoid very thin lining near zipper paths | Unlined works for document sleeves; bound seams improve interior finish; lining suits retail kits, swatches, tablets, or contents that need protection | Lining adds cost and sewing time; loose lining can catch in the zipper or pucker near pockets |
| Zipper grade | #5 nylon coil zipper for most flat portfolios; #7/#8 nylon coil for deeper gusseted kits; specify tape color, puller type, and stops | Best balance of flexibility, smooth travel, and weight for canvas portfolios | Low-grade zippers can jam, split, wave at corners, or fail at top stops during repeated booth handling |
| Zipper path | Straight top zipper, L-shaped zipper, or three-side zipper with sufficient corner radius on wraparound styles | Straight is economical; L-shaped improves access; three-side opening presents inserts or craft kits clearly | Wraparound designs need better patterning; tight corners, seam bulk, and lining interference are common failure points |
| Logo method | Screen print for simple bold art, heat transfer for short-run multi-color art, woven label or sewn patch for low-ink premium branding | Allows buyers to match artwork complexity, order quantity, and brand positioning | Uncontrolled print may bleed on textured canvas, crack, lift, scorch, or drift off position |
| Handle construction | No handle for document portfolios; 25 mm to 38 mm cotton or polyester webbing handle for mobile kits | No-handle versions pack flatter; handles help sales reps, workshop kits, and maker-market transport | Handles require reinforcement patches, bartacks or box stitching, and pull-strength checks |
Buyer checklist before sampling
- Confirm the finished outside size, usable internal size, zipper opening length, gusset depth, and intended contents: letter, A4, A5, art prints, patterns, catalogs, menus, samples, tools, or custom inserts.
- Specify canvas weight in oz and GSM where possible; state whether the fabric is raw, washed, pre-shrunk, sanforized, dyed, coated, or water-repellent finished.
- Set practical tolerances in the purchase order: for many sewn canvas portfolios, use ±5 mm for finished length/width, ±3 mm to ±5 mm for logo placement, and agreed shade tolerance against a sealed swatch.
- Define zipper specification: nylon coil or other type, zipper size such as #5 or #7, coil color, tape color, slider count, puller material, puller finish, top stop, bottom stop, and open-close test requirement.
- Choose the opening style: straight top, L-shaped, or three-side opening; confirm whether the contents must be visible and removable without fully unloading the portfolio.
- Provide vector logo artwork and define Pantone/brand color target, print method, logo dimensions, print location measured from seams, safe margin from zipper/seam lines, and acceptable placement tolerance.
- Decide before quoting whether the item needs lining, bound seams, inner pockets, divider panels, elastic loops, pen loops, card sleeves, label windows, reinforced base, or foam stiffener.
- If handles are required, specify webbing width, handle drop, reinforcement patch size, stitch pattern, bartacks, and a target static pull test appropriate to the intended loaded weight.
- State packing requirements: individual bag or paper wrap, tissue/interleaf for printed faces, polybag thickness if used, hang tag, barcode label, carton pack count, carton marks, and mixed-SKU rules.
- Ask suppliers to break out sample cost, sample lead time, bulk lead time, screen or transfer setup charges, custom label charges, custom puller tooling, dye-lot MOQ, and packing cost.
Factory quote questions to send
- What exact canvas weight in oz and GSM is included in your quote, and what tolerance do you apply to incoming fabric weight?
- Can you provide a physical swatch and identify the weave, finish, color reference, and whether the fabric is stock, made-to-order, or custom dyed?
- Is the canvas raw, washed, pre-shrunk, sanforized, coated, or water-repellent, and what shrinkage or dimensional-change expectation should we assume?
- Which zipper specification will you use: type, size, coil or teeth material, tape color, slider material, puller design, top stop, bottom stop, and supplier grade?
- For an L-shaped or three-side zipper, what corner radius, seam allowance, and reinforcement method do you recommend to reduce zipper catching and corner stress?
- Is the quoted construction unlined, bound-seam, partially lined, or fully lined, and what is the unit-price change for 210D versus 300D polyester lining?
- What stitch density do you plan for the main seams and zipper tape, and where will you use backtacking, bartacks, or box stitching?
- What finished-size tolerance, usable-internal-size tolerance, and logo-placement tolerance can you hold in bulk production?
- What print method do you recommend for our artwork on this canvas texture, and what screen charge, transfer charge, color limitation, or artwork cleanup fee applies?
- What abrasion, adhesion, or wash/steam exposure checks do you perform on printed or transferred logos before approving bulk production?
Quality-control points to confirm
- Canvas weight should match the approved specification within the supplier’s stated tolerance, and panels should not show obvious weight, texture, or shade mismatch between front, back, gusset, pocket, and handle reinforcement parts.
- Canvas shade must match the approved swatch or sealed sample under the agreed light source; natural canvas may vary, but panel-to-panel mismatch should be controlled.
- Cut panels should be square, directionally consistent, and aligned to the fabric grain so the portfolio lies flat and does not twist diagonally when closed.
- Finished outside dimensions, usable internal dimensions, gusset depth, zipper opening, pocket dimensions, and handle drop should be measured against the approved sample and purchase-order tolerance.
- Zipper must open and close smoothly across the full path without catching at top stops, corners, lining, binding tape, pocket seams, or gusset intersections.
- Zipper tape should be sewn evenly with no exposed raw edge, skipped stitches, broken teeth, coil distortion, sharp puller burrs, loose stops, or slider roughness.
- For wraparound openings, corner sections require targeted inspection because tight radius, seam bulk, and lining interference can cause functional defects.
- Print or transfer decoration should match the approved color and placement, with no ghosting, pinholes, cracking, ink bleed, edge lift, scorch marks, or visible color shift against the canvas tone.
- Woven labels, patches, and side labels should be straight, securely stitched, and positioned within the agreed tolerance without puckering the panel.
- Stitch density should be consistent and appropriate for the canvas weight; backtacking or bartacks should be present at zipper ends, pocket openings, handle anchors, and stress points.