Start With the Warehouse Date, Not the Fair Date
Craft fair deadlines can be misleading. The public opening date is visible, but procurement usually needs the custom canvas zipper portfolios much earlier. Cartons have to be received, counted, checked, allocated, possibly relabeled, and then sent to booth teams, stores, makers, sales reps, or regional warehouses. If the goods arrive three days before the first event, the shipment may look on time in a supplier report, yet the buyer has almost no recovery room.
Work backward from the required warehouse arrival date. Add freight transit, customs or courier clearance, warehouse appointment time, export handover, final inspection, packing, sewing, printing, cutting, material preparation, sample approval, artwork proofing, and purchase order release. The clock does not truly start when a factory says the project is possible. It starts when the factory has the approved specification, artwork, deposit or PO, and permission to buy materials.
For a first custom order, approving the pre-production sample 7-9 weeks before the required warehouse date is a practical planning benchmark. A very simple program may move faster when it uses stock natural canvas, standard zipper colors, one-color screen printing, and basic packing. More complex programs need more margin. Dyed fabric, custom zipper tape, woven labels, printed retail bands, barcode labels, or several internal pockets each add a separate approval or sourcing step.
Split the schedule into buyer-controlled and factory-controlled tasks. Buyers control artwork readiness, Pantone references, barcode data, packing instructions, PO release, deposit timing, freight instructions, and sample feedback speed. Factories control material purchase, cutting, printing, sewing, trimming, pressing, inspection, packing, and export preparation. When those responsibilities are not visible, both sides can lose a week waiting for an answer that nobody formally owns.
- Plan from the required warehouse arrival date, not from the craft fair opening date.
- For unchanged repeat orders, use 35-50 days after sample confirmation as a common production planning range, excluding freight.
- For first custom orders, allow 55-75 days before freight when sampling, component booking, and packing approval are included.
- Add peak-season buffer for factory capacity, zipper color availability, carton supply, inspection scheduling, and freight congestion.
- Request milestone dates for artwork proof, sample dispatch, material arrival, cutting, printing, sewing, inspection, packing, and handover.
- Reserve several working days after arrival for receiving count, random checks, relabeling, repacking, and allocation.
Define the Portfolio Like a Product Spec
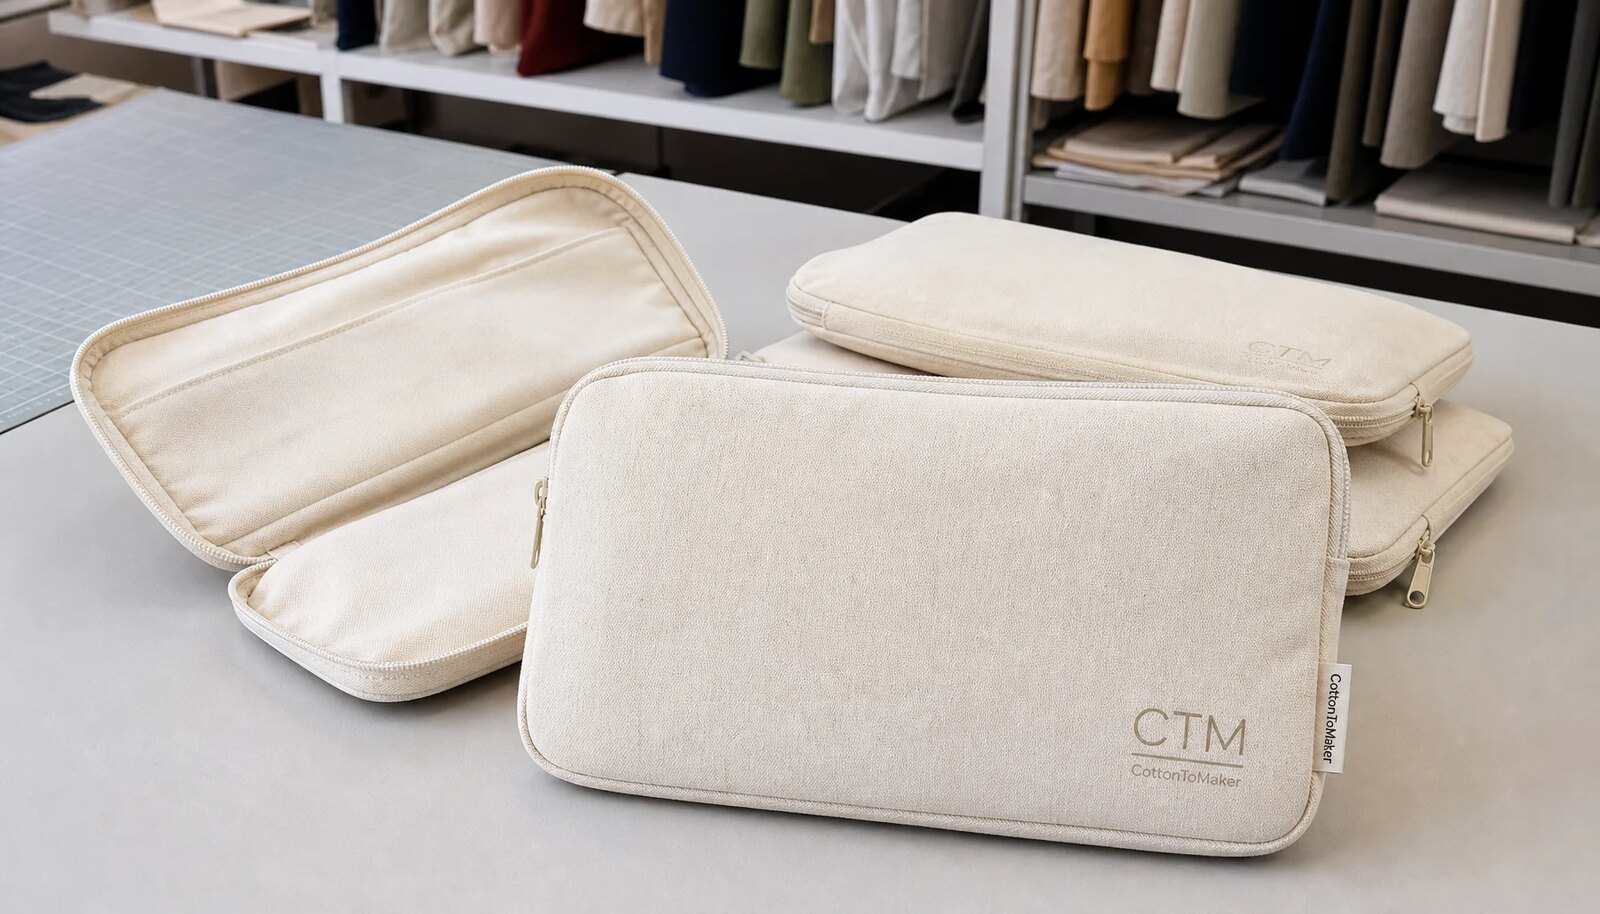
A canvas zipper portfolio is not one universal item. A flat pouch for 8 x 10 inch prints, a document holder for A4 line sheets, a stationery kit bag, and a retail-ready organizer can look similar in photos. In production, they need different dimensions, zipper lengths, seam allowances, pocket layouts, and packing methods. If the RFQ is vague, a supplier may quote the simplest version and add cost once the real details appear.
The most common RFQ gap is outside size only. Usable internal space shrinks after seam allowance, zipper tape, rounded corners, divider stitching, fabric thickness, and turning. A portfolio can measure correctly outside and still fail when A4 sheets scrape the zipper, catalogs bend at the corners, or print sets cannot slide in quickly at a busy booth. Procurement should state finished outside dimensions and minimum usable inside dimensions after sewing.
Decide what job the portfolio must do before pricing it. A protective document pouch prioritizes fit, flatness, and zipper reliability. A branded giveaway needs logo visibility and cost control. A retail-ready craft fair kit may require cleaner stitching, individual packing, hangtags, barcode labels, and carton marks. That role determines whether the best design is a simple flat pouch or a more structured portfolio with divider pocket and premium decoration.
Include the intended contents in the RFQ. If the portfolio must hold 25 postcards, a receipt book, a pen, and sample cards, provide the maximum stack thickness. If it must fit inside a mailer, display bin, welcome kit, or booth tote, provide those internal dimensions too. These small practical notes prevent a polished sample from failing during distribution.
- State the intended contents: A4 sheets, US letter papers, prints, catalogs, receipt books, postcards, stickers, pens, or sample kits.
- Specify finished outside size, minimum usable inside size, zipper opening length, and acceptable dimensional tolerance.
- Identify zipper layout: long-side, short-side, top opening, two-sided opening, or wrap-around opening.
- Clarify corner construction: square, rounded, bound, reinforced, slightly boxed, or flat turned seam.
- List every feature: divider, card pocket, pen loop, hang loop, woven label, patch, handle, retail band, or barcode sticker.
- Confirm whether the portfolio must lie flat, fit a standard mailer, hang on a peg, or stack in a display bin.
Choose Canvas Weight and Finish With Tolerances
Canvas weight changes the feel, the sewing behavior, the print surface, the zipper line, the carton weight, and the landed cost. A 10 oz canvas, roughly 310-340 GSM depending on construction, can work for budget pouches or light event giveaways. It may also wrinkle more and feel less structured. A 12 oz canvas, around 380-410 GSM before washing or finishing, is a strong default for reusable craft fair portfolios because it gives a more substantial hand while still sewing cleanly around a No. 5 zipper.
Heavier is not automatically better. A 14 oz canvas can add structure, but it should be sampled before approval. Thick canvas can create bulky corners, visible needle marks, slower sewing, and zipper waviness. Those problems are easy to miss in a flat mockup and hard to repair once bulk cutting is complete.
Do not rely on ounce weight alone. Two fabrics sold as 12 oz can differ in yarn count, weave tightness, surface texture, finishing, shrinkage, and opacity. Ask for both oz and GSM. Also clarify whether the figure is measured before washing, after washing, after coating, after lamination, or after another finish. For procurement records, attach a swatch, test report if available, or sealed sample reference to the PO.
Finish also affects brand presentation. Natural unbleached canvas has cotton seed flecks and a warmer tone that fits maker, stationery, artisan, and craft fair positioning. Bleached canvas gives a cleaner background for print but shows dirt more easily. Dyed canvas supports brand-color programs, but it brings lab dip approval, shade tolerance, shrinkage questions, and longer material booking. Washed canvas feels softer, yet it can reduce dimensional predictability if shrinkage is not controlled.
- Use 10 oz canvas for lower-cost flat pouches, lightweight mailers, and simple document holders.
- Use 12 oz canvas as the default for reusable craft fair portfolios needing structure and clean sewing.
- Use 14 oz canvas only after testing zipper flatness, corner bulk, needle marks, and carton weight.
- Choose natural canvas for artisan, stationery, eco-positioned, neutral, or maker-market branding.
- Choose dyed canvas only when the calendar allows lab dips, shade approval, and fabric booking time.
- State fabric weight tolerance, shade tolerance, finish, shrinkage expectations, and unacceptable fabric defects in the PO.
Specify Zipper Construction, Not Just Color
The zipper gets handled every time the portfolio is used. It deserves more detail than "black zipper" or "matching zipper." For most 12 oz canvas zipper portfolios, a No. 5 nylon coil zipper is a practical choice. It balances strength, flexibility, availability, and smooth operation. A No. 3 zipper may reduce cost and bulk, but it can feel underbuilt on heavier canvas and may not support the buyer's quality target.
A complete zipper specification includes size, tape color, teeth color, slider finish, puller type, zipper length, end stop method, opening direction, and whether the puller is standard, cotton cord, fabric tab, metal, or branded. One missing detail can change price and timing. A stock black No. 5 zipper may be easy to source. A custom-dyed zipper tape or special slider finish may need a separate minimum and extra days.
Zipper sewing strongly affects the finished appearance. If tape is stretched while sewing, the zipper edge can wave. If the tape is too light for the canvas, puckering appears along the seam. If rounded corners are too tight, the slider may catch near the end stop. For craft fair programs, these are not minor cosmetic issues. The portfolio often lies on a booth table, where warped corners and uneven zipper seams are immediately visible.
Test the zipper after the portfolio is assembled and packed, not just as loose tape. Open and close the sample repeatedly. Check drag at corners, end stop security, slider looseness, puller edges, and thread caught in the teeth. If units are individually packed, inspect whether the slider presses into the printed face or dents the next portfolio in the carton.
- Use No. 5 nylon coil zipper as the default for 12 oz canvas portfolios with repeated booth or retail use.
- Use No. 3 zipper only for lightweight, occasional-use, or cost-sensitive pouches after sample approval.
- Confirm tape color, teeth color, slider finish, puller style, zipper length, end stop method, and opening direction.
- Test zipper operation for at least 10 cycles on samples and random cycles during inspection.
- Reject catching, skipped teeth, wavy tape, loose sliders, broken pullers, sharp puller edges, and trapped threads.
- Control packing direction or interleaving when zipper sliders can press against printed panels.
Match Branding Method to Artwork and Calendar
Screen printing is usually the most efficient decoration method for custom canvas zipper portfolios when artwork uses one to three solid colors. Printing flat panels before sewing improves registration and keeps placement cleaner than printing after assembly. For a usable quote, provide vector artwork, Pantone or target color references, print size, placement from finished edges, minimum line thickness, and whether ink hand-feel is important.
Canvas texture changes artwork. Fine type, hairline strokes, thin outlines, and low-contrast colors can lose sharpness on woven cotton. A logo that looks crisp in a digital mockup may fill in on 12 oz natural canvas or appear uneven over slubs and flecks. Large solid ink areas can feel stiff or show curing problems if the ink deposit is too heavy. Sample approval should include opacity, edge sharpness, registration, curing, rub resistance, and placement near seams.
Alternative branding methods can work well, but they change both cost and schedule. Woven side labels add a premium detail and suit repeat programs, though yarn colors are not exact Pantone matches and label production may have its own MOQ. Cotton patches give a handmade look but add stitching labor and placement variation. Embroidery adds texture, yet high stitch density can distort a flat panel. Heat transfer and digital print can support full-color graphics, but adhesion, cracking, and compatibility with the selected canvas must be tested.
For fixed-date craft fair programs, keep decoration as simple as the brand can accept. One-color screen print on stock natural canvas is lower risk than dyed canvas plus custom zipper plus woven label plus patch plus retail band. If the program repeats, standardize the base portfolio and reuse the same print position, label, carton count, and packing method to reduce future sampling time.
- Use screen print for bold logos, event names, maker marks, sponsor logos, and seasonal fair programs.
- Keep important artwork at least 15-20 mm from zipper seams, side seams, bottom folds, and thick corners unless tested.
- Specify minimum stroke width, print size, Pantone target, placement tolerance, and approved ink opacity.
- Use woven labels for subtle premium branding, but confirm label MOQ, yarn color limits, and label lead time.
- Use embroidery only after testing panel distortion, backing marks, stitch density, and thread tension.
- Use heat transfer or digital print for full-color graphics only after adhesion, flex, and rub checks on the selected canvas.
Separate MOQ by Component and Cost Driver
MOQ is not only a sewing-line question. It is shaped by fabric roll usage, zipper tape color, slider stock, print setup, label production, packing material, cutting efficiency, and the factory's scheduling threshold. A supplier may accept a 300-piece trial when the buyer uses stock natural canvas, standard zipper tape, one-color screen print, and simple packing. The same design can move toward 1,000 pieces or more when it includes custom dyed fabric, custom zipper tape, woven labels, barcode packing, and printed retail bands.
Ask for MOQ by component. The bag body may have one minimum. The woven label, custom zipper tape, patch, hangtag, printed band, and carton marks may each have another. If these are bundled into one vague figure, a low unit price can hide leftover-material charges, under-minimum surcharges, or pressure to substitute materials later. Clear line items make it easier to simplify the spec without losing the purpose of the product.
One useful strategy is to standardize the base portfolio and customize only the decoration. Keep the same 12 oz natural canvas body, No. 5 zipper, divider pocket, thread color, and carton layout across multiple craft fair programs. Then change the screen print, hangtag, or side label. This reduces sample variables, improves material planning, and makes repeat orders more predictable.
Cost comparison should include schedule risk. A better zipper, individual packing, or more controlled carton layout may add cost, but it can reduce complaints, relabeling, repacking, and emergency freight. The lowest FOB unit price is not always the lowest landed risk when the delivery window is fixed and the craft fair selling period is short.
- Use stock natural canvas and standard zipper colors for small trials or urgent programs.
- Expect custom dyed canvas to require lab dips, shade approval, fabric MOQ, or under-minimum surcharges.
- Ask if custom zipper tape color, special slider finish, or branded puller has a separate minimum.
- Separate screen setup, unit print cost, woven label cost, patch cost, hangtag cost, and repeat-order charges.
- Confirm whether individual packing, barcode labeling, carton marks, moisture protection, and export documents are included.
- Record quote validity, payment terms, sample charge, revised sample cost, rush cost, and split-shipment options.
Use a Physical Sample Approval Gate
A photo sample is not enough for a canvas zipper portfolio. Many of the real risks are tactile, mechanical, or dimensional: canvas stiffness, zipper smoothness, print opacity, usable inside size, pocket placement, corner thickness, odor, and packed shape. A physical pre-production sample lets buyers load the intended contents, open and close the zipper, judge hand-feel, and see whether the portfolio lies flat on a table.
For first orders, the pre-production sample should use bulk-equivalent canvas, zipper, thread, print method, label, pocket construction, packing material, and carton arrangement whenever possible. If any substitute material is used, the supplier should identify it in writing. Otherwise, the buyer may approve a sample with a smoother zipper, softer canvas, or different print behavior than the actual bulk order.
Review the sample against the RFQ line by line. Measure outside size, usable inside size, zipper opening, pocket depth, and divider placement. Load the actual documents, print sets, catalogs, receipt books, pens, or kit items. Open and close the zipper at least 10 times. Check whether the portfolio lies flat after packing. Look at print opacity in daylight, rub the print lightly with a clean white cloth, and check for transfer after curing.
Do not release bulk cutting until sample approval is documented. For high-visibility retail, distributor, or event programs, keep a sealed sample with both buyer and factory. If changes are small, marked-photo approval may be acceptable. If the change affects construction, zipper layout, fabric, print scale, or fit, request a revised physical sample before production starts.
- Measure finished outside size, usable inside size, zipper opening length, pocket depth, and divider placement.
- Test the sample with the actual papers, prints, catalogs, receipt books, pens, or kit items.
- Cycle the zipper at least 10 times and check drag, corner catching, slider looseness, and tape waviness.
- Review print coverage, edge sharpness, color, curing, ink hand-feel, and rub resistance on actual canvas.
- Confirm thread color, stitch density, label placement, puller style, pocket construction, and packing method.
- Approve a sealed sample, signed sample report, or marked final sample photos before bulk cutting begins.
Convert Lead Time Into Milestones
A single promised ship date gives weak schedule control. Buyers need milestone dates so problems show up early, not in the final week. Useful checkpoints include artwork proof approval, first sample dispatch, sample approval, material arrival, cutting start, printing completion, sewing completion, inline inspection, final inspection, packing completion, export document preparation, and cargo handover.
Lead time depends on complexity. A stock natural canvas portfolio with a standard No. 5 zipper and one-color print may move quickly after approval. A custom dyed canvas body with custom zipper tape, woven labels, divider pockets, hangtags, barcode labels, and retailer carton marks needs more coordination. An aggressive schedule is only credible if it explains how each component will be sourced and when each approval is due.
Milestones also help procurement decide what to simplify. If fabric dyeing threatens the required date, use natural stock canvas. If woven labels are late, consider a printed hangtag or standard side label if brand rules allow. If retail packing is the bottleneck, ship bulk-packed goods to a local kitting center only when the warehouse has time and labor. If freight becomes the main risk, split the shipment so urgent cartons move by air or express and the balance follows the planned route.
Buyer deadlines belong in the timeline too. A factory cannot protect a schedule if barcode files arrive after packing starts or sample comments take a week. Assign internal owners for artwork, compliance labeling, packaging files, purchase order release, sample approval, payment, and freight instruction. Every late approval should be treated as a lead time change, not a harmless delay.
- Artwork proof commonly needs 1-3 working days after complete vector files, colors, size, and placement are received.
- Standard sample making often needs 5-10 working days; custom dyed fabric, labels, or zipper colors can extend this.
- Sample correction can add 3-7 working days when construction, pocket sizing, print scale, or zipper layout changes.
- Bulk material booking often needs 7-20 working days depending on fabric, zipper, label, carton, and packing availability.
- Bulk production should include cutting, panel printing, sewing, trimming, pressing, inline checks, final inspection, and carton sealing.
- Freight handover requires booking, export documents, pickup, customs process, and any warehouse appointment requirements.
Control Packing Before Production Starts
Packing affects appearance, cost, carton count, freight cost, and receiving efficiency. If printed panels are stacked face-to-face without protection, ink rub or zipper slider marks can appear during transit. If cartons are overfilled, corners can crush and portfolios may arrive warped. If each unit needs a barcode, suffocation warning, country-of-origin label, hangtag, or paper band, the factory needs files and placement instructions before packing begins.
Choose packing based on distribution. Bulk packing can work when a distributor will repack locally or when portfolios are used internally by event teams. Individual polybags protect canvas, keep units clean, and simplify counting. Paper bands or glassine-style sleeves may support plastic-reduction goals, but they still need to protect against abrasion, dirt, and moisture. For printed panels, stacking direction and interleaving can matter as much as the outer bag.
Carton planning belongs in the RFQ, not after production. Ask for units per carton, carton dimensions, gross weight, net weight, and estimated CBM. A carton that is efficient for the factory may be too heavy for craft fair organizers, store teams, or courier networks. Many buyers prefer cartons below 15-18 kg gross weight for manual handling, but the correct limit should follow the buyer's routing guide or warehouse rule.
Cotton canvas is sensitive to moisture and odor. Ocean freight, humid routes, rainy-season loading, and long storage can expose cartons to damp conditions. Depending on the route, buyers may request inner poly liners, desiccants, stronger export cartons, or a moisture-control plan. Printed goods should be fully cured and dry before sealing, because trapped moisture or solvent odor can create receiving problems.
- Use tissue, interleaving, or controlled stacking direction when printed faces may touch zipper sliders.
- Keep carton gross weight within buyer warehouse, courier, or retailer routing limits.
- Use inner moisture protection for ocean freight, humid routes, long storage, or rainy-season shipment.
- Provide barcode files, carton mark format, item number, color code, PO number, and country-of-origin label instructions early.
- Request packed-sample photos showing unit packing, carton arrangement, carton marks, and compression level.
- Confirm carton dimensions, units per carton, gross weight, net weight, estimated CBM, and pallet needs before production packing.
Compare Quotes by Landed Risk and QC Standard
The lowest unit price can be the wrong choice if it depends on lighter canvas, a smaller zipper, weak packing, vague tolerances, or an unrealistic lead time. A quote for 10 oz canvas with a No. 3 zipper is not equivalent to 12 oz canvas with a No. 5 zipper, divider pocket, individual packing, and defined inspection criteria. Procurement should compare the exact specification, not the product name.
Build a quote comparison sheet with line items for fabric weight and finish, zipper specification, construction, decoration method, print colors, label type, packing, carton data, sample cost, setup charge, inland freight, export handling, and lead time assumptions. Ask whether each material is in stock or must be ordered. This turns a basic price table into a useful landed-risk comparison.
Inspection standards should be agreed before production. Define finished size tolerance, print placement tolerance, pocket placement tolerance, zipper defect standard, stain limits, odor limits, acceptable canvas character, carton count requirements, and AQL or sampling plan if used. Broken zippers, wrong materials, wrong artwork, severe stains, missing labels, and short shipment are serious issues in most bag programs, but buyer and supplier should align on defect severity in writing.
Substitution rules matter. Suppliers should not change fabric weight, zipper size, slider finish, label material, packing method, or print process without written approval. If alternatives may be needed to protect the craft fair deadline, list pre-approved options in advance, such as stock natural canvas instead of dyed canvas or a paper band instead of a printed retail sleeve. Controlled alternatives are far safer than last-minute improvisation.
- Compare canvas oz, GSM, finish, color, stock status, and fabric tolerance before comparing price.
- Check whether zipper size, tape color, slider finish, puller, end stop, and opening length are identical across quotes.
- Separate sample charge, screen charge, decoration cost, label cost, packing cost, carton cost, and export handling.
- Include individual packing, barcode labeling, carton marking, moisture protection, and carton strength in the quoted scope.
- Ask for carton quantity, carton dimensions, gross weight, net weight, estimated CBM, and loading assumptions.
- Record QC tolerances, AQL or sampling plan, defect classifications, substitution rules, quote validity, and lead time assumptions.
Specification comparison for buyers
| Spec decision | Procurement recommendation | Typical tolerance or planning figure | Buyer risk to check |
|---|---|---|---|
| Canvas body fabric | 12 oz natural cotton canvas, about 380-410 GSM before washing or finishing, is a strong default for reusable craft fair portfolios. | Fabric weight tolerance is often discussed at +/-5%; approve shade against a sealed swatch or signed sample. | Too-light canvas can collapse and wrinkle. Too-heavy canvas can create bulky corners, zipper waviness, needle breakage, and higher freight weight. |
| Finished size basis | Quote both finished outside size and minimum usable inside size after sewing. | Finished dimension tolerance is often around +/-5 mm for flat portfolios; usable opening should be checked with the actual document, print set, or kit. | If buyers provide only outside dimensions, suppliers may quote a smaller pattern that looks acceptable on paper but fails in use. |
| Portfolio structure | Use a flat zipper portfolio with one divider pocket, optional card pocket, and no extra panels unless they support the program. | Each added pocket adds cutting, placement, and sewing checks; pocket placement tolerance should be stated at about +/-5-8 mm. | Overbuilt interiors slow production and raise defect risk at pocket mouths, thick corners, zipper seams, and turning points. |
| Zipper specification | Specify a No. 5 nylon coil zipper with approved tape color, teeth color, slider finish, puller, zipper length, and end stop method. | Samples should open and close smoothly for at least 10 cycles; final QC should include random zipper cycling. | A No. 3 zipper can feel under-specified on 12 oz canvas. Cheap tape may pucker, wave, or catch after sewing. |
| Print method | Use 1-3 color screen printing on flat panels before sewing for most bold logos and event graphics. | Keep key artwork at least 15-20 mm from zipper seams, side seams, folds, and thick areas unless the sample proves the placement works. | Fine strokes can fill on textured canvas. Large ink areas may feel stiff, crack, or transfer if curing is weak. |
| Logo alternative | Consider a woven side label, cotton patch, printed hangtag, or retail paper band when the main print should stay simple. | Custom labels and patches may need 7-15 working days and may carry a separate MOQ. | Label or patch lead time can exceed bag sewing time. Yarn label colors are less exact than Pantone ink matches. |
| MOQ logic | Use stock canvas and standard zipper colors for trials; reserve dyed canvas and custom components for larger programs. | Small runs may be possible around 300 pieces when materials are stock and decoration is simple; custom programs often make more sense at 500-1,000+ pieces. | Custom dyed canvas, zipper tape, woven labels, patches, retail bands, and printed packaging can each create separate minimums. |
| Packing method | Confirm individual polybag, glassine-style sleeve, paper band, bulk packing, export carton, and inner moisture protection before production. | Carton gross weight is often kept below 15-18 kg for easier manual handling unless the buyer approves a different limit. | Over-tight cartons can cause slider dents, print offset, crushed corners, moisture marks, and warped portfolios. |
| Lead time buffer | For first custom orders, approve the pre-production sample 7-9 weeks before the required warehouse arrival date. | Repeat orders with unchanged specs may run 35-50 days after approval; first orders commonly need 55-75 days before freight. | Counting only sewing days misses artwork proofing, sampling, material booking, inspection, export handover, customs or courier clearance, and receiving checks. |
Buyer checklist before sampling
- Define the contents first: A4 sheets, US letter documents, 8 x 10 inch prints, postcards, receipt books, stickers, stationery kits, catalogs, sample cards, or maker onboarding materials.
- State finished outside size and minimum usable inside size after sewing; include a size tolerance such as +/-5 mm unless the program needs tighter control.
- Specify canvas in oz and approximate GSM, and state whether the weight is before washing, after washing, coated, laminated, dyed, bleached, natural, or unwashed.
- Confirm zipper size, tape color, teeth color, slider finish, puller type, end stop treatment, zipper length, and whether the opening is long-side, short-side, top, two-sided, or wrap-around.
- Place artwork with exact distance from finished edges; provide vector files, Pantone or target color references, print dimensions, minimum stroke width, and approval standard for opacity.
- List all sewn and attached details: divider pocket, card pocket, pen loop, bound edges, woven side label, patch, hang loop, handle, interior label, barcode sticker, hangtag, and retail band.
- Build the calendar from artwork approval, deposit or purchase order release, sample approval, bulk material booking, cutting, printing, sewing, inspection, packing, freight handover, and warehouse receiving.
- Require a pre-production sample made with bulk-equivalent canvas, zipper, thread, label, print method, packing material, and carton layout before authorizing mass production.
- Confirm packing method, units per carton, carton dimensions, gross weight, net weight, carton marks, moisture protection, pallet needs, and retailer or courier limits.
- Add zipper operation, print rub resistance, seam strength, size tolerance, pocket placement, flatness, odor, stain control, carton count, and packed appearance to the inspection checklist.
Factory quote questions to send
- What exact canvas weight in oz and GSM is included in the quoted price, and is the weight measured before washing, after washing, or after finishing?
- Is the quoted fabric stock natural canvas, bleached canvas, custom dyed fabric, washed canvas, coated canvas, or made-to-order fabric, and what is the fabric MOQ?
- What shrinkage range, shade tolerance, weaving flaw standard, and fabric inspection method will be used before cutting?
- Is the zipper No. 3, No. 5, or another size, and what tape color, teeth color, slider finish, puller, end stop, and zipper length are included?
- Are zipper colors and sliders in stock, or do custom colors require separate minimums, added cost, or extra lead time?
- Is the decoration price based on screen printing, heat transfer, digital print, embroidery, woven label, cotton patch, printed hangtag, or another method?
- How many print colors are included, and what are the screen setup charges, repeat-order charges, color matching charges, revised artwork charges, or proof charges?
- What is the MOQ for the bag body, custom fabric color, zipper tape, woven label, printed patch, hangtag, barcode label, individual packing, and export carton?
- How many working days are needed for artwork proof, first sample, revised sample, material booking, cutting, printing, sewing, inline inspection, final inspection, packing, and export handover?
- Will the pre-production sample use the same canvas, zipper, thread, label, ink, pocket construction, packing material, and carton arrangement as the bulk order?
Quality-control points to confirm
- Canvas GSM, weave density, color tone, fabric hand-feel, fleck level, and finish match the approved swatch or sealed sample within the agreed tolerance.
- Finished outside size, minimum usable inside size, zipper opening length, pocket depth, and divider placement remain within approved tolerance after sewing and pressing.
- Zipper opens and closes smoothly across the full length without catching, skipped teeth, slider damage, loose end stops, wavy tape, sharp puller edges, or thread caught in the teeth.
- Print position, color, opacity, curing, registration, edge sharpness, and hand-feel match the signed sample and do not transfer during light dry rub checks.
- Seams are straight, stitch density is consistent, corners are clean, backstitching is secure, seam allowance is stable, and no raw edge is exposed inside the portfolio.
- Internal divider pockets, card pockets, pen loops, labels, hangtags, barcode stickers, country-of-origin labels, and retail bands match the approved placement and packing list.
- Canvas panels are free from unacceptable stains, oil marks, heavy weaving flaws, severe creases, loose threads, mixed shade outside range, dampness, and strong odor.
- Individual packing prevents print-to-print contact, zipper slider dents, abrasion, barcode loss, moisture damage, crushed corners, and deformation during carton compression.
- Carton marks, quantity per carton, item number, color code, purchase order number, gross weight, net weight, and carton dimensions match the shipping documents.
- Final inspection includes random zipper cycling, measurement checks, print rub checks, seam review, carton count verification, packed appearance review, and carton drop or compression checks when required.