Start with the buying job, not the item name
A custom canvas zipper portfolio sounds straightforward until three suppliers quote three different products under the same name. One may price a soft document pouch with a basic zipper. Another may include heavier canvas, reinforced corners, a smoother slider, a sewn label, and individual packing. A third may assume a stock blank with decoration only. On paper, the unit prices look comparable. In production, they are not buying the same thing.
For eco apparel brands, the portfolio usually supports a commercial moment: wholesale appointments, seasonal line reviews, retailer onboarding, showroom documentation, employee kits, or press materials. It may sit beside fabric swatches and finished garments, so the hand-feel and construction matter. A zipper that catches, a print that rubs, or a label sewn visibly off position can make an otherwise thoughtful buyer kit feel unmanaged.
The useful starting point is a required-versus-optional spec. Required performance might include finished size, fit for a specific catalog or line sheet, reliable #5 zipper, approved natural canvas shade, one document sleeve, and one branding method. Optional finish might include heavier canvas, lining, contrast binding, a second print color, patch branding, paper bands, or retail-style labeling.
This keeps the bulk pricing plan honest. Instead of asking factories to hit a target number and leaving them to remove value quietly, procurement can see what each design choice adds or saves. The best version is not always the heaviest or most decorated. It is the version that fits the use, budget, freight plan, and brand standard without leaving key decisions open to interpretation.
- Define the business use first: wholesale kit, sales folder, internal pack, event giveaway, or retail-adjacent accessory.
- Lock the minimum acceptable build before asking for discount tiers.
- Price upgrades and deductions separately so cost drivers stay visible.
- Compare suppliers only after material, zipper, branding, packing, MOQ, and incoterm assumptions match.
- Treat unusually low quotes as incomplete until every component detail is confirmed in writing.
Write an RFQ that limits substitution
A strong RFQ does more than repeat the search phrase custom canvas zipper portfolios bulk pricing plan for eco apparel brands. It tells the supplier what to price, what to hold, and what cannot change without written approval. Start with finished dimensions, not pattern dimensions. Include width, height, gusset if any, zipper opening, pocket depth, and the exact insert size the portfolio must carry.
Fit deserves its own line. If the portfolio must hold A4 sheets, US letter line sheets, lookbooks, fabric swatch cards, a tablet sleeve, or a mixed buyer kit, provide the actual measurements and required clearance. Outside dimensions alone can mislead. Seam allowance, lining, divider panels, and zipper construction can reduce usable space.
Specify canvas in both ounces and gsm. Those numbers are often used loosely, and they may refer to nominal mill weight, unfinished greige fabric, or finished fabric after dyeing, washing, brushing, shrinking, or coating. Ask for actual finished gsm from production fabric. A clear RFQ might say: natural cotton canvas, target 12 oz, finished gsm to be confirmed, physical shade swatch required before PP sample approval.
Zipper language should be just as clear. A #5 nylon coil zipper is a practical baseline for many flat canvas portfolios, but the quote should still define tape color, slider finish, puller style, zipper length, end stop, and whether the zipper is exposed, bound, or hidden. If the portfolio has rounded corners, the zipper must be tested around the curve, not only pulled in a straight line.
Attach a construction drawing even if it is simple. Mark pocket openings, divider height, pen loop position, card slot dimensions, label location, print area, seam allowance, and reinforcement points. Written specs tell the factory what the materials and tolerances are. The drawing shows where everything belongs.
- Use finished measurements and intended insert measurements, not only a rough outside sketch.
- State canvas oz and gsm, and ask whether the gsm is before or after finishing.
- Specify zipper construction, tape, slider, puller, stop, length, and opening style.
- Attach a drawing for pockets, labels, patches, print placement, seam allowance, and reinforcement.
- List every substitution that requires written buyer approval before production.
Set tolerances before the sample is approved
Sewn canvas goods will not behave like molded plastic parts, but vague tolerances create expensive arguments. Separate functional tolerances from cosmetic tolerances. A non-critical outside edge may allow more variation than a zipper opening that must accept a catalog. Logo and label placement may need tighter control than an internal seam that is rarely seen.
As a planning reference, many sewn canvas portfolio programs discuss about plus or minus 10 mm for general body dimensions and about plus or minus 5 mm for logo or label placement. These are not universal rules. Heavy canvas, lining, binding, curved zippers, interior pockets, and thick corner build-up all affect what a factory can hold consistently.
Use the pre-production sample to validate the tolerance plan. If the sample measures correctly but the intended insert is difficult to load, the spec is not complete. Add a functional fit check to the inspection standard. If a logo looks centered on one sample but shifts during bulk sewing, measure placement from a fixed seam or edge instead of relying on visual judgment.
Tolerances also affect price. A supplier quoting loose inspection standards may look cheaper than one planning slower sewing, better fixtures, and more rejects to meet tighter placement rules. Ask the factory to confirm capability during RFQ. When a tolerance is unrealistic, adjust the construction before production rather than negotiating defects after final inspection.
- Separate critical measurements, branding placement measurements, and non-critical sewn-edge measurements.
- Use tighter controls on zipper opening, pocket depth, logo position, and label position when those details affect use or presentation.
- Confirm tolerances from the PP sample, not only from the drawing.
- Measure from fixed seams or edges so inspectors and operators use the same reference points.
- Expect tighter tolerances to influence sewing speed, rejection rate, and unit cost.
Choose canvas weight and claims with care
Canvas weight is one of the main levers for cost, structure, and freight. A 10 to 12 oz canvas, often about 280 to 340 gsm after finishing depending on weave and treatment, can work for lightweight document carry, internal kits, and event materials. It is easier to fold, usually softer in hand, and may reduce carton weight. The tradeoff is structure. Lighter canvas can wrinkle after compression, collapse at corners, and feel less protective when carrying catalogs or swatch cards.
A 14 to 16 oz canvas, often about 390 to 450 gsm after finishing, gives the portfolio more body. It can sit flatter on a meeting table and feel more substantial in buyer-facing use. The cost impact goes beyond fabric price. Heavier canvas can slow sewing, require stronger needles, create thicker corner build-up, affect zipper alignment, and increase carton gross weight.
Eco apparel brands should be precise with material language. Natural canvas, unbleached cotton, organic cotton, recycled cotton, recycled cotton blend, low-impact dyeing, and plastic-free packing are different requirements. If the claim will appear in marketing, retailer documentation, or product labeling, ask what evidence the supplier can provide and whether that documentation is included in the quote.
Shade control needs early agreement. Unbleached canvas can vary by lot, and some variation may be acceptable if the buyer signs a shade range. Dyed canvas should use lab dips and physical approvals. For reorders, ask whether the supplier can keep the same mill, retain approved swatches, and flag material changes before sampling. Without a physical standard, repeat orders can drift even when the factory believes the color is close.
- Use 10 to 12 oz canvas for lighter, softer, cost-sensitive programs.
- Use 14 to 16 oz canvas when structure, durability, and presentation value matter more.
- Request actual finished gsm from production fabric.
- Use organic, recycled, or low-impact claims only when documentation supports them.
- Approve natural canvas shade ranges and dyed fabric lab dips with physical samples.
Build pricing tiers procurement can use
Bulk pricing tiers are useful only when every tier uses the same specification. Ask the supplier to quote 300, 500, 1,000, 2,000, 3,000, and 5,000 units with the same canvas, zipper, pocket layout, branding, packing, incoterm, and destination. If the supplier changes material, print method, or packing at higher quantities, the tier is no longer a clean comparison.
Ask for adders and deductions alongside the base price. What does it cost to move from 12 oz to 16 oz canvas? What is the impact of adding lining, a divider, a second print color, a woven label, a sewn patch, an individual protective sleeve, or a paper band? These line items help merchandising, finance, sales, and sustainability teams make tradeoffs without guessing.
MOQ should be broken down by variant. A 2,000-unit purchase order is not one efficient production run if it includes four canvas colors, two zipper colors, three artwork versions, and different packing formats. Each variant can create separate cutting, printing, labeling, inspection, and carton-control work. Ask for MOQ by body color, zipper tape color, artwork, label version, patch material, and packing format.
Unit price should not be the only number in the pricing plan. Include setup charges, sample fees, artwork fees, carton dimensions, units per carton, gross weight, CBM, and lead time. A cheaper unit can become more expensive after freight, warehousing, and receiving labor are included. For apparel brands managing seasonal launches, late or messy deliveries can be more costly than a small unit-price difference.
- Request quantity breaks with the same exact specification at each tier.
- Ask for line-item adders for material, pocket, branding, and packing changes.
- Break MOQ down by production variant, not only total order quantity.
- Compare unit cost together with setup fees, sample charges, carton volume, and freight basis.
- Use tiers to plan repeat orders instead of overbuying the first run.
Pick the supplier route based on risk
A direct factory is often the strongest route when the buyer needs custom construction, repeat orders, stable materials, and direct technical answers. The factory can usually explain cutting yield, sewing constraints, zipper sourcing, print handling, and packing risks. Even then, verify what is truly in-house. Printing, embroidery, labels, patches, washing, and specialty packing may still be outsourced.
A trading company or sourcing agent can be useful when the purchase includes several accessory categories, such as portfolios, totes, pouches, garment bags, and packaging. The benefit is consolidated communication and often consolidated shipment. The risk is reduced visibility. Ask who the actual factory is, where production occurs, how QC is performed, and whether component substitutions require written buyer approval.
A regional decorator using stock blanks can be the fastest option for urgent or small-volume programs. This route works when the buyer needs a logo on an existing portfolio and accepts fixed size, canvas shade, zipper, and pocket layout. It is less suitable for custom material claims, controlled shade ranges, exact construction, or stable reorders from a buyer-owned spec.
Supplier selection should weigh risk, not just the unit price. For a one-time internal event, stock blanks may be enough. For a multi-season wholesale sales program, direct production may reduce reorder surprises. For a mixed accessory buy, a sourcing partner can work if factory disclosure, sample approvals, and QC responsibility are written into the process.
- Use direct factory sourcing for controlled construction and repeat programs.
- Use a trading company when consolidation is valuable and factory visibility is still documented.
- Use stock blanks when speed matters more than custom construction.
- Ask what is in-house and what is outsourced: fabric, cutting, sewing, printing, labels, packing, and inspection.
- Choose the route that best matches reorder control, technical responsiveness, and QC access.
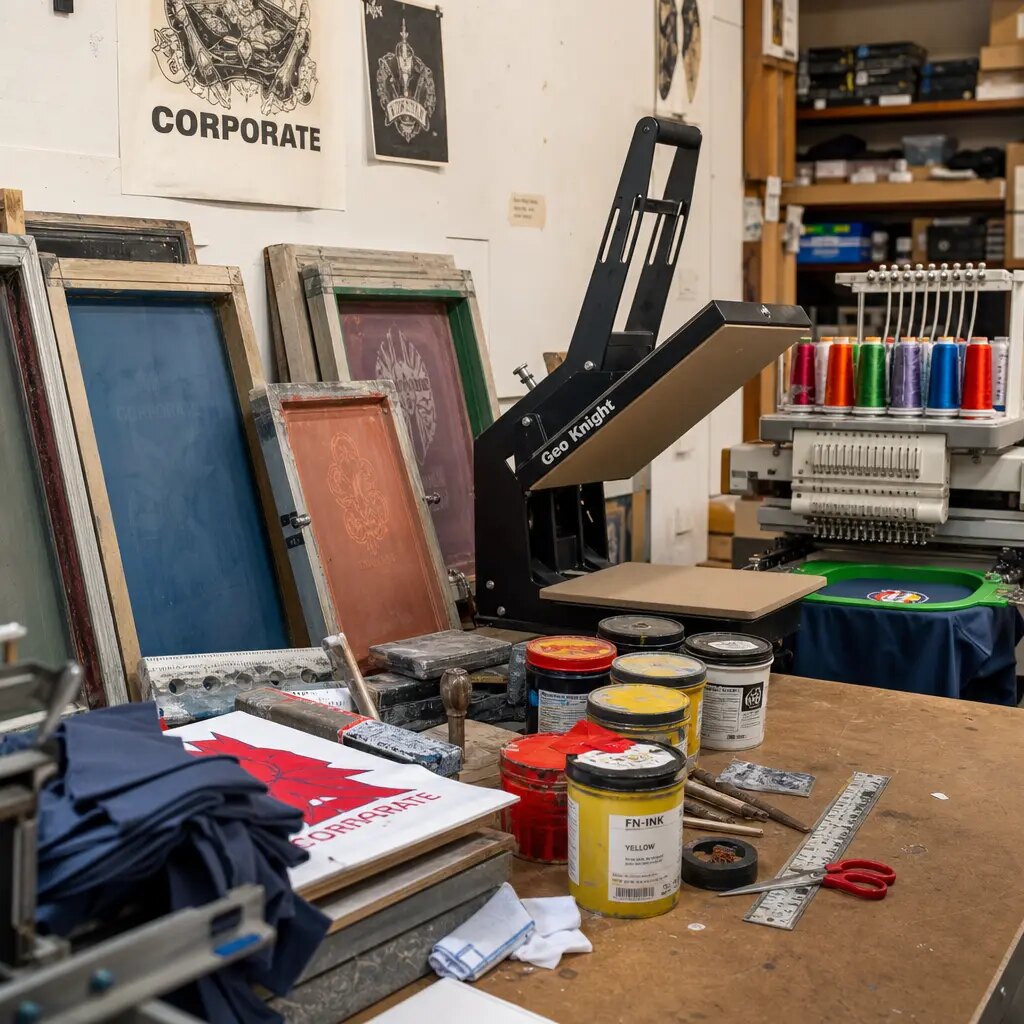
Make branding repeatable in bulk
Screen printing is still a practical branding method for canvas zipper portfolios when the artwork is bold, flat, and one or two colors. It can be efficient for bulk production and often works well with natural canvas. Approve a print strike-off on the actual production canvas. Texture, absorbency, and shade affect ink opacity and edge sharpness.
Print QC needs more than a quick glance. Inspect opacity, registration, edge definition, pinholes, smudges, curing, tackiness, cracking, and dry-rub resistance. If the print sits near a zipper puller, fold line, or stacked packing pressure point, test abrasion after packing. Heavy ink coverage can stiffen the panel or change the hand-feel. That may be acceptable, but it should be approved from a physical sample.
Woven labels, side tabs, and sewn patches can suit eco apparel brands that prefer quieter branding. They reduce ink coverage and may feel more premium. They also add controls: label material, logo legibility, spelling, fold accuracy, stitch security, edge fraying, shade consistency, and placement tolerance. A tiny woven logo can look clean in a digital proof and become hard to read after weaving.
Patch branding requires material clarity. If animal leather is not acceptable, say so. If the brand avoids certain synthetics, ask for patch composition, backing details, and any available documentation. Embroidery can work on heavier canvas, but dense stitches may distort lighter panels. For every branding method, approve actual scale, actual material, and actual placement before bulk production.
- Use screen print for bold one-color or two-color artwork.
- Use woven labels or patches for understated branding and lower ink coverage.
- Approve strike-offs on production canvas, not unrelated fabric scraps.
- Set logo placement tolerance and measure it from fixed edges or seams.
- Inspect legibility, rub resistance, spelling, orientation, and stitch security during production.
Control zipper, stitching, and interior details
The zipper is the main functional component. If it fails, the portfolio fails. A #5 nylon coil zipper is often a sensible baseline because it is flexible, smooth, and widely available. Still, the buyer should define tape color, slider finish, puller style, zipper length, end stop, and whether the zipper is exposed, hidden, or bound. A metal zipper may look more premium, but it should be tested for weight, scratching, and smoothness on the actual canvas.
Zipper opening width matters as much as outside size. A portfolio can measure correctly and still be awkward if seam allowance, lining, binding, or pocket construction reduces access. Test the PP sample with the intended documents, catalogs, swatches, or tablet sleeve. The zipper should open far enough for contents to enter without bending, and it should close without forcing the slider around overloaded corners.
Stitching requirements should be written in practical production language. Define thread color, stitch appearance, reinforcement points, bartacks, backstitching, and trimming standard. Stress points include pocket openings, zipper ends, corners, labels, handles if any, loops, and divider attachment points. Loose threads may be minor on a flat edge, but they become more serious near a stress seam.
Interior features should earn their place. One document sleeve can be valuable for order forms or line sheets. A card slot, pen loop, divider, elastic holder, mesh pocket, or swatch pocket can help if the sales team will actually use it. Each feature adds placement risk and sewing time. Price interior elements separately so the final build stays intentional.
- Specify zipper size, type, tape, slider, puller, stop, and construction method.
- Test zipper travel with the intended contents inside.
- Inspect zipper tape sewing for waviness, skipped stitches, puckering, and uneven edge spacing.
- Require reinforcement at pocket openings, zipper ends, corners, and label or loop attachment points.
- Add lining, dividers, card slots, and pen loops only when the use case justifies the cost.
Use samples as production controls
Sampling should follow the way risk appears. A first development sample can confirm shape and rough dimensions. A construction sample can confirm pockets, zipper path, divider placement, and insert fit. A logo strike-off can confirm print, label, patch, or embroidery quality. The pre-production sample should bring final fabric, final zipper, final trims, final branding, final construction, and final packing together.
The PP sample becomes useful only when it matches the written specification. A photo approval cannot confirm hand-feel, zipper smoothness, shade, print texture, or packing compression. If the factory sends a sample made with substitute canvas, substitute zipper, temporary label, or unfinished packing, treat it as a development sample. Do not use it as mass production approval.
Pair the golden sample with a signed spec sheet. The document should list finished dimensions, material details, trim details, branding method, logo size, placement tolerances, packing method, carton assumptions, and inspection criteria. Keep one reference with the buyer and one with the factory. Bulk QC should compare goods against the same standard, not against memory or email photos.
Any material change after approval should trigger written reapproval. This includes fabric mill, canvas weight, zipper supplier, zipper color, slider finish, print ink, label material, patch backing, thread color, lining, packing sleeve, carton count, or anything that changes product shape. Reapproval can be narrow, but it should be visible.
- Use development, construction, logo, and pre-production samples for different approval purposes.
- Approve mass production only from a PP sample made with final materials and final packing.
- Seal a golden sample and match it with a signed specification sheet.
- Require written approval for component or packing changes after PP approval.
- Keep buyer and factory reference samples for inspection and reorders.
Set QC rules for the shipment
A real QC plan covers function, measurement, appearance, and packing. Function comes first. The zipper must open and close smoothly, the puller must be secure, pockets must accept the intended inserts, seams must hold at stress points, and the body should lie reasonably flat when closed. A portfolio that looks good but cannot be used is not a successful B2B purchase.
Measurement checks should follow the approved spec sheet. Inspect body width, height, zipper opening, pocket depth, gusset, logo placement, label placement, and any critical insert clearance. For sewn canvas goods, general body tolerance may be wider than branding tolerance. If the item must hold a specific catalog or swatch kit, test that fit directly instead of inferring it from outside measurements.
Agree on defect categories before final inspection. Critical defects may include unsafe contamination, wrong logo, wrong SKU, broken zipper, or unusable construction. Major defects may include open seams, poor zipper function, obvious shade mismatch, missing labels, crooked branding outside tolerance, severe print smudges, or wrong packing. Minor defects can include small loose threads or slight cosmetic variation within the approved standard.
Packing QC protects the order after sewing is complete. Check carton marks, SKU separation, units per carton, gross weight, carton dimensions, moisture protection if needed, interleaving, sleeve placement, and packing-list accuracy. A shipment can pass product inspection and still create warehouse problems if cartons are mixed, unmarked, overpacked, or scuffing printed surfaces in transit.
- Inspect zipper function, insert fit, seam strength, body flatness, and pocket usability first.
- Measure critical fit points and branding placement against the approved spec.
- Define critical, major, and minor defects before inspection begins.
- Check shade, print, stitching, labels, patches, and trims against the golden sample.
- Audit carton marks, counts, weights, SKU separation, and scuff protection before release.
Specification comparison for buyers
| Spec decision | Recommended option | When it fits | Buyer risk to check |
|---|---|---|---|
| Supplier route | Direct factory with controlled cutting, sewing, trim sourcing, final inspection, and either in-house or approved outsourced printing | Best for repeat B2B programs, custom pattern work, controlled materials, and buyer-specific QC requirements | Confirm which steps are in-house, which vendors handle printing or trims, and who pays for rejected print, zipper, sewing, or packing defects |
| Supplier route | Trading company or sourcing agent managing multiple factories with documented factory disclosure | Useful for mixed accessory orders, consolidated shipments, or buyers without local factory management capacity | Ask for the actual factory name, production location, QC responsibility, component approval flow, and whether substitutions require written buyer approval |
| Supplier route | Regional decorator using stock blank portfolios | Useful for urgent events, low quantities, simple logo application, and limited customization | Check that body size, canvas shade, zipper color, pocket layout, and reorder availability are fixed; stock blanks often cannot hold custom tolerance or material requirements |
| Canvas weight | 10 to 12 oz canvas, typically about 280 to 340 gsm after finishing depending on weave and treatment | Light document carry, internal kits, event materials, lower freight weight, and a softer hand-feel | May feel limp, wrinkle after compression, show weaker edge recovery, and provide less protection for catalogs or swatch cards |
| Canvas weight | 14 to 16 oz canvas, typically about 390 to 450 gsm after finishing depending on weave and treatment | Wholesale buyer kits, premium presentation, repeated sales use, and portfolios expected to hold a flatter shape | Higher material cost, thicker corner build-up, slower sewing, possible zipper puckering, heavier cartons, and more needle control required |
| Zipper specification | #5 nylon coil zipper with stable tape, smooth slider, secure puller, and color-matched or intentional contrast tape | Practical default for most flat canvas zipper portfolios because it balances cost, flexibility, and smooth operation | Check zipper length, tape waviness, puller attachment strength, end stop quality, slider plating consistency, and opening width after sewing |
| Zipper specification | #5 metal zipper or metal-look puller only after sample testing | Works when the brand wants a more premium hardware look or a fashion-accessory feel | Metal teeth can add weight, scratch printed surfaces, feel less flexible on corners, and increase defect risk if the body is lightly structured |
| Branding method | One-color or two-color screen print on production canvas | Best for bold logos, larger flat artwork, repeatable bulk decoration, and natural canvas branding | Check ink opacity, registration tolerance, edge sharpness, curing, dry-rub resistance, and whether heavy coverage stiffens the panel |
| Branding method | Woven side label, sewn fabric patch, PU-free patch, or approved leather-alternative patch | Fits understated eco apparel branding, lower ink coverage, and premium presentation pieces | Confirm label material, logo legibility, spelling, stitch security, edge finishing, placement tolerance, and whether patch claims are documented |
Buyer checklist before sampling
- Finished portfolio width, height, gusset depth if any, zipper opening width, pocket depth, and the exact insert size the portfolio must carry without forcing the zipper
- Technical drawing or measurement sheet showing body size, zipper path, pocket placement, label placement, print placement, seam allowance, and reinforcement points
- Measurement tolerances separated by critical fit points, branding positions, and general sewn edges; use tighter controls on zipper opening and logo position than on a non-functional edge
- Canvas weight in both oz and gsm, with confirmation that the quoted gsm is finished fabric weight after dyeing, washing, brushing, shrinking, or coating
- Canvas construction details, including cotton, recycled cotton blend, organic cotton if required, weave type if known, lining if any, and whether material claims require documents
- Fabric color standard, such as approved physical swatch, lab dip, Pantone reference for dyed fabric, or a signed natural-canvas shade range for unbleached goods
- Canvas finishing requirements such as unbleached, dyed, washed, enzyme-washed, pre-shrunk, brushed, water-repellent, or untreated, plus any expected shrinkage or colorfastness checks
- Zipper specification including size, nylon coil or metal, tape color, slider finish, puller shape, end stop, opening direction, exposed versus hidden construction, and required smoothness
- Thread color, stitch density target, seam construction, binding material, bartack locations, backstitch requirements, and corner reinforcement method
- Interior features such as lining, divider panel, document sleeve, business card slot, pen loop, mesh pocket, elastic holder, swatch pocket, or printed insert card
Factory quote questions to send
- What actual finished fabric gsm are you quoting, and what gsm variation do you allow within the same fabric lot?
- Is the canvas greige, dyed, bleached, unbleached, washed, pre-shrunk, brushed, coated, or treated in any way that affects weight, shrinkage, shade, or stiffness?
- What fiber content are you quoting, and what documents can you provide if the buyer specifies organic cotton, recycled cotton, or another material claim?
- Which zipper construction is included: nylon coil, metal, or molded; what zipper size; what tape material; what slider finish; and what puller style?
- What zipper brand, zipper grade, or equivalent quality reference are you using, and can the same zipper supplier be used for repeat orders?
- Will fabric, zipper, thread, binding, label, lining, patch, and packing materials come from the same sources for reorders, or can they change by batch?
- How many logo colors, print locations, labels, patches, embroidery positions, or trim applications are included in the quoted unit price?
- Are screen charges, artwork setup, patch tooling, embroidery digitizing, strike-off fees, sample charges, PP sample fees, inspection support, and courier charges included or separate?
- What is the MOQ per body color, per zipper tape color, per artwork, per label version, per patch material, and per packing format?
- Please quote 300, 500, 1,000, 2,000, 3,000, and 5,000 units using the same specification, same incoterm, and same packing method.
Quality-control points to confirm
- Approve final fabric shade against a physical swatch or lab dip under daylight-equivalent lighting, not only a phone photo or monitor image
- Check actual finished fabric gsm from production fabric and record whether the sample is cut before or after washing, dyeing, brushing, coating, or shrinking
- Measure finished width, height, zipper opening, pocket depth, gusset width, print placement, label placement, and insert fit against the approved spec sheet
- Test zipper function across the full travel path for smooth opening, clean closure, no snagging at corners, secure puller attachment, and consistent slider finish
- Inspect zipper tape stitching for waviness, skipped stitches, loose threads, weak backstitching, needle damage, and uneven distance from the edge
- Inspect stress points, pocket openings, zipper ends, corners, label attachment points, divider seams, and any loops or handles for reinforcement and clean trimming
- Verify seam alignment, edge binding, corner shape, body flatness, panel twist, and whether the portfolio bows when closed with the intended contents
- Check print registration, edge sharpness, ink opacity, color match, pinholes, smudges, curing, tackiness, cracking, and dry-rub resistance on actual canvas
- Confirm label, patch, or woven tab placement, spelling, orientation, logo legibility, stitch security, edge fraying, and shade consistency across variants
- Perform functional insert checks using the actual documents, catalogs, swatch cards, tablet sleeves, or buyer meeting materials the portfolio is designed to hold