Why Print Proofing Matters More Than Buyers Expect
A custom canvas wine carrier can look straightforward on paper, but procurement problems often start in the proofing stage rather than on the sewing line. The bag is a structural item, a printed branding surface, and a retail packaging component at the same time. If any one of those functions is defined loosely, the factory may still deliver what was technically ordered, yet the result may not perform well in store. Typical issues include a logo landing too close to a side seam, a bottle pushing the front panel out of shape, print color looking dull on natural canvas, or handles attached in a way that interferes with the visible branding area.
For liquor retailers, the proof should act as a production control document, not just a visual preview for marketing approval. It needs to connect artwork, bottle fit, fabric, sewing, print method, and packing into one agreed specification. Buyers who approve a proof too quickly often discover that unit price was not the real problem. The real cost comes later through re-sampling, delayed launch dates, mixed expectations between merchandising and sourcing teams, or excess stock that does not meet display standards.
This is especially important for custom canvas wine carriers because the logo is rarely seen on a perfectly flat surface in real use. Once a bottle is inserted, the front panel curves slightly, the gusset opens, and the handle tension changes how the bag hangs. A proof that ignores these realities may still look correct on a PDF but perform poorly in store. Strong proofing practice helps buyers compare supplier offers on the same basis and reduces the chance that a low quote is masking a lighter fabric, a weaker handle build, or an incomplete approval process.
- Use the proof to control production details, not only artwork appearance.
- Require the supplier to show print position on the actual finished bag size, not a generic rectangle.
- Treat the proof, sample, and QC criteria as linked documents rather than separate approvals.
- Escalate any unresolved fit, color, or packing question before bulk production starts.
Start With Bottle Fit Before Discussing Artwork Placement
The first technical decision is not the logo. It is the bottle. Liquor retailers often carry a mix of 750 ml Bordeaux bottles, Burgundy bottles with broader shoulders, Champagne bottles with greater body diameter, and taller spirits bottles with different weight distribution. A bag sized only from a catalog reference can easily underperform once the actual product is inserted. Even small differences in bottle diameter and shoulder shape affect the gusset opening, front-panel tension, and how centered the printed logo appears during use.
For a single-bottle carrier, buyers should define the bottle height, maximum diameter, shoulder profile, and filled weight. This is what determines usable internal space after seam allowances and gusset folds are considered. A bag that appears tall enough on a flat measurement may still grip too tightly at the bottle shoulder, causing awkward insertion or distortion of the print panel. If the retailer expects occasional use across multiple bottle shapes, the bag should be sized for the largest must-fit format, not for the average product in the assortment.
Two-bottle carriers need even more precision. The divider height, divider stiffness, and the base structure all matter because bottles can knock against each other if the partition is too soft or too low. If the carrier is meant for premium gifting, presentation is also important: bottles should sit upright, the top line of the bag should remain balanced, and the handles should not pull the center divider out of shape. These details should be clarified in the RFQ rather than left to supplier interpretation.
A practical approval step is to test the pre-production sample with real product or a dimensional dummy bottle of equal weight. Procurement teams should not rely only on flat dimensions. Insert the intended bottle, lift the bag fully by its handles, set it down on a surface, and look at the logo from normal customer viewing distance. That process often reveals whether the print area is sitting too low, whether the body collapses too much, or whether the opening is too tight for efficient store use.
- State bottle diameter, bottle height, shoulder width, and filled weight in the RFQ.
- For mixed retail assortments, design for the largest bottle that must fit reliably.
- For two-bottle carriers, define divider type: sewn-in canvas, padded partition, or other structure.
- Confirm whether the bag must stand upright on shelf or only function as a carry-out item.
- Test fit with real bottles before final artwork approval, not after.
Choose Canvas Weight and Fabric Construction With the End Use in Mind
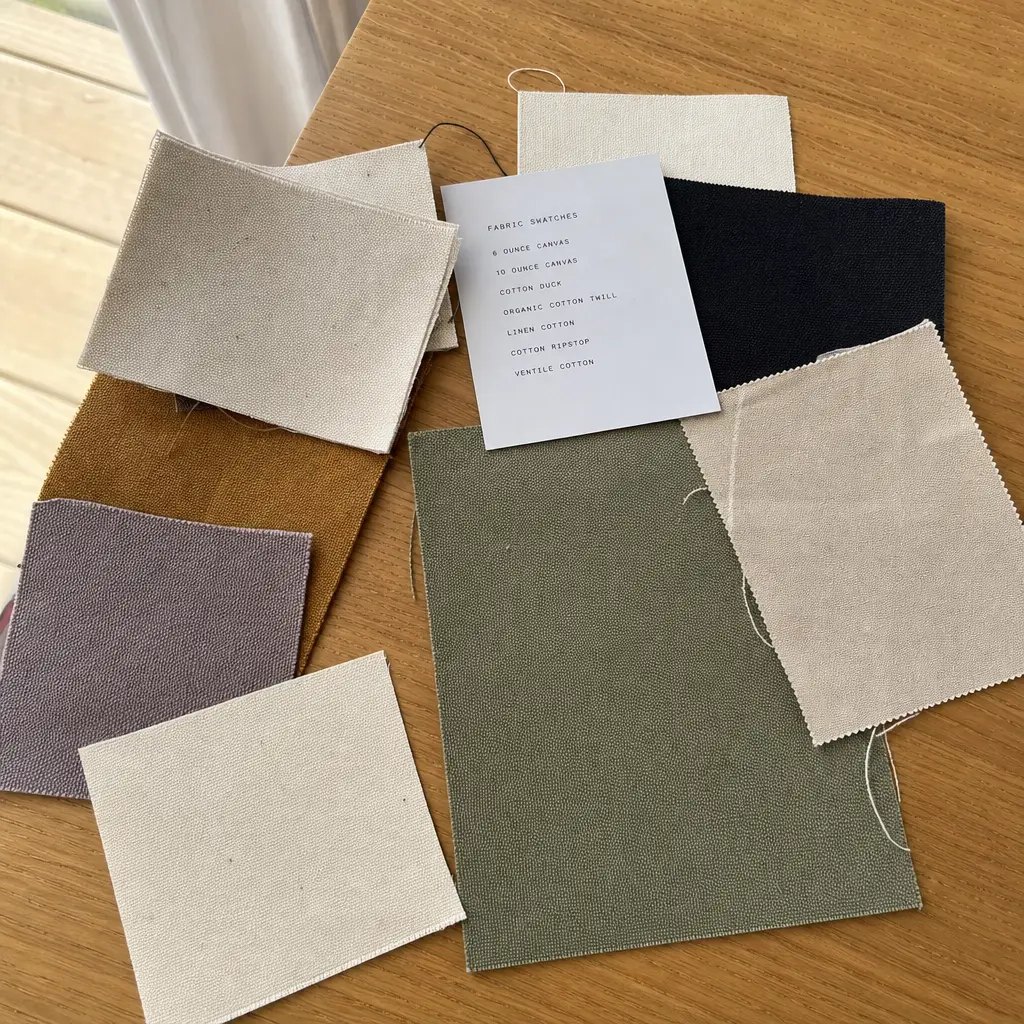
Canvas selection directly affects carrying performance, print clarity, and perceived retail quality. For most custom canvas wine carriers used by liquor retailers, 10 oz to 12 oz cotton canvas, roughly 280-340 GSM, is a sensible starting range. It usually gives enough structure to support a filled bottle, keeps the bag from looking overly promotional, and provides a more stable print surface than lightweight cotton. When the fabric is too light, the body collapses more easily, the bottle shape telegraphs through the panel, and large printed areas may appear uneven because the cloth shifts under tension.
That does not mean heavier is always better. A 14 oz or heavier canvas can improve body and premium feel, but it also raises material cost, sewing resistance, carton weight, and freight volume. In a checkout program where the carrier is mainly a branded add-on, the extra weight may not improve sell-through enough to justify the cost. In a winery gift format or holiday premium pack, however, heavier fabric may align better with price positioning. Buyers should therefore link canvas weight to the role of the bag in the retail program rather than choosing based only on sample feel.
Fabric color and finish also matter. Natural canvas is popular because it signals a classic, reusable look and often works well with winery branding, but it has a warm undertone and may include small flecks. That affects how ink appears. Bleached canvas offers a cleaner, brighter base for color accuracy, while dyed canvas can sharpen contrast for lighter logos but may require a white underbase. Recycled-content canvas may support sustainability goals, but buyers should still verify consistency in shade, yarn irregularity, and print response rather than assuming all recycled canvas behaves the same.
A strong RFQ should ask suppliers to quote exact fabric weight, composition, and finish. If one supplier prices 280 GSM natural canvas and another prices 380 GSM dyed canvas, those are not directly comparable offers. Procurement teams should normalize specifications before evaluating price. If shrinkage or steaming exposure matters for final presentation, ask whether the fabric is pre-shrunk or request a simple sample test before sign-off.
- Request fabric weight in GSM or oz and keep units consistent across supplier quotes.
- Clarify natural, bleached, dyed, recycled-content, or blended canvas because each affects print outcome.
- Expect natural canvas to show slight base-tone warmth and occasional flecking unless otherwise specified.
- If fabric consistency matters for repeat orders, ask how the mill controls shade variation lot to lot.
- Check whether the quoted canvas is the same fabric used for both sample and bulk production.
Match the Print Method to the Artwork, Fabric, and Order Structure
Screen printing is typically the most practical method for custom canvas wine carriers print proofing because it handles solid branding well, gives good durability, and remains cost-efficient for repeat retail quantities. For one-color or two-color winery logos, event marks, or store branding, screen print usually provides the cleanest balance of readability and landed cost. However, buyers should still adapt artwork to the realities of textured canvas. Fine serif details, tiny reverse text, and large dense ink blocks may need adjustment before approval to avoid poor edge definition or heavy hand feel.
Heat transfer can work when the logo includes gradients, detailed imagery, or a lower-volume seasonal graphic that does not justify multiple screens. But it must be evaluated carefully on a wine carrier because the panel bends around the bottle and experiences regular flexing. A transfer that looks good when flat can become stiff, glossy, or vulnerable to edge lift once the bag is loaded and handled. Buyers should request a physical sample and specifically inspect edge adhesion, flexibility, and visual contrast against the canvas texture.
Embroidery can add a premium effect, but it is usually best reserved for small marks such as a monogram, crest, or compact brand icon. Large embroidered front logos often add cost, increase production time, and create puckering on midweight canvas. For procurement teams, the key is not whether embroidery looks upscale in theory, but whether it suits the bag size, artwork scale, and intended retail price point. If the bag is expected to sit flat and display a wide front-facing logo, embroidery may introduce more problems than value.
Dark dyed canvas requires another layer of print planning. Many logo colors need a white underbase for visibility, especially reds, metallic-looking tones, and bright brand colors. That underbase can alter hand feel and may slightly affect the final appearance of the top color. Buyers should ask if the underbase is included in the quoted process and whether the approved sample reflects bulk execution exactly. For procurement, this is a cost and consistency issue as much as a design one.
- Use screen print for solid logos, repeated retail programs, and cost-controlled bulk orders.
- Use heat transfer only after testing flexibility, edge adhesion, and visual finish on the loaded bag.
- Use embroidery for small premium marks rather than large front-panel coverage.
- Avoid very fine lines, tiny reverse text, or oversized ink blocks unless the supplier confirms workable limits.
- If using dark fabric, ask whether a white underbase is required and how it affects cost and hand feel.
What a Strong Print Proof Must Show Before You Approve It
A useful proof for custom canvas wine carriers should contain measurable production information, not just a centered logo on a generic outline. At minimum, the proof should show finished bag dimensions, print dimensions, distances from side seams, top edge, bottom fold, and gusset fold, plus handle-stitch clearance where relevant. If the bag includes a center divider or unusual top shape, the proof should also show how the visible front panel is defined once the structure is assembled. This level of detail reduces disagreement later about whether the logo was placed correctly.
Buyers should insist on millimeter-based placement rather than approval by eye alone. Statements such as 'center the logo' or 'print front middle' are too vague for production control. A proof should specify exact print width and height, and exact offsets from fixed reference points. This becomes particularly important when the front panel is not perfectly symmetrical after sewing. A logo that appears mathematically centered on a flat cut panel may not look centered on the finished carrier once the bottle opens the gusset. The supplier should therefore proof placement on the finished bag template, not only on a cut-piece drawing.
Color information also needs to be handled carefully. Pantone references help align expectations, but buyers should remember that coated-paper color references do not automatically reproduce the same on absorbent canvas. Natural cloth usually warms and softens colors. Dark cloth may mute or shift them unless an underbase is used. If color matters to the retail brand, a strike-off or physical sample should be part of the approval path. A PDF proof alone is not enough to sign off print color.
Version control is another procurement issue. Retailers often revise logos, legal taglines, campaign dates, or festive variants late in the process. Every artwork file should carry a clear version code, issue date, and design name. The same code should appear on the proof and, where practical, on internal production records. This is a simple control step that reduces the risk of the factory printing an outdated file after the buyer has already approved a newer one.
- Show print size in millimeters, not only as a visual mockup.
- Measure distances from side seam, top edge, bottom fold, and any handle stitch box.
- Define a safe print area away from heavy seam bulk and fold distortion zones.
- Mark Pantone references and note whether a white underbase is included.
- Use artwork version codes so old and revised logos cannot be confused.
Sample Approval Should Function as a Mini Production Audit
A digital proof confirms layout. A physical sample confirms whether the product can actually be approved for production. For liquor retailers, the pre-production sample should use the same fabric weight, same fabric color, same print process, same handle construction, and same overall dimensions planned for the order. Sample-room substitutions may be acceptable for early shape discussion, but not for final sign-off. If the sample uses substitute fabric or a different print process, the buyer is still approving an assumption rather than a production-ready item.
The best way to review the sample is to simulate real retail handling. Insert the intended bottle, lift the carrier by its handles, carry it for a short distance, and set it back down. Look at the logo while the bottle is inside, not only when the carrier is flat. Check whether the body shape remains clean, whether the print panel wrinkles excessively, and whether the handles sit evenly in the hand. If the bag is intended for gifting, review its display value as well: does it stand reasonably, does the top line look balanced, and does the logo read clearly from normal customer distance?
The print itself should be checked beyond simple color acceptance. Rub the printed area after curing, flex the front panel around the bottle curve, and inspect whether the ink shows cracking, tackiness, or excessive thickness. A heavy ink deposit may initially look rich but can become uncomfortable in hand and more vulnerable to abrasion. If the fabric is natural canvas, compare the actual print against the brand expectation under consistent lighting rather than under mixed office light or by phone photo.
Documenting the sample matters too. Procurement teams should record the measured dimensions, logo placement, approved artwork version, and any specific concessions accepted during review. Keep one approval sample with the buyer and one with the supplier when possible. This becomes the reference for inline checks, final inspection, and repeat production. Without a clear reference sample, later disputes often turn into subjective arguments about what was originally intended.
- Approve bottle fit before approving final logo scale.
- Check print color under consistent light against the agreed reference.
- Measure logo placement from fixed edges and record allowable tolerance.
- Test handle comfort and balance with the actual filled weight.
- Retain an approved reference sample for final inspection and repeat orders.
Understand MOQ, Price Drivers, and Why Simple First Orders Usually Perform Better
MOQ for canvas wine carriers is driven by more than factory preference. It reflects fabric purchasing, cutting efficiency, screen setup, color separation, labor planning, and packing complexity. A natural canvas carrier with one print color and one size usually supports a cleaner MOQ structure than a dyed program split across several colorways and artwork variants. Buyers sometimes assume that a large combined order total will offset complexity, but if each SKU is small, the production run can still be inefficient and expensive.
For first orders, there is a strong procurement case for keeping the specification disciplined: one fabric color, one print color, one size, and one packing standard. This gives the retailer a reliable baseline for quality, fit, and sell-through. It also limits opportunities for version mix-ups and makes QC more straightforward. Once the product proves itself in market, additional holiday colors, regional branding, or two-bottle premium versions can be introduced with better demand visibility and more accurate cost planning.
Price should also be broken down clearly. The unit cost of a custom canvas wine carrier usually reflects fabric consumption, canvas weight, divider construction if any, handle material, stitching reinforcement, print colors, screen charges, packing style, and order split. If the quote combines all of this into one number without assumptions, buyers cannot tell where cost differences are coming from. A slightly higher unit cost may be justified by heavier fabric, stronger stitching, or cleaner packing. A lower quote may simply omit these elements.
Procurement teams should also account for landed-cost effects. Heavier fabric increases not only product cost but also carton weight and shipping expense. Lower carton compression to protect prints can improve quality but increase volumetric freight. If the order is promotional and time-sensitive, a low ex-factory price may still become a poor decision if rework or delayed approval pushes the shipment into a more expensive freight window.
- Quote MOQ by design, fabric color, and print color, not only by total pieces.
- Separate one-time setup charges from repeat-order unit pricing.
- Keep first orders structurally simple unless sales data clearly supports variants.
- Compare landed cost, not just ex-factory unit cost.
- Check whether premium packing or underbase printing changes both MOQ and production timing.
Packing, Cartons, and Warehouse Readiness Need to Be Specified Early
Packing is often treated as an afterthought, but for liquor retailers it directly affects store presentation, receiving efficiency, and damage risk. A custom canvas wine carrier may leave the factory in acceptable condition and still arrive with logo creasing, moisture marks, or shape distortion if the packing method was underspecified. This is particularly relevant for natural canvas, which can show transit marks more visibly than darker dyed fabric. Procurement teams should define how the print face is protected and how tightly the bags may be compressed in cartons.
The inner packing format should align with the retailer's downstream use. If the bags will be issued quickly at checkout, simple flat packing with print-face protection may be enough. If they will move through a warehouse and be distributed to multiple stores, inner bundling, labeling, and carton identification become more important. Some buyers prefer polybag protection, others prefer paper banding or no individual bagging for sustainability reasons. Whatever the choice, the requirement should be explicit so suppliers quote and pack to the same standard.
Carton specification also deserves more detail than many RFQs provide. Pieces per carton, carton dimensions, gross weight, moisture barrier, SKU separation, and carton marks should all be confirmed before production. A carton that is efficient for factory loading may be too heavy for store staff or may not match warehouse receiving limits. If multiple designs are ordered, mixed cartons should be avoided unless the buyer requests them deliberately and the labels are clear enough to prevent picking errors.
Because freight cost can be strongly affected by carton volume, procurement should request estimated packed carton dimensions early rather than calculating landed cost from product weight alone. This is especially helpful when comparing heavier premium canvas versus a more standard construction. A quote that looks close on ex-factory price can diverge meaningfully once packed volume and handling method are considered.
- Confirm packing direction so the print face is not folded sharply through the logo area.
- Specify whether individual protection is polybag, glassine, paper band, or none.
- Set acceptable carton gross weight based on warehouse and store handling limits.
- Require carton marks with SKU, quantity, PO reference, and artwork code if needed.
- Ask for packed carton dimensions early for more accurate freight comparison.
Build Quality Control Around Measurable Tolerances and Real Failure Points
Quality control for custom canvas wine carriers should focus on the failures that actually matter in retail use: wrong fabric weight, poor bottle fit, off-position logos, weak handles, visible print defects, stains, and mispacked cartons. A generic inspection note that says 'check appearance and workmanship' is not enough. Buyers should define measurable checkpoints before production starts so the factory, inspector, and procurement team all work from the same criteria. This reduces subjective disputes and speeds up final approval.
Fabric should be checked not only for color and hand feel but also for consistency with the approved sample. If the order is natural canvas, discuss what level of slub or flecking is acceptable. If the order is dyed canvas, define how shade variation will be judged. Dimensions should be measured flat using agreed points such as top width, body height, gusset depth, handle width, and handle drop. Where bottle fit is critical, include a practical fit test with the intended bottle or dimensional equivalent rather than relying only on flat measurements.
Print inspection should cover more than obvious smears. Check for pinholes, ghosting, double image, registration shift on multi-color logos, heavy ink ridges, under-cured tackiness, and poor edge definition where the artwork requires clean readability. Placement should be measured from fixed edges, with an agreed tolerance range. This is especially important if the bag has a visible front-facing retail role rather than simply functioning as a carry-out bag.
Handle and seam strength deserve equal attention. Even if the logo is perfect, a weak handle attachment will trigger customer complaints much faster than a minor print issue. Inspect stitch density, skipped stitches, uneven reinforcement boxes, seam opening, and divider attachment if the bag is dual-bottle. Finally, the inspection should include cleanliness and packing review because a stained or damp canvas bag can fail retail acceptance even when construction is technically sound.
- Define inspection checkpoints before bulk production, not only before shipment.
- Measure body dimensions and logo position from fixed reference points.
- Inspect print defects beyond color alone, including cure quality and edge clarity.
- Review handle reinforcement and seam integrity as primary functional risks.
- Include cleanliness, odor, moisture condition, and carton accuracy in final QC.
Manage Lead Time From the Right Starting Point and Protect the Launch Window
Lead time disputes are common because buyers and factories often start counting from different moments. Procurement may count from the first inquiry or price confirmation, while the factory counts from final artwork, approved sample, confirmed packing, and payment readiness. For seasonal wine promotions, holiday gifting, tasting events, or retail chain launches, that misunderstanding can create serious schedule pressure. The practical rule is simple: production lead time should start only after all approval inputs are complete and documented.
Several routine events can stretch the schedule even when the supplier is responsive. Artwork revisions may require new screens. A color decision on natural canvas may need an extra strike-off. Fabric for a dyed order may need to be purchased or dyed after approval. Bottle fit changes can affect pattern size and therefore require a fresh sample. Carton markings and barcode label requests can also slow the handover from finished goods to shipment. None of these are unusual, but they need to be reflected in the sourcing calendar.
Buyers should break the project into milestones: RFQ issue, supplier quote review, artwork proof approval, pre-production sample completion, buyer sample review, bulk material booking, production start, inline or pre-shipment inspection, shipment booking, and arrival buffer. This helps merchandising teams understand that a visually simple product still has multiple approval gates. It also allows procurement to identify which delays are internal and which are supplier-driven.
For launch protection, build in realistic contingency. If the order includes dyed fabric, multiple SKUs, or several approval stakeholders, add more buffer than for a one-color natural canvas reorder. Ask the supplier to identify which materials are stock-supported and which require fresh procurement. That transparency matters more than optimistic promises, especially when the custom canvas wine carriers are tied to a fixed retail season.
- Start lead-time counting only after artwork, sample, packing, and commercial approvals are complete.
- Set milestone dates for proofing, sample review, production, inspection, and shipment.
- Add contingency for dyed fabric, multi-SKU orders, and peak seasonal congestion.
- Ask which materials are stock and which must be newly purchased or dyed.
- Do not lock a retail launch date from a digital proof alone.
Specification comparison for buyers
| Spec decision | Recommended option | When it fits | Buyer risk to check |
|---|---|---|---|
| Canvas fabric weight | 10 oz to 12 oz cotton canvas, roughly 280-340 GSM, pre-shrunk if available | Most liquor retail gift packs, winery shops, holiday promotions, and branded checkout sales where the bag must support a filled bottle without looking flimsy | A cheaper quote based on 6 oz or 8 oz cotton may collapse under bottle weight, distort the front logo, and create inconsistent print coverage because the fabric moves more |
| Bottle capacity format | Single-bottle or two-bottle carrier with confirmed finished size, gusset depth, and bottle reference | Single-bottle for standard 750 ml retail add-ons; two-bottle for gift bundles, seasonal packs, and premium promotional sets | If capacity is not tied to actual bottle dimensions, the bag may fit Bordeaux but fail on Champagne, Burgundy, taller spirits bottles, or wider shoulders |
| Print method | Screen print for solid logos; heat transfer only for complex gradients or lower-volume graphic runs; embroidery only for small premium marks | Screen print is usually the best balance of durability, clarity, and cost for custom canvas wine carriers ordered in repeat retail programs | Large solid fills, very fine lines, textured canvas, and dark fabric requiring a white underbase can all affect edge sharpness, hand feel, and setup cost |
| Print position | Front center panel with measured safe area away from side seams, bottom fold, gusset fold, and handle stitch box | Best for shelf-facing branding, winery gift displays, tasting-room sales, and point-of-purchase presentation | Artwork placed too close to seams or folds can look crooked when the bag is loaded, even if it looked centered on a flat drawing |
| Handle construction | Self-fabric canvas handles or cotton webbing with reinforced cross stitching and adequate handle drop | Retail orders where end customers carry one or two glass bottles from store to car, event, or gift destination | Weak stitch reinforcement, short handle length, or uneven attachment is often a higher failure risk than the printed panel itself |
| Sample approval route | Digital proof plus pre-production physical sample using actual fabric, actual print method, final size, and planned handle construction | Any branded liquor retail order where logo position, bottle fit, perceived quality, and repeatability matter | Approving only a flat artwork proof does not reveal ink absorption, panel curvature, bottle balance, handle comfort, or actual fit tolerances |
| Packing method | Flat packed with print-face protection, then export carton with moisture control and clear carton marking | Retail replenishment, e-commerce prep, store distribution, event kits, and warehouse storage where clean presentation matters | Over-compression can crease the print face; poor moisture protection can stain natural canvas; mixed-SKU cartons increase receiving errors |
| MOQ and color split | Start with one fabric color and one print color unless sell-through data supports variants | First retail launch, pilot programs, or new SKU testing where control matters more than variety | Too many colorways below efficient MOQ raise setup cost, slow sampling, complicate inspection, and increase risk of shade variation between lots |
Buyer checklist before sampling
- Define the exact bottle type before sizing: 750 ml Bordeaux, Burgundy, Champagne, spirits bottle, or mixed assortment.
- State finished bag dimensions in the RFQ, including body width, body height, gusset depth, handle length, handle drop, and acceptable tolerance.
- Specify canvas weight by oz or GSM and require suppliers to quote the same construction and composition across all options.
- Clarify whether the fabric is natural, bleached, dyed, recycled-content, or blended canvas because print appearance changes by base cloth.
- Provide vector artwork, Pantone references, maximum print area, and logo placement measured from fixed bag edges.
- Request a print proof that shows artwork scale, print position, color callout, seam distance, gusset fold clearance, and handle-stitch clearance.
- Approve a physical pre-production sample made with final fabric, final print method, final thread, and final handle construction.
- Test the sample with the heaviest bottle expected in the program for fit, balance, standing behavior, and handle comfort.
- Rub and flex the printed panel after curing to check for cracking, tackiness, poor adhesion, or excessive ink build-up.
- Confirm packing details: pieces per inner pack, carton count, carton dimensions, gross weight, moisture protection, labels, and carton marks.
Factory quote questions to send
- What canvas weight are you quoting in GSM or oz, and is the fabric natural, bleached, dyed, recycled-content, or blended canvas?
- What finished size, gusset, divider construction if any, handle length, and handle width are included in the quote, and what production tolerances apply?
- Which print method is quoted, how many print colors are included, and what setup or screen charges apply per color or artwork version?
- Can you provide a print proof showing artwork scale, Pantone references, distance from seams, distance from bottom fold, and handle-stitch clearance before sampling?
- If dark canvas is quoted, will the artwork require a white underbase, and is that included in the price and hand-feel expectation?
- Will the pre-production sample use final bulk fabric, final ink, and final sewing construction, or only sample-room substitutes?
- What bottle dimensions did you use to confirm fit, and can you test against buyer-provided bottle measurements or a physical bottle sample?
- What is the MOQ by design, by fabric color, and by print color, and how does the price change if the order splits into multiple SKUs?
- What packing details are included: pieces per carton, inner packing method, moisture protection, carton dimensions, gross weight, and carton labeling?
- What inspection standard do you use for print position, ink defects, seam quality, handle attachment, stains, and carton marking?
Quality-control points to confirm
- Fabric weight should match the approved sample and quoted GSM within the agreed tolerance, and fabric hand feel should be consistent across the lot.
- Finished dimensions should be measured flat at top width, body height, gusset depth, handle width, and handle drop against the approved specification.
- Bottle-fit checks should be performed with the target bottle type or an agreed dimensional equivalent, especially for Champagne, Burgundy, and tall spirits formats.
- Logo position should remain within agreed tolerance, commonly plus or minus 3-5 mm for basic screen print placement, measured from fixed edges.
- Ink color should be checked under consistent lighting against the approved sample or Pantone target, not against a phone image or uncalibrated screen.
- Print surface should be free from pinholes, ghosting, smears, heavy ink ridges, double image, cracking, obvious registration shift, and under-cured tackiness.
- Handle stitching should be reinforced and inspected for skipped stitches, loose thread ends, uneven stitch boxes, and weak stress points at attachment areas.
- Side seams, gusset seams, and divider seams if used should be inspected for seam slippage, open stitching, raw-edge exposure where not intended, and shape consistency.
- Each bag should be clean, dry, odor-controlled, and free from oil marks, mildew spots, excessive fabric slubs beyond the approved standard, and cutting debris.
- Packing should protect the print face from abrasion, keep cartons dry, separate SKUs correctly, and match the buyer's carton marking requirements.