Start with the bottle journey
Custom canvas wine carriers for coffee roasters often sit between packaging and merchandise. The same bag may be used for a holiday bundle, a tasting-room counter display, a corporate gift, or a wholesale sample kit with wine, cold brew concentrate, syrup, olive oil, or pantry products. That mixed use makes durability more important than a polished mockup. The carrier has to survive factory packing, warehouse handling, filling, retail display, and customer carrying while still looking like it belongs to a premium coffee brand.
Before choosing fabric or chasing the lowest quote, map the carrier journey. Will it ship empty and be filled locally, or will it ship already loaded with glass? Will store staff hang it, stack it, or place it upright on shelves? Will the customer carry it for a short handoff or reuse it several times? These answers define the stress points: handles, upper seams, bottom corners, insert board, print panel, and carton compression.
A useful durability checklist should turn that journey into measurable requirements. Instead of asking a supplier whether the carrier is strong, ask whether the approved construction passes a stated load, hang time, lift cycle, fold, rub, and packing check. That is the difference between buying a sample and controlling a production run.
- List every intended content type, including wine bottles, coffee bottles, tins, mugs, cards, and inserts.
- Confirm maximum filled weight before selecting fabric, handles, and base construction.
- Define whether the carrier must stand upright empty, filled, or only with a display insert.
- Separate appearance checks from strength checks so both are inspected before shipment.
- Keep the signed sample and test notes as the production standard.
Choose canvas weight with proof
Canvas weight affects structure, handfeel, carton bulk, and cost. Many bottle-carrier programs are quoted around 12 oz to 16 oz canvas, but buyers should treat these numbers as supplier-confirmed starting points, not universal rules. A 12 oz canvas can work for simple promotions when the bottle load is light and the base is not expected to stand like a box. A 14 oz canvas is often a practical middle ground for retail gifting. A 16 oz canvas gives more structure for premium carriers, but it still needs correct seam design, thread, and reinforcement.
Heavier fabric does not automatically solve durability. If the needle, stitch tension, seam allowance, or handle reinforcement is wrong, thick canvas can tear at stitch holes or distort at base corners. Heavier canvas also increases carton volume and can hold creases if packed tightly. The buyer should approve fabric weight together with construction and packing, not as an isolated number.
Finish matters too. Natural canvas may show seed flecks, slubs, and shade variation, which some roaster brands like. Bleached canvas can make print cleaner but may show dirt faster. Dyed canvas needs colorfastness and lot consistency checks. For food-adjacent gift programs, ask about odor and storage conditions because closed cartons can trap smell.
- Specify fabric weight in oz and/or GSM, including tolerance after finishing.
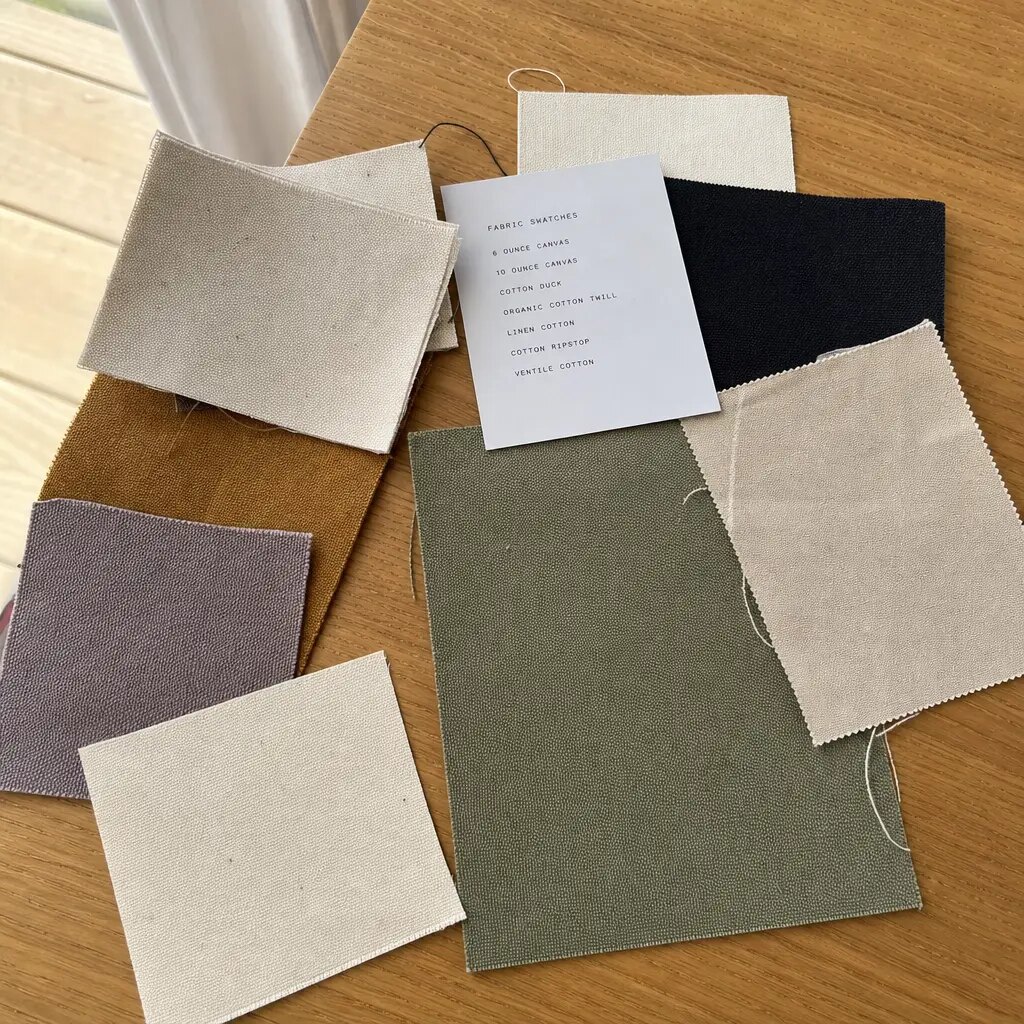
- Ask for production-fabric swatches before approving printed samples.
- Check odor, handfeel, shade variation, shrinkage, and crease recovery.
- Confirm whether canvas is natural, bleached, dyed, washed, or recycled-content.
- Avoid comparing quotes that state only 'canvas' without weight and finish detail.
Write a quoteable product spec
A supplier can only quote accurately when the construction is clear. The spec should include finished dimensions, usable internal space, bottle count, gusset depth, base style, handle drop, handle width, seam type, reinforcement method, print area, label location, packing method, and tolerances. If the carrier is for one 750 ml bottle, say so. If it must also fit larger wine bottles, olive oil bottles, coffee syrups, or cold brew bottles, include the largest height and diameter.
Separate required features from optional upgrades. Buyers often request canvas, print, insert board, label, divider, hangtag, and retail packing in one note, then compare quotes that include different assumptions. One supplier may include a sewn-in base board while another quotes no insert. One may include two-side printing while another assumes one side. A lower price may simply mean the quote is incomplete.
A quoteable spec also helps when cost needs adjustment. You can review the real levers: fabric weight, lining, print colors, label type, divider, insert board, individual packing, carton count, or inspection scope. That protects the structural requirements from being quietly weakened during negotiation.
- State finished size and internal clearance in centimeters or inches.
- Provide bottle dimensions and maximum loaded weight.
- Define base type: flat seam, boxed bottom, sewn-in insert, removable board, loose insert, divider, or no insert.
- Specify handle material, width, drop, attachment length, reinforcement patch, and stitch type.
- Include annotated artwork with logo placement reference points.
- Break out sample charge, print setup, labels, inserts, packing, and freight assumptions.
Specify handles and stress points
Most failures appear at predictable places: handle attachments, upper side seams, bottom corners, and the base. Handle language must be measurable. Define whether handles are self-fabric canvas, cotton webbing, polyester webbing, rope, or another material. Then state handle width, drop, attachment length, reinforcement patch size, stitch pattern, thread color, and required load test.
Stitching should be inspected closely, not only photographed from the front. Box stitches, cross stitches, and bar-tacks can all work when matched to the fabric and repeated consistently. Problems such as skipped stitches, loose tension, short bar-tacks, needle cuts, and uneven seam allowance can make a premium-looking sample weak in use. Ask for close-up sample photos and first-article photos from the bulk line.
The base should match the display plan. A low-cost sleeve may use a simple flat seam. A carrier that must stand upright usually needs a boxed bottom, board, or structured insert. If an insert is used, specify material, thickness, edge finish, size, and whether it is sewn in, removable, or loose. Loose boards can reduce cost but may shift during packing or customer handling.
- Require reinforcement at the exact handle attachment points.
- Set a target stitch density where appropriate, such as 7-9 stitches per inch for many canvas constructions, subject to supplier confirmation.
- Inspect inside seams, thread trimming, seam allowance, and corner finishing.
- Check base corners after load testing, not only when the carrier is empty.
- Approve bulk production only after handle and base details match the signed sample.
Use sample durability protocols
Sample testing should simulate commercial handling without becoming unnecessarily complex. Start with static loading. For a one-bottle carrier, a buyer might test at 3 kg/6.6 lb to cover a filled bottle plus margin. For two bottles or heavier gift contents, 6 kg/13.2 lb may be a more suitable starting point. Hang the carrier by the handles for 2 hours, then inspect handle pullout, seam opening, fabric tearing, and base sag.
Follow with repeated lifting. Lift the loaded carrier by the handles, set it down, and repeat 100 to 200 cycles depending on the risk level and reuse expectation. Add a controlled handling check: short handle jerks and set-downs from about 30 cm/12 in can reveal weak bar-tacks, shifting base boards, and seams that fail under sudden stress. These are practical buyer protocols, not certification claims, so record the method clearly in the purchase file.
Also test how the bottle enters and exits. Insert and remove the intended bottle 20 times. Check whether the opening snags, the shoulder scrapes the print panel, the side seams stretch, or the base distorts. A carrier can pass a static load test and still feel awkward or fragile in retail use.
- Static load: test at maximum filled weight plus margin for 2 hours.
- Repeated lift: complete 100-200 lift-and-set-down cycles at the approved weight.
- Drop/set-down: perform controlled 30 cm/12 in set-downs with the loaded carrier.
- Jerk handling: apply short handle pulls to reveal weak stitch tension or attachment length.
- Bottle insertion: insert and remove the bottle 20 times and inspect opening wear.
- Pass/fail: no handle pullout, tearing, seam opening over 2 mm, or base sag beyond the approved limit.
Test branding before bulk print
Branding often looks worn before the carrier structure fails. A one-color screen print can be a strong choice for roaster logos because it is cost-effective and repeatable, especially when artwork avoids heavy ink coverage and fold lines. Woven labels and sewn patches are durable because the brand element becomes part of the construction, but they still need checks for placement, stitching, fraying, and handfeel.
Approve branding on the actual canvas, not only on a digital mockup. Natural canvas absorbs ink differently from paper or coated fabric. Dyed canvas can change contrast. Large full-panel graphics may crack or crease when folded into cartons. If the carrier will be packed flat, test the print after folding in the exact direction planned for shipment.
Use numeric placement tolerances. For example, a buyer might allow logo placement within +/-5 mm from the approved top and side reference points, and reject obvious skew over 2 degrees on a centered front logo. The exact tolerance can change by artwork and brand standard, but it should be written before production starts.
- Request a strike-off or printed sample on production canvas.
- Check dry rub for 20 cycles and light damp rub for 10 cycles.
- Fold the carrier as packed and inspect for cracking, peeling, or ink transfer.
- Measure logo position from fixed reference points, not by eye only.
- Place branding away from base creases, seam intersections, and handle stress areas when possible.
Set tolerances and defect categories
Sample approval should produce measurable acceptance limits. Without tolerances, buyers and suppliers end up debating subjective terms such as 'slightly crooked' or 'close enough.' Common practical examples include +/-10 mm for finished height or width, +/-10 mm for handle drop, +/-5 mm for logo placement, no seam opening over 2 mm at stress points after testing, and no visible handle stitch slippage. These are examples buyers can adjust to their design and supplier capability.
Classify defects before final inspection. Critical defects include handle pullout, severe seam opening, unsafe insert edges, contamination, or anything that makes the carrier unsafe for a glass bottle. Major defects include wrong fabric weight, wrong dimensions outside tolerance, missing labels, incorrect print, warped base, or carton packing that damages saleability. Minor defects may include small thread ends or slight natural canvas variation within the approved standard.
Natural canvas requires clear visual standards. Slubs, seed flecks, and shade variation may be acceptable when approved. Oil marks, dirt, heavy stains, strong odor, mold, sharp board edges, and unapproved dye variation should not be treated as normal material character. Photograph acceptable and rejected examples during sample approval so the inspection team has a practical reference.
- Set tolerance limits for width, height, gusset, handle drop, insert size, logo placement, and skew.
- Define critical, major, and minor defects before production.
- Retain one signed sample with the supplier and one with the buyer.
- Use approved fabric and print references for final comparison.
- Require corrective action before shipment when critical or repeated major defects appear.
Match supplier route to risk
The best supplier route depends on order size, artwork complexity, and quality risk. A direct sewing factory is often better for repeat programs, private-label work, and tight control over stitching, line setup, and packing. It can also make first-article and inline corrections easier because the production team is closer to the problem.
A print-and-sew specialist can be a better fit for pilot launches, tasting-room exclusives, and small seasonal runs. These suppliers may support lower MOQs and faster artwork changes, but unit costs are usually higher and fabric choices may be limited to stocked materials. Trading companies can be useful when a roaster is sourcing several gift components together, but the buyer should verify where cutting, printing, sewing, inspection, and packing actually happen.
Ask for MOQ by variable, not just total quantity. Fabric color, artwork version, label type, insert style, and packing method can each create separate minimums. A 1,000-piece order split across four logos and two fabric colors may not be treated like a simple 1,000-piece run.
- Use direct factories for repeat volume and tighter production control.
- Use low-MOQ specialists for pilot launches and artwork testing.
- Verify subcontracting and responsibility for defect correction.
- Ask for MOQ by color, size, artwork, label, insert, and packing method.
- Require first-article approval when bulk sewing begins.
Inspect production before packing
Inspection should not wait until every carrier is sealed in cartons. Start with incoming fabric checks for weight, color, odor, and obvious contamination. Then inspect first articles from the actual production line before full sewing continues. This catches the most expensive mistakes early: wrong fabric, wrong handle drop, weak reinforcement, reversed logo, missing insert, or incorrect label placement.
Inline checks should focus on stress points. Pull a small number of pieces during sewing and inspect handle stitching, top opening, side seams, base corners, and thread trimming. If a defect repeats, pause and correct the process rather than sorting hundreds of finished units later. For higher-risk orders, a third-party or buyer-side inspection can use an AQL-style plan, such as general inspection level II, with critical, major, and minor defect categories defined in advance.
Final inspection should include packed presentation. Count pieces per inner and master carton, verify labels and barcodes, weigh cartons, measure carton dimensions, and open random cartons to check creasing, dirt, odor, and logo condition. A structurally sound carrier can still fail a retail program if packing makes it look crushed or dirty.
- Check fabric before cutting and first articles before full sewing.
- Inspect handles, base corners, stitch tension, labels, and print alignment inline.
- Use AQL-style sampling for retail or high-value programs when appropriate.
- Confirm carton count, gross weight, dimensions, barcode labels, and packed appearance.
- Do not approve shipment on exterior carton photos alone.
Control packing and landed cost
Packing affects both appearance and landed cost. Canvas carriers may be folded flat, lightly shaped, bundled, individually packed, or separated with tissue. If the carrier has a structured base, the carton plan must prevent boards from shifting, bending, or marking the fabric. If the logo is on the front panel, fold direction should avoid the most visible print area whenever possible.
Ask for carton dimensions, inner count, master carton count, net weight, gross weight, and estimated CBM before production ends. Cartons that are too tight can crease panels and crush base structure. Cartons that are too loose allow shifting and dirt transfer. Cartons that are too heavy create handling risk and may arrive damaged. A practical gross weight limit should be agreed with the warehouse or retail partner.
Lead time should be counted from sample approval, not inquiry. The schedule should separate artwork preparation, fabric procurement, dyeing or washing, print setup, label production, cutting, sewing, inspection, packing, and freight booking. For holiday programs, the calendar should include time for sample revisions, carton sign-off, and corrective action if first articles do not pass.
- Approve fold direction and packed presentation before shipment.
- Set carton gross weight and crush-risk limits with the logistics team.
- Compare total delivered cost per saleable unit, not only ex-works unit price.
- Include print setup, labels, inserts, inspection, packing, and freight in cost comparison.
- Build schedule buffer for sample revisions and corrective action.
Specification comparison for buyers
| Test or sourcing decision | Recommended buyer standard | When it fits | Acceptance risk to check |
|---|---|---|---|
| Static load test | Test at the maximum filled weight plus margin, such as 3 kg/6.6 lb for one bottle or 6 kg/13.2 lb for two bottles; hang 2 hours by the handles | Retail carriers, gift bundles, and any program involving glass bottles | Fail if handle pullout, fabric tearing, seam opening over 2 mm, or base sag beyond the approved limit appears |
| Repeated lift test | Lift and set down the loaded carrier 100-200 cycles at the approved test weight | Tasting-room retail, corporate gifting, and customer reuse | Fail if bar-tacks loosen, stitch tension slips, handle attachment distorts, or base corners open |
| Drop and jerk handling | From 30 cm/12 in, perform controlled set-downs and short handle jerks with the loaded carrier | Warehouse handling, store replenishment, and filled gift assembly | Fail if a bottle shifts through the base shape, seams pop, insert edges cut fabric, or handle reinforcement tears |
| Print rub and fold test | Dry rub 20 cycles, light damp rub 10 cycles, then fold as packed and inspect the logo panel | Screen print, heat transfer, and large front-panel branding | Fail if ink transfers heavily, smears, flakes, cracks at the fold, or logo becomes visibly unsaleable |
| Carton packing check | Pack to the proposed inner count and master carton count; check after compression and handling simulation | Folded carriers, structured bases, woven labels, and retail-ready cartons | Fail if logo panels crease permanently, boards shift, cartons bulge, or gross weight creates crush risk |
| Fabric weight choice | Supplier-confirm actual oz/GSM after finishing; common buyer targets are 12-16 oz canvas depending on use | Promotions, premium carriers, and roaster gift programs | Risk rises when a quote states only 'canvas' without weight tolerance, finish, handfeel, odor, and shrinkage detail |
| Handle construction | Specify handle material, width, drop, attachment length, reinforcement patch, stitch type, and thread | Heavy bottles, two-bottle carriers, and reusable merchandise | Weak handles may pass a visual sample review but fail after load, lift, or jerk testing |
| Branding method | Use screen print, woven label, or sewn patch based on wear expectation and artwork complexity | Private label retail, seasonal gifts, and wholesale bundles | Check logo skew, color target on actual canvas, label fraying, print cracking, and placement tolerance |
| Inspection level | Use incoming fabric checks, first-article approval, inline handle/base checks, and final AQL-style inspection | Repeat programs, retail deadlines, and orders with fixed launch dates | Final-only inspection can discover structural defects too late for economical rework |
Buyer checklist before sampling
- Confirm bottle count, bottle dimensions, filled weight, and whether the carrier must stand upright when empty, filled, or displayed.
- Lock fabric weight in oz or GSM, fabric finish, color, shrinkage expectation, odor requirement, and acceptable natural canvas variation.
- Specify finished width, height, gusset depth, opening size, handle drop, base size, and tolerances for each dimension.
- Define handle material, handle width, reinforcement patch, stitch pattern, thread color, and target load test weight.
- State whether the carrier is for 750 ml wine bottles, larger bottle formats, olive oil bottles, coffee syrups, cold brew bottles, tins, mugs, or mixed gift items.
- Approve print method, artwork size, color target, logo placement reference points, acceptable skew, and whether strike-offs must be made on production canvas.
- Confirm base construction: flat seam, boxed bottom, sewn-in insert, loose insert, removable board, divider, lining, or no insert.
- Request pre-production samples, first-article photos from the bulk line, inline production photos, and final inspection records before shipment.
- Set packing method, fold direction, inner count, master carton count, carton gross weight limit, barcode or retail labeling, and pallet requirements.
- Quote lead time from sample approval, with separate windows for fabric procurement, printing, sewing, inspection, packing, and freight booking.
Factory quote questions to send
- What canvas weight do you recommend for this exact bottle weight, and what is the confirmed GSM or oz range after finishing?
- Will cutting, printing, sewing, inspection, and packing happen in one factory or across separate subcontractors?
- What reinforcement is included at the handles, top opening, side seams, gusset points, and base corners?
- What stitch density do you use on handle attachments, and can you provide close-up photos from previous bottle-carrier production?
- Which branding method is included in the price, and how many colors, placements, labels, screens, or setup charges are included?
- What is the MOQ by fabric color, carrier size, artwork version, label type, insert type, and packing method?
- Can you test an approved sample at our required load, hang time, lift cycles, drop/jerk handling, and pass/fail thresholds?
- What are your normal dimensional tolerances for canvas bags, logo placement tolerance, and acceptable print skew?
- What is included in the sample charge: fabric, print setup, insert board, divider, label, packing, shipping, and revisions?
- What are the packed carton dimensions, inner count, master carton quantity, gross weight, net weight, and estimated CBM?
Quality-control points to confirm
- Fabric weight matches the agreed oz or GSM range, with no lightweight substitution, uneven dyeing, unacceptable odor, heavy contamination, or unapproved finish change.
- Finished dimensions stay within tolerance; practical examples include +/-5 mm for logo placement, +/-10 mm for width/height, and +/-10 mm for handle drop unless the buyer approves otherwise.
- Cut panels align when the carrier stands empty and filled; front, back, gusset, and base pieces should not twist, lean, or pull out of square.
- Handle stitching uses the approved bar-tack, box stitch, or cross stitch pattern; stitch density can be checked against a buyer target such as 7-9 stitches per inch where suitable for the construction.
- Handle pull testing passes the approved load without tearing, stitch pop, or visible slippage; for glass-bottle carriers, buyers should set a numeric test load rather than accepting 'strong enough.'
- Seams remain closed after static load, repeated lift, and handling tests; reject seam openings over the agreed limit, such as 2 mm at stress points, unless the signed sample establishes another standard.
- Base insert, divider, or boxed bottom sits flat, does not puncture fabric, does not shift excessively, and keeps base sag within the approved sample limit, such as no more than 10-15 mm under load.
- Print and labels are measured from agreed reference points; reject obvious logo skew, off-center labels, ink bleed, cracking, peeling, heavy rub transfer, or inconsistent label height.
- Top opening and gussets allow the intended bottle to enter and exit without scraping, snagging, or stretching the carrier out of shape.
- Cartons use the agreed count and gross weight; flag bulging cartons, crushed corners, dirty packaging, loose inserts, and tight packing that permanently creases the logo panel.