Start With The Use Case, Not The Artwork
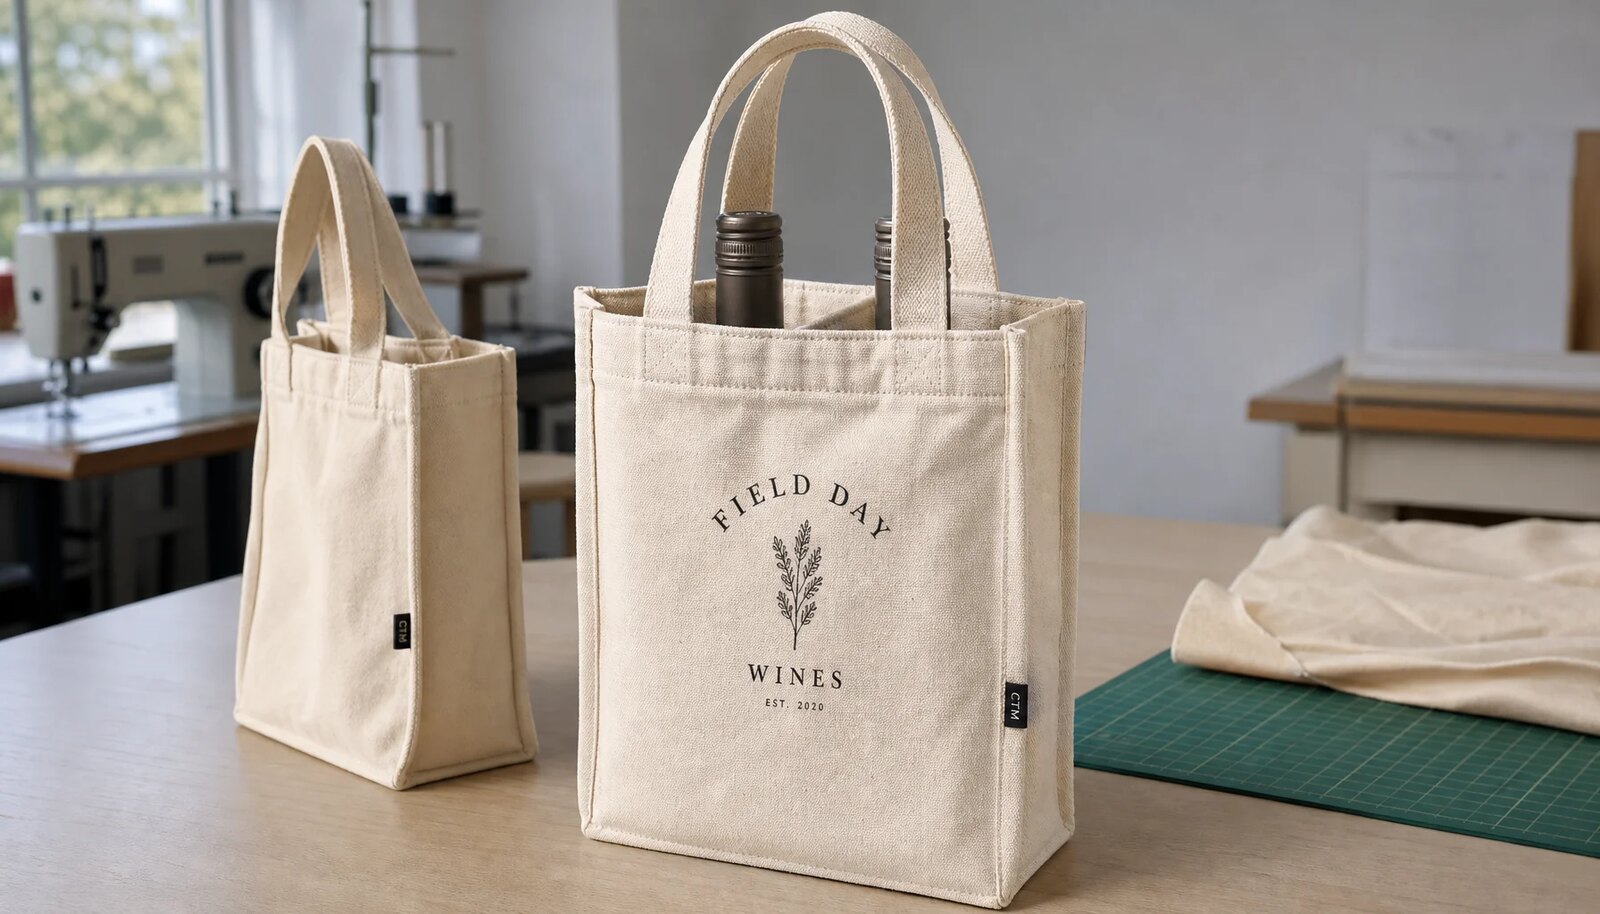
A custom canvas wine carrier is not a flat promo tote. It holds a bottle, carries weight by the handles, and gets judged the moment a customer picks it up at a farmers market booth, tasting room, or gift checkout. That means the first buying decision is not the logo. It is the use case: one bottle or two, gift or resale, short carry or repeated reuse. If the supplier starts with decoration before the carrier geometry is locked, the proof may look fine on screen and still fail when the real bottle sits too high, too low, or too tight in the finished bag.
For farmers market vendors, the product has an extra job. It has to present well at point of sale, survive being handed from booth to customer, and often look clean enough to be reused later. That changes what matters. A loose pattern that works for a generic shopping tote can shift a logo behind a seam, crowd the neck opening, or make the bottom panel collapse when the bag is filled. Buyers should begin with bottle dimensions, carry format, and display behavior before they touch artwork.
- Define the bottle diameter, neck height, and whether the carrier needs a divider or insert.
- State whether the bag is for retail handoff, gift packaging, or repeated consumer reuse.
- Approve the carrier geometry before asking for print placement or logo scale.
Translate Fit Into A Real Spec Sheet
The easiest way to remove guesswork is to turn fit into measurable spec language. A sourcing request should include finished size, not just a vague model name. For a two-bottle carrier, that means the buyer should state the target height, width, and depth after sewing, plus the acceptable tolerance. A practical starting point is plus or minus 5 mm on the overall finished dimensions and plus or minus 3 mm on internal divider spacing. That is tight enough to keep the bottles stable without demanding unrealistic factory control.
Handle drop matters as much as body size because it changes how the carrier hangs and where the artwork lands once the bag is loaded. If the handle base shifts even a small amount, a centered logo can look off. Buyers should also ask for a cut pattern or a pre-production paper pattern so they can check seam lines, panel proportions, and artwork clearance before approving anything. On a narrow front panel, there is not much room to hide a bad alignment.
- Specify finished dimensions and accept a plus or minus 5 mm tolerance as a baseline.
- Set divider or sleeve spacing at plus or minus 3 mm if the carrier holds more than one bottle.
- Ask for a pattern or paper mockup before the first physical sample is made.
Choose Canvas, Stitching, And Hardware That Survive Market Handling
Canvas weight drives structure, print behavior, and perceived quality. For most custom canvas wine carriers, 12 oz canvas is a practical baseline because it balances body and sewability. If the buyer wants a firmer hand, better abrasion resistance, or a more premium retail look, 14 oz is a sensible step up. Going heavier can improve structure, but it also changes folding, packing, and the way the carrier sits under print. Buyers should request the exact oz weight and GSM so they can compare suppliers that use different measurement systems.
The stitching spec deserves the same attention. A durable carrier should not rely on the print to hide poor sewing. For load-bearing seams, ask for 7 to 9 stitches per inch and reinforcement at the handle anchors. If the carrier includes a side label, patch, or divider seam, that extra component should not distort the front panel or pull the logo off-center. Natural canvas can vary in shade between lots, so if the order is visual-heavy, ask the factory to hold the same fabric lot for the full run or to flag any planned lot change before bulk starts.
- Use 12 oz canvas as a practical baseline and 14 oz when structure matters more than lowest cost.
- Ask for both oz and GSM so you can compare apples to apples across regions.
- Set load-bearing seams at 7 to 9 stitches per inch and require reinforcement at stress points.
Pick The Print Method And Set Durability Targets
Screen print remains the cleanest choice for simple logos, bold type, and repeatable production when the run is large enough to amortize setup. It gives a stable, durable mark on canvas if curing and ink load are controlled. Transfer methods such as heat transfer or DTF can be better for short runs, multicolor graphics, or launch orders where artwork is still evolving. The tradeoff is feel and edge behavior. On rugged canvas, a transfer can reveal lift, edge wear, or a surface look that feels less integrated than a well-printed screen graphic.
This is where many buyer checklists stay too vague. A serious sourcing spec should ask for color match against the approved sample under neutral light, not only under factory lights. It should also name a test requirement. For market-facing bags, a useful starting point is dry and wet crocking at grade 4 or better and abrasion performance of at least 10,000 cycles by Martindale or an equivalent lab method the supplier can document. If the carrier will be washed, require one cold wash and air-dry test on the sample before bulk release.
- Use screen print for simple repeat logos and transfer methods for short runs or detailed art.
- Set a color target against the approved sample and record the acceptance standard in writing.
- Ask for crocking and abrasion evidence before you approve bulk production.
Compare Supplier Routes With Procurement Criteria
Supplier route matters because it changes what the buyer can actually control. A direct factory with in-house print is usually the strongest route when you need one accountable owner for the pattern, the print, and the pack. It is easier to prove consistency when the same team controls the fabric, sewing line, and decoration method. A trading company can still be useful for bundle buying, but the buyer should not confuse commercial convenience with process control. If the trader cannot name the real factory, the real print method, and the person who approves the sample, then the quote is thin on accountability.
Domestic decoration on imported blanks is often the right answer for smaller orders or rush launches, but the buyer inherits more of the risk. A blank that varies in seam allowance or panel size can move the print and alter the final presentation. Regional converters can be good when transit time is the constraint and the buyer needs shorter feedback loops, but they only work when they can hold the same fabric lot and repeat the same carton pack. For farmers market vendors, those details matter because the product is both packaging and a visible retail item.
- Direct factory sourcing is strongest when you need a single owner for pattern, print, and pack.
- Trading companies are useful only if they can show the actual factory and the proof path.
- Local decoration on blanks works best when the buyer can inspect the blank quality before print release.
Write An RFQ That Forces Apples-To-Apples Quotes
A useful RFQ does more than ask for a unit price. It breaks the product into the pieces that drive cost and quality: canvas weight, print setup, unit print charge, sewing construction, label or patch, packaging, carton terms, and freight basis. If all of those are merged into one line, you cannot compare suppliers or see whether the low price is coming from cheaper fabric, weaker stitching, thinner packing, or an optimistic assumption about defect rate. The buyer should also ask for the re-order price after tooling is already in place, because the second run is often the number that matters most for a seasonal or recurring market program.
For farmers market vendors, the RFQ should also reflect the sales calendar. If the first shipment must arrive before a harvest weekend or spring market launch, lead time has to be split into artwork approval, sample production, bulk production, carton packing, and freight. That is the only way to see where the schedule can fail. A factory promising a short sewing time may still miss the launch if sample approval sits in the buyer's inbox for a week. The RFQ should make those dependencies visible.
- Ask for separate pricing lines for blank carrier, print setup, unit print charge, packaging, and freight basis.
- Request both first-run and re-order pricing so the long-term economics are visible.
- Break lead time into artwork, sample, bulk, pack, and transit stages.
Proofing Workflow: Digital Proof, Strike-Off, PP Sample, Golden Sample
A digital proof is useful, but it is not a production approval. It cannot show how the ink sits on textured canvas, how the seam line cuts through the print zone, or how much the base fabric shade changes the visual result. The right approval chain starts with the layout proof, then moves to a strike-off or physical sample made on the same canvas weight and print method that will be used in bulk. If the supplier prints a sample on a different fabric or with a different cure, that sample is not a reliable reference for production.
Once the physical sample is approved, the buyer should treat it as the golden sample and retain it with the spec pack. A production sample should be pulled from the first bulk lot and compared against that golden sample before the shipment is released. If the factory changes fabric lot, ink supplier, screen, transfer film, or sewing pattern after approval, the buyer should require a new sign-off. That is not bureaucracy. It is the point where sample quality stays connected to the actual goods that will ship.
- Approve layout first, then approve a physical sample on the final fabric and print method.
- Keep a golden sample and a documented sample-retention record with the PO.
- Treat any change in fabric, print material, or sewing pattern as a new approval cycle.
QC Checklist: Tolerances, Inspection, And Defect Limits
Quality control should be specific enough that a third party could inspect the goods without guessing. For print placement, the buyer should define the reference points and the acceptance box. For color, the buyer should say whether the sample is being matched under daylight, D65, or another neutral light standard. For seams, the acceptance criteria should distinguish cosmetic flaws from structural ones. A small loose thread on an inside seam is not the same as a handle stitch that could fail in use. If the supplier uses AQL, that is fine, but it should sit on top of product-specific limits instead of replacing them.
A practical QC plan for custom canvas wine carriers should also include carton-level checks. The print face should not rub against another bag in transit, handles should not crease the logo, and carton compression should not crush the bottom seam. If a bag includes a woven label, side tag, or badge, that element should be checked for straightness and stitch security as its own line item. Buyers often focus on the front logo and then discover the secondary details are what make the product feel off in a retail setting.
- Set print placement tolerance in millimeters and identify the exact reference points used to measure it.
- Use a neutral light standard for color approval and keep the approved sample on hand.
- Separate cosmetic defects from structural defects so rejection rules are clear before bulk starts.
Audit Files, Compliance, And Third-Party Inspection
Procurement depth is not only about the sample. Buyers should ask for an audit file that can survive an internal review. At minimum, that file should include the factory profile, business registration or equivalent, material spec sheet, ink safety data sheet, and any relevant test reports the supplier can provide. If the product is being sold into a market with specific chemical or labeling rules, the buyer should review those requirements before ordering. For example, a U.S. buyer may need to think about California Proposition 65 exposure depending on inks, coatings, or decorations, while other markets may care more about REACH-related restrictions or low-heavy-metal ink controls.
A third-party inspection workflow helps when the order is large, the supplier is new, or the launch cannot tolerate a miss. A sensible sequence is pre-production sample approval, inline check at roughly the first 20 to 30 percent of bulk, and final random inspection before shipment. The inspector should compare the goods to the golden sample and the written spec, not to memory. The buyer should also retain one sample from the accepted bulk lot and one from the pre-production stage. That gives you a direct reference if the reorder drifts later.
- Request a factory profile, business registration, material spec sheet, ink SDS, and any relevant test report.
- Check compliance obligations early instead of after production starts.
- Use a third-party inspection plan with a pre-production sample, an inline checkpoint, and a final random inspection.
Packing And Reorder Rules For Farmers Market Programs
Packing is part of the product because the carrier often reaches the buyer in retail-ready condition. If the print face rubs against another bag, the logo can scuff before the carton even leaves the warehouse. The pack spec should say whether the carrier is folded with tissue, sleeved in thin poly, or packed loose inside the carton. It should also say which side faces out, how the handle is folded, and whether the print panel needs a separator to stop abrasion. For farmers market vendors, this matters because the customer usually opens the package immediately or sees it within minutes of purchase.
Reorder control is the last piece that keeps the program stable. Buyers should keep a reorder pack that includes the approved sample, the dimension sheet, print file, packaging spec, carton label format, and a note on which fabric lot was used on the first run. If the second order needs a different canvas lot or a revised print screen, that change should be visible in the record before the PO is placed. That is the simplest way to avoid the common problem where the first batch looks right and the second batch slowly drifts.
- Specify tissue, sleeve, or poly protection if the print face is vulnerable to rub marks.
- Set master carton count, carton dimensions, and a gross weight target that is practical for handling.
- Keep a reorder pack with the golden sample, spec sheet, artwork file, and pack format.
Specification comparison for buyers
| Supplier route | Best fit | What to verify before awarding | Decision signal |
|---|---|---|---|
| Direct factory with in-house print | Repeat orders, simple logos, and buyers who want one accountable owner for sewing, print, and pack | Ask for machine photos, a same-line sample, fabric lot control, and proof that printing is not subcontracted | Best when the factory can show the exact canvas weight, print method, and packing method used on your sample |
| Domestic decorator on imported blanks | Rush programs, small launch quantities, and market timing that cannot absorb long ocean freight | Check blank panel dimensions, rub resistance after decoration, and whether the decorator controls final placement on the real blank | Works when landed cost is acceptable and the buyer can inspect incoming blanks before print release |
| Trading company managing several workshops | Multi-item programs that include labels, inserts, and packaging across more than one source | Request the actual factory name, audit documents, sample approval owner, and escalation path if bulk misses spec | Useful only when the trader can prove who owns the process, not just who sends the invoice |
| Regional converter near destination market | Shorter lead times, flexible carton labels, and moderate volume runs | Verify that they can hold the same fabric lot and reproduce the same carton pack on reorders | Strong when transit risk matters more than the absolute lowest unit price |
| Premium small-batch artisan supplier | Gift programs, tasting-room retail, and boutique winery assortments where presentation matters | Ask for output capacity, stitch consistency, replacement policy, and pack photos from prior runs | Best if the buyer is paying for finish quality and can accept a higher unit cost |
| Blank-only supplier with local decoration | Very small runs or buyers with their own print QA and local finishing capacity | Require measured panel size, seam allowance, lot consistency, and protection of print faces during transit | Only economical when decoration control is already internal and the blank supply is stable |
Buyer checklist before sampling
- State the use case first: one bottle, two bottles, or a gift set with an insert, then size the carrier around the bottle diameter and neck height.
- Lock finished dimensions before artwork. A practical RFQ should specify finished size, not just cut size, with a tolerance of plus or minus 5 mm on height, width, and depth.
- If the carrier includes a divider or bottle sleeve, set divider spacing and internal clearance with a plus or minus 3 mm tolerance so bottles do not bind after sewing.
- Specify canvas weight in both oz and GSM. For standard market carriers, 12 oz is a workable baseline; for a more structured premium feel, move to 14 oz.
- Ask whether the canvas is natural, bleached, washed, calendared, or pre-shrunk, because finish changes print appearance and packed size.
- Set structural seam expectations in the RFQ: 7 to 9 stitches per inch on load-bearing seams, reinforced bartacks at handle anchors, and no loose thread tails longer than 3 mm on visible edges.
- Choose the print method by artwork and volume, not by lowest quote. Use screen print for simple repeat logos, transfer for short runs or fine detail, and embroidery only for labels or accent pieces.
- Name the color target in the proof package. For spot logos, ask for Pantone matching against the approved sample and a color variance target of delta E 2.5 or better on the first run, with a written note if natural canvas shifts the visual result.
- Define print placement with measurable references: center line, top edge, seam line, and bottom edge. A common starting point is plus or minus 3 mm on the primary logo placement.
- Ask for crocking and abrasion evidence if the carrier will be handled at markets. Request dry and wet crocking of grade 4 or better and a fabric abrasion result of at least 10,000 Martindale cycles or an equivalent supplier test.
Factory quote questions to send
- What finished dimensions, divider spacing, and handle drop are you quoting, and what tolerances will you hold in bulk?
- What exact canvas weight, weave, and finish are included, and can you keep the same fabric lot through the whole production run?
- Which print method will you use, how many colors are included, and what is the setup charge per screen, plate, or transfer?
- How will you control color matching on natural canvas, and what is your acceptance standard for delta E or visual match against the approved sample?
- What are the MOQ requirements for the blank carrier, the printed order, and any woven label, patch, or insert component?
- Is your quote EXW, FOB, or delivered, and what packaging and carton labeling are included in the unit price?
- What stitch density and reinforcement do you use on load-bearing seams and handle anchors, and can you show a similar finished sample?
- Can you share your standard inspection criteria, your AQL level if applicable, and any product-specific rejection rules for print placement or seam distortion?
- What tests can you provide for rub, wash, or abrasion performance, and who pays if a sample needs to be remade after test failure?
- Do you own the sewing and print line, or is any part of the work subcontracted, and how would you notify us if the production source changes?
Quality-control points to confirm
- Finished dimensions should stay within plus or minus 5 mm of the approved sample unless the bag is intentionally oversized for shrinkage or packing.
- The front logo should stay within the defined placement box and not drift more than 3 mm from the approved center line or seam reference.
- Spot color should match the approved Pantone target under daylight or neutral light, not just under warm factory lighting.
- On natural canvas, background shade variation is acceptable only if the logo remains legible and the contrast still matches the signed-off sample.
- No visible bleeding, smudging, pinholes, ghosting, or dry spots should appear in the artwork area on the front panel.
- Stitching at handles, side seams, and bottom panels should be even, with no skipped stitches, seam puckering, or stress distortion around the print zone.
- Reinforcement at handle anchors should be symmetrical, secure, and free of loose thread ends longer than 3 mm on visible surfaces.
- Woven labels, side tags, or badges should be straight, fully stitched, and positioned within the agreed location tolerance.
- Printed faces should pass the agreed rub test with no ink transfer beyond the allowed crocking grade and no edge lift on transfer graphics.
- If the carrier is washable, the pre-production sample should survive one cold wash and air dry with no cracking, peeling, or visible dye migration.