Why decoration method matters more than the tote itself
For trade shows, a canvas tote is not only a giveaway. It is a carrying tool, a brand surface, and often the first item a visitor touches after registration. The choice of decoration method changes how the bag looks on the table, how it photographs in the booth, how it folds into freight, and whether it still looks presentable after being stuffed with brochures, samples, and brochures again. In procurement terms, the print method is part of the product specification, not a cosmetic add-on.
Buyers often run into trouble when they send a vague request such as “custom printed canvas totes” and ask suppliers to quote the cheapest possible decoration route. That produces non-comparable offers. One supplier may quote a one-color screen print on 10 oz canvas, another may quote a transfer on 8 oz canvas, and a third may include a sewn patch plus individual packing. The prices may look close, but the event performance, lead time, and defect risk are not equivalent.
If you are sourcing custom canvas tote bags for trade shows, start from the use case. Is the tote a registration handout, a sponsor bag, a VIP gift, or a brand merch piece intended to be kept? The answer changes the acceptable print feel, artwork complexity, and price ceiling. That is why a good buyer comparison has to connect artwork, fabric, and production controls before it talks about decoration style.
Start with the base bag spec before comparing print quotes
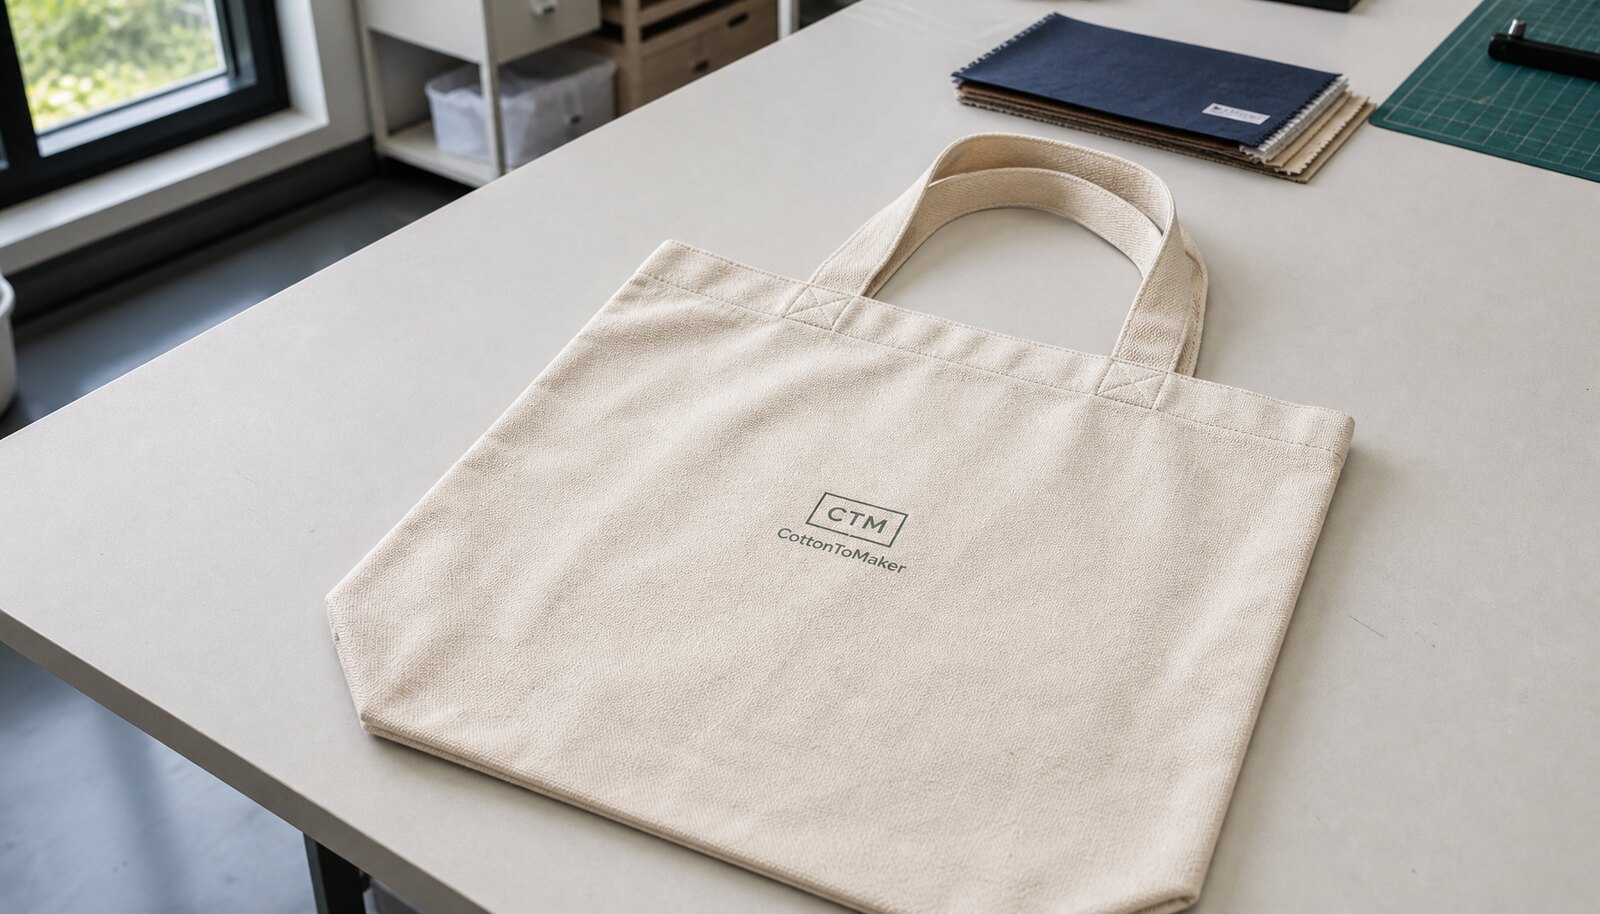
Decoration can only be judged fairly when the bag itself is defined. A light 6 oz canvas tote may be acceptable for flat leaflets, but it may also show strike-through, crease marks, or handle distortion if the decoration is dense. Most trade show buyers begin with 8 oz to 10 oz canvas because it gives enough structure for a clean logo without pushing the tote into a heavy premium price band. For VIP events or programs that may be reused after the show, 12 oz to 14 oz canvas often creates a more structured, retail-like hand feel.
The RFQ should specify fabric weight in grams per square meter or ounces, finished size, gusset depth, handle length, and whether the bag is sewn with a single or double bottom seam. Ask the supplier to confirm whether the weight refers to raw cloth or finished bag construction. Those are not the same number, and they can affect both price and durability. If the supplier cannot explain that difference clearly, the quote is not yet procurement-ready.
Construction details matter because the print method interacts with sewing. Heavy ink coverage on a loosely sewn panel can cause minor distortion around the logo. Dense embroidery can pull on a light canvas panel. Transfers can fail at a crease if the panel is folded by the packer. So the correct comparison is not just decoration method versus decoration method; it is decoration method plus fabric plus construction quality versus your event requirement.
Useful specification items to lock before you request decoration pricing are the bag size after sewing, the handle attachment style, whether a gusset is required, whether the bag must stand open for packing, and whether the tote should be foldable or structured. A quote that omits these details usually leaves room for change orders later.
Print method comparison matrix: cost, MOQ, lead time, and event fit
The comparison below is designed for procurement use, not for marketing copy. The right method depends on quantity, artwork, and event format. A method that is perfect for a 500-piece roadshow may be inefficient for a 5,000-piece exhibition program. Likewise, a premium finish may look attractive but still be the wrong choice if the tote is being handed out to high-volume visitors at registration.
Use the matrix to compare not only appearance, but commercial impact. Ask each supplier to quote the same artwork, same bag construction, same packing method, and same delivery term so the numbers can be compared without hidden variables. If the supplier recommends a different decoration route, request that as a second line item rather than letting them quietly substitute it into the main price.
- Screen print is usually the strongest option for simple logos, repeat orders, and large event quantities where unit cost matters most.
- Transfer methods are better when the artwork has more colors, smaller runs, or last-minute design changes.
- Digital print can help with complex artwork on receptive canvas, but it needs careful control of pretreatment and color stability.
- Embroidery and woven labels are better for premium programs or bags that will be reused after the show.
- The best method is the one that fits the event, artwork, and shipment timeline, not only the lowest per-piece number.
How each decoration method performs on canvas
Screen print is the traditional workhorse for trade show totes. It works best with 1 to 3 spot colors, large logo shapes, and clean line art. On canvas, it usually gives a crisp, familiar look at a competitive price. The main buyer controls are mesh selection, registration, curing, and ink coverage. If the design includes small text, thin outlines, or halftones, ask the factory to confirm the minimum line width they can hold on the chosen fabric. A print that looks acceptable on paper may close up on textured canvas.
DTF or heat transfer is useful when the design changes from event to event or when the art includes multiple colors, gradients, or photographic detail. The tradeoff is feel and flex performance. Transfers can sit thicker on the fabric than screen print, and the edges can show wear if the tote is folded repeatedly along the print line. For this reason, it is wise to ask for a folded-and-flexed sample, not just a flat visual proof.
Digital direct print can work for high-detail graphics and smaller quantities, but it is more sensitive to canvas absorbency and finishing. Buyers should ask whether the factory pre-treats the bag, how they cure the ink, and how they control color on natural or dyed canvas. Because canvas weave can pull ink into the fibers unevenly, the same file may look different across fabric lots if the process is not controlled.
Embroidery gives the logo a premium, tactile finish and is often selected when the tote is meant to feel like merchandise rather than a disposable event handout. The hidden risk is stitch density. Dense embroidery can pucker lighter canvas, distort a panel edge, or make the tote feel stiff. Buyers should ask for a stitch count estimate and a sample on the exact bag weight to judge whether the logo remains flat and legible.
Woven labels and sewn patches are not a replacement for large printed graphics, but they can be a smart answer when the brand wants durable, low-profile identification. They also work well when the tote needs a cleaner premium appearance without full-panel decoration. The buyer should confirm placement tolerance, stitch path, and whether the label will interfere with the top hem, handle reinforcement, or folding line.
Lead-time and MOQ: where the real schedule risk sits
For tote orders, lead time is rarely determined by sewing alone. It is usually driven by artwork preparation, decoration setup, sampling, curing, and final packing. Screen print needs screen preparation and registration checks. Transfer methods need file preparation and pressing steps. Embroidery needs digitizing and stitch testing. Digital print may be faster for artwork changes, but it can still slow down if fabric pretreatment or drying capacity is limited. The quote should show each of those steps clearly enough that a procurement team can see where the critical path sits.
MOQ behaves the same way. It is not just the factory’s preferred batch size; it reflects the cost of setup labor, machine changeover, and decoration complexity. A simple one-color screen print may have a lower MOQ and a lower cost curve at scale. A multicolor transfer or dense embroidery pattern may be available at lower quantities, but the per-piece cost can stay high because setup is spread over fewer units. That is why the buyer should ask for pricing at multiple volumes, not only one threshold.
A practical comparison is to ask for 500, 1,000, 3,000, and 5,000 pieces, or whatever order levels fit your program. Then ask the supplier to show setup charges separately from unit price. A quote that only gives one all-in number hides the point at which the line becomes economical. It also makes it hard to evaluate whether a slightly higher MOQ could reduce landed cost enough to justify the larger order.
If your event date is fixed, do not let a fast price quote distract you from the full timeline. Ask for sample lead time, production lead time after sample approval, and packing lead time separately. The safest schedule is built around the longest step, not the fastest one.
What to request in a quotation so quotes are actually comparable
A procurement-grade quote should let you compare factories on the same basis. That means the supplier needs to show the exact bag spec, print method, artwork area, packing method, and commercial terms. If the quote says “all included” but does not separate decoration, packing, and label costs, it will be hard to compare landed cost later. Even if the price is competitive, you still need to know what you are buying and what might change the number.
For decoration, ask the supplier to identify the method, the maximum color count or stitch complexity included in the quote, the exact print area in millimeters or inches, and whether the decoration is done in-house. In-house decoration usually gives better control over sample consistency, QC visibility, and schedule coordination. Outsourced decoration can still be acceptable, but then the supplier should name the subcontractor, explain who owns approval, and show how they control quality between the factory and the decoration vendor.
Commercially, the quote should include unit price at multiple quantities, sample cost, sample lead time, production lead time, carton dimensions, gross weight, and the packing count per carton or polybag. Ask for the freight-relevant details before you book transport; otherwise, a low ex-works price can become a higher landed cost once carton volume and weight are added. If the supplier is unable to provide carton data early, they may not yet have a locked production plan.
One useful buyer habit is to send a quote template to every supplier and require line-by-line completion. That reduces the chance that one factory quietly includes a service the others do not, such as artwork adjustment, inner packaging, or carton labeling. It also helps the sourcing team spot whether a supplier is quoting a real production route or just an estimate based on a similar bag.
Sample approval: what to inspect on the first physical sample
A tote sample should be inspected as a working item, not just as a visual sample. Start by checking the logo location against the finished sewn bag, not just the flat panel artwork. When canvas is sewn, handles and seams can pull the bag slightly off center. That matters if the logo must sit above the fold line, align with a seam, or stay visible when the tote is full. Ask the factory to confirm placement coordinates against the finished bag size.
Next, inspect the decoration quality under normal handling. Fold the tote along the way a show attendee might fold it after receiving it. Open it again and look for cracking, edge lift, or puckering. If the bag will be given with brochures or product inserts, load it with a realistic event weight and check whether the handles twist, the side gusset distorts, or the print becomes visually compressed. A sample that looks fine flat may fail when used in the actual trade show flow.
The sample should also reveal craftsmanship issues: loose threads, uneven seam allowance, skipped stitches, and reinforcement quality at the handle join. On embroidery, look for puckering and stitch density around the logo. On transfers, check whether the print has a glossy patch, edge ridge, or press mark. On screen print, check whether the ink sits evenly on the weave or leaves pinholes in the filled areas. These details matter because a trade show bag is handled in public and often photographed.
If the order is important, ask for at least one physical approval sample made from the same canvas weight and the same decoration line that will be used in production. Photos are useful for quick review, but they do not show hand-feel, flex behavior, or subtle print distortion.
Quality control thresholds and acceptance criteria procurement teams can use
A commercial tote order needs measurable acceptance criteria. Without them, QC becomes subjective and disputes are harder to resolve. Before production starts, define what counts as acceptable on fabric, printing, stitching, and packing. The factory does not need a laboratory-grade standard for every job, but it does need a written target that can be inspected consistently.
For print registration, ask the supplier to state a tolerance in millimeters for logo alignment and color layer fit. For simple screen print on canvas, a practical buyer requirement is to reject obvious misalignment visible at normal viewing distance; if you need a numeric rule, ask the factory to commit to a max offset range by design size. For transfers, define whether edge lift, cracking, or banding is rejectable at first inspection. For embroidery, require the factory to disclose stitch count and backing method so the buyer can judge whether puckering is likely on the chosen canvas weight.
For seam quality, define the minimum finishing level in plain language: no open seams, no skipped stitches, no broken thread tails, and no visible needle damage near the logo or handle joint. If you want a more detailed threshold, ask the supplier to provide a sample inspection sheet that includes seam checks, handle symmetry, and panel dimensions. A useful procurement check is to compare the finished bag width, height, and gusset against the approved specification after sewing and pressing, not before.
Packing acceptance should also be defined. State the allowed defect limit for wrong count per carton, scuffed print surface, wet bags, damaged cartons, and mismatched labels. If the totes are going directly to a show, pack-out errors matter as much as print defects because late repacking can cause labor and freight cost. The RFQ should therefore include whether the bags must be folded flat, separated by tissue, polybagged individually, or grouped by event SKU.
How to evaluate factory capability by print method, not by general claims
A supplier may be perfectly good at sewing canvas totes and still be weak at decoration control. Buyers should evaluate print-method capability separately from general bag-making capability. The first question is whether decoration is in-house. In-house screen print, embroidery, or transfer production usually gives better control over schedule, sample matching, and defect accountability because the same factory owns the entire chain. If decoration is outsourced, ask who approves the sub-supplier, who does final inspection, and what happens if the print arrives from the subcontractor out of spec.
The second question is whether the factory can show the right evidence. Useful evidence includes photos of the print room, machine list, sample strike-offs, cure method notes, and an internal QC checklist. For embroidery, ask whether they digitize in-house and whether they can provide stitch count estimates before sampling. For digital print, ask how they control pretreatment, drying, and shade variation. For screen print, ask how they handle color mixing, screen separation, and registration checks for multi-color art. These are the operational questions that reveal whether the supplier actually manages the method or only buys it from elsewhere.
You should also ask how the factory deals with artwork complexity. If your logo has thin lines, gradients, or small text, ask for a comment on the minimum line width or minimum text height they can hold on the selected canvas. If your artwork is large and bold, ask whether the supplier recommends a one-pass print or a double-pass ink build to get opacity on natural canvas. The factory’s answer should be specific, not vague. A serious supplier can explain why a certain method is appropriate and what it will do to cost, lead time, and appearance.
Finally, ask for a sample origin statement: was the approval sample made on the same machine, same canvas, and same operator line intended for production? If not, the sample may be only a lookalike. That is not enough for a tight event schedule.
Packing, freight, and event distribution planning
Packaging is easy to overlook because the tote itself is the headline item. But trade show bags travel through multiple handoffs: factory, freight forwarder, warehouse, event storage, and show floor. If the packing method is wrong, the tote can arrive with creases, scuffs, or print damage. If the packing is too loose, carton count and freight volume increase. Buyers need a packing plan that protects the decoration and matches the distribution path.
The quote should state whether the bags are bulk packed, tissue-wrapped, individually polybagged, or packed by event SKU. Bulk packing is usually cost-efficient, but it can mark transfers or leave fold lines in dense prints. Individual polybags can protect the surface better, but they add labor, material, and waste. For premium embroidery or woven label programs, a bit of extra protection may be justified if the bags are going straight to VIP distribution. For simple registration totes, a more economical packing format may be enough if the print is fully cured and the cartons are stable.
Ask for carton dimensions and gross weight before you compare freight. That data affects warehouse receiving, palletization, and shipping mode. If the supplier can provide cartons per pallet or pallet dimensions, that is even better. For orders with multiple tote variants, request carton markings by event SKU so the warehouse can sort quickly. Mislabeling at this stage can create more problems than the bag itself.
If the event date is close, do not let the factory assume a packing method. Put it in the PO. A tote designed for flat bulk pack is not automatically ready for individual polybagging, and a print that feels fine after pressing may scuff if stacked too soon. Packing needs to be part of the production method, not an afterthought.
Specification comparison for buyers
| Print method | Typical cost range per bag | Typical MOQ range | Lead-time impact | Artwork limits |
|---|---|---|---|---|
| Screen print | Low to mid; usually the lowest-cost option for simple art at scale | 500–5,000+ depending on color count and factory setup | Lowest setup burden if artwork is final and screens are straightforward; add time if multiple colors require registration checks | Best for 1–3 spot colors, bold logos, large text, and flat graphics; fine lines and halftones need confirmation |
| DTF / heat transfer | Mid; can be competitive for short runs but often higher per piece than screen print | 100–1,000+; some suppliers go lower for simple transfer jobs | Moderate; artwork prep is faster than screens but film/transfer production and pressing add steps | Best for multicolor logos, gradients, small text, and versioned event graphics; opacity on natural canvas must be checked |
| Digital direct print | Mid to high; cost can be efficient for small, complex runs but not always for large simple logos | 50–1,000+ depending on equipment and fabric prep | Moderate; quick for artwork changes but may need pretreatment and careful curing on canvas | Best for complex, full-color artwork on light, receptive canvas; opacity, saturation, and edge crispness depend on fabric absorbency |
| Embroidery | High; usually premium pricing due to stitch time and digitizing | 100–1,000+; small logos possible but dense designs raise cost quickly | Moderate to high; digitizing, stitch testing, and sampling can extend the approval cycle | Best for simple logos and limited text; very fine details may fill in or distort |
| Woven label / sewn patch with small logo print | Mid; label cost can be efficient but sewing and placement add labor | 300–3,000+ depending on label sourcing and sewing line | Moderate; label procurement and sewing add an extra step but usually less artwork complexity than full decoration | Best for restrained branding, heritage looks, and durable identity marks; not ideal if the bag needs a large printed graphic |
| Material | 8-12 oz cotton canvas, 120-220 gsm cotton, recycled cotton, or blended fabric selected by use case and target price | Before price comparison | Different cloth weights, backing, or certification claims make quotes hard to compare | |
| Construction | bag size, gusset, handle drop, seam allowance, stitch density, reinforcement patch, and loading expectation | Before sampling | Weak stress points create returns and failed inspections | |
| Decoration | screen print, heat transfer, embroidery, woven label, or hangtag matched to fabric texture and brand durability needs | Before artwork approval | The wrong method can crack, bleed, pucker, or fail on the chosen fabric |
Buyer checklist before sampling
- Confirm finished tote size, fabric weight in GSM or oz, gusset depth, handle length, and whether the bag must stand open for packing at the show.
- State the artwork type in production language: solid logo, multicolor logo, small text, halftone, gradient, or photo-style image.
- Define the print area in millimeters or inches and keep the logo away from side seams, top hem, and handle stitch lines.
- Ask for the same quote basis from every supplier: bag spec, print method, packing method, carton count, and delivery term.
- Request a physical pre-production sample or strike-off on the actual canvas weight, not just a digital proof.
- Specify whether the bags must be folded flat, tissue-wrapped, polybagged individually, or packed by event SKU.
- Request carton dimensions, gross weight, and cartons per pallet if relevant to warehouse receiving or import planning.
- Ask the factory to state the curing or fixation method, the print tolerance standard, and who owns final QC if decoration is outsourced.
- Require a written note on whether the logo will be printed in-house, embroidered in-house, or subcontracted, and whether the approval sample came from the same line.
- Include acceptable defect limits in the RFQ: loose threads, misprint count, crooked handle rate, and pack-out errors.
Factory quote questions to send
- What is the exact canvas construction, fabric weight, and finished bag size after sewing shrinkage?
- Which print method are you quoting, and what artwork complexity is included in that price?
- Is the decoration done in-house or outsourced, and where is the approval sample produced?
- What is the MOQ by print method, and does changing ink color, bag color, or handle length change the MOQ?
- What curing, fixation, or pressing process is used, and how do you verify it before packing?
- Please quote unit price at 500, 1,000, 3,000, and 5,000 pieces, and separate setup charges from piece price.
- What is the maximum number of colors, strokes, or stitch density you recommend for this canvas weight?
- How are the bags packed per carton, and what are the carton dimensions, gross weight, and carton count?
- What is the sample cost, sample lead time, and production lead time for the selected method?
- What QC standard do you use for print registration, shade variation, loose threads, seam strength, and pack-out accuracy?
Quality-control points to confirm
- Fabric weight should match the approved spec within a defined manufacturing tolerance agreed in advance, and the hand feel should remain consistent across the run.
- Print registration should stay within a practical tolerance of the approved artwork boundary; ask the factory to state the tolerance in millimeters for each method.
- Color should be checked against an agreed reference method such as Pantone target, approved swatch, or lab dip note; do not rely on a generic 'close enough' statement.
- On screen print, line edges should stay crisp enough that small text remains legible at normal viewing distance and no double image appears at the logo edge.
- On transfers, the decoration should be flex-tested at the normal fold line and should not show visible edge lift, cracking, or peeling after manual folding.
- On embroidery, stitch density should not distort the panel; require a sample on the actual canvas weight to check puckering near the top hem and side seams.
- Handle stitching should be even and secure, with bartacks or reinforcement points visible and aligned; check symmetry on both handles.
- Seams should be straight, with no skipped stitches, broken thread, open seam ends, or obvious needle damage around the gusset and bottom panel.
- Pack-out should match the agreed count per carton or polybag, with acceptable defect limits defined for mispacks, scuffs, stains, and wrong labeling before shipment.
- Carton markings should match the PO and event SKU, and a random carton check should confirm inner count, packing style, and protection against print abrasion.