Start With the Box Job, Not the Tote Style
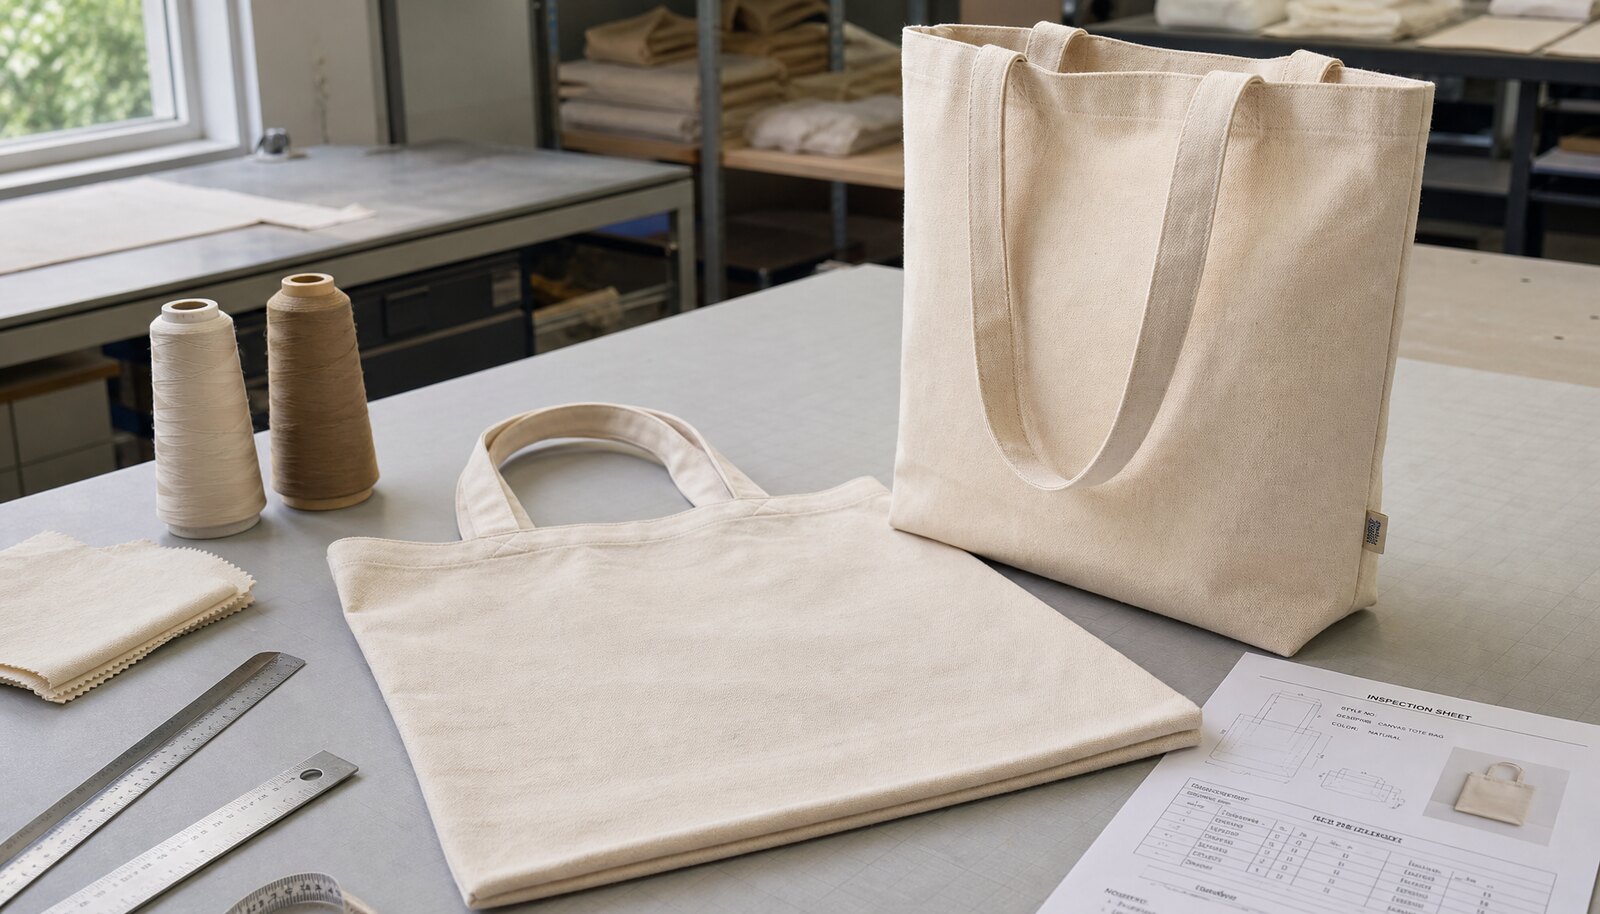
For custom canvas tote bags for subscription boxes, the buying decision starts with packing, not fashion. The tote has to fit the carton, survive folding, and arrive in a condition that does not slow the fulfillment line. A tote that looks strong on a flat sample can still fail if it adds too much bulk, covers other inserts, or creates a fold line through the logo.
Define the tote's role before you ask for quotes. If it is only a carrier inside the box, optimize for fit, consistency, and low labor. If it is part of the retail experience, add requirements for hand feel, print clarity, and repeat-use durability. The spec should follow the job, not a generic tote template.
- State whether the tote is a loose insert, a premium add-on, or a reusable item expected to stay in circulation.
- Document the internal carton size before you finalize body width, gusset depth, and handle drop.
- Specify the fold orientation so the logo does not land on a crease line.
- Decide whether the bag is meant to look soft and natural or structured and retail-ready after packing.
Write the Tote Spec Before You Price It
A quote is only useful when every supplier is pricing the same tote. That means finished dimensions, seam allowance, fabric weight, finish, handle construction, print placement, and packed form all need to be written before the first RFQ goes out. If any of those items are left open, suppliers will fill in the gaps with their own assumptions, which makes the price look comparable when it is not.
Fabric description needs more than the word canvas. State the weight in gsm or oz, the finish, and any shrinkage assumption. If the tote must fit a fixed carton or a fixed packing line, that dimensional tolerance belongs in the tech pack, not in a later email thread. The same is true for handles: length, width, drop, and attachment style should all be part of the bid package.
- Use a finished-size drawing with critical dimensions marked clearly.
- Write the accepted fabric finish: raw, washed, bleached, or dyed.
- Specify the color reference as a physical master or a named standard.
- Include both flat size and folded size if the tote must be packed in a fixed box.
Pick the Right Supplier Route for the Risk Level
The best supplier route depends on how much control the program needs. A direct cut-and-sew factory with in-house printing is usually the cleanest route when the tote will repeat across subscription cycles and the buyer wants one party responsible for the result. That reduces handoff risk, but only if the factory actually owns the sewing line and the print process instead of outsourcing those steps silently.
A trading company can still be the right answer when the program includes more than one item, or when the buyer wants one commercial contact across several factories. The tradeoff is visibility. The more subcontractors there are, the more important it becomes to ask who approves the sample, who buys the fabric, and who pays for rework if a batch misses the spec. For a pilot or a very short run, a local decorator using imported blanks may be efficient, but only if the blank tote already matches the required fit and reinforcement.
- Ask for the production site name, not just the sales office name.
- Map each step: fabric, cutting, sewing, print, packing, and inspection.
- Use the same spec sheet across all bids so route differences are the only variable.
- Treat sample accuracy and communication speed as commercial inputs, not soft extras.
Build a Sample Chain That Proves Fit, Not Just Artwork
A useful sample chain should eliminate surprises. Start with a blank sample when the tote has a custom size, gusset, or handle length. Test that sample in the actual box, because a tote that fits flat on a table can still fail once it is folded and packed with other inserts. Then move to a pre-production sample that uses the actual fabric lot, print method, reinforcement, and folding method that will go into the order.
Do not rely on a digital proof for final approval. A mockup can confirm color intent and logo placement, but it will not show seam puckering, fold bulk, handle distortion, or where the print lands after compression. Keep one signed physical sample as the gold standard for repeat orders, and ask the supplier to photograph the first production run if the quantity is large enough that line drift matters.
- Approve a blank sample first if the tote has a nonstandard body size or handle drop.
- Test the folded sample in the actual subscription box, not only on a table.
- Keep one signed master sample for reorders and dispute resolution.
- Ask how long a remake takes if the first sample fails.
Turn QC Into Measurable Limits
Inspection only works when the defect language is measurable. The factory should know the accepted range for body dimensions, handle drop, stitch density, print position, and carton count before production starts. If those numbers are missing, the supplier will fall back to internal tolerances that may be wider than the buyer can accept. For a box program, a small dimensional drift can be enough to trigger a packing issue or a carton overfill.
Use a written defect taxonomy. Critical defects should stop the lot, major defects should fail the lot or trigger rework, and minor defects should only be accepted if the buyer explicitly allows them. If the tote is launch-critical, add a 100 percent carton count check and a visual pull from the top, middle, and bottom of the shipment even when the lot is being sampled under AQL.
- Write AQL levels into the PO or quality annex.
- Define critical, major, and minor defects with examples the factory can inspect against.
- Set a size tolerance for the one dimension that governs carton fit.
- Require an inspection report with carton numbers, defect counts, and photos.
Lock Sewing and Reinforcement Details
Tote quality usually comes down to construction details that are easy to overlook when the buyer is focused on the logo. Handle attachment is the first one. If the reinforcement is weak or uneven, the bag can feel cheap immediately and may fail at the stress point after a small amount of use. Write the attachment pattern into the spec and require symmetry left to right.
Seam allowance and stitch consistency matter just as much. A wandering seam allowance changes the finished width, can skew the bag body, and may push the tote out of the carton fit range. A buyer does not need to micromanage machine settings, but the factory does need a clear target. For most programs, a visible rule for stitch density, clean cornering, and no skipped stitches is more valuable than vague language about strong sewing.
- Specify the reinforcement pattern at each handle end.
- Use one approved seam allowance and require it on the production sheet.
- Check the first sewn pieces for top-edge puckering before mass production continues.
- Reject asymmetric handles if the tote hangs crooked in a hand test.
Approve Print Like a Production Feature
Print method affects more than appearance. It also changes stiffness, fold behavior, and the chance of customer complaints after shipment. Screen print is usually the safest option for simple, repeated logos because it scales well and holds up if the cure is correct. Heat transfer can work for shorter runs or changing designs, but it needs tighter review because edge lift, gloss variation, and crease sensitivity show up quickly on canvas.
Whatever method you use, approve it as a production feature rather than a digital image. The buyer should see a strike-off or print sample on the actual canvas, with the logo placed relative to seams and folds. If the tote is packed for subscription boxes, the print needs to survive compression. A design that looks fine when flat can still fail if the fold line cuts through the art or if the ink rubs during carton packout.
- Require a strike-off or production print sample on the approved canvas.
- Set placement tolerance in millimeters, not in vague terms like centered.
- Define registration tolerance if the artwork has more than one color.
- Confirm that the print still looks acceptable after folding and carton compression.
Pack for Warehouse Handling, Not Display
Packing is part of the product. A tote can pass sewing inspection and still create problems if the fold is wrong, the carton count is off, or the bag arrives with creased artwork. The buyer should define the fold direction, whether tissue is required, whether each unit needs an individual polybag, and how many pieces go into each master carton. The goal is not to maximize carton density at any cost. The goal is to make receiving simple and keep the tote usable when the box opens.
Carton labeling should be explicit. The receiving team needs the PO, style, color, carton count, and gross weight in a format that matches the buyer's warehouse process. If the shipment is loose or palletized, add a carton drop criterion and require the shipment to survive normal transit abuse without product damage. When the tote is part of a subscription pack, even a small packing inconsistency can slow the line and create avoidable labor.
- Lock the fold direction so the logo avoids the crease line.
- State whether the bag is packed loose, tissue-wrapped, or polybagged.
- Write the carton label format in advance.
- Require carton drop criteria before shipment leaves the factory.
Ask Quote Questions That Expose Hidden Cost
A good RFQ separates the tote into the cost drivers that matter: fabric, cutting, sewing, print setup, packing, inspection, and freight assumptions. That gives you a real comparison across suppliers with different business models. A low unit price can hide a large setup charge, expensive individual packing, or a remake policy that makes sample failure costly. The right question is not only what the bag costs. It is what has to be true for that price to hold.
MOQ and lead time deserve the same level of scrutiny. A factory may quote a sharp price at one volume and move sharply at a lower quantity or a different print method. Ask for price breaks by size, color count, and decoration method. For subscription programs, ask about repeat orders too, because the tote often comes back in another season and the second order needs to be priced against the same approved quality level.
- Request separate pricing for blank tote, print, folding, inner packing, and master carton packing.
- Ask whether the MOQ changes by artwork complexity or color count.
- Confirm sample fees and remake fees in writing.
- Ask for stage-by-stage lead time: sample, materials, production, inspection, and ship readiness.
Use a Final Acceptance Matrix Before You Release the PO
Before the order is released, treat the tote like a controlled spec, not a general accessory. If the size, fabric, print method, sample, and carton plan are all signed, the PO can be issued with less risk. If any one of those items is still open, the supplier will have room to interpret the job and the result may not match the subscription box plan. The final check should be quick and binary.
This is the point where a short pass/fail matrix helps the warehouse and procurement teams move fast. If a tote fails the sample, the quote, or the packing plan, it should not move to bulk. If it passes, the supplier should have no ambiguity about what needs to be duplicated in production. That is the simplest way to avoid repeated clarifications after the line has already started.
- Pass if the signed sample fits the actual box and the print lands outside the fold line.
- Pass if the supplier has named the inspection standard and defect classes.
- Pass if the handle reinforcement, stitch density, and pull test are written in the PO.
- Fail if any dimension, packing rule, or color target is still described only in emails.
- Fail if the factory cannot explain who owns sample approval and rework.
- Fail if the carton plan has not been tested with a filled sample shipment.
Specification comparison for buyers
| Decision point | Best when | Buyer tradeoff | Spec to write into RFQ |
|---|---|---|---|
| Direct cut-and-sew factory | You need one party to own fabric, sewing, print, and packing for repeated subscription drops | Best control and clearer accountability, but only if the factory truly performs the work in-house | Require the factory legal name, production site, and confirmation of which steps are subcontracted |
| Trading company with multiple subcontractors | The program combines totes with inserts, labels, or other mixed components | Easier sourcing coordination, but more handoffs and more chances for spec drift | Name the responsible factory for each step and require sample approval authority in writing |
| Local decorator using imported blanks | You need a fast pilot or a very short run with limited customization | Quick launch path, but the blank must already match the final size, handle, and fold plan | Ask for blank dimensions, seam reinforcement details, and a folded-fit test in the actual carton |
| 8 oz / about 270 gsm canvas | The tote is a light insert or low-cost premium add-on | Lower cost and easier packing, but less body and less perceived value | State whether the bag must hold shape after folding or can be a soft insert only |
| 10 oz / about 340 gsm canvas | You need the most balanced option for body, cost, and repeatability | Common middle ground, but it can still create bulk in a tight carton | Lock finished dimensions, folded size, and carton count before you ask for price |
| 12 oz canvas | The tote is part of the brand experience and needs a heavier hand feel | More premium feel, but higher weight, bulk, and sewing load | Ask for a pre-production folded sample to confirm box fit and freight impact |
| Screen print | The artwork is simple, repeated, and durability matters | Best value for solid logos and repeat runs, but cure and registration still need proof | Require a print strike-off and define acceptable misregistration and opacity |
| Heat transfer | The artwork changes often or the first order is a short run | Fast and flexible, but edge lift and hand feel can become complaints | Set pass/fail rules for edge lift, gloss mismatch, and crease performance after folding |
| Self-fabric handles with reinforcement | You want a clean, fabric-matched look | Good appearance, but poor reinforcement will show quickly in use | Specify handle attachment pattern, bartacks or box-X, and symmetry on both sides |
Buyer checklist before sampling
- Define the tote's job first: loose insert, gift-with-purchase, or reusable item the customer should keep after unboxing.
- Lock the finished flat size, gusset depth, handle length, and handle drop before asking for price.
- Specify fabric weight in gsm or oz and state whether you want raw, washed, bleached, or dyed canvas.
- Set the print method, artwork size, color count, and approved color reference or physical master sample.
- Write the folded size and carton fit rule so the tote does not crush the subscription contents or the artwork.
- Confirm whether each tote is packed loose, tissue-wrapped, or in an individual polybag.
- List defect thresholds in writing for stains, holes, odor, crooked handles, skipped stitches, and bad print coverage.
- Ask for the sample path in sequence: blank sample, pre-production sample, and first-run production photos if needed.
- Request lead time by stage, not only as one total number: sample, material purchase, production, inspection, and ship readiness.
- Ask for a quote that separates fabric, sewing, printing, packing, sampling, inspection, and freight assumptions.
Factory quote questions to send
- Are you the direct sewing factory, or are you quoting through a trading company or sourcing agent?
- What exact canvas weight, weave style, and shrinkage assumption are you pricing into the quote?
- Is printing done in-house? If not, who owns strike-off approval, registration control, and color approval?
- What are the MOQ, price break, and lead time changes by size, color count, and print method?
- What sample fees apply for blank samples, pre-production samples, courier charges, and remake samples if the first sample fails?
- What finished dimensions, handle length, handle drop, gusset depth, and seam allowance are you using?
- What stitch density are you building to on body seams and top hems, and is it documented on the production sheet?
- How is handle reinforcement built: bartack, box-X, double stitch, or another approved pattern?
- What pull test do you use for the handles, what force is the pass threshold, and how long is the hold time?
- What defects are treated as critical, major, and minor in your inspection report?
Quality-control points to confirm
- Use ISO 2859-1 or an equivalent named sampling plan. A common starting point is General Inspection Level II with AQL 2.5 for major defects, 4.0 for minor defects, and zero tolerance for critical defects unless the buyer signs off otherwise.
- Fabric weight should match the approved spec within the supplier's stated tolerance. If no tolerance is stated, require the factory to quote one explicitly before production starts.
- Finished body dimensions should stay within plus or minus 1 cm unless the tote must fit a tight carton, in which case use plus or minus 0.5 cm on the critical fit dimension.
- Handle length and handle drop should match the approved sample. For box-fit programs, write the allowed variance directly into the PO.
- Use a controlled stitch-density target and record it on the tech pack. A practical starting point is 8 to 10 stitches per inch on major seams and 10 to 12 stitches per inch on hems, or a documented stronger equivalent approved against the sample.
- Handle reinforcement should be symmetrical and fully secured. Specify one approved attachment pattern, such as bartacks or box-X, and require both handles to match.
- Perform a handle pull test with a calibrated force gauge. Use a minimum pass threshold in the PO, for example 15 kgf / 33 lbf for light promotional totes or 20 kgf / 44 lbf for heavier reuse-oriented programs, with no seam opening, thread burst, or handle separation after the hold.
- Print position should stay within 5 mm of the approved placement for single-color logos unless the artwork or seam layout requires a different written tolerance.
- For multi-color artwork, require registration within 2 mm between colors or the factory's named production standard, whichever is stricter.
- If brand color is critical, compare against the approved physical master or define a measured target such as Delta E00 under the agreed lighting condition. Otherwise, sign off against the physical sample only.