What this tote has to do in a subscription box or retail launch
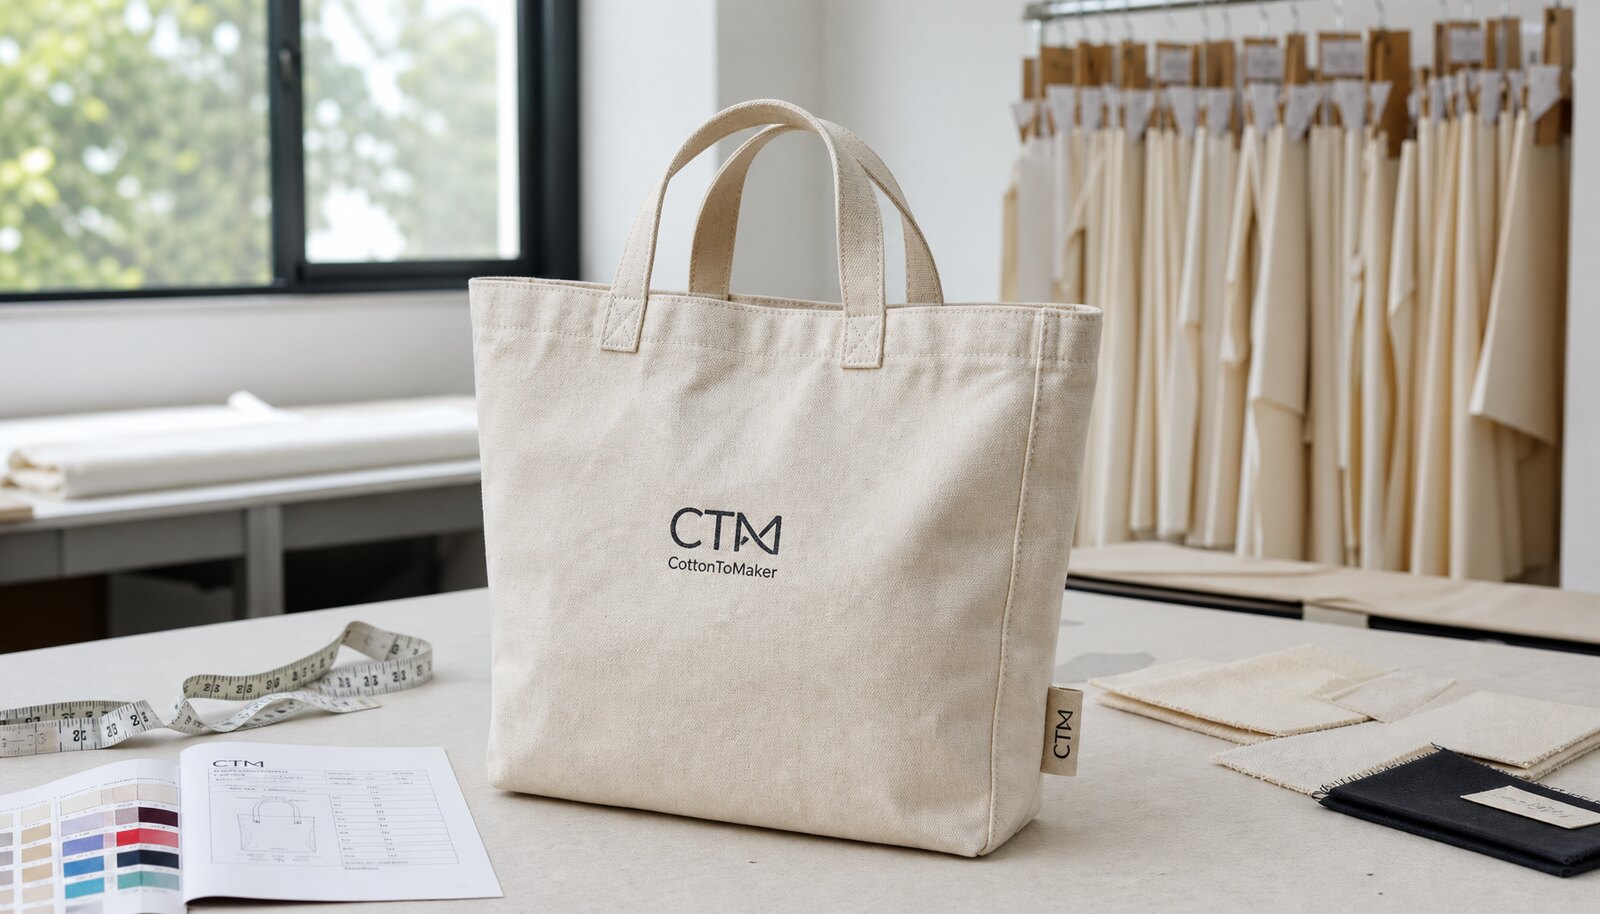
Custom canvas tote bags for subscription boxes and retail launch programs are rarely bought as generic promotional items. In these programs, the tote is part branding asset, part packaging component, and part resaleable product. That means the bag has to satisfy two separate buying decisions at once: it must fit the subscription box workflow, and it must still feel credible when the customer uses it later as a daily carry tote or sees it on a retail shelf.
Procurement teams often under-specify the item because the design team focuses on artwork and the operations team focuses on box fit. The result is a tote that looks fine in a mockup but fails in production because the handles are too short, the canvas is too thin, or the print sits too close to the edge. A reliable buying process starts by defining the tote’s job in the launch. Is it a premium free insert, a bundled gift, a retail SKU, or a durable carry bag for boxed goods? Each use case changes the right fabric weight, stitch reinforcement, and packing style.
If the tote is going into a subscription box, the first question is not the print method. It is whether the bag folds cleanly, sits well inside the box, and survives being packed by the warehouse without creating labor issues. If the tote is for retail launch, the first question is whether the hand feel, logo size, and construction look strong enough to support a price point. Good buying teams define both outcomes before requesting quotes.
- Decide whether the tote is an insert, a premium gift-with-purchase, or a standalone retail SKU.
- Set the load case: light lifestyle carry, boxed-product carry, or daily-use tote.
- Define the box-pack constraint early so the final size works for fulfillment, not only for design.
- Treat the tote as a branded product with quality expectations, not just a packaging insert.
Start with a production-ready spec, not a mood board
Most quote confusion comes from incomplete specs. A supplier cannot price the same tote consistently if one buyer says “natural canvas tote with logo” and another provides finished dimensions, closure type, artwork size, carton count, and target market. For procurement, the goal is not creative inspiration; it is a spec that can be priced, sampled, and inspected without guesswork.
A strong tote spec should include finished body size, gusset depth, handle length and drop, fabric weight in oz or GSM, closure type if any, artwork location, print colors, and packing format. You should also specify whether the tote must be shipped folded flat, stuffed for shape, or individually packed. These details change labor, carton density, and final landed cost. If the bag will be sold in a retail channel, include the expected shelf presentation and whether the tote needs to stand upright or hold a boxed item without collapsing.
The more specific the brief, the more useful the quote. Suppliers can then tell you if the request is realistic, where the cost drivers are, and whether a particular construction choice creates risk. That is especially important for first-run launches, where a small mismatch can become a missed launch date or a retail rejection.
- Finished size: length, width, and gusset depth in the units your factory uses.
- Handle spec: length, drop, width, and attachment method.
- Artwork spec: logo size, placement from top edge and side seam, and number of print colors.
- Packing spec: flat fold, label type, inner bag requirement, carton count, and destination.
- Market spec: retail channel, subscription box, or mixed use, because this changes quality expectations.
Fabric, finish, and structure: choose for use case, not just unit price
Fabric weight is a cost driver, but it also shapes the customer’s first impression. A lighter canvas may be acceptable for a low-cost giveaway or a box insert that carries only soft goods. A heavier canvas usually gives a more structured, retail-ready feel and can better support repeated use. In practice, 10 oz, 12 oz, and 14 oz canvas are common decision points, but the best choice depends on what the tote must carry and how the brand wants it to feel in hand.
For many launch programs, 12 oz is a workable middle ground because it balances price and body. However, there is no universal “safest” weight. If the tote is carrying boxed cosmetics, books, or other dense items, 12 oz may still feel too soft unless the handles and seams are reinforced. If the tote is only an insert and the goal is a soft, foldable giveaway, 10 oz may be enough and will reduce freight volume. For a premium retail bag where customers will judge the tote by structure and longevity, 14 oz may be a better fit, provided the buyer accepts the cost and packaging impact.
Finish matters as much as weight. Raw natural canvas, washed canvas, and coated canvas do not behave the same way. A rough or heavily slubbed fabric can make small text look uneven. A washed or softened finish can improve drape but may slightly change the final dimensions and the sharpness of the print. If your artwork has thin lines, fine typography, or tight registration, ask the supplier to recommend a fabric surface that supports those details rather than assuming any canvas will work.
- Use 10 oz for lightweight, cost-sensitive inserts when carrying load is low.
- Use 12 oz when the tote needs a more balanced feel and better retail perception.
- Use 14 oz when structure, longevity, or premium positioning matters more than freight cost.
- Avoid rough weaves or aggressive wash effects if the artwork contains small type or fine lines.
- Ask whether the quoted weight is before or after finishing, because that can change comparisons across suppliers.
Closure type, gusset depth, and handles change both function and cost
Many tote buyers focus on the front panel and forget the features that affect usability most. Closure type, gusset depth, and handle construction can change both the perceived value and the failure risk of the bag. An open-top tote is simpler and cheaper, but a zipper or snap closure may be worth the added cost if the tote will be used as a travel bag, premium retail item, or carry tote for smaller contents that should stay enclosed.
Gusset depth affects whether the bag can hold a boxed product without tipping over or stressing the seams. A bottom gusset alone is common for standard shopping totes, but side gussets can improve capacity and stability if the item needs a more upright shape. The tradeoff is extra sewing steps and another area to inspect for alignment and seam quality. For subscription box programs, this decision should be tied to the pack-out sequence: if the tote must fit into a fixed box with other inserts, a bulky gusset may create friction during fulfillment.
Handle construction is one of the most important quality decisions. Self-fabric handles with reinforced cross-stitch or bar-tack are a common retail choice because they look integrated and can be durable when made correctly. Webbing handles can offer strength and consistent lift, but they may look more utilitarian. The buyer should not ask only “strong or not.” Ask for handle length, width, drop, reinforcement style, and the load the factory designs for. If the tote will carry heavier boxed goods, a weak handle attachment can become a major defect even if the rest of the bag looks fine.
- Open top: simpler and cheaper, but best when the tote will not carry small loose items.
- Zipper closure: better enclosure and retail value, but inspect slider function and seam finish.
- Snap or button closure: useful in some mid-range programs, but confirm hardware alignment and finish.
- Bottom gusset: standard and efficient, but confirm it supports the actual carry load.
- Side gusset: improves capacity, but increases seam complexity and inspection points.
- Reinforced handle attachments: essential for heavy contents and repeated use.
Print method should follow artwork, quantity, and durability targets
The print choice should be driven by artwork complexity and launch volume, not habit. For one- or two-color logos, screen print is often the most efficient and repeatable option, particularly when the tote will be made in a meaningful quantity. It usually gives clean edges and good cost absorption once setup is spread across the order. For simple branding on canvas, screen print is usually the first method buyers should ask about.
For smaller runs, seasonal graphics, personalization, or more complex artwork, heat transfer or digital print may be more practical. These methods can support more detail, but they change the durability conversation. A print that looks strong at the sample stage can still fail under flexing, repeated folding, or friction in transit. That is why procurement should ask the supplier not only what method they use, but how the print is cured, what tests they can run, and what artwork limitations apply to the specific fabric surface.
The buyer should also confirm whether the supplier can hold consistent ink density across the whole run. On natural canvas, rough texture and slight shade variation can affect how the print reads. If the logo includes fine type or tight spacing, request a strike-off or sample with the exact artwork size rather than approving from a reduced mockup. A tote is handled often, so the print needs to survive both use and packing.
- Screen print: best for simple logos and larger volumes.
- Heat transfer: useful for short runs or variable graphics, but test wear resistance.
- Digital print: useful for complex artwork, but confirm fabric compatibility and color density.
- Ask for print size, print location, and edge margins in millimeters or centimeters.
- Request the supplier’s curing method and ask how they verify adhesion after printing.
How to compare supplier quotes without being misled by unit price
A low bag price is not the same as a low program cost. Tote quotes often differ because the quote basis is different, not because the supplier is cheaper. One quote may include only the bag body while another includes printing, inner packing, carton labeling, and export cartons. Some quotes are based on 10 oz canvas while others assume 12 oz or 14 oz. Without a normalized comparison sheet, the buyer may choose the cheapest-looking quote and end up with a higher landed cost.
The cleanest way to compare offers is to line them up on the same specification sheet. Require the same body size, same fabric weight, same closure, same handle construction, same artwork count, same packing method, and same destination. Then ask for unit price, setup cost, sample cost, carton count, estimated carton dimensions, and freight assumption. If a supplier cannot state what is included, mark the quote as incomplete rather than assuming the missing pieces are free.
For first launches, it is worth asking the supplier to show the price break by quantity and by setup. That way you can see whether the first run is expensive because of tooling or printing setup, or whether the program is simply priced too high to support the retail math. The right procurement question is not “who is cheapest?” It is “which quote gives the lowest reliable landed cost for the same spec and risk level?”
- Normalize every quote to the same fabric weight, size, print method, and packing format.
- Separate setup cost from piece price so the first order model is accurate.
- Request carton dimensions and gross weight because freight can change the outcome materially.
- Treat missing information as a red flag, not a discount opportunity.
- Ask for price breaks at realistic quantities, not only at the highest tier.
Choose the sourcing route that matches your control needs
There is no single best sourcing route for every canvas tote program. Direct factory sourcing usually works best when the launch is stable, the artwork is fixed, and the buyer wants better control over production details and packing. It also makes it easier to inspect the line of responsibility if there is a defect or packing issue. For repeat subscription box programs and retail rollouts, this route often gives the strongest combination of transparency and cost control.
A trading company or sourcing agent can be useful when the tote is only one part of a larger launch and the buyer wants one point of contact for several suppliers. This can reduce coordination effort, but it can also hide who is actually controlling the factory and where the margin sits. Buyers should ask for the factory name, production location, and the QC process in writing. If the middle layer cannot answer detailed questions about stitching, print curing, or carton loading, then the communication convenience may not be worth the risk.
The key procurement filter is technical depth. Ask how the supplier has handled similar canvas tote programs: what fabric they used, how they packed it, and what they checked before shipment. A supplier that can discuss seams, reinforcement, carton density, and print limitations usually has more production control than one that only repeats the lowest unit price and fastest date. For a launch item, that technical control matters more than polished sales language.
- Direct factory: strongest when you need repeatability and packing control.
- Trading company: useful for coordination, but verify who owns production and QC.
- Ask for evidence of similar tote production, not just general “bag” experience.
- Request the real factory contact or named production owner before approval.
Sampling: use each stage to eliminate a different type of risk
Sampling should not be treated as a formality. Each sample stage answers a different question. The digital artwork proof checks the layout, spelling, and print placement. The pre-production sample checks construction, fabric feel, and packing compatibility. The gold sample locks the version that production must match. If buyers skip one of these stages, they usually discover the problem after bulk goods are already sewn.
The sample review should be physical and measured. Lay the tote flat, press it lightly, and compare the finished dimensions to the spec sheet. Measure the handle drop, opening width, and print offset from the top edge and side seam. Then check how the tote folds for fulfillment. A bag can look acceptable when hanging on a hook but become awkward when packed to the exact dimensions of the subscription box or warehouse case pack.
If the launch involves multiple stakeholders—marketing, retail, operations, and a 3PL—use the sample meeting to get everyone to approve the same physical item. That reduces the chance of one department approving a bag that another team later rejects because it does not fit the packing or merchandising requirement. Buyers should also keep the approved sample, dated and signed, as the reference standard for bulk inspection.
- Approve a digital proof before any physical sample is made.
- Use a pre-production sample to test construction and packing fit.
- Keep a signed gold sample as the production reference.
- Measure the bag on a flat surface after light pressing, not while it is wrinkled from shipping.
- Test the bag in the actual box or carton if it is a subscription insert.
What to put in the RFQ so suppliers price the right thing
A good RFQ prevents guesswork and reduces quote spread. It should tell the supplier what to build, how to pack it, and how to prove compliance. That means more than artwork files. Include finished dimensions, fabric weight, closure type, handle spec, print placement, color references, packing format, carton instructions, and your target delivery window. If the tote is intended for a specific market, note whether you need any destination-market compliance support or documentation.
It also helps to be explicit about tolerances and reject conditions. For example, if you can accept a small natural shade variation in undyed canvas, say so. If the retail channel will reject crooked logos, loose seams, or broken handles, say that too. Suppliers price risk differently depending on how strictly the buyer will inspect. Clear tolerance language reduces back-and-forth later and makes the quote more meaningful.
Do not overcomplicate the RFQ with legal language if the supplier is unfamiliar with it. Simple, measurable instructions work better. Use a spec table, attach the artwork, identify the approval sample route, and ask the supplier to note exclusions. The best RFQs make it easy for a factory to respond with a quote that can actually be executed on the line.
- Attach artwork in editable and preview formats if possible.
- State finished dimensions and target tolerance range.
- Include packing and carton instructions, not only bag specs.
- Name any required testing, documents, or retailer standards.
- Ask the supplier to list exclusions line by line so nothing is assumed.
Inspection and QC: use measurable checks, not general impressions
QC for canvas totes should be more than a visual glance. A useful inspection plan separates critical, major, and minor defects. Critical defects are the ones that make the bag unusable or unacceptable for retail: open seams, missing handles, broken closures, wrong print entirely, or wrong SKU/labeling. Major defects include poor print alignment, weak reinforcement, holes, significant size out of tolerance, or a closure that does not function correctly. Minor defects may include small loose threads or slight natural variation that does not affect use or shelf appeal.
Agree the measurement method before production starts. A practical approach is to measure finished dimensions on a flat, lightly pressed bag and record a tolerance range. Many tote buyers work with a tolerance of roughly +/- 0.5 cm to 1 cm on smaller dimensions and a little wider on handle drop, depending on construction and material behavior. The point is not to force an unrealistic perfect number; it is to make sure the factory and buyer are judging against the same reference.
Inspection should include more than size. Check stitch density and reinforcement at the handle attachment, side seams, gusset corners, and any hardware points. Look for skipped stitches, loose thread tails, seam puckering, and uneven box-X reinforcement. For print, inspect placement against a centerline and top edge reference, then do a dry rub test and a flex test on the printed area. If the tote is expected to be used repeatedly, ask for a wash test or the supplier’s equivalent durability check. Finally, verify pack count, barcode, carton mark, and case label against the packing list. Receiving disputes often start with simple labeling or count errors that should have been caught before shipment.
- Use an AQL-based inspection plan that matches your brand risk and channel risk.
- Classify defects by severity before production starts.
- Measure size on a flat, pressed tote using the same method every time.
- Inspect handle reinforcement, seam intersections, and hardware points.
- Test print durability with dry rub, damp rub, and flex checks.
- Verify case count, carton marks, and SKU labels before shipment.
Specification comparison for buyers
| Spec decision | Recommended option | When it fits | Buyer risk to check |
|---|---|---|---|
| Supply route | Direct factory with export packing capability | Repeat launches, controlled artwork, and tighter control over carton marks, bag folding, and unit cost | Factory may quote a low bag price but omit print setup, inner packing, or export carton requirements |
| Supply route | Trading company or sourcing agent with named factory | Small first program, multi-item box, or buyer needs one contact for several SKUs | Markup opacity, slower technical feedback, and unclear responsibility if defects appear |
| Fabric weight | 10 oz canvas | Lightweight giveaway or low-load insert where cost matters more than structure | Bag may feel soft, crease easily, and distort under larger logos or dark ink coverage |
| Fabric weight | 12 oz canvas | Balanced launch spec for many subscription box inserts and entry retail SKUs | If contents are heavy or the tote is sold as a premium retail item, it may feel too light |
| Fabric weight | 14 oz canvas | Retail-facing tote, heavier contents, or programs where perceived value matters | Higher freight and material cost; confirm the buyer still wants the extra body and stiffness |
| Fabric finish | Natural unwashed canvas | Simple branding, lower decoration risk, and a more organic retail look | Shade variation and surface texture can affect small text, fine lines, and repeatability |
| Fabric finish | Washed or softened canvas | Lifestyle retail programs where drape and hand feel matter | Wash effects can change dimensions, slightly soften the structure, and affect print sharpness |
| Closure type | Open top | Subscription box insert, easy pack-out, and lowest complexity | Items can fall out during transit if the tote is packed loosely inside a box |
| Closure type | Zipper closure | Higher-value retail tote, travel use, or when contents must stay enclosed | Adds cost, assembly complexity, and more inspection points for zipper function and alignment |
Buyer checklist before sampling
- Write a one-page spec before requesting quotes: finished size, canvas weight in oz and GSM, handle length, closure type, gusset, print method, and target load.
- Define the end use clearly: subscription box insert, premium gift-with-purchase, retail SKU, or boxed-product carry tote.
- Request a quote based on the same assumptions from every supplier: fabric, print colors, reinforcement, closure, packing, carton quantity, and destination.
- Ask for a physical pre-production sample or gold sample before bulk; do not approve from artwork alone.
- Require the supplier to state what is included in the unit price and what is charged separately: setup, labeling, inner packaging, carton marks, and freight.
- Get sample approval notes in writing, including any acceptable shade variation, print tolerance, and size tolerance.
- Ask for production photos at cut/sew and packing stages if the order is time-sensitive or first-run.
- Confirm warehouse or 3PL constraints early: folded dimensions, carton max weight, palletization, barcode placement, and case pack needs.
- Use landed cost, not ex-factory price, when comparing options across fabric weight, closure type, and print method.
- Set an inspection plan before shipment: AQL level, defect classification, and what counts as a major versus minor defect.
Factory quote questions to send
- What is the exact fabric weight in oz and GSM, and is it measured before or after finishing?
- Which closure type are you quoting, if any, and what hardware or sewing steps does it add?
- What is the handle construction, handle drop, stitch count, and reinforcement method at stress points?
- What are the finished dimensions, gusset depth, and dimensional tolerance after pressing and folding?
- What print method are you quoting, how many colors are included, and what setup cost applies per color or artwork?
- What ink or decoration durability tests can you perform before bulk approval: rub, flex, wash, or adhesion?
- Is the fabric color raw natural, dyed, washed, or coated, and what variation should we expect between lots?
- What is the MOQ by color, by artwork, and by closure type, and can you combine variants in one production run?
- What is included in the packing spec: individual polybag, tissue, size sticker, barcode label, master carton, and palletization?
- What are the carton dimensions, pieces per carton, gross weight, and whether carton marks match our warehouse labels?
Quality-control points to confirm
- Agree the measurement method before production: use finished, pressed dimensions on a flat surface, not fabric stretched by hand.
- Set dimensional tolerances in the PO. A practical example is +/- 0.5 cm to 1 cm on smaller tote dimensions and slightly wider tolerance on handle drop, depending on construction and fabric behavior.
- Classify defects by severity. Major defects should include wrong print placement, missing reinforcement, open seams, broken handles, incorrect closure function, and wrong packing count.
- Define minor defects separately. Examples may include small loose threads, slight natural shade variation within an agreed range, or tiny printing specks outside the logo area.
- Inspect seam construction at stress points: handle attachment, side seam intersections, gusset corners, and any hardware mounting points.
- Check stitch density and consistency. Look for skipped stitches, broken thread tails, loose back-tacking, seam puckering, and uneven reinforcement boxes.
- Confirm print registration and alignment against a centerline and top-edge reference, especially for logos with text or multi-part artwork.
- Run a dry rub test on the printed area with white cloth or paper. Then repeat with slightly damp cloth if the tote is retail-facing or likely to be handled often.
- Perform a flex test by folding and unfolding the bag repeatedly along the printed area. Watch for cracking, flaking, or delamination.
- If the tote is intended for repeated use, request a wash test on the sample or ask the supplier what wash standard they use for comparable programs.