Why coffee-brand canvas totes fail in inspection
Coffee buyers usually care about the artwork first, but tote failures show up in the boring details: fabric that is too thin, handles that pull out, and prints that look fine on one sample but shift in bulk. For coffee brands, the bag is often sold at retail, used as a gift-with-purchase, or carried into cafés daily, so the inspection standard has to match real use rather than just a photo approval.
The main buying problem is consistency. A canvas tote can look premium on the first sample and still miss the mark if the bulk fabric weight changes, the print method is not matched to the artwork, or the factory changes the handle reinforcement to save time. That is why a good inspection checklist starts before production, not after arrival.
- Do not treat a tote bag as a simple promotional item if it sits next to coffee beans, mugs, or retail merch.
- Use one approved technical sheet for size, fabric, print, handle, packing, and carton marks.
- If the bag is for resale, make retail appearance and repeatability part of the QC criteria.
Choose the right canvas spec before you compare quotes
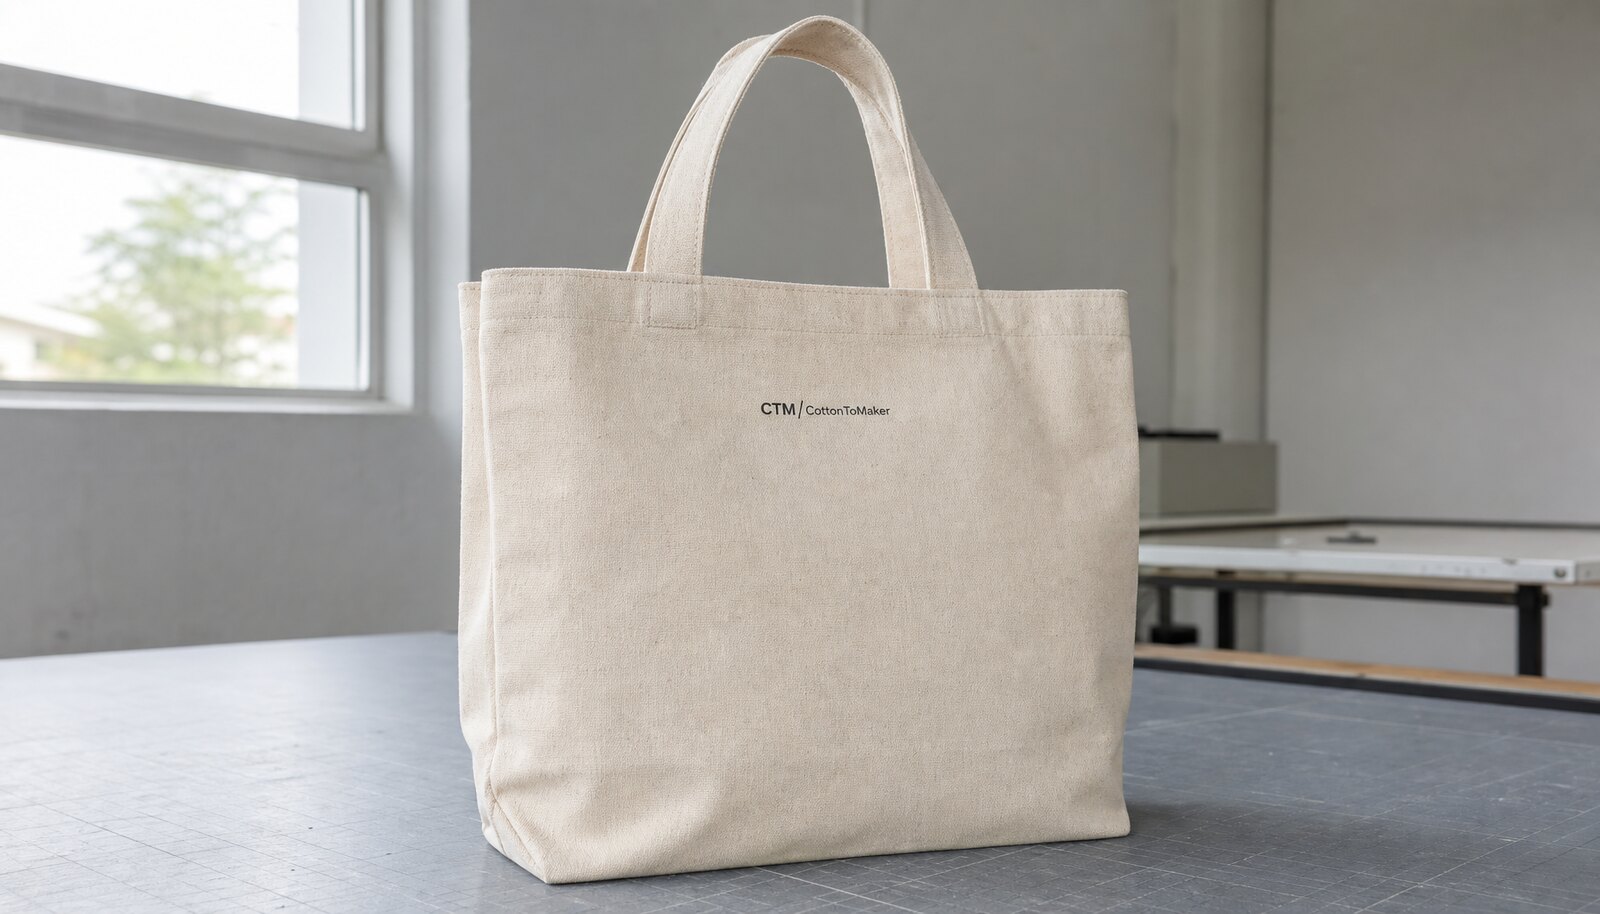
For coffee brands, a practical starting point is 10 oz to 12 oz canvas, or roughly 340 to 400 GSM. That range gives a stable hand feel, better print appearance, and enough structure for a tote that will be sold rather than handed out once. If you go much lighter, the bag can wrinkle badly and feel cheap. If you go much heavier, your sewing cost rises and the bag may become too rigid for some retail shoppers.
The quote is only meaningful if every supplier is pricing the same base spec. Some factories will quote a similar-looking tote on thinner canvas, lighter thread, or a cheaper weave finish. Others may include a bottom gusset or a longer handle without saying so clearly. When you compare quotes, align the fabric weight, bag size, handle construction, and print method before you compare the unit price.
- For premium coffee retail, 12 oz canvas is often the safer baseline.
- For lower-cost promo runs, 10 oz can work if the print area is small and the bag is not meant for heavy carry.
- If the artwork covers a large panel, ask for a smoother weave and a bulk fabric swatch before approval.
Compare sourcing routes: factory-direct, trading company, or local converter
The cheapest quote is not always the lowest-risk route. A direct factory usually gives better control over fabric, stitching, and print execution, especially when you need repeat orders or want to hold the same spec for a seasonal coffee launch. A trading company can help if you need multiple products consolidated into one shipment, but you may lose visibility on who actually controls the fabric lot and print curing.
Local converters or regional decorators can be useful for short lead times and small volumes, but they often rely on imported blank bags or outsource the sewing. That can work for a test market, yet the landed cost per piece may climb fast once artwork setup, domestic decoration, and re-packing are added. The right route depends on your order size, control needs, and whether you plan to reorder.
- Direct factory: best for repeatability, MOQ discipline, and bulk price control.
- Trading company: best when you need a mixed basket of products or one contact for multiple SKUs.
- Local converter: best for urgent launches or small trials, but inspect blank quality before decoration.
How print method changes cost, appearance, and failure risk
Screen print is usually the most practical option for coffee brand logos, especially if the design is one to three colors and you want a clean retail look. It gives sharp edges and stable repeat production, but the supplier must control registration and ink curing. If the print is too heavy, it can crack at the fold line; if it is under-cured, it can smear during packing.
Embroidery can make a small brand mark feel more premium, but it is not always the best answer for full-logo artwork or thin canvas. Heat transfer is useful for short runs or complex artwork, yet buyers should be cautious about long-term flex cracking and adhesive quality. If your brand sells totes through cafés and gift shop shelves, the customer will handle the bag repeatedly, so the print system has to survive folding and daily use.
- Screen print: best balance for most coffee logos and repeat orders.
- Embroidery: good for small marks, but inspect puckering and backing material.
- Heat transfer: acceptable for test runs, but ask for rub and fold durability proof.
Use a sample approval process that matches bulk production
The sample should not be a showroom item. It should be made from the same bulk fabric weight, same thread, same print method, and same handle construction the factory plans to use in production. If the sample is made from better material than the bulk order, you will approve a bag that cannot be repeated at scale. That mistake is common when buyers focus only on artwork placement and overlook the material source.
A useful approval sample needs three checks: physical dimensions, visual finish, and production feasibility. Measure the width, height, gusset, handle drop, and seam allowances. Then review print placement, edge sharpness, and the visual balance of the logo on the panel. Finally, verify that the sewing line can reproduce the same result without slowing the factory into an unprofitable process that leads to shortcuts later.
- Approve one reference sample for material, one for print, and one for packing if the order is large.
- Mark the approved sample with date, sign-off, and version number.
- If the supplier changes any of the three core items later, require a revised sample.
Inspection thresholds that matter in bulk production
Your QC team does not need a long list of cosmetic preferences. It needs clear acceptance criteria. For canvas totes, the most important checks are size tolerance, print alignment, stitch quality, handle strength, and fabric consistency. A bag can pass visually but still fail retail use if the handles are off-center or the gusset is twisted after packing.
A practical tolerance approach is to allow minor variation, but not enough to affect retail presentation or function. If the bag is designed to sit upright in a shop display, a crooked seam or uneven base will matter. If it is meant for café resale, the print must stay centered and consistent across the batch so the wall display looks uniform.
- Width and height should stay within a defined tolerance band on every lot.
- Handle stitching must show full reinforcement and no loose starts or thread breaks.
- Print position should not drift enough to look off-center in a front-facing retail display.
Packing details can damage an otherwise good tote
Many tote orders fail at the packing stage, not at sewing. If bags are folded inconsistently, over-compressed into cartons, or packed without size labels, the retailer receives wrinkles, distorted panels, and a time-consuming receiving process. For coffee brands distributing to multiple stores or café locations, packing consistency is part of the product quality.
Flat packing is usually the cleanest route for canvas totes. Each bag should be folded the same way, placed in an inner polybag if your market requires it, and counted into master cartons with clear marks. If the tote has a printed front panel, the folding position should not create a permanent crease directly across the logo area. That is a common mistake when buyers leave packing instructions too vague.
- Specify one folding method and keep it consistent across the whole lot.
- Use carton marks that show item name, color, size, and quantity per carton.
- If bags are for retail shelves, require a clean inner bag or dust protection if needed.
MOQ logic and landed-cost comparison for coffee buyers
MOQ is not only a factory number. It is a cost structure. For a custom canvas tote, the unit price changes with fabric purchase efficiency, print setup, sewing line time, and packing labor. If you split the order into too many colors or artwork versions, the factory spreads setup cost across fewer pieces and the price rises quickly. This is why one clear design usually beats three small variants on the first order.
When you compare landed cost, include more than the FOB price. Add sampling, print setup, carton charges, export packing, freight, and any local receiving or relabeling cost. A slightly higher factory quote can still land cheaper if it uses efficient packing and fewer damage claims. For coffee brands selling through retail or café channels, the real cost is the cost of a sellable bag on the shelf, not the invoice price alone.
- One colorway and one artwork version usually gives the best MOQ efficiency.
- Ask the supplier to quote the same tote under 500, 1,000, and 3,000 pieces if your volume may grow.
- Compare sample cost, setup charges, and carton packing before comparing unit price.
What to look for during final inspection and pre-shipment release
Before shipment, the bulk lot should be compared against the approved sample and the purchase order. The final inspection should focus on repeatability: are the print colors consistent, are the seams straight, are the handles aligned, and do the cartons match the labeled count? A final check is also the place to catch late changes, such as substitute thread color or a different fold method, which can happen when factories try to recover time.
If the tote is going directly to retail, do one extra review of shelf presentation. Pull a few bags from cartons, unfold them, and look at the front panel from a shopper’s perspective. The logo should sit cleanly in the center of the visual field, the bag should open evenly, and the handle length should look balanced. Those details affect conversion on the shelf even if the bag technically meets size spec.
- Cross-check carton count against the purchase order and packing list.
- Open random cartons to inspect both the first and last packed bags, not just the top layer.
- Hold shipment if the bulk finish no longer matches the approved sample in a way customers will notice.
Specification comparison for buyers
| Spec decision | Recommended option | When it fits | Buyer risk to check |
|---|---|---|---|
| Fabric weight | 10 oz to 12 oz canvas, or about 340 to 400 GSM | Retail merch, café sales, and daily-use totes that need a more premium hand feel | Too light and the bag collapses; too heavy can raise cost and slow stitching if the factory is not set up for thick canvas |
| Canvas construction | Plain woven cotton canvas with stable warp and weft tension | Most custom coffee-brand totes where print clarity and repeatability matter | Loose weave can distort artwork and create a wavy panel after washing or packing |
| Print method | Screen print for flat logos; heat transfer only for short runs or complex art; embroidery for premium small marks | When your brand mark is simple and you want clean repeat orders | Soft-hand transfers can crack in folding; embroidery can pucker on lightweight fabric and shift the bag panel |
| Handle style | Self-fabric handles with reinforced X-box or bar-tack stitching | Retail bags that need better load performance and a more finished look | Short handles reduce shoulder carry comfort; weak handle attachments are the most common failure point in use |
| MOQ route | Factory-direct with one approved bulk spec; avoid mixing too many colorways on the first order | When you want the best unit cost and can commit to a standard design | Low-volume multi-color orders often hide setup fees, plate charges, and waste allowances |
| Sample path | Pre-production sample using actual bulk fabric, actual print method, and final carton spec | Any first-time order, new artwork, or new supplier | A salesman’s hand sample may look right but still fail in bulk due to different fabric lot or print curing |
| Packing method | Flat-packed in inner polybags with size labels and master carton marks | For wholesale, e-commerce, and distributor re-shipments | Overstuffed cartons create creases and uneven panels; loose packing increases dust and transit damage |
| Supplier route | Direct factory for repeat volume; trading company only if you need consolidation or multi-item sourcing | When your team wants control over production details and inspection timing | Indirect sourcing can blur accountability on fabric source, print tolerance, and rework responsibility |
| Lead time profile | Sample 7 to 14 days, bulk 25 to 40 days after approval, plus transit buffer | Standard custom programs with clear artwork and stable fabric availability | Rushing approval compresses inspection and carton verification, which is where size and print mistakes slip through |
Buyer checklist before sampling
- Confirm finished size, seam allowance, and handle drop on the drawing, not only the flat width and height.
- Lock fabric weight in GSM or oz and require the mill name or fabric description to stay consistent across sample and bulk.
- Approve one print reference for color, edge sharpness, and placement tolerance before bulk release.
- Define acceptable stitch density, reinforcement points, and whether the bag needs a bottom gusset or side gusset.
- Set carton pack count, inner polybag requirement, and master carton mark format before the production order is issued.
- Request a pre-production sample made from bulk fabric and bulk trim, not a showroom prototype.
- Ask for the actual lead time split: fabric sourcing, printing, sewing, inspection, and packing.
- Make sure the quote states whether plate charges, setup fees, and overrun/underrun tolerance are included.
Factory quote questions to send
- What exact canvas weight, weave type, and fabric width are you quoting, and will the bulk order use the same lot as the sample?
- Which print method is included in the quote, how many colors are priced, and what is the repeat setup charge for reorder?
- What is your MOQ by color and by artwork version, and how does the unit price change if we reduce the order quantity?
- What stitching reinforcement do you include at the handle joins, and can you share the standard seam and bar-tack specification?
- What is the acceptable size tolerance for width, height, and handle length, and what is your inspection standard for these points?
- How will the bags be packed, how many per carton, and what carton test or transit protection do you use for export shipping?
- What is the realistic bulk lead time after sample approval, and what parts of the schedule are most likely to delay shipment?
- If the print shifts or the fabric shade varies, what rework or replacement policy applies before shipment?
Quality-control points to confirm
- Measure finished size on at least three locations per bag to verify consistency across the batch.
- Inspect canvas weight by supplier certificate and by physical hand feel against the approved sample.
- Check print registration, edge definition, ink coverage, and cure resistance with a light rub test.
- Examine handle attachment stitching, reinforcement pattern, and thread tension for loose ends or skipped stitches.
- Confirm seam straightness, bottom corner strength, and internal thread trimming to avoid retail complaints.
- Review bag shape after folding and repacking to detect panel distortion or uneven gusset formation.
- Verify carton counts, inner pack labels, and master carton marks against the purchase order.
- Compare bulk pieces to the approved pre-production sample for color, artwork placement, and overall finish.