Start With The Decoration, Not The Bag
For custom canvas tote bags for apparel brands, the print method decides more than decoration. It changes the blank bag spec, the MOQ, the labor split, the sample path, and even how the tote folds in carton. A supplier can quote the same looking bag two very different ways: a simple sewn blank with local print, or a fully finished tote with in-house decoration, packing, and carton marks. If you do not define the print route early, you will compare quotes that are not actually comparable.
Apparel brands usually care about three things at once: a clean retail look, consistent brand color, and a unit cost that still works after freight and duty. Screen print is often the cheapest and most stable for one or two colors. DTF or heat transfer becomes useful when the art is detailed or the launch volume is still uncertain. Embroidery and woven labels make sense when the tote needs to feel more like merch than a promotional giveaway. The right answer depends on the bag weight, the logo size, and how many reorders you expect.
- Define the decoration method before asking for a price per piece.
- Match the method to the likely order pattern: launch test, seasonal drop, or replenishment program.
- Keep one drawing for bag size, one drawing for logo placement, and one line for packing.
Choose Canvas Weight For The Use Case
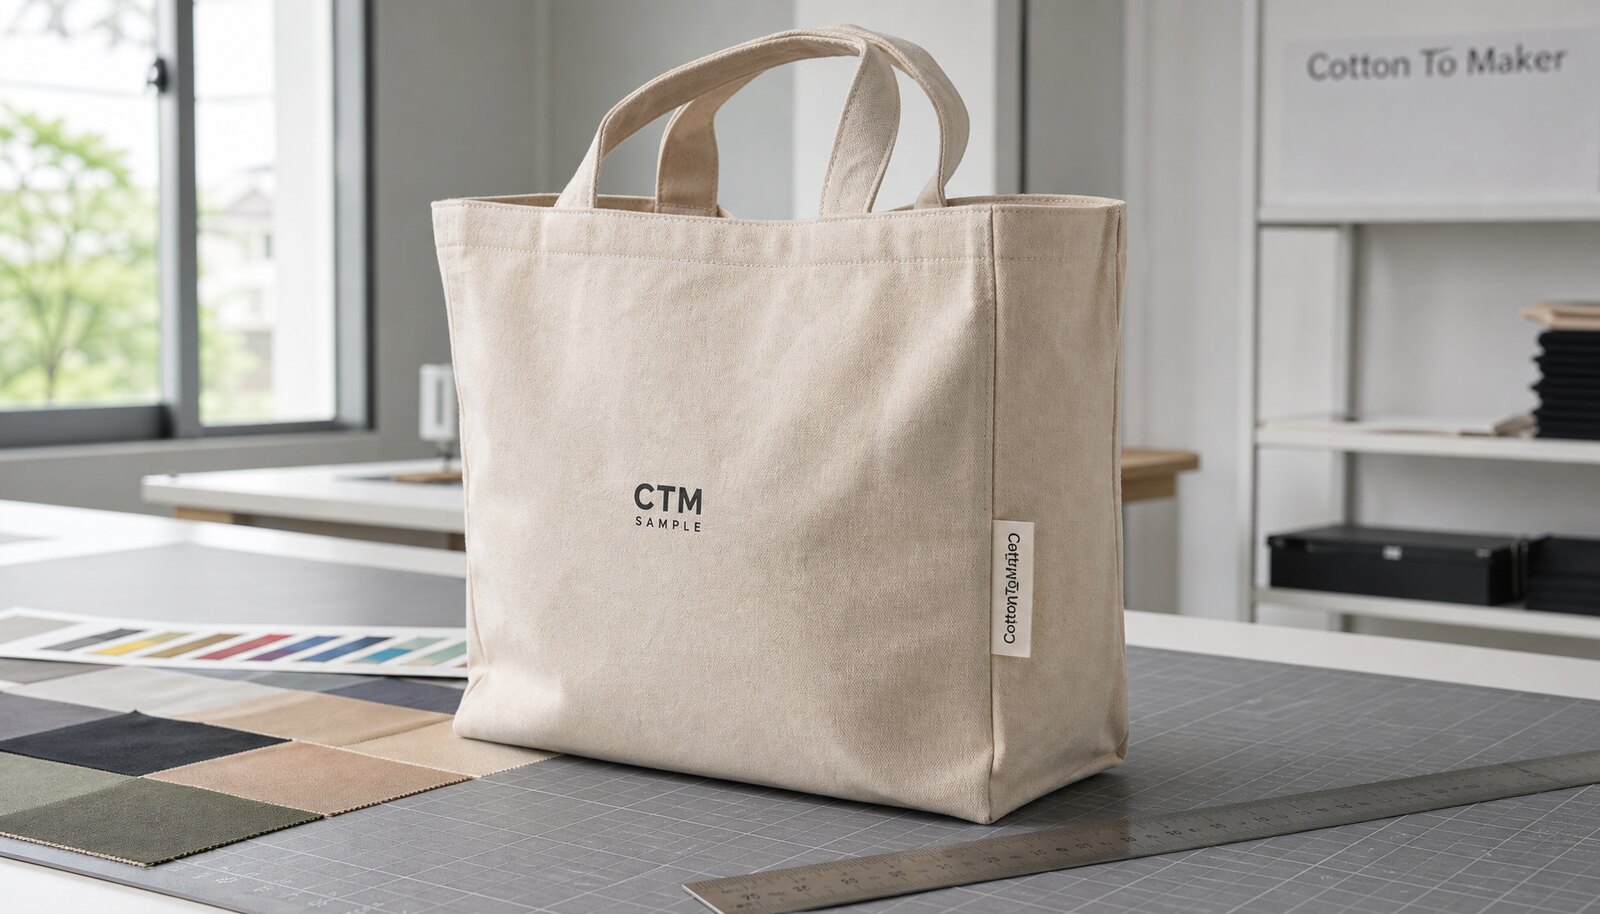
Canvas weight drives both the look and the print result. A light 8 oz canvas, roughly 270 gsm, folds easily and keeps the tote affordable, but it can show weave texture under fine logos. A common apparel-branded tote is 10 oz, around 340 gsm, because it balances body, print clarity, and cost. Move up to 12 oz, around 400 gsm, when the bag needs a more premium hand, better shape retention, or better support for heavier inserts. Fourteen ounce canvas, often close to 475 gsm, is more rigid and can feel premium, but it costs more to sew, pack, and ship.
The canvas choice should match what the tote will carry. A launch giveaway that holds a T-shirt and a flyer does not need the same build as a retail tote that carries folded apparel, a notebook, and a water bottle. If the bag is too light, screen print can look patchy and the handles can twist after repeated use. If the fabric is too heavy, you may lose carton efficiency and pay more in freight than you expected. Ask the factory to quote the same print on at least two fabric weights so you can see the true cost of upgrading.
- 8 oz works for low-cost giveaways and short use cycles.
- 10 oz is the safest default for apparel-brand retail totes.
- 12 oz or heavier is better when the bag should hold shape and support premium branding.
- Always confirm whether the quoted GSM is before or after finishing.
Compare Print Methods By How Suppliers Actually Quote Them
Most quote mistakes happen because buyers compare print methods by appearance instead of by process. Screen print needs screens, setup, and controlled ink curing. DTF and other transfer methods reduce setup and make small artwork easier, but they introduce film thickness and adhesion risk. Embroidery changes the equation again because the supplier must control hooping, thread count, and panel distortion. A flat print can be cheaper at scale, while a premium texture can justify a higher unit cost if the tote is part of the product story.
The supplier route matters as much as the print method. A direct cut-and-sew factory with its own print room will usually give you better control over placement and less finger-pointing if the ink runs out or the bag panel shifts. A trading company can be useful if you need multiple decoration types or if you want one point of contact, but it can hide where the work is actually happening. Local decorators are fast for small runs, yet the blank tote may not match the imported production spec you plan to reorder later.
- For one-color branding and repeat orders, screen print is usually the most stable route.
- For detailed or multi-color artwork, a transfer method can protect the design better than forcing a bad screen setup.
- For premium merch, embroidery or a woven label can read more intentional than a large printed block.
- Do not let a supplier substitute a different decoration process without written approval.
Build A Quote That Lets Suppliers Price The Same Thing
A clean quote for custom canvas tote bags should break out the bag and the decoration, not hide them inside one unit price. The bag line should show size, canvas weight, color of fabric, handle length, and whether the tote is gusseted. The print line should show the method, number of colors, print size, and placement. If you need a woven label, hangtag, or barcode sticker, each should be a separate line. This is the only way to see whether one supplier is cheaper because they are more efficient, or cheaper because they left out part of the job.
MOQ logic also needs to be explicit. Some factories have a minimum on the bag body, then a separate minimum on the print if they must make screens or plates. Others price small test runs with a higher per-piece cost but lower setup burden. If you plan to reorder, ask for a price ladder at 500, 1,000, 3,000, and 5,000 pieces so you can see where the setup cost gets absorbed. For apparel brands, the real decision is rarely just the first order price. It is whether the quote supports a repeat program without changing the tote shape, ink color, or packing spec.
- Request line items for fabric, cutting, sewing, print setup, print run, labels, packing, and cartons.
- Ask for prices at multiple quantities so you can see the setup curve.
- Make the supplier confirm whether the quote includes overs, underruns, or only the exact ordered quantity.
- Separate sample charges from bulk pricing so the first invoice does not distort the comparison.
Sample Approval Should Prove The Hard Parts
A sample is not just a preview of the logo. It should prove that the bag holds the target fabric weight, the print sits in the right place, and the finished tote folds the way your warehouse expects. For screen print, ask for a strike-off on the actual canvas rather than on paper or a substitute fabric. For DTF or heat transfer, inspect the edge, the hand feel, and the placement relative to the seams. For embroidery, check the reverse side and the stitch density because too much density can pucker the canvas panel.
The approval sample should lock the reference points before bulk starts. That means the approved color, the approved print size, the seam-to-logo distance, the handle drop, and the carton pack plan. If the supplier wants to swap a thicker canvas, a different thread, or a different transfer film after approval, treat that as a re-approval event. A lot of production disputes start because the buyer approved a visual sample and never documented the dimensions or the packaging standard.
- Approve one physical sample against a written spec, not against memory or email notes.
- Measure logo placement from the same edge every time.
- Use the approved sample as the reference for bulk inspection and receiving.
Set QC Thresholds Before Production Starts
Canvas totes are simple products, which is exactly why small defects stand out. A crooked print, loose handle stitch, or inconsistent fold pattern can make an entire retail shipment look careless. The QC standard should be based on what the customer can see and what the warehouse can count. Check stitch density around the handles, seam alignment on the gusset, print edge sharpness, and whether the tote body is square when laid flat. If the bag is meant for retail display, also check that the folded dimensions fit the shelf or shipper case you planned.
Print-specific defects are worth calling out in the PO. Screen print should not show smearing, bleeding, pinholes, or visible underbase shift if you use multiple colors. Transfers should not peel at corners or feel brittle after curing. Embroidery should not distort the panel or leave loose threads near the face of the logo. If you need a more formal threshold, write acceptable placement tolerance, color delta expectations, and carton defect rate in the approval document. The point is not to create paperwork. The point is to keep the factory from deciding quality on your behalf.
- Inspect random pieces for logo placement, stitch quality, and handle symmetry.
- Reject obvious ink bleed, transfer lift, puckering, and broken seams.
- Tie the QC standard to what the final buyer will actually notice.
Packing Can Change The Real Cost More Than The Print Does
Packing is often treated as a final detail, but for apparel brands it affects shelf readiness, freight efficiency, and return risk. A tote that is folded loosely and bulk packed may save a little labor, but it can arrive wrinkled and harder to merchandise. A tote that is individually polybagged with a barcode sticker takes more labor, more material, and more carton space, but it may be the better choice if the bags go straight to retail or a 3PL. The right packing spec depends on where the tote enters your supply chain.
Ask the factory to quote the same tote in at least two packing modes if you are unsure. One version can be bulk packed for distribution centers. Another can be individual polybag plus master carton marks for retail or ecommerce. If the brand needs a hangtag or care label, make sure the stitching or attachment point does not interfere with the print. The practical rule is simple: do not approve the tote alone and assume packing will solve itself later. Packing is part of the finished product.
- Specify whether each bag is folded, tissue-wrapped, polybagged, or bulk packed.
- Confirm barcode placement and carton label format before production.
- Check whether packing changes carton count, carton size, and freight cost.
Plan Lead Time Around Samples, Not Just Bulk Sewing
The lead time on a tote order is usually longer than the sewing time. If the artwork needs screens, transfer film, or embroidery digitizing, that setup can take longer than expected. If the bag spec is not frozen, sample revisions can push the production slot back while the factory waits for approval. Apparel buyers often lose time because they quote only the bulk date and ignore the time needed for artwork confirmation, pre-production sample, and packing sign-off.
For imported orders, schedule risk also comes from external timing, not just the factory floor. Port congestion, carrier rollovers, weather, and holiday closures can all affect the ship date. A simple way to protect the launch is to separate the timeline into sample lead time, bulk production lead time, and freight time. Then add buffer at the point where the tote must be in your warehouse, not at the point where the factory says it is finished. That is the only date that matters when the tote is tied to a product drop.
- Ask for sample lead time and bulk lead time as two separate numbers.
- Build buffer for artwork corrections and sample approval rounds.
- Do not plan a launch on the factory completion date alone.
Compare Landed Cost By Route, Not Just Unit Price
A tote can look cheap at the factory and still land expensive. Screen print usually wins when the logo is simple and the volume is steady because setup cost spreads out. DTF or heat transfer can be the better test-run choice because it lowers setup friction, but the per-piece cost may stay higher. Embroidery often carries the strongest premium, yet it can create a better retail perception if the bag is sold rather than given away. The landed-cost question is not which method is cheapest in isolation. It is which method gives the best margin after decoration, packing, inland transport, freight, duty, and warehouse handling.
When you compare routes, compare the total package. A factory quote that includes the blank bag but not the print may still be more expensive than a slightly higher all-in quote from a factory that controls the whole process. Likewise, a local decorator can look attractive for a pilot run, but if the blank bag is different from your imported bulk spec, the test may not tell you anything useful about the final launch. The buyer should compare like for like: same canvas weight, same print area, same packing, and the same delivery point.
- Compare all-in landed cost, not only ex-factory price.
- Use the same fabric weight and packing spec across all supplier quotes.
- Treat setup fees as part of total program cost, especially on low-MOQ orders.
Write The RFQ So The Factory Cannot Guess
If you want a useful quote, your RFQ needs enough detail that the supplier does not have to guess. Start with the bag size, canvas weight, handle length, color of bag, logo artwork, print area, and decoration method. Then add packaging, carton marks, target quantity, ship-to terms, and the deadline for the first sample. If you need multiple sizes or multiple colorways, list them in a matrix so the factory can price each variant cleanly. A vague RFQ produces a vague quote, and vague quotes are where margin surprises live.
The best RFQ for apparel brands also tells the supplier what can change and what cannot. Maybe the handle length can move by a half inch, but the logo placement cannot move at all. Maybe the packing can be bulk or polybagged, but the print color must match a specific PMS target. These constraints help the supplier choose the right process and keep you from buying the wrong tote for the program. The more precisely you define the non-negotiables, the easier it is to compare offers and avoid a production mistake that will cost more to fix after the order is placed.
- Use one spec sheet for the bag and one spec sheet for the decoration.
- State what can be changed and what must stay fixed.
- Ask the supplier to return the quote in the same format you sent.
Specification comparison for buyers
| Spec decision | Recommended option | When it fits | Buyer risk to check |
|---|---|---|---|
| One-color logo on 10 to 12 oz canvas | Direct screen print from a cut-and-sew factory with in-house printing | Best for apparel brands that want a clean retail look, steady repeat orders, and predictable unit cost | Check print registration, ink hand feel, and whether the quote includes one screen per color |
| Full-color artwork with gradients or fine detail | DTF transfer or high-resolution heat transfer from a supplier that already decorates canvas bags | Works when the logo has many colors, small text, or photographic detail that screen print cannot hold cleanly | Check film edge feel, wash resistance, and whether transfer size changes with bag seam placement |
| Premium minimal branding on heavier canvas | Embroidery from a factory that can hoop the panel without distorting the bag body | Fits premium capsules, gift-with-purchase programs, and brand merch where texture matters more than ink coverage | Check stitch density, puckering risk, thread color matching, and added cost per color change |
| Low-color logo on a fast replenishment program | Stock blank tote plus local or domestic decorator | Useful when speed matters more than the lowest ex-factory price and you need smaller replenishment runs | Check domestic labor cost, margin erosion, and whether the blank tote matches the imported production spec |
| Large print area with flat solid graphics | Water-based or plastisol screen print on a smooth 10 to 12 oz canvas | Good for bold brand marks, seasonal graphics, and artwork that should sit flat rather than sit on top as a film | Check bleed on coarse weave, curing temperature, and whether heavy ink affects folding and carton count |
| Very small test order or pilot drop | Digital transfer or local decorator on a limited blank batch | Useful for market tests before committing to a higher MOQ and a fixed print setup | Check that test samples come from the same blank spec you plan to bulk order |
| Retail tote with secondary branding | Sewn woven label, side label, or patch plus a simple print | Fits brands that want a premium story without a large print on the face of the bag | Check label placement, sewing tension, and whether the supplier treats labels as an added line item |
| Uniform brand standard across multiple SKUs | One factory with cut-and-sew plus decoration under the same approval flow | Best when you need the same logo placement and color control across tote sizes or seasonal runs | Check whether the supplier actually owns the print room or outsources it after sewing |
Buyer checklist before sampling
- Lock the bag size, canvas weight, handle length, and seam spec before asking for print quotes.
- State the exact print area in inches or centimeters and include a placement drawing if the logo must avoid seams.
- Provide artwork in vector format and note the number of ink colors, PMS targets, and any small text.
- Confirm whether you want screen print, DTF, embroidery, woven label, or a mixed decoration package.
- Ask for sample cost, setup cost, run charge, and any label, hangtag, or polybag add-ons.
- Request the planned MOQ, lead time for samples, and bulk production lead time separately.
- Define packing: folded dimensions, polybag status, carton pack count, carton marks, and barcode needs.
- Set acceptance tolerances for color, print alignment, stitch quality, and handle length before bulk approval.
Factory quote questions to send
- What exact canvas weight, weave, and finished size are you quoting, and is that a pre-wash or post-wash measurement?
- Which print method are you using, and is the decoration done in-house or by a subcontractor?
- What is the setup fee per color, per artwork, or per screen, and what changes if we revise the art after sample approval?
- What is the MOQ for the bag body and the MOQ for the print separately?
- What is included in the unit price: blank bag, print, sewing, label, polybag, carton, and master carton marks?
- How will you control color matching and print placement, and what sample do you approve before bulk starts?
- What is the bulk lead time after sample approval, and what are the main delay risks in your schedule?
Quality-control points to confirm
- Canvas weight matches the approved spec within the agreed tolerance, and the weave is even without weak streaks.
- Handle attachment points are reinforced and the handle length is consistent across cartons.
- Print registration stays within the approved placement window and no seam interference cuts into the logo.
- Ink or transfer coverage is even, with no pinholes, smearing, ghosting, cracking, or curing marks.
- Embroidery or labels sit flat without puckering, skipped stitches, loose thread tails, or crooked placement.
- Finished tote dimensions and folded packing size match the packing plan used for retail or warehouse receiving.
- Carton pack count, inner polybag count, and outer marks match the purchase order exactly.
- Sample and bulk lots are checked for odor, contamination, broken stitches, and random pull-test failures before shipment.