Start with the use case, not the bag silhouette
A canvas messenger bag can serve very different jobs: a lightweight giveaway at a trade show, a retail accessory for an eco apparel line, a commuter bag for daily carry, or a bundled item inside a wider merch program. Those uses do not need the same construction. If the buyer does not define the use case up front, the factory will fill the gaps with its default assumptions, and those defaults may not match your cost target, brand position, or quality standard.
The first procurement decision should be the expected load. A bag that only holds a brochure and a notebook can be built lighter than one that carries a tablet, charger, water bottle, and daily personal items. The load matters because it drives canvas weight, strap reinforcement, closure choice, and the amount of structure needed in the body. If your team wants a soft, foldable promo bag, do not specify retail-grade hardware that adds cost and weight without adding value. If the bag is going to live in a retail line, do not underbuild it just to save a few cents.
- Define the channel: giveaway, staff kit, retail, wholesale, or e-commerce bundle.
- Define the expected load in plain terms, not just as sturdy or durable.
- Set the target lifespan: one event, seasonal use, or daily carry.
- Write down whether the bag is part of a sustainability claim that must be documented.
Write a spec that can be quoted without guesswork
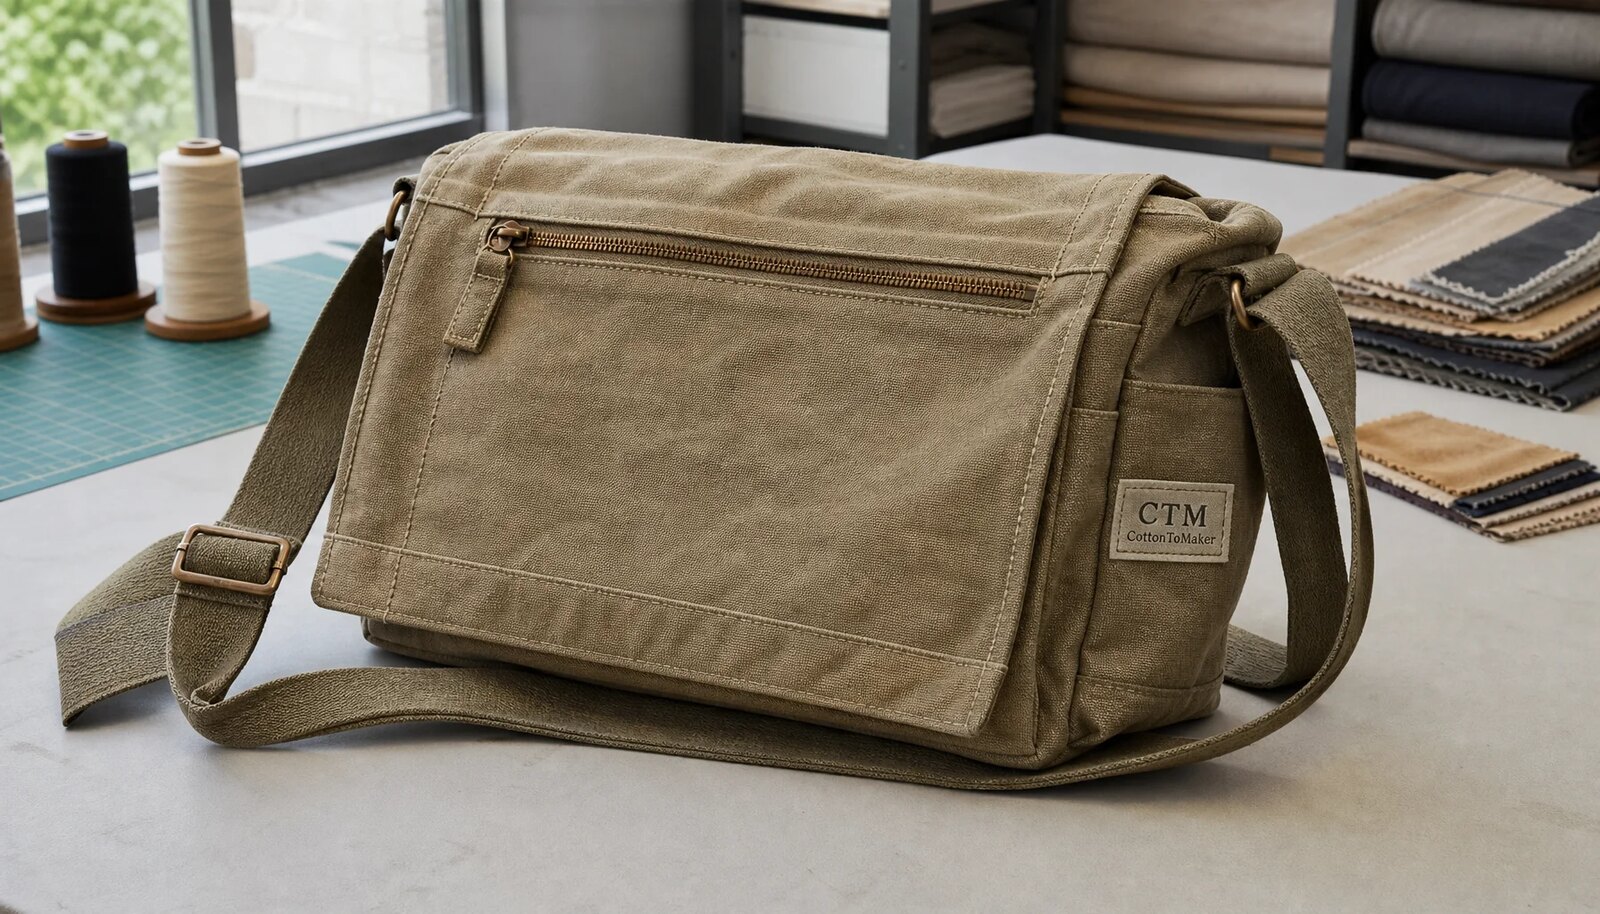
A useful spec sheet makes the bag measurable. It should include body width and height, gusset depth, flap overlap, pocket size, strap width, strap adjustment range, and any handle drop. State whether measurements are taken flat or assembled and where each point is measured. That sounds basic, but many quality disputes start because the buyer and factory measured the same bag in different ways.
The same logic applies to materials. Do not stop at canvas bag. Write the outer fabric weight in oz or GSM, the weave or finish if it matters, the lining if there is one, the thread color, the zipper size, the buckle style, the webbing width, and the label placement. If the bag needs to support a sustainability claim, attach the evidence requirement as part of the spec instead of treating it as a separate marketing task.
- Attach vector artwork, a placement map, and color references for every logo or label.
- Include tolerances for critical measurements and logo placement before sampling starts.
- State if the pre-production sample must use production materials only.
- Call out any nonstandard detail such as contrast stitching, extra pockets, or special packaging.
Compare quotes by scope, not just by unit price
Two quotes can look similar at first glance and still describe very different products. One supplier may be quoting a shell bag with a one-color print and basic folding. Another may be including lining, reinforced strap joints, branded labels, unit wrapping, export cartons, and inspection support. If the scope is not broken out, the cheaper quote is often just the quote with more omissions.
For procurement, the key is comparison discipline. Ask each supplier to break out fabric, lining, hardware, decoration, labels, packing, sample fees, and lead time. That gives you a real basis for review and makes it easier to spot hidden assumptions. Also ask who is actually doing the work. A factory, a trading partner, and a decoration shop can each be useful, but the quality risk is different in each case. You need to know who controls cutting, who controls decoration, and who approves rework.
- Compare canvas weight, finish, lining, hardware grade, logo method, packing standard, MOQ, sample cost, and bulk lead time side by side.
- Confirm whether MOQ applies per style, per color, per artwork version, or per shipment.
- Ask if cutting, printing, embroidery, washing, sewing, or packing is outsourced.
- Treat unusually low pricing as a prompt for scope clarification, not as proof of efficiency.
Approve the sample as a control point, not a photo opportunity
The pre-production sample is the best chance to catch a repeatable defect before bulk production starts. Photos are useful, but they do not show strap twist, zipper drag, puckering around the logo, or a flap that sits off-center when the bag is loaded. When the order matters, inspect a physical sample or appoint a third party to do it and document the findings clearly.
The sample should be made with the intended canvas, hardware, labels, decoration process, and packing method whenever possible. If the factory substitutes materials to move faster, the sample still has value for fit and design, but it should not be treated as the final production reference unless you explicitly accept the substitution. Keep one sealed reference sample, record the measurements, and note every approved deviation in writing.
- Measure the body, gusset, flap, pocket, and strap dimensions against the spec sheet.
- Check the bag empty and filled with the intended load or a realistic equivalent.
- Open and close closures repeatedly instead of testing them only once.
- Inspect logo opacity, registration, adhesion, embroidery density, and placement.
Inspect fabric, cutting, and sewing before the defect spreads
Many bag defects begin before the pieces are even sewn. Fabric shade variation, roll damage, poor cutting alignment, and inaccurate panel placement all become harder to correct later. That is why inline checks are more useful than waiting until the final carton is packed. A problem caught after cutting may still be recoverable. The same problem caught after packing is usually a chargeback, a delay, or a resale issue.
Incoming canvas should be checked for weight, hand feel, usable width, shade consistency, roll-end defects, stains, and odor. Natural canvas can vary, but natural does not mean uncontrolled. Buyers should define what variation is acceptable. During cutting, confirm the grain direction and the symmetry of mirrored panels. During sewing, check seam allowance, stitch tension, strap orientation, pocket alignment, and reinforcement. Stress points are where the bag will fail first, so they deserve more scrutiny than low-load decorative seams.
- Before cutting: verify fabric weight, roll consistency, shade, and usable width.
- Before assembly: confirm decoration placement, panel orientation, and any printed or embroidered parts are undamaged.
- During sewing: inspect seam allowance, stitch density, thread tension, reinforcement, and pocket alignment.
- Before packing: verify finished dimensions, loose thread trimming, hardware function, and odor.
Treat decoration and sustainability claims as separate QC tracks
Canvas texture changes decoration performance. A simple screen print can be the cleanest solution for a bold logo, while embroidery may suit a premium mark or patch. Heat transfer can work for smaller runs or more complex art, but it should be tested on the actual fabric because texture, coating, and pressure all affect adhesion. Oversized embroidery can pull on lighter canvas. A print that looks sharp on a flat proof can still crack, blur, or feel too heavy once it is applied to the real bag.
Eco apparel brands also need discipline around claims. If the bag, hangtag, carton, label, or product page says organic, recycled, undyed, or similar, the claim should be backed by the right batch evidence and the right wording for the market. Do not let marketing copy outrun sourcing proof. The same standard applies to care labels, fiber content labels, barcode labels, and brand trims. The item the customer receives must match the approved claim language, not a loose supplier description.
- Request a strike-off or printed swatch on actual production canvas when color or durability matters.
- For screen print, check opacity, pinholes, edge sharpness, bleed, and full cure.
- For transfer print, check adhesion, edge lift, gloss level, and cracking after bending.
- For embroidery, check density, puckering, backing comfort, thread trimming, and placement.
Test hardware, straps, and daily-use performance
Hardware failures usually do not show up in a first glance inspection. They show up when the customer uses the bag. A rough zipper, weak slider, loose rivet, slipping adjuster, weak magnet, or sharp edge can turn a bag that looked acceptable in the factory into a return in the field. That is why the quote should name the hardware, not just describe it as good quality or metal.
A practical sample check should include repeated use under load. Fill the bag with the kind of weight it is meant to carry, then test the closure, strap adjustment, and reinforcement points. Run the zipper or flap closure through multiple open-close cycles. Tug the strap at the load points. Check whether the webbing twists, whether the adjuster creeps, and whether the bag keeps its shape when carried. The goal is not laboratory precision. The goal is to surface obvious functional problems before bulk production.
- Confirm zipper size, slider type, buckle material, D-ring thickness, snap type, magnet strength, and finish.
- Check for sharp edges, loose plating, rust marks, or rough surfaces that could scratch clothing or hands.
- Verify that the strap adjustment holds under load and does not creep during normal movement.
- Inspect bartacks, box stitches, or rivets at every stress point, not just on the visible front panel.
Set final inspection rules before the shipment is sealed
Final inspection should not be improvised at the warehouse. By that point, the factory should already know the defect criteria, packing layout, and carton label rules. For canvas messenger bags, the final pass needs to check quantity, workmanship, dimensions, decoration, hardware function, cleanliness, odor, and packing. If your organization uses AQL, set the sampling plan and the defect categories before shipment, not after a problem appears.
The most useful defect structure is simple. Critical defects include unsafe sharp hardware, mold, wrong artwork, wrong material claim, or severe short shipment. Major defects include open seams, failed hardware, incorrect dimensions outside tolerance, visible stains, misaligned graphics, or weak adhesion. Minor defects include small loose threads or wrinkles that do not change use or presentation. That framework helps the buyer decide what can be reworked and what should block shipment.
- Specify whether cartons contain one SKU only or a controlled mixed-SKU layout.
- Require unit wrap and fold direction that protects the logo and hardware from pressure.
- Confirm carton marks, barcode labels, hangtags, and pallet labels before packing starts.
- Ask for final packing photos that show the unit, carton fill, seal, and pallet condition if applicable.
Keep the documentation tight enough to prevent disputes
A good bag order is not only about product quality. It is also about evidence. When the factory and the buyer both hold the same approved sample, spec sheet, artwork file, inspection checklist, and packing standard, disputes become easier to resolve and reorders become easier to repeat. Without that record, even a good shipment can become a prolonged argument because nobody is looking at the same source of truth.
For eco apparel brands, the same file should hold the material proof that supports any sustainability claim, along with the final artwork file and any packing copy that appears on the product or carton. If the buyer changes a logo, fiber claim, or label wording late in the process, the revised version should be dated and approved in writing. That sounds procedural, but it is the simplest way to keep a custom order from drifting into something that no longer matches the approved sample.
- Store the quote, spec sheet, artwork, approved sample notes, and inspection report together.
- Version-control any change to logo size, label wording, fabric finish, or packing method.
- Keep photos of defects and approved exceptions with the shipment record.
- Use the same reference package for both production follow-up and future reorders.
Specification comparison for buyers
| Spec decision | Recommended threshold | Test method | Pass / fail rule | Buyer risk to check |
|---|---|---|---|---|
| Canvas weight | 10-12 oz for promotional use, 12-14 oz for retail basics, 14-16 oz for heavier daily-carry programs | Weigh a cut swatch or finished panel and compare against the approved target; confirm the same fabric lot across body panels | Pass if the actual weight stays within about +/-5% of the agreed target and all visible panels match the approved lot; fail if the bag feels too limp, too bulky, or inconsistent across panels | Too light can sag and show print bleed-through; too heavy can increase sewing difficulty, carton bulk, and freight cost |
| Fabric finish and shrinkage | Pre-shrunk or washed canvas for retail programs; raw canvas only when the buyer accepts natural movement and shade variation | Record pre- and post-test measurements after the agreed wash, steam, or conditioning method for the program | Pass if shrinkage stays within the buyer limit, usually 3-5% for washable or repeatedly handled bags; fail if the finish changes the size, hand feel, or appearance beyond the approved sample | Finish affects hand feel, odor, color, print result, and dimensional stability |
| Finished dimensions and pattern accuracy | Body width, height, gusset depth, flap length, strap width, and pocket size should match the signed spec sheet | Measure 3-5 random units per lot with a tape measure on a flat surface using the same measuring points every time | Pass if critical dimensions stay within +/-5 mm for body and gusset and +/-3 mm for logo placement; fail if the bag shape or pocket function changes materially | Small pattern drift can reduce capacity, throw off logo placement, and hurt retail presentation |
| Stitching and reinforcement | Target 7-9 stitches per inch on medium canvas unless the approved sample uses a different construction; bartacks at every load point | Inspect under good light and, where needed, with 5x magnification; tug strap joints, flap corners, and pocket openings by hand | Pass if there are no skipped stitches, open seams, broken threads, or loose reinforcement; fail if stress points deform, gap, or pull under normal hand force | Weak stitching is the fastest route to returns, even when the bag looks acceptable on the shelf |
| Hardware and closure performance | Use a defined zipper size, slider type, buckle material, snap strength, and adjuster style that fit the bag's intended load | Run 30 open-close cycles on zippers, snaps, magnets, or flap closures and check edges, plating, and alignment under load | Pass if closures run smoothly, stay aligned, and show no snagging, sharp edges, rust, or slippage; fail if the closure sticks, misaligns, or loosens during testing | Weak hardware creates functional failures that are expensive to rework after packing |
| Print, embroidery, or patch adhesion | Logo placement within +/-3 mm of the approved map; artwork should be sized for the canvas texture and decoration method | Perform dry rub, bend, and adhesion checks on the production canvas or on an approved strike-off using the same process | Pass if print edges stay crisp, colors remain opaque, embroidery does not pucker the fabric, and no cracking, peeling, or lift appears after testing; fail if the logo shifts, flakes, or distorts | Canvas texture can expose weak artwork setup, poor curing, or oversized embroidery density |
| Packing and carton standard | Unit wrap, fold direction, carton marks, SKU separation, moisture protection, and carton strength should be written before bulk packing begins | Open cartons from the top, middle, and bottom of the shipment and verify unit count, label accuracy, fold orientation, and condition | Pass if the shipment arrives dry, clean, count-accurate, and protected from print scuffing or crushed hardware; fail if cartons are mixed, damp, underfilled, or mislabeled | Bad packing can damage otherwise acceptable bags and create receiving delays |
Buyer checklist before sampling
- Lock the bag architecture first: body width and height, gusset depth, flap length, pocket map, strap width, strap adjustment range, and intended load weight.
- Specify the canvas in measurable terms: composition, oz or GSM, weave, finish, shade tolerance, shrinkage limit, and whether organic, recycled, undyed, or other documentation is required.
- Define the build: lining yes or no, seam type, reinforcement points, bartack locations, thread color, label placement, zipper size, buckle style, and hardware finish.
- Send vector artwork with logo size, color references, placement map, and the exact tolerance you will accept for print or embroidery positioning.
- Ask for a physical pre-production sample made with the intended canvas, hardware, labels, decoration method, and packing method. If substitutions are used, mark the sample as developmental only.
- Write the defect rules in advance: what counts as critical, major, and minor for stitching, print adhesion, stains, odor, hardware, dimensions, and packing.
- Set the inspection sample size and acceptance method before shipment, including whether your team will use AQL, a full count, or a tightened first-order check.
- Require inline photos at cut, decoration, sewing, reinforcement, and packing stages so problems can be caught before the lot is sealed.
- Confirm carton count, SKU separation, barcode or hangtag needs, moisture protection, and pallet plan before the factory starts packing.
- Keep one version-controlled file that includes the quote, approved sample notes, artwork, inspection checklist, and shipment photos so the buyer record and factory record match.
Factory quote questions to send
- What exact canvas weight, weave, finish, and color process are you quoting, and what tolerance do you allow in bulk production?
- Is the canvas stock-dyed, piece-dyed, garment-washed, enzyme-washed, pre-shrunk, organic, recycled, undyed, or conventional, and what proof can you provide if sustainability claims are required?
- Which decoration method is included in the unit price, and what are the setup, screen, digitizing, plate, strike-off, or transfer charges by color or artwork version?
- Is the MOQ based on total quantity, per bag style, per fabric color, per lining color, per hardware finish, or per artwork version?
- What is the lead time for swatches, the pre-production sample, sample revisions, and bulk production after written sample approval?
- How are strap joints, handle points, flap corners, zipper ends, and pocket openings reinforced, and can you share stitch type, stitch density, bartack length, or load-test target?
- What hardware grade is included in the quote: zipper size, slider type, buckle material, D-ring thickness, snap type, magnet strength, plating color, and finish standard?
- Will cutting, printing, embroidery, sewing, washing, or packing be outsourced, and if so, who owns quality inspection and rework approval at those steps?
- What packing standard is included: individual polybag, paper wrap, tissue, desiccant, hangtag, barcode label, master carton, inner carton, or palletization?
- What inspection process do you perform before shipment, and can you provide production photos, measurement sheets, defect photos, carton count confirmation, and packing list reconciliation?
Quality-control points to confirm
- Canvas weight, hand feel, and surface texture match the approved range across body panels, flap panels, gusset, strap tabs, and pocket parts.
- Canvas color and finish match the approved swatch within the agreed tolerance and do not show obvious shade mismatch between panels or dye lots.
- Finished dimensions match the spec sheet: body width and height, gusset, flap length, pocket size, strap width, and strap adjustment range stay within the agreed tolerance.
- Logo size, placement, color, edge sharpness, curing, embroidery density, or transfer adhesion are within the approved artwork tolerance.
- Seam allowance is even, stitch tension is balanced, and load areas use reinforcement without skipped stitches, broken threads, needle holes, or open seams.
- Straps are symmetrical, securely attached, correctly oriented, adjustable without slipping, and free from twisting, fraying, weak end finishing, or sharp webbing edges.
- Zippers, buckles, D-rings, snaps, magnets, and Velcro operate smoothly, align correctly, and show no sharp edges, loose attachment, rust, or plating defects.
- Interior finishing is clean: lining is not twisted or bunched, pocket openings are secure, raw edges are overlocked or bound, and loose threads are trimmed.
- The bag is clean and retail-ready with no oil marks, chalk marks, mold odor, dye transfer, glue residue, dust, stains, excessive wrinkles, or foreign material.
- Packing preserves product shape, separates SKUs correctly, protects printed panels and hardware, and uses dry, count-accurate, clearly labeled cartons.